|
|
Post by mlehman on Feb 2, 2014 7:17:25 GMT -8
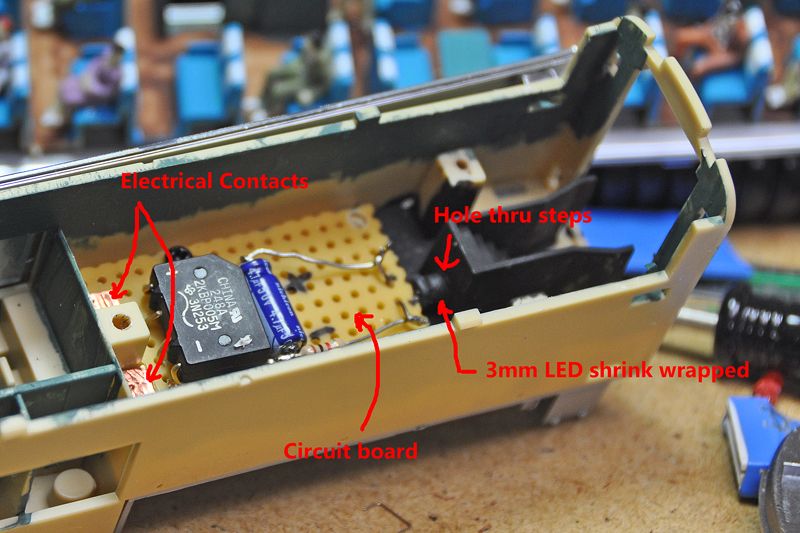
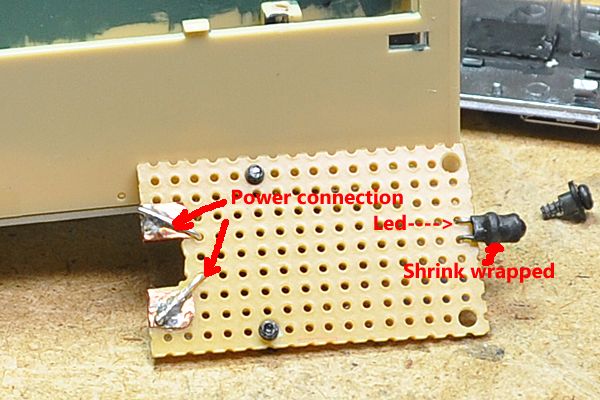
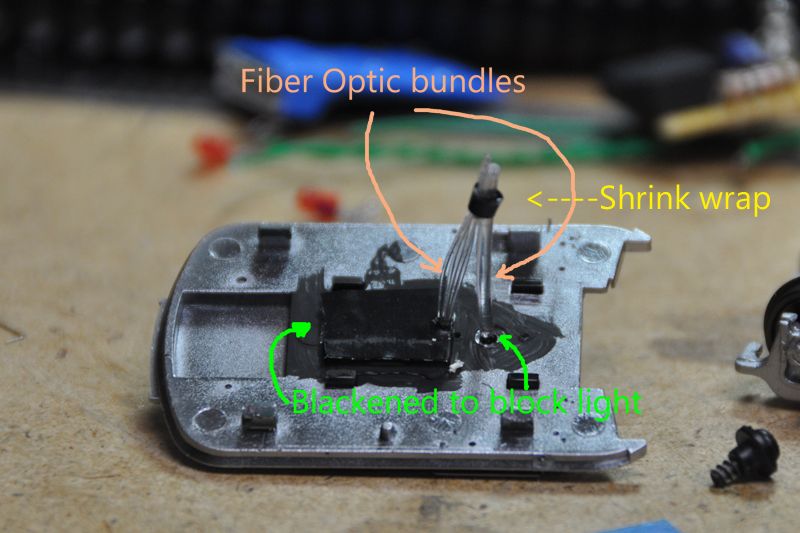
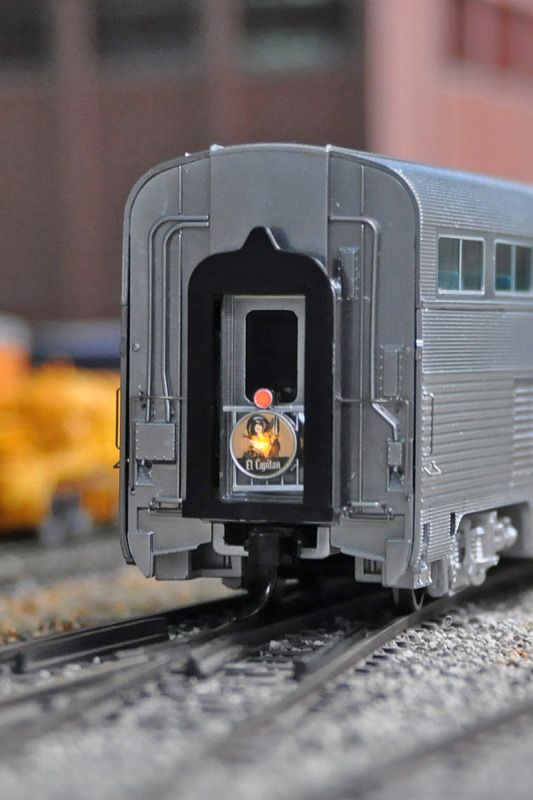
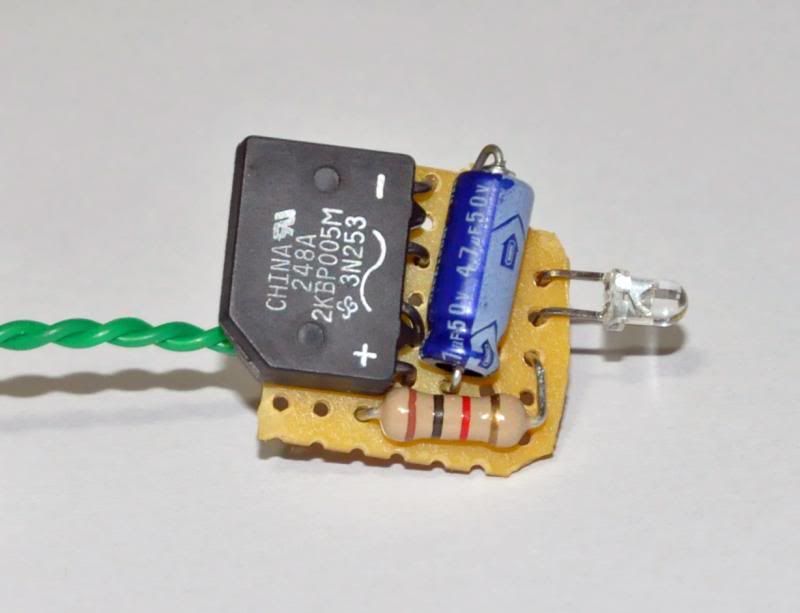
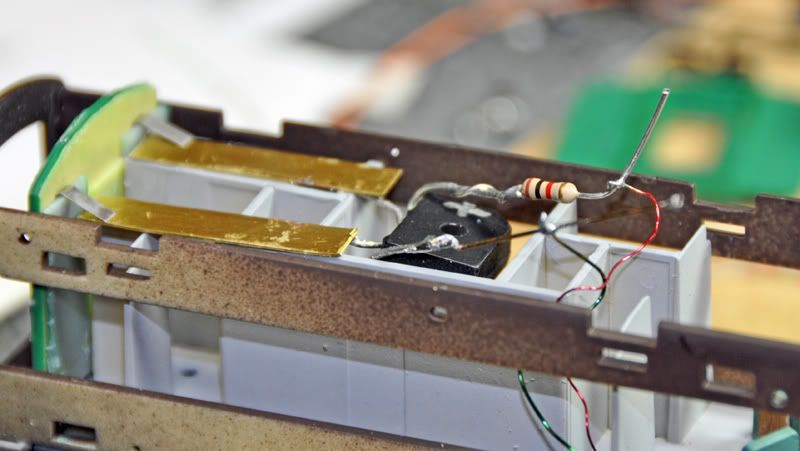
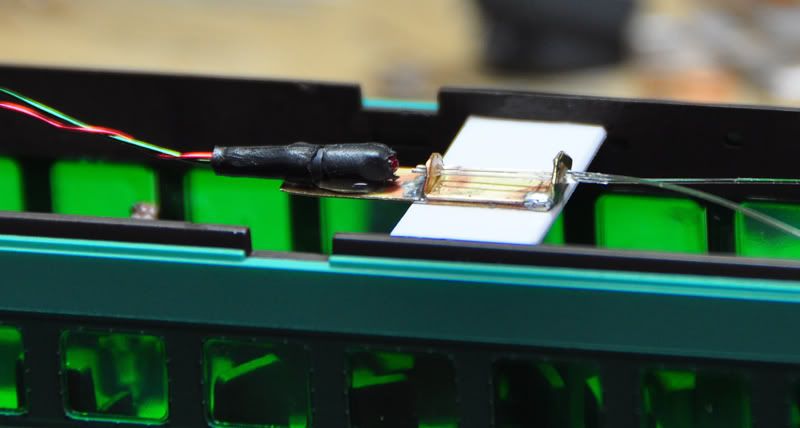
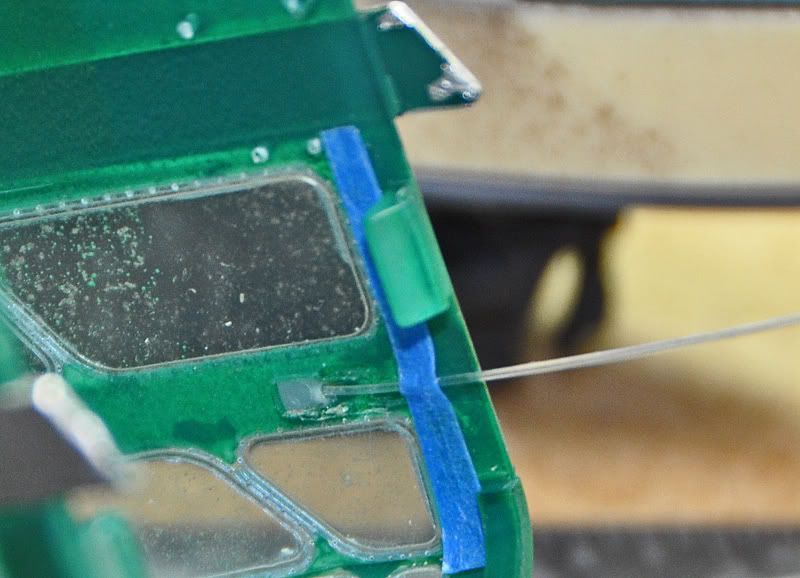
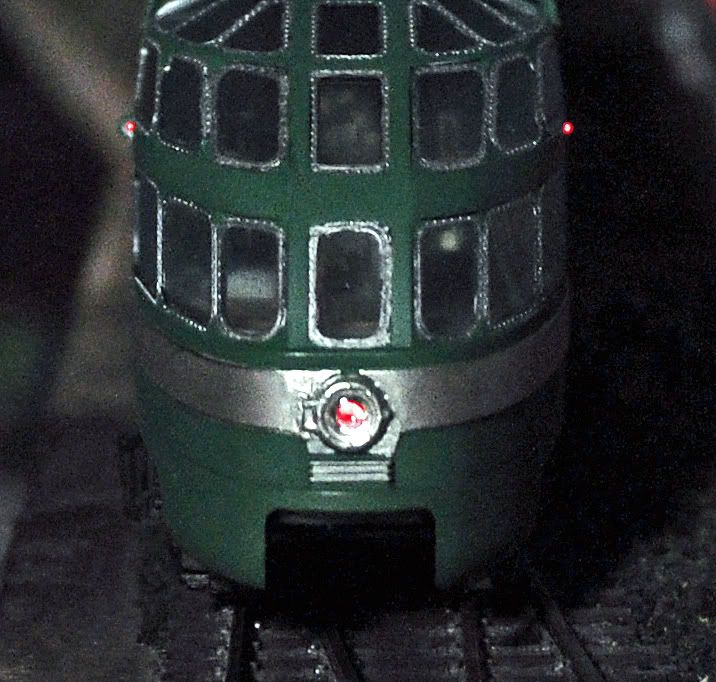
I've been working on updating and improving my passenger car fleet recently, both standard gauge and narrowgauge. One of the things I've wanted to do was add lighting to a number of cars, but the cost of buying the kits to do so or the even more expensive decoder-equipped boards has kept me from going directly there. After scaring up some LEDs that will work, I thought I'd share. The LEDs involved are from two sources. First, Radio Shack is now carrying LED strip lighting. Price is $30 for a 1 meter length. Now, I said cheap, right? Well, $30 sounds kind of high, but you get a bunch of material at much cheaper cost than otherwise, as this gives you a lot of LEDs. There is one every inch and you can cut each group of three separately, so you get 13 "units" (each with 3 LED lights). I went with the RS LEDs here, but you can get these even cheaper online. The other source is available through Hobby Lobby. It's branded as the "Rice Light" LED battery operated light set. Cost is $8 for 20 LEDs on a 6.5 foot string. Since it's got a powerpack built-in, it's like a built-in tester. These are not SMDs but simply a very small version of the standard LED form-factor, so they are still very versatile. Here's some pics. 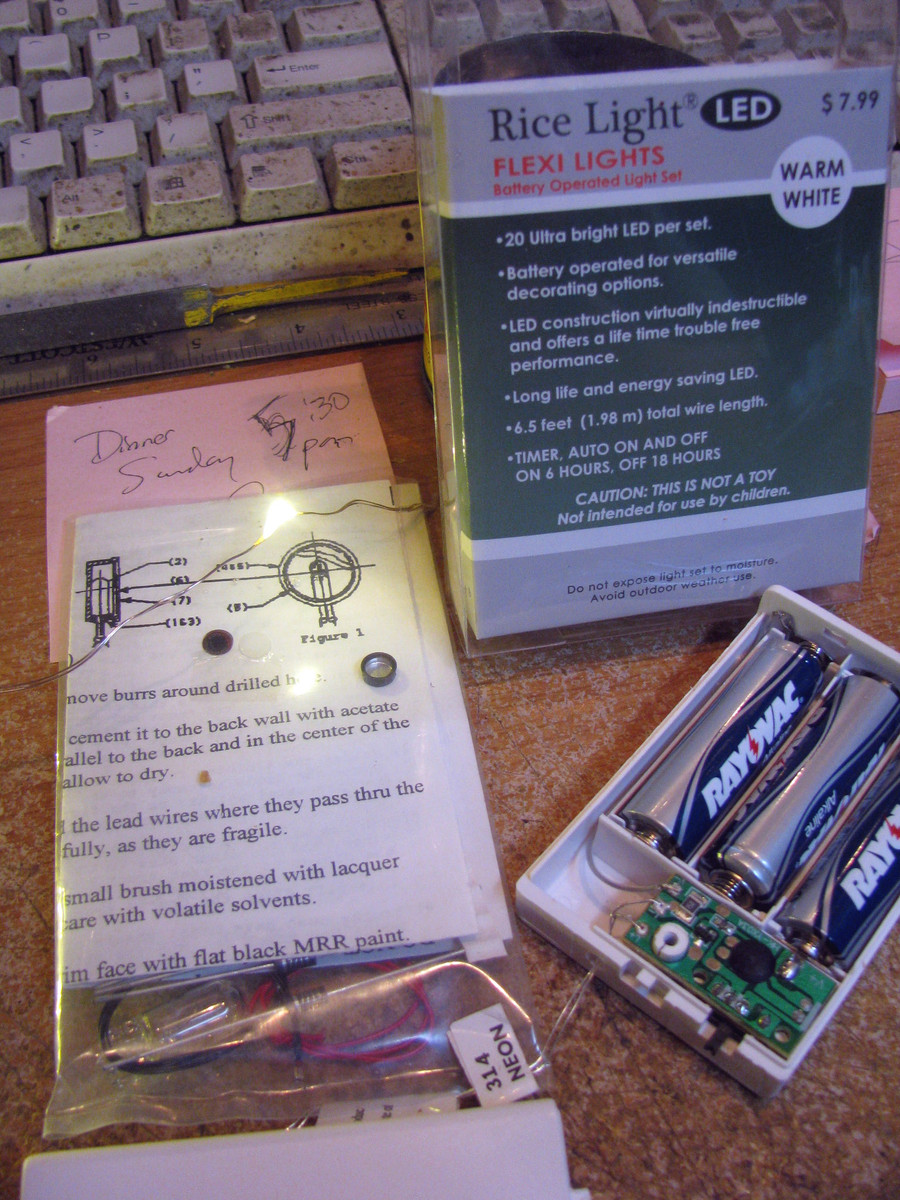 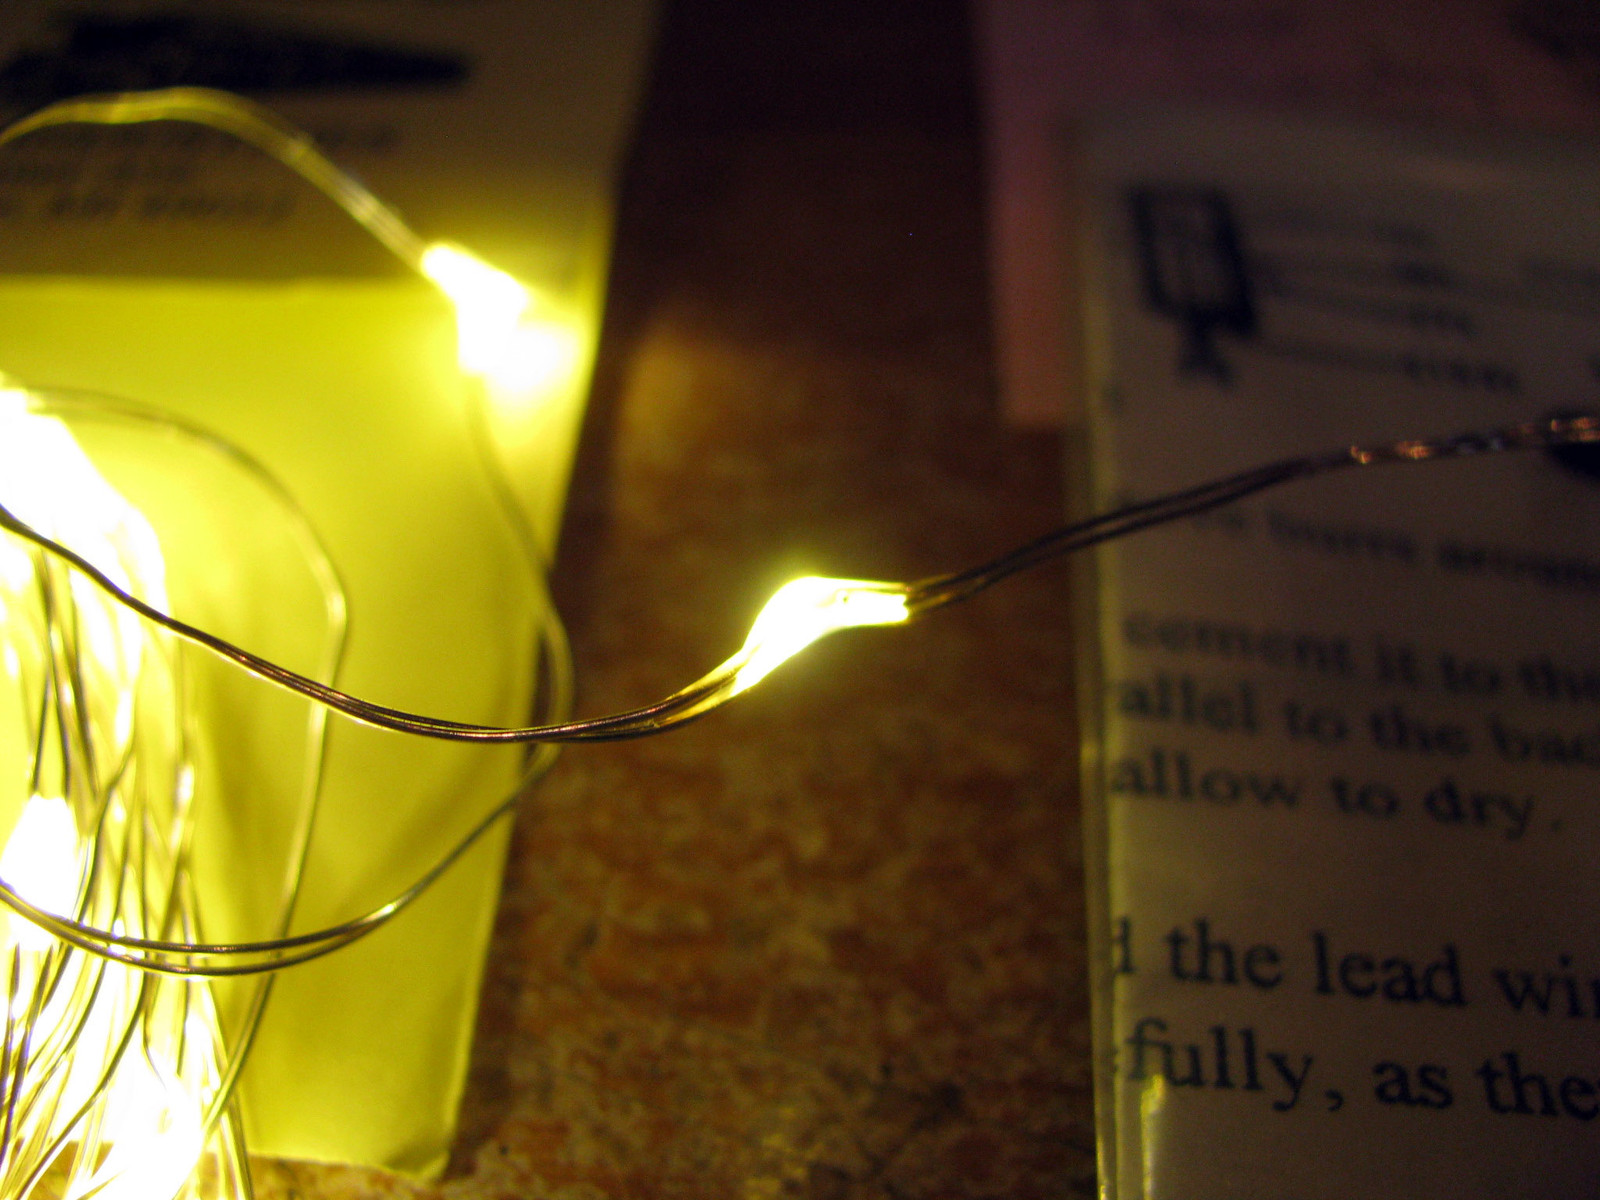 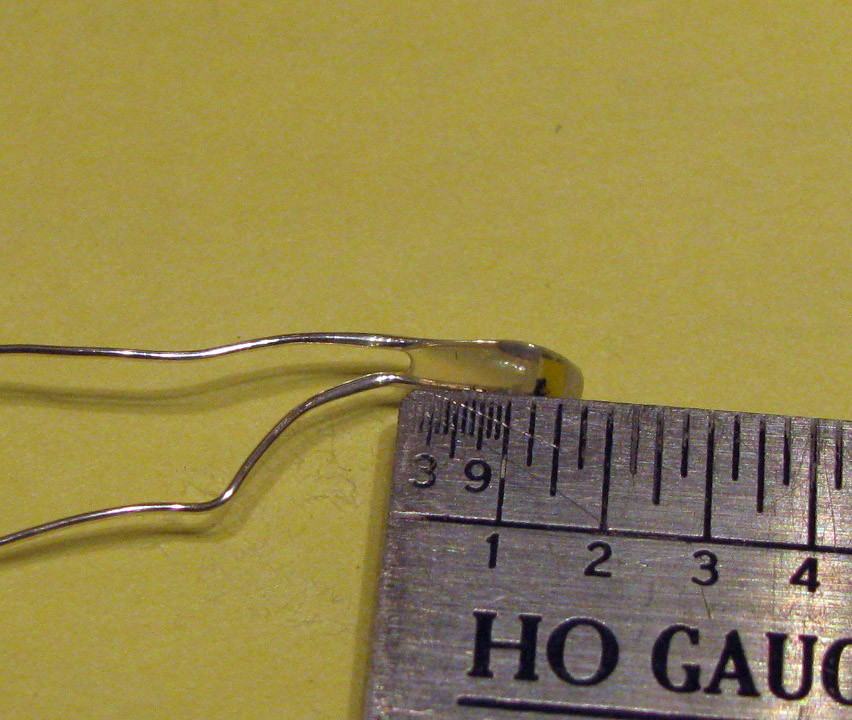 I do have some Richmond Controls SMD LEDs with leads on the way for this, but after finding the Rice Lights, I went ahead and tried to make the fit -- and succeeded  Here's the case for Tomar drumhead kit and one of the Rice Light LEDs. I did use a drill on the case to carefully open up the hole for leads a little. 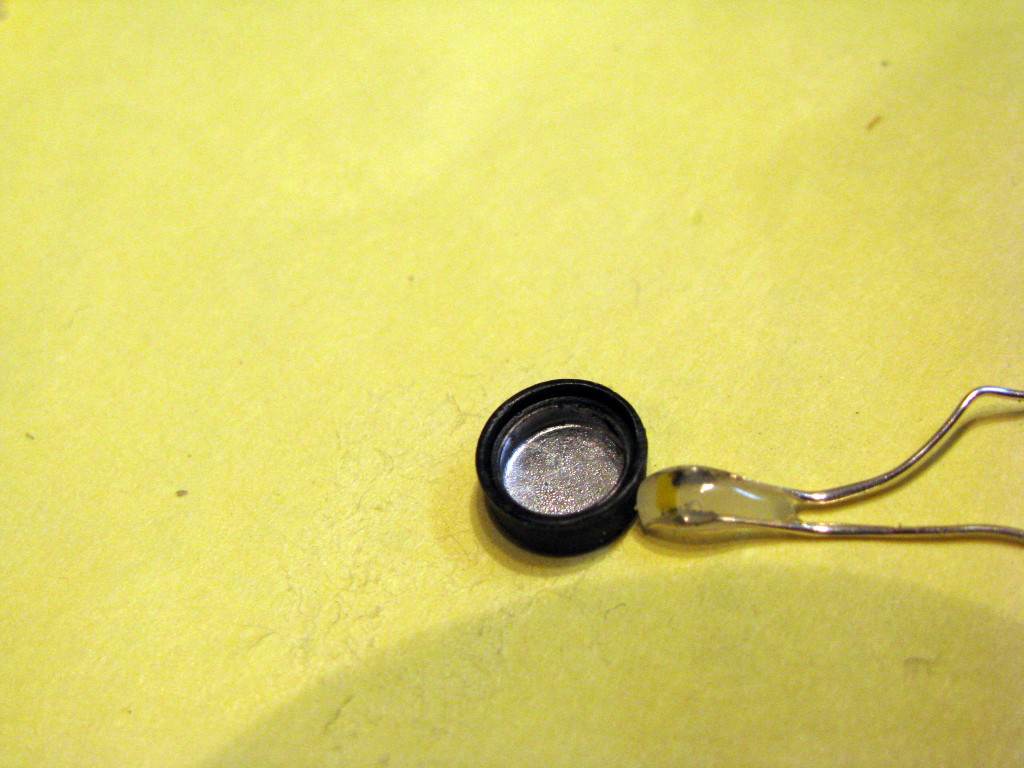 That was the first attempt. I worked at cutting and sanding it smaller, but eventually cut too deep and it didn't light. FAIL So I cut another one off, this time using the nipper to cut the encasing epoxy right above the LED. Within two minutes, I took off a few spots to make it fit with the file and had it ACC-ed in. 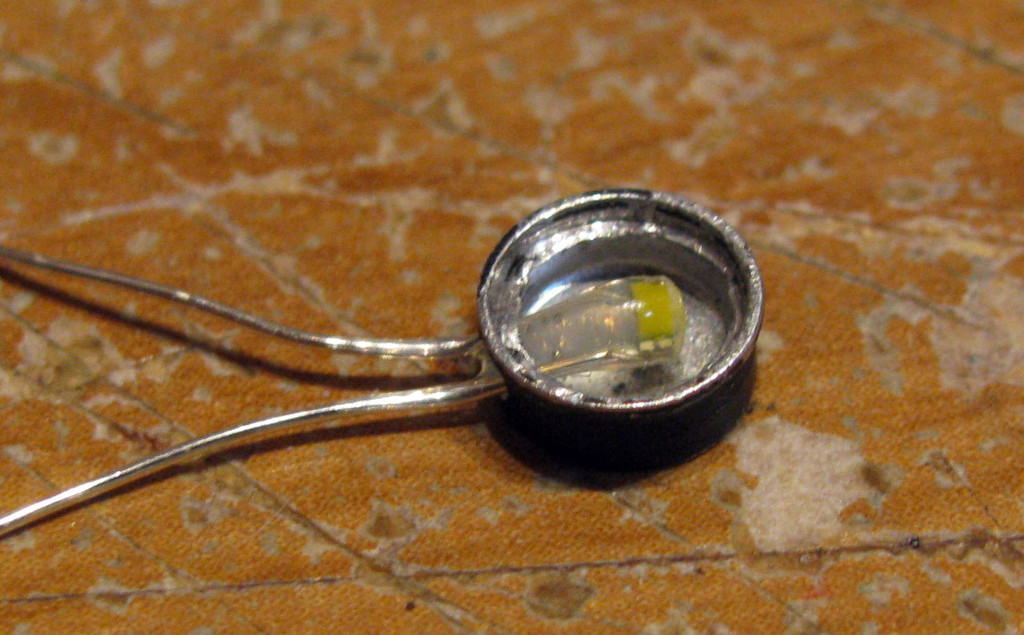 Once nestled into the case, it was pretty simple to finish building the drumhead per the Tomar instructions. Here's the drumhead and the back end of my HOn3 "Durango" parlor car. You can see it has a representation of the drumhead soldered to the rear platform railing. I thought about taking it off, but decided it was thin enough to leave and serve as the mount. I'll also note that this car, like most of my brass HOn3 passenger cars, has been converted to Blackstone passenger trucks. These have built-in wipers. I removed mine originally to take out the little but of drag they add, but added them back to make the contact side of this install easy.  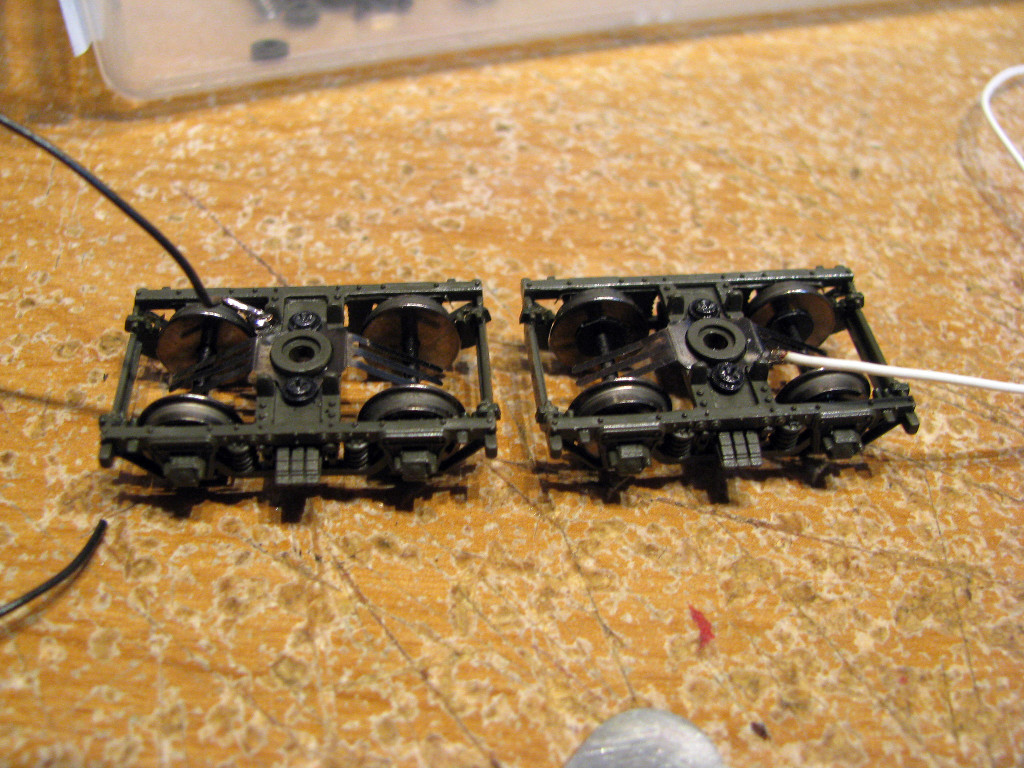 I built a small power supply and built the walls up inside the car to provide a place to hide it in the galley. 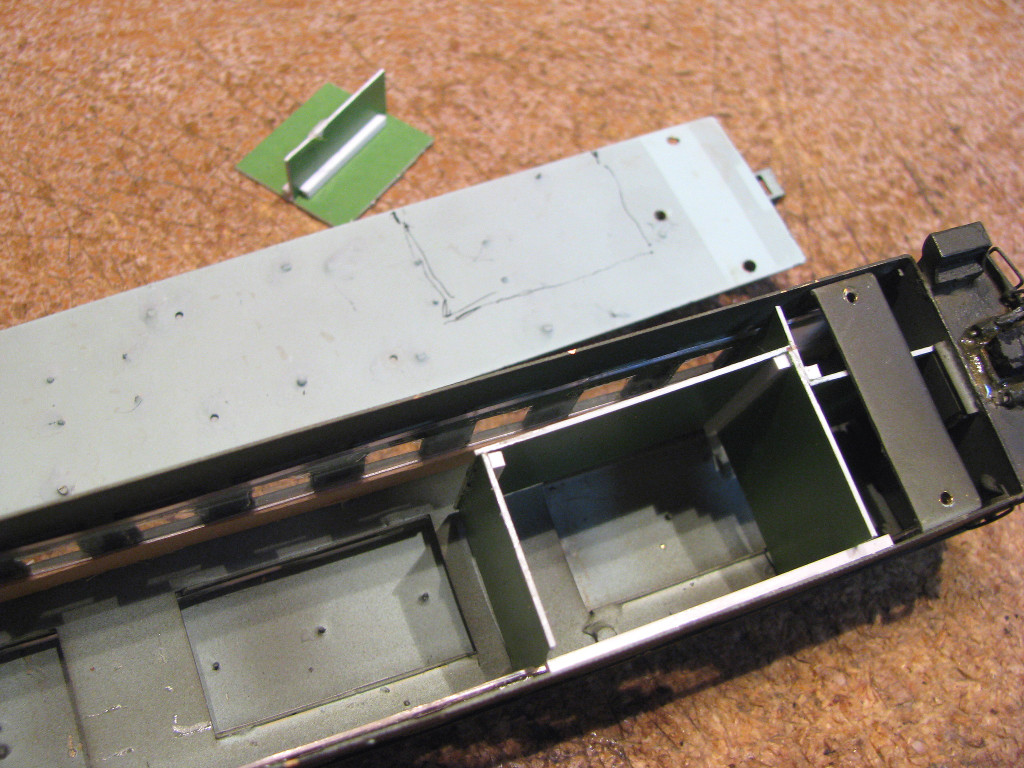 It's simple, a bridge rectifier (RS 276-0268 or equivalent 1.5A bridge rectifier) and a cap across the leads to the lights, plus the usual resistor to step down to feed the LEDs. Note that you need a "single phase" bridge rectifier to feed the LEDs. Here's the install. 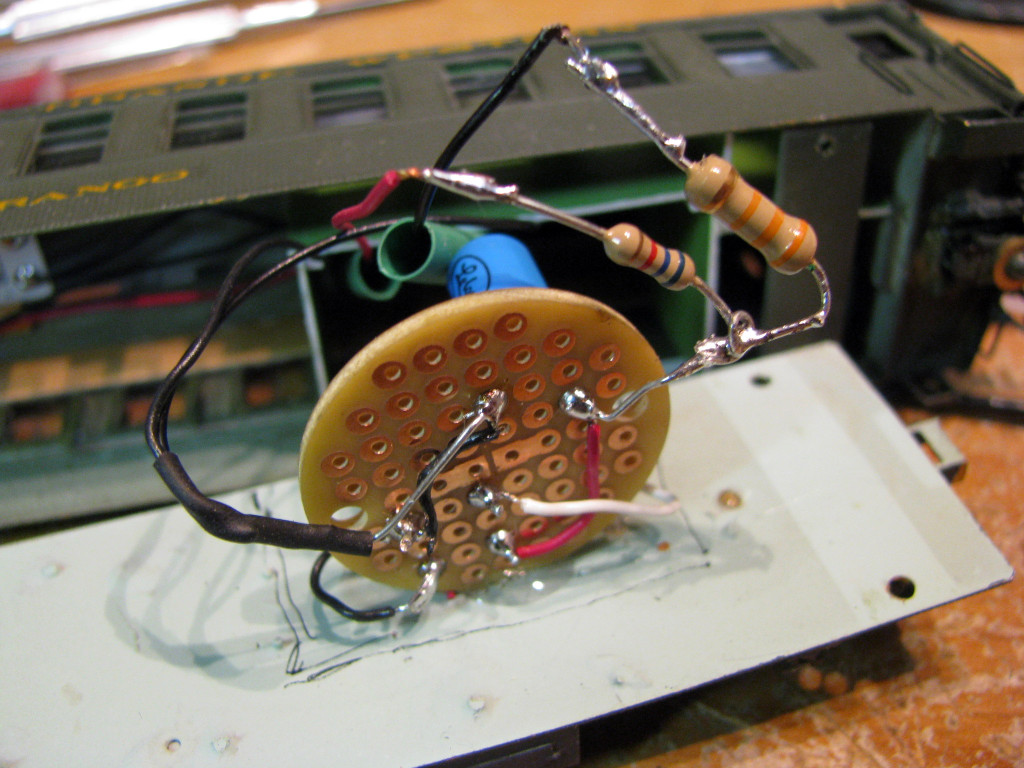 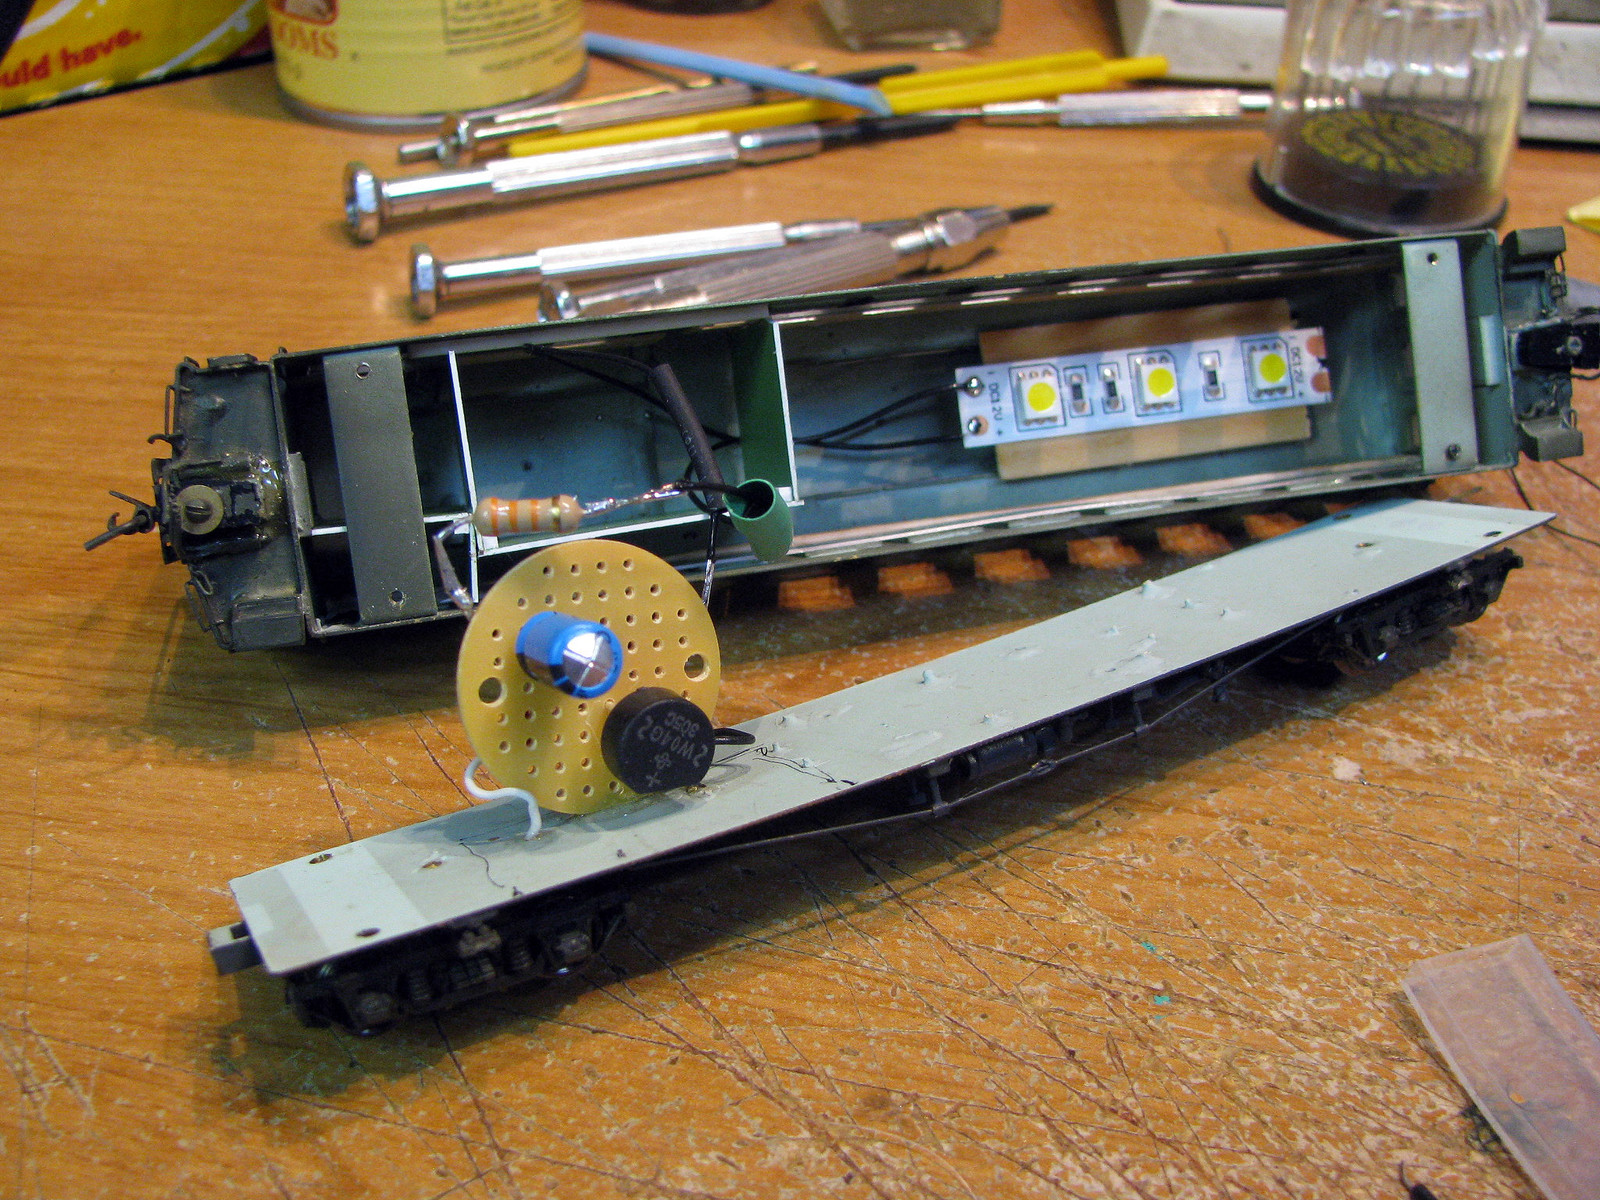 The second pic also shows the overhead lighting, provided by the 3 LED units from the RS strip lighting kit. It and the drumhead are fed through two separate resistors to get the power stopped down for correct brightness. IIRC, I used a 5600 ohm n the overhead lights and something like 68000 ohms to get the drumhead mellow looking. Here's a close up of the strip light piece installed. 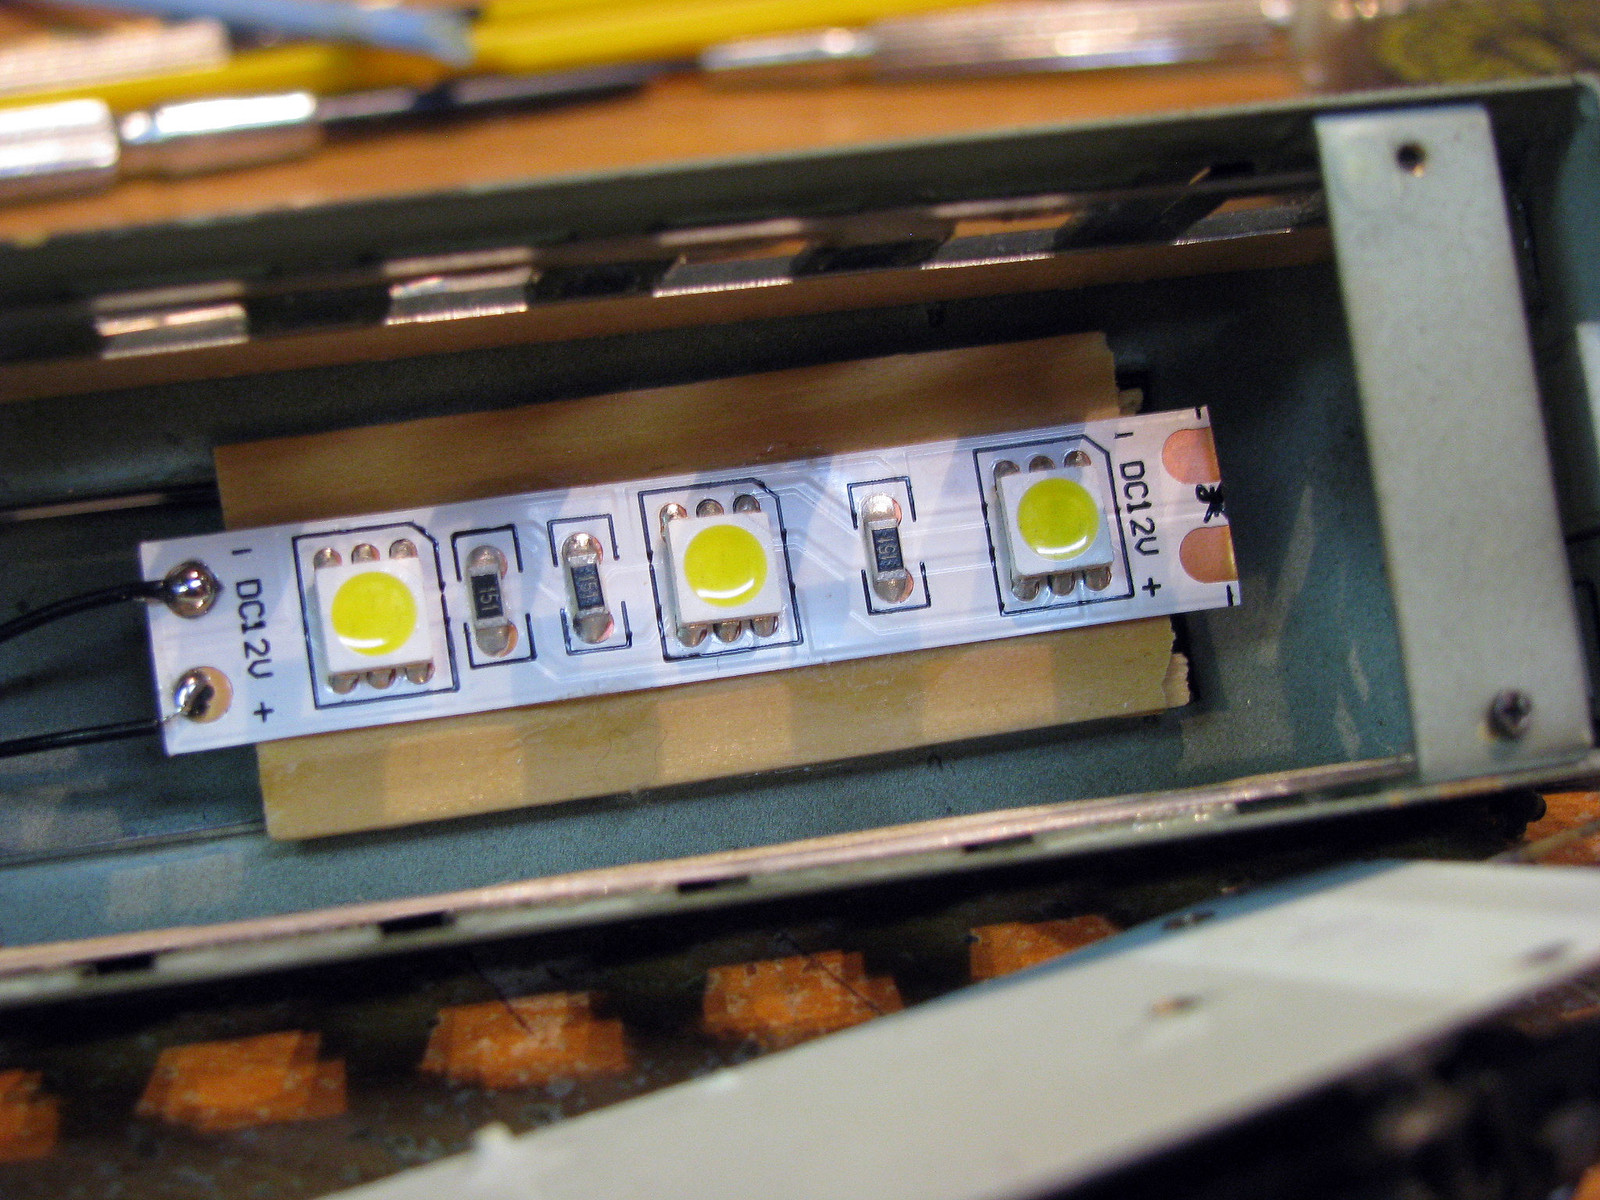 And some shots of the result, first with the room lights toned down, then one with them turned up. It's a little hard to get the drumhead right, but worth experimenting with. I may still soften it a bit more, but it's good for now because it looks right in the daylight, too. 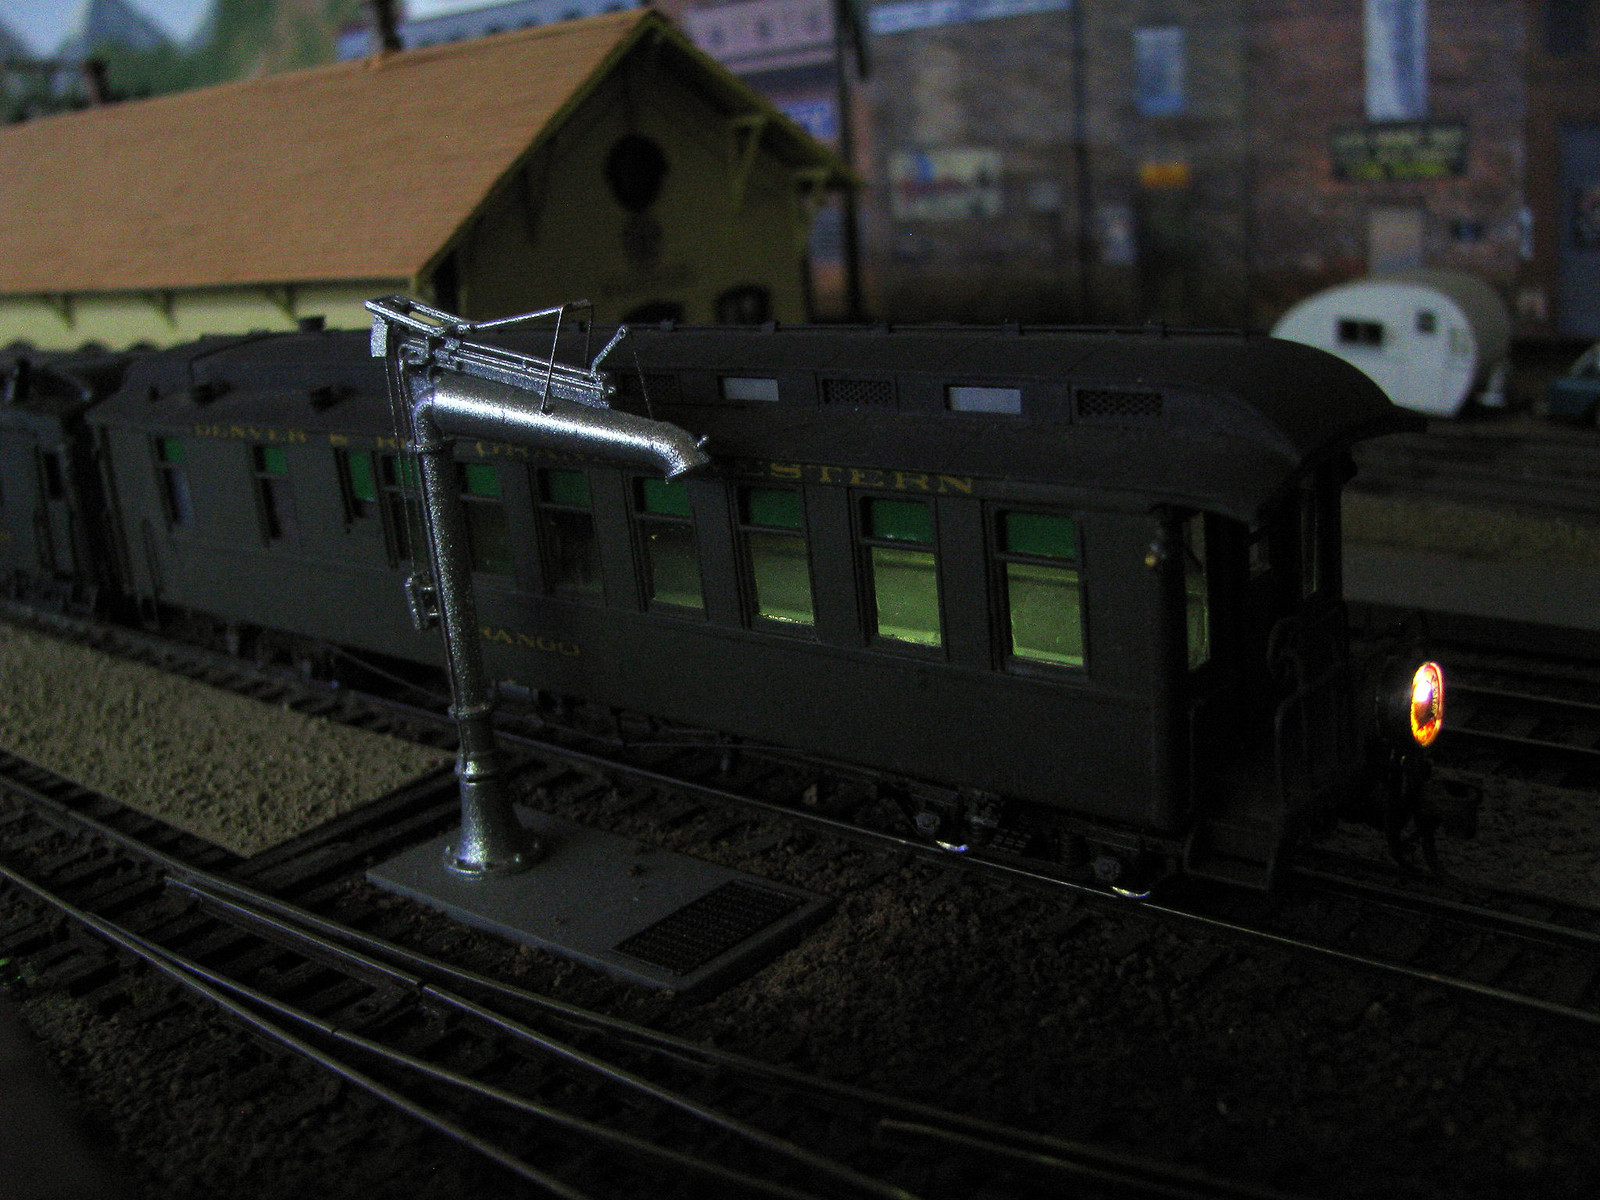 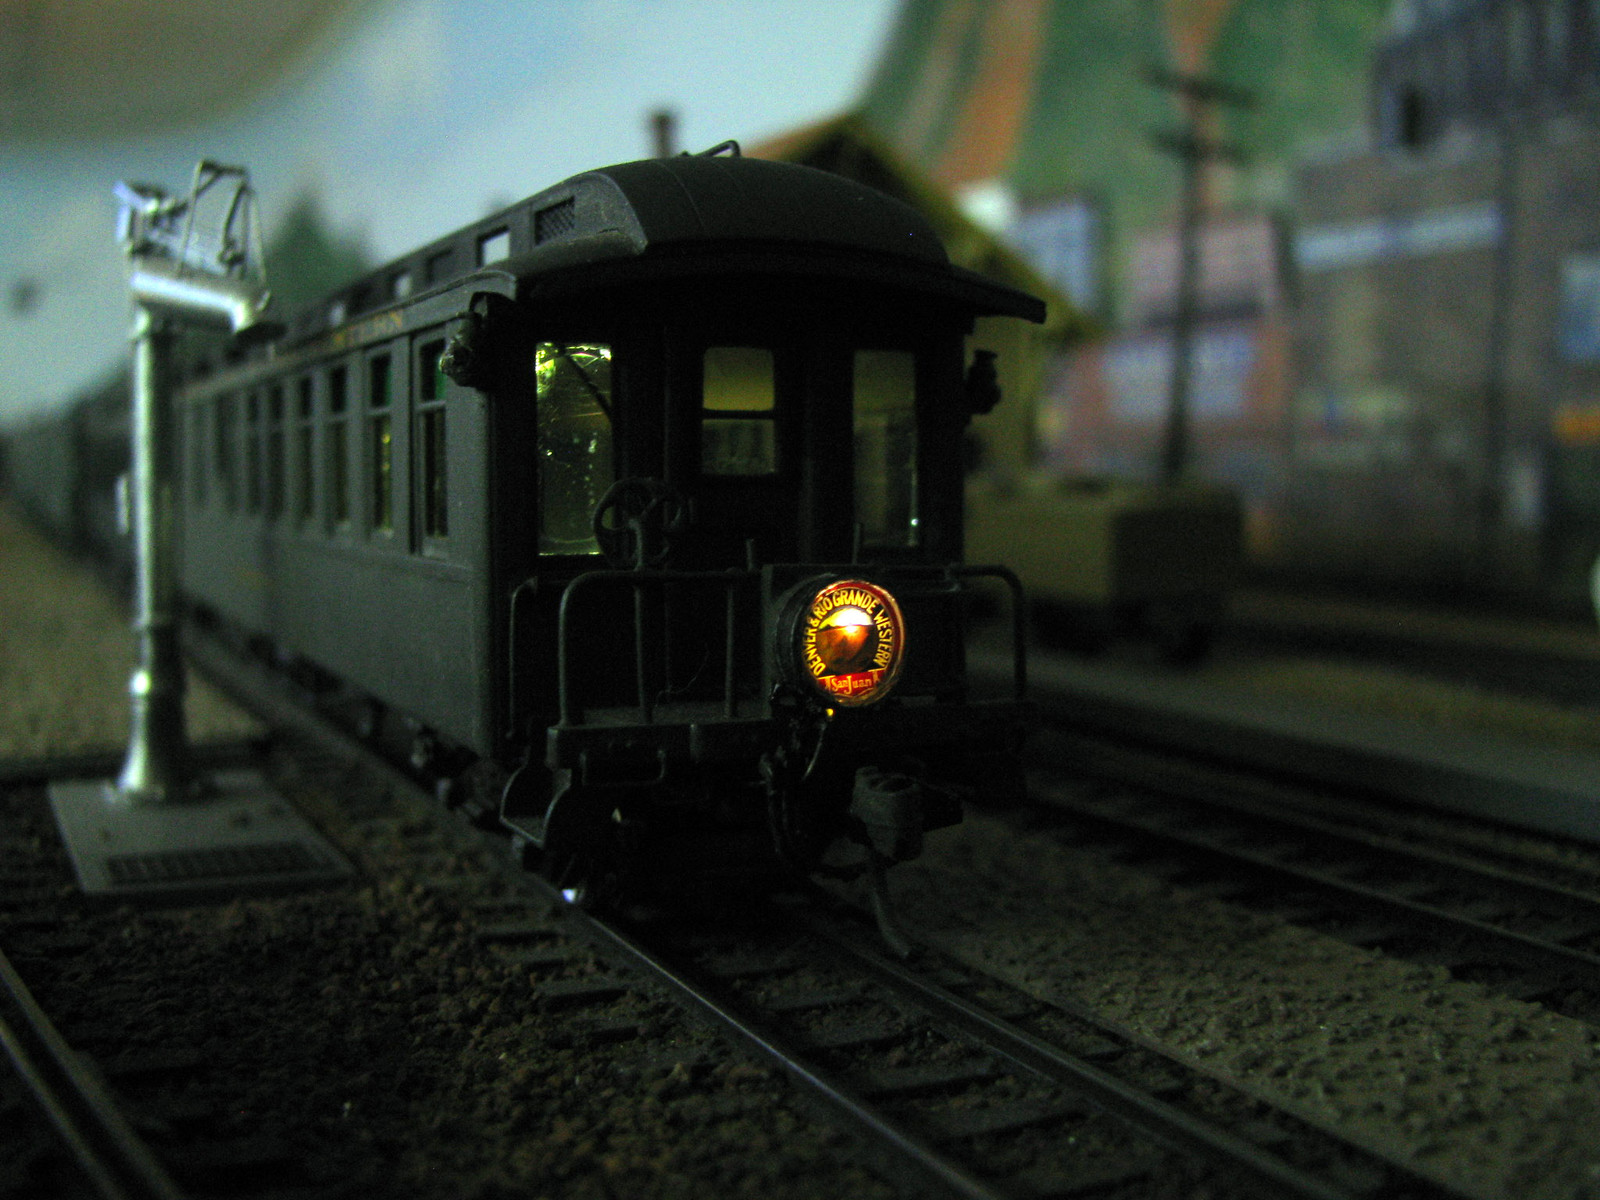 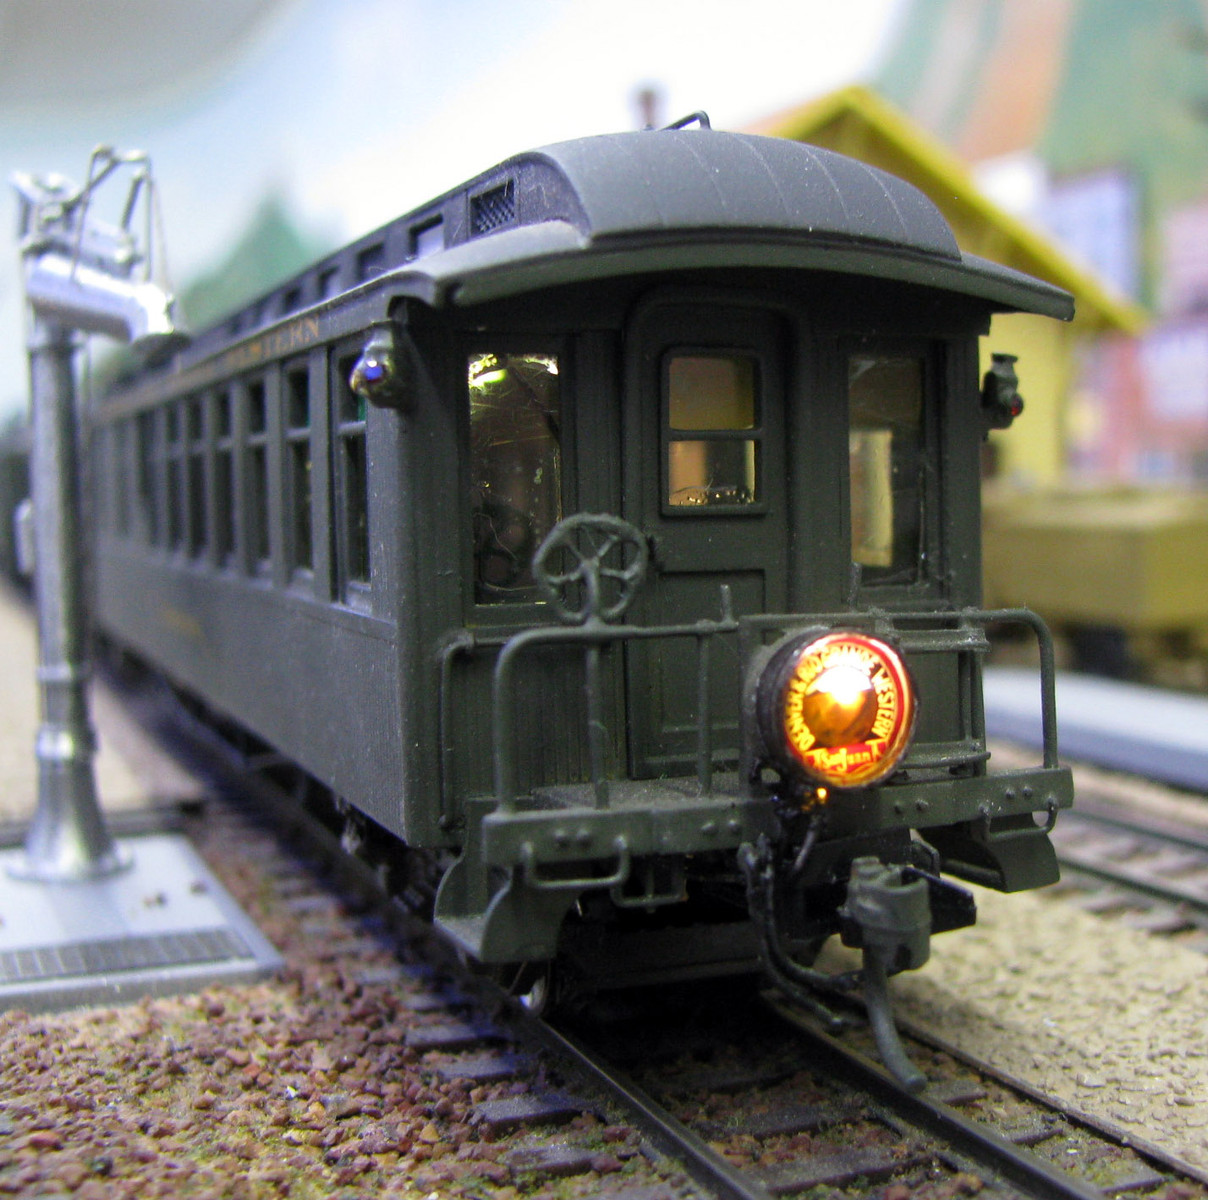 Obviously, nothing to control the lights here. You can add a switch or decoder to do that. The listed lifetime of the RS lighting strip was >1,000 hours, but with the resistor mellowing them out, the lifetime should be greatly extended. I just leave mine on the track and don't worry about it. |
|
|
|
Post by mlehman on Feb 2, 2014 7:35:16 GMT -8
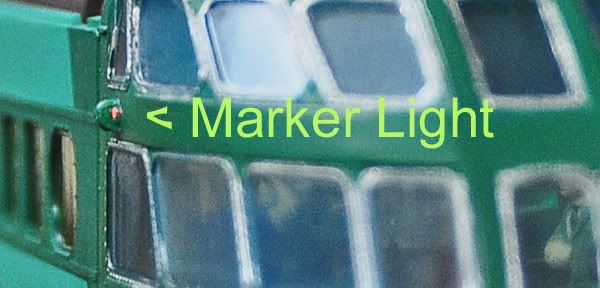
Of course, what works for narrowgauge allows more elbow room in standard. Here's another install in a SG car that I previously installed for a rear LED taillight. 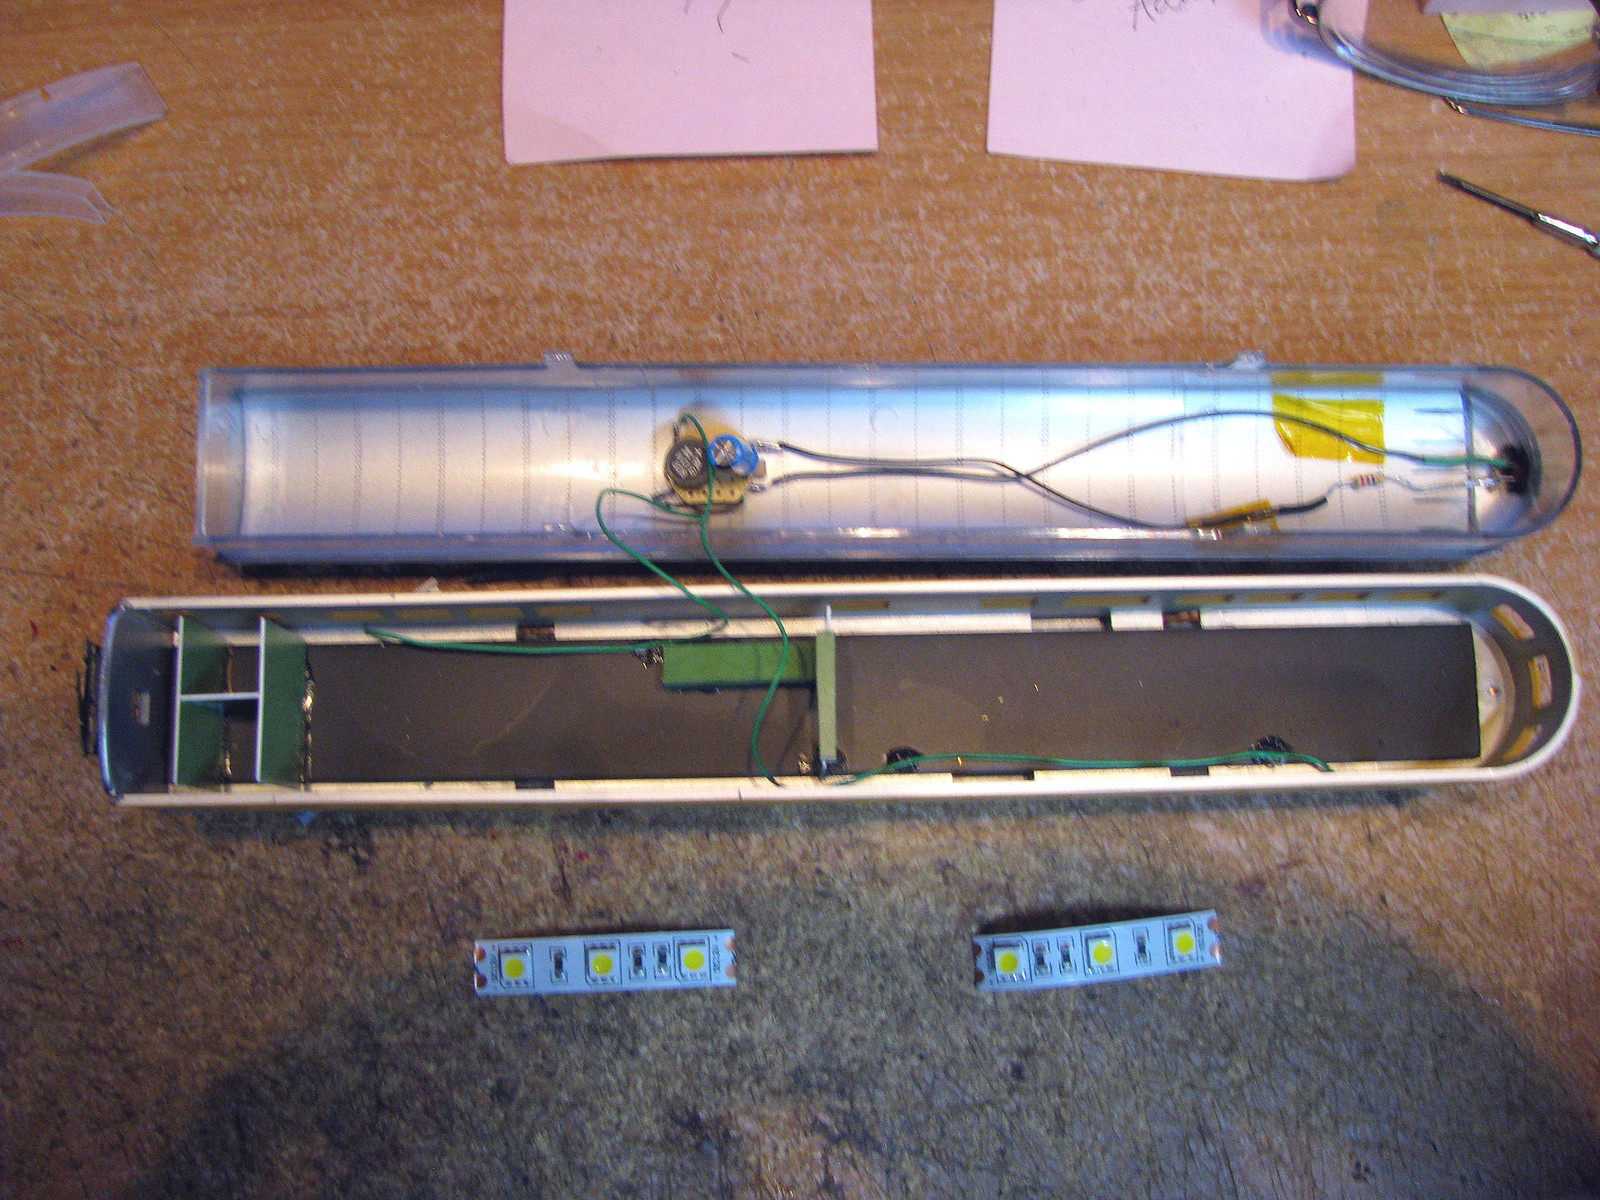 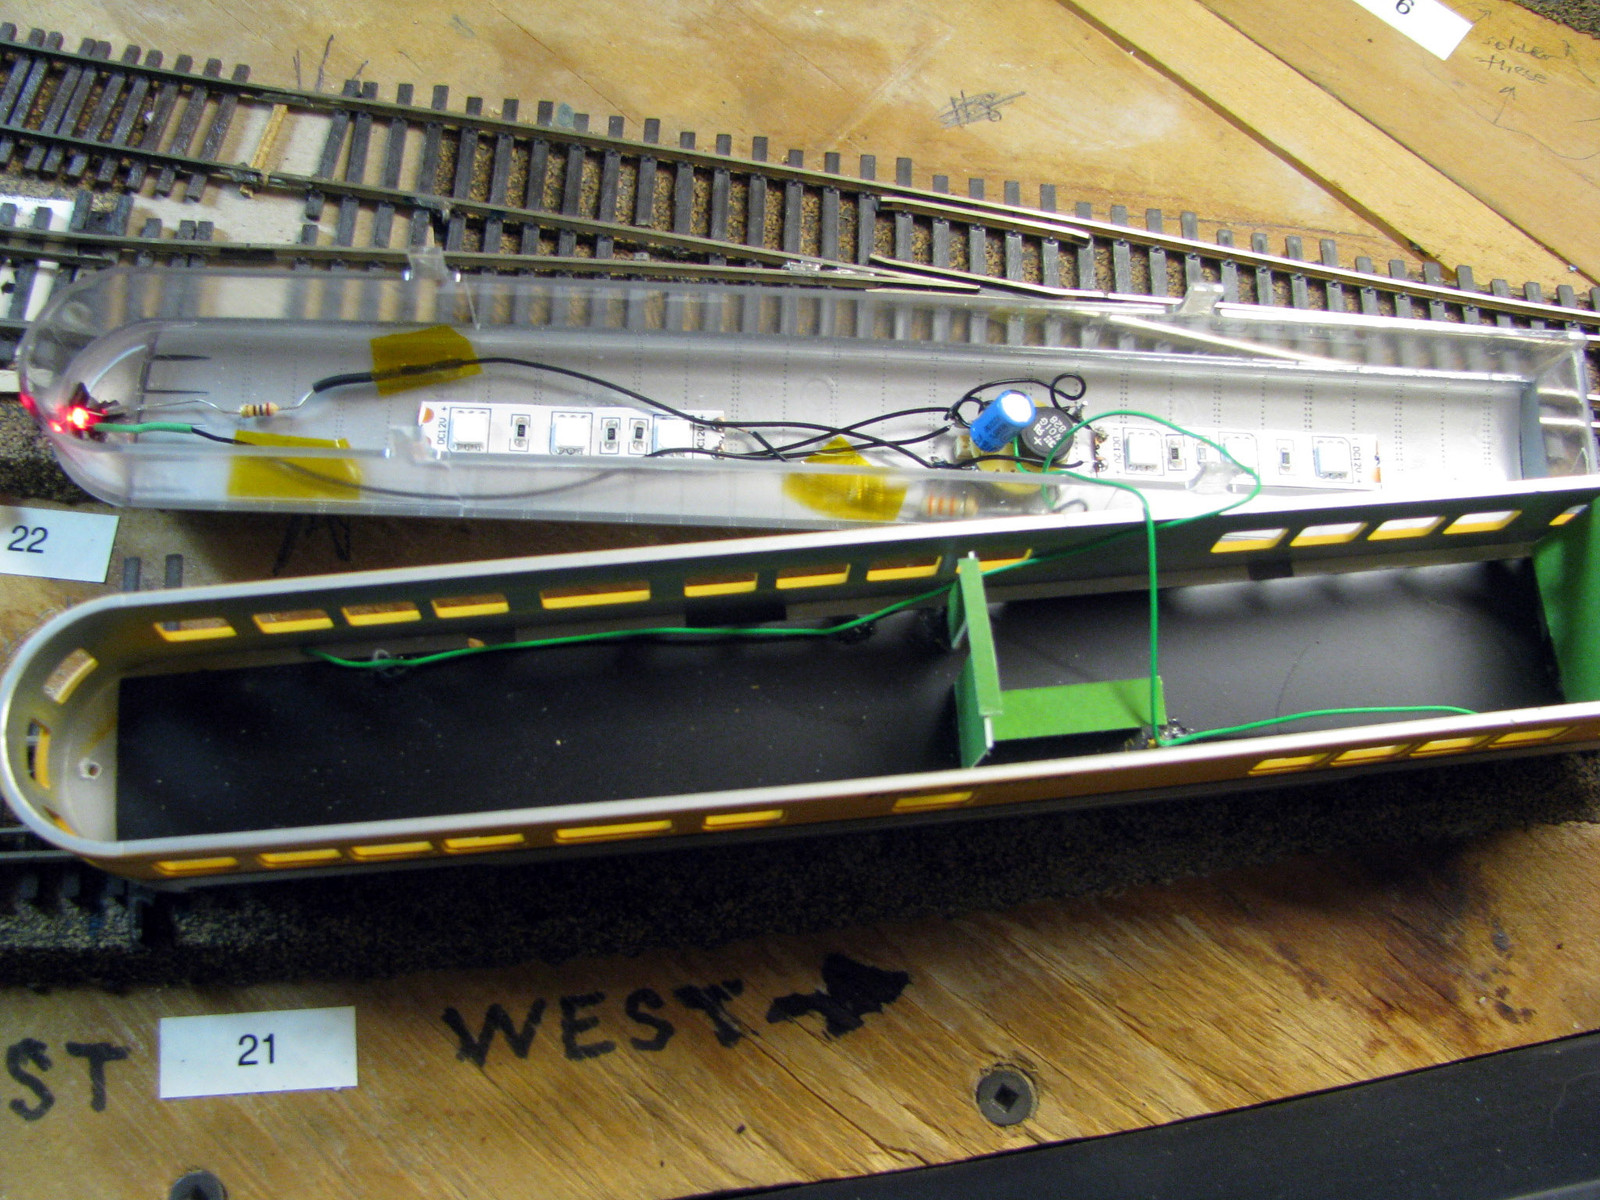 Here is is next to a BLI CZ car for comparison. The lights were just too dim at the original resistor (5600 ohm) I used with the one LED unit I installed in the Durango, so I played around with it some more.  It's now a little too bright, but I'll fix that next time I have it open. The problem with adding lighting is that you then need to start adding interior detail once you can see inside so well.  |
|
|
|
Post by oldmuley on Feb 2, 2014 9:52:37 GMT -8
That's some nice work, but I have one question... What the heck happened to your keyboard in that first picture!!! Did you practice some weathering technique on it?
|
|
|
|
Post by mlehman on Feb 2, 2014 10:46:50 GMT -8
That's my workshop keyboard and it picks up a little of everything I do in front of it. One of the sanitary perils of modern online modeling, I suppose.  It's a good keyboard, too, as it came with my original 1996 computer. They don't make them like this anymore...and there is no weathered option available except as custom work.  Didn't even notice my desktop  huh? It gets similar abuse. Been thinking of replacing both, but you gotta keep your priorities straight. That would be time away from modeling, especially the desk top. |
|
|
|
Post by mlehman on Feb 2, 2014 10:54:45 GMT -8
A few more pics now that IS is working again... Here's the 100uf cap and the bridge rectifier. This time, no circuit board, because no room for it.  Those parts will drop right into a bedroom, though, if just pigtailed together. 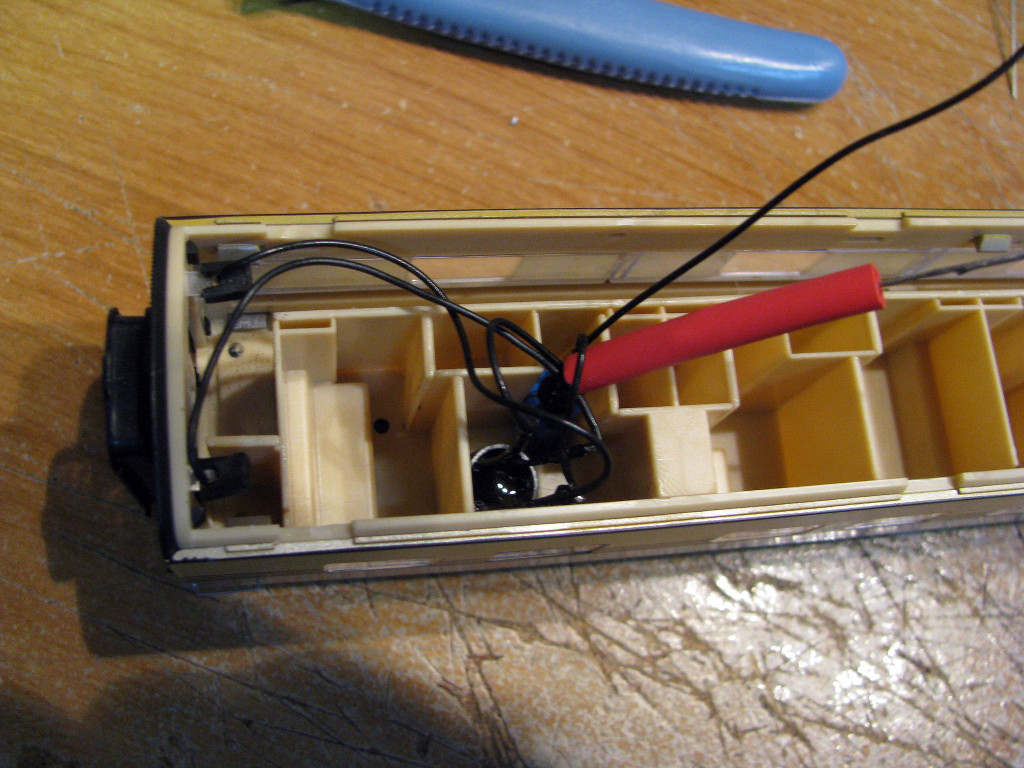 Here's how it goes together with the LED strips wired. Note that this is a coach, not the sleeper in the other pics in this entry, so it used the lavatory instead of a bedroom. 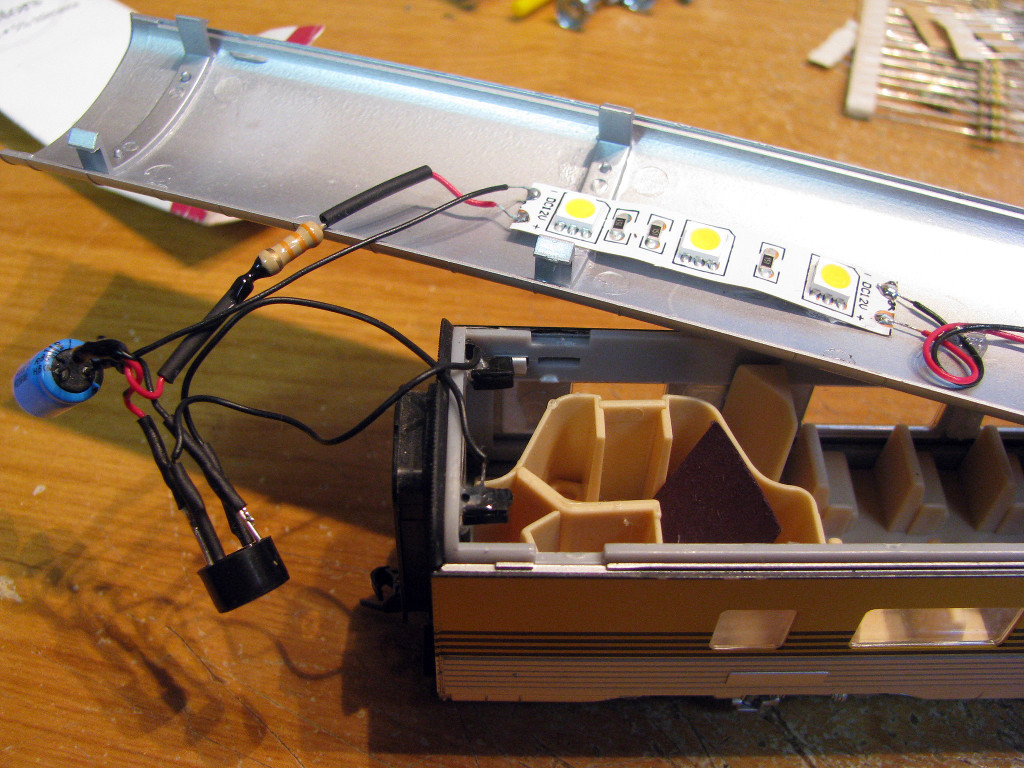 In this case, because it's a sleeper and I want more random lighting, I left the LED strips loose to sit on top of the interior. I bent the strips a little and placed them to best effect. 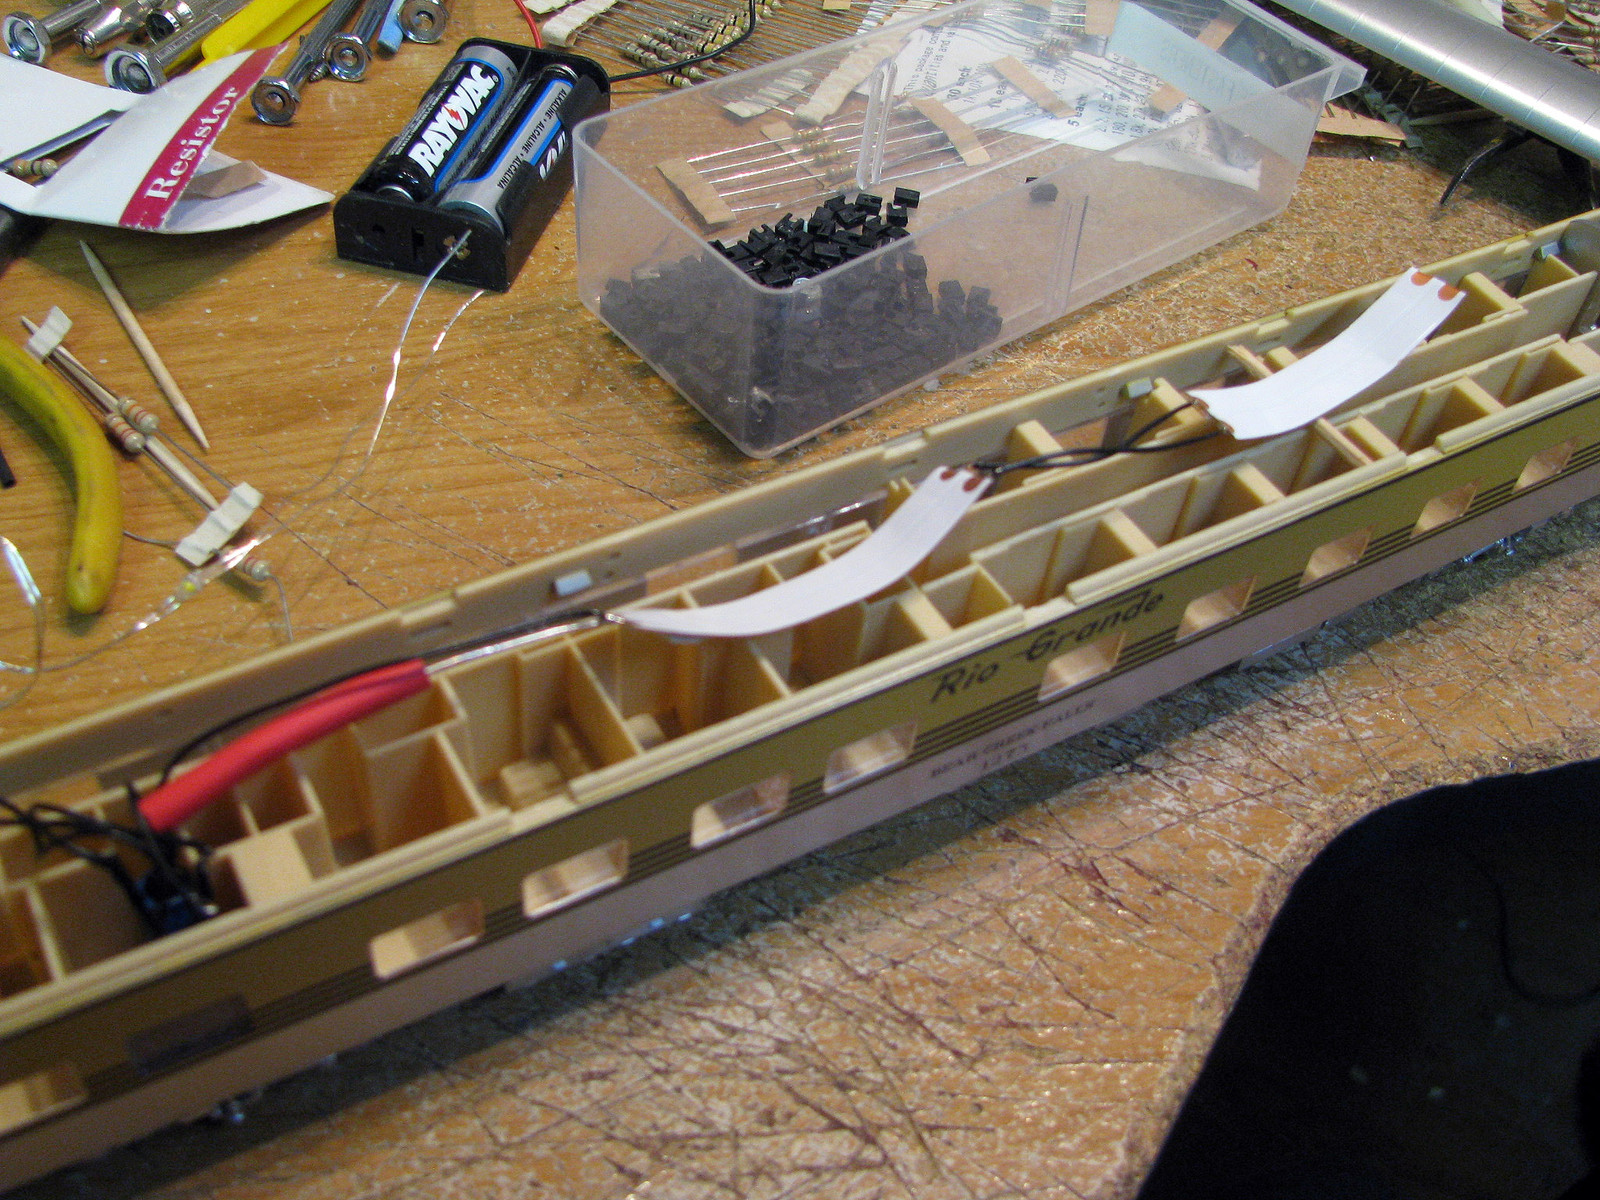 Here's the result. 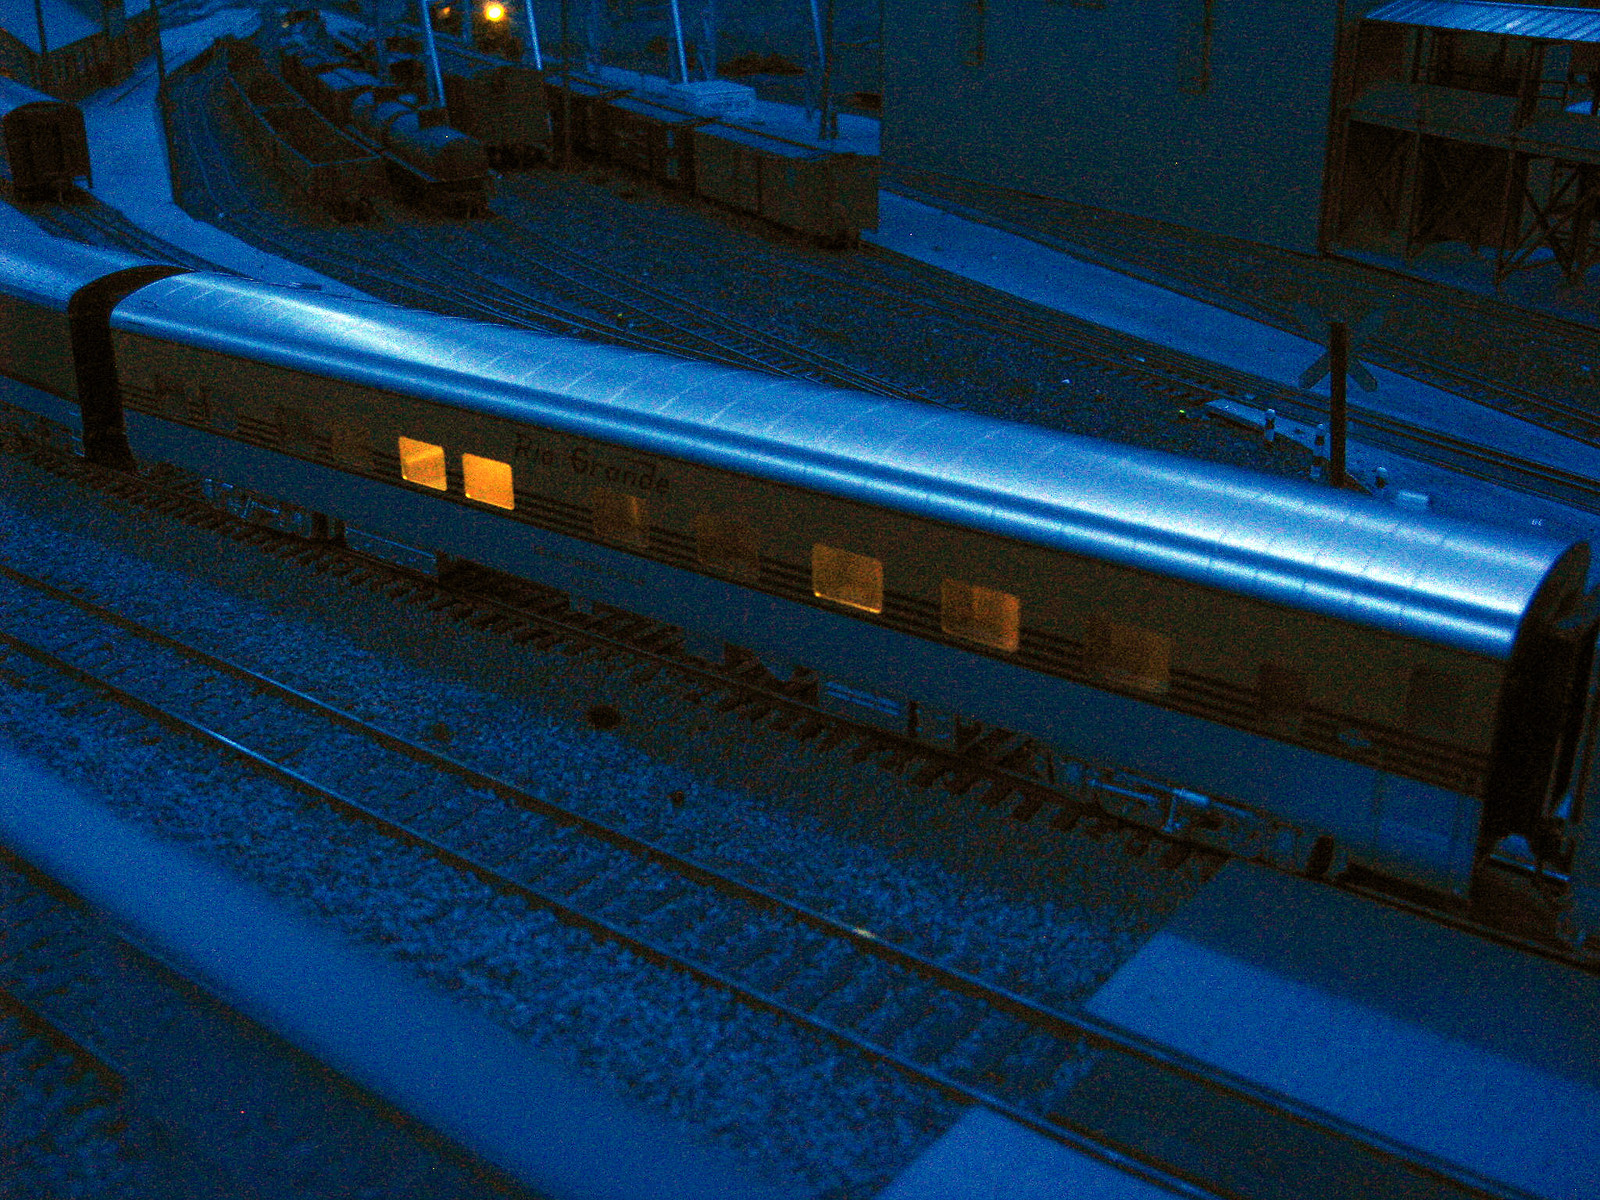 |
|
|
|
Post by mlehman on Feb 2, 2014 22:04:20 GMT -8
|
|
|
|
Post by mlehman on Feb 3, 2014 20:44:55 GMT -8
The LEDs involved are from two sources. First, Radio Shack is now carrying LED strip lighting. Price is $30 for a 1 meter length. Now, I said cheap, right? Well, $30 sounds kind of high, but you get a bunch of material at much cheaper cost than otherwise, as this gives you a lot of LEDs. There is one every inch and you can cut each group of three separately, so you get 13 "units" (each with 3 LED lights). I went with the RS LEDs here, but you can get these even cheaper online. I've got a correction. I thought the LEDs were spaced every inch on the strip lighting. I was wrong, they are closer together. In fact, you actually get 20 of the 3 LED units, not 13, in the meter length package. You only need 2 of the units, possibly 3 in a few cases, to light a full-length standard gauge passenger car. So, still a little pricey compared to the internet in bulk, but actually a pretty good value and available conveniently at your local RS as part number 276-0329. Another thing I noticed in adding extra resistance is, if you add enough, it turns out there are actually 3 tiny LEDs behind the translucent cover of the 3 "LEDs" in each unit. Here's a pic showing the effect you get. 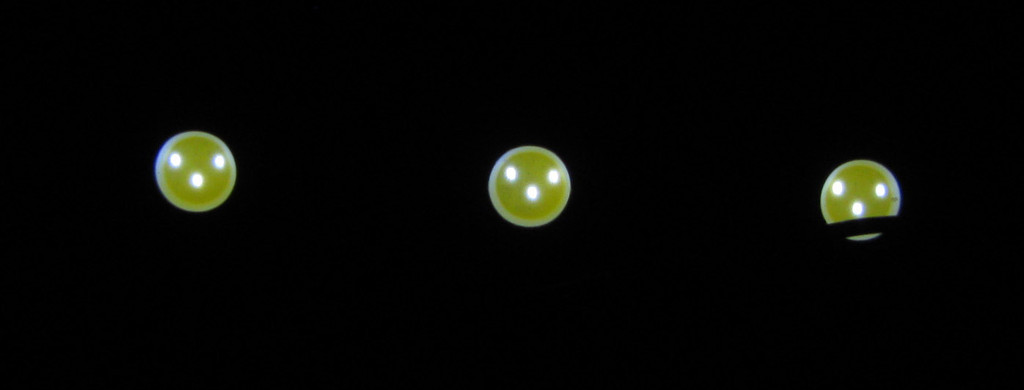 It looks a lot like the a household overhead light fixture with three bulbs. Note that it's even about the right size, at 1 scale foot diameter (~9/64"). I haven't tried it yet, but I presume the individual "cells" in each 3 light unit can be broken up and fed power individually with a little ingenuity. |
|
|
|
Post by mrsocal on Feb 5, 2014 16:34:05 GMT -8
Super great work there Mike but you have created a bit of a problem with your efforts......
Now you need to fill the seats with peoples!!!
Great work man!!!
|
|
|
|
Post by mlehman on Feb 6, 2014 0:22:07 GMT -8
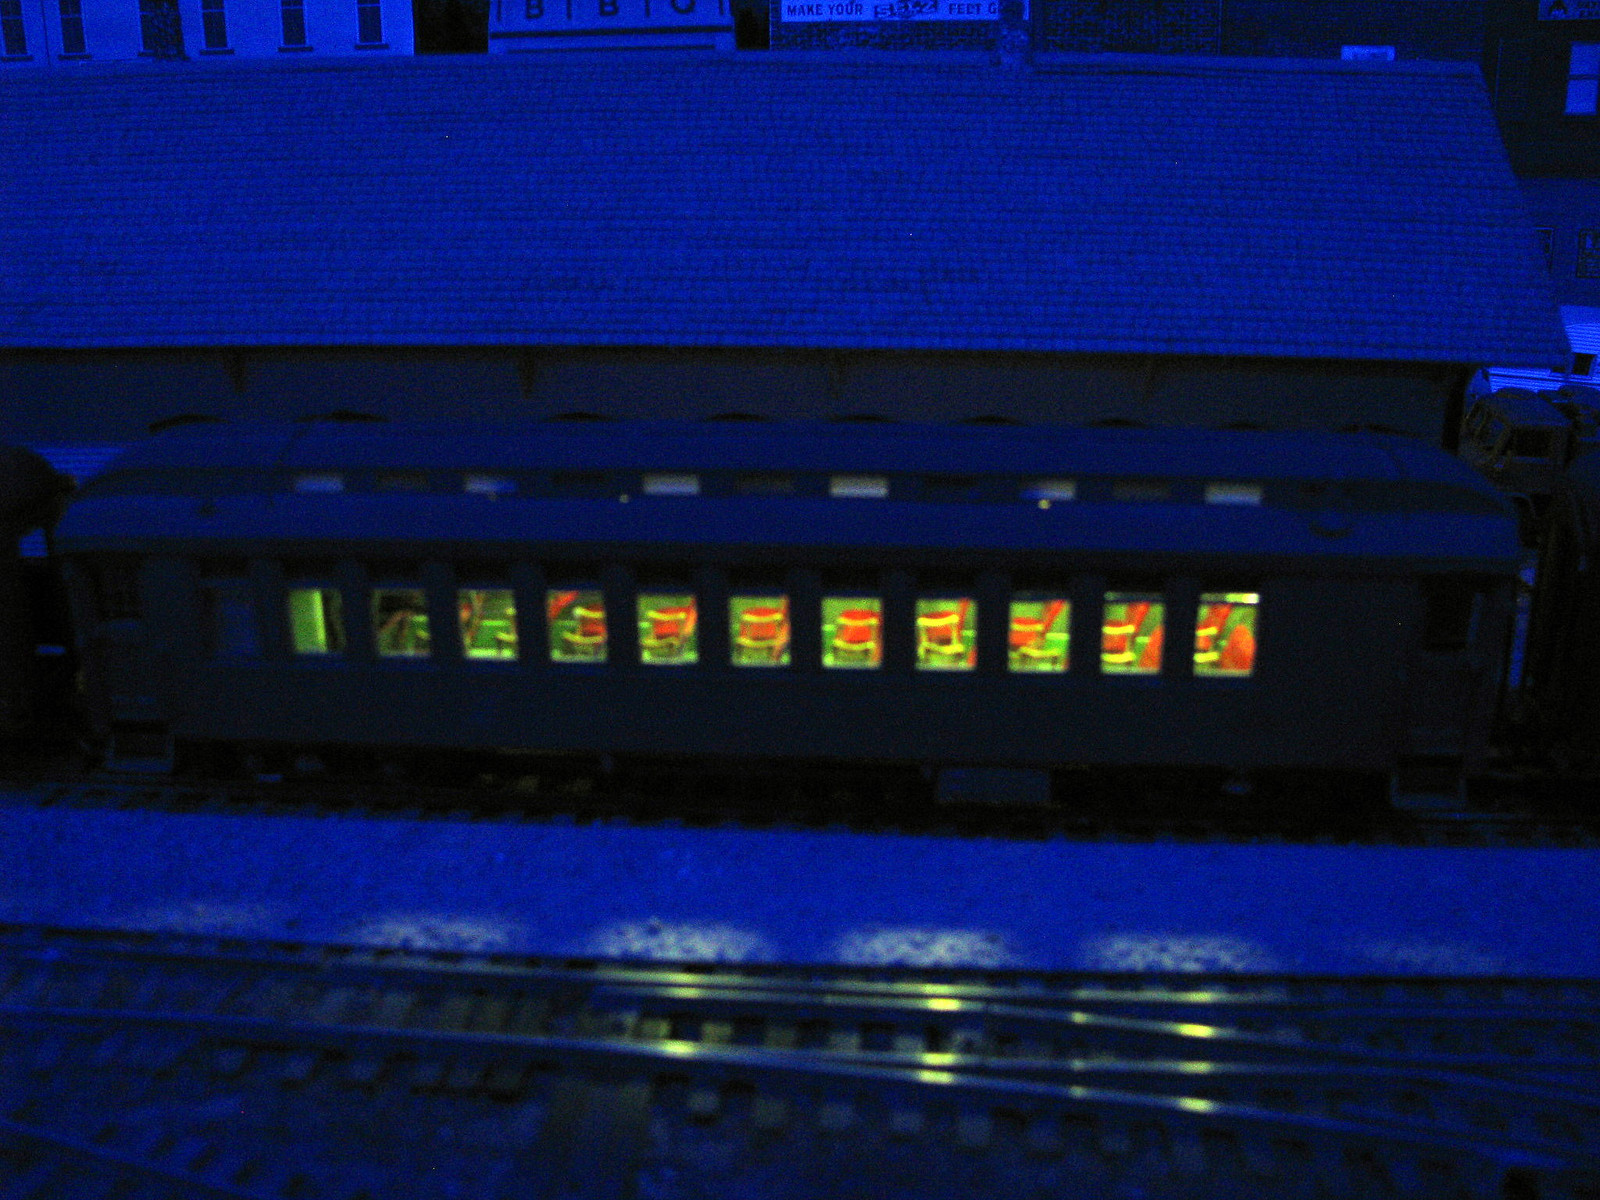
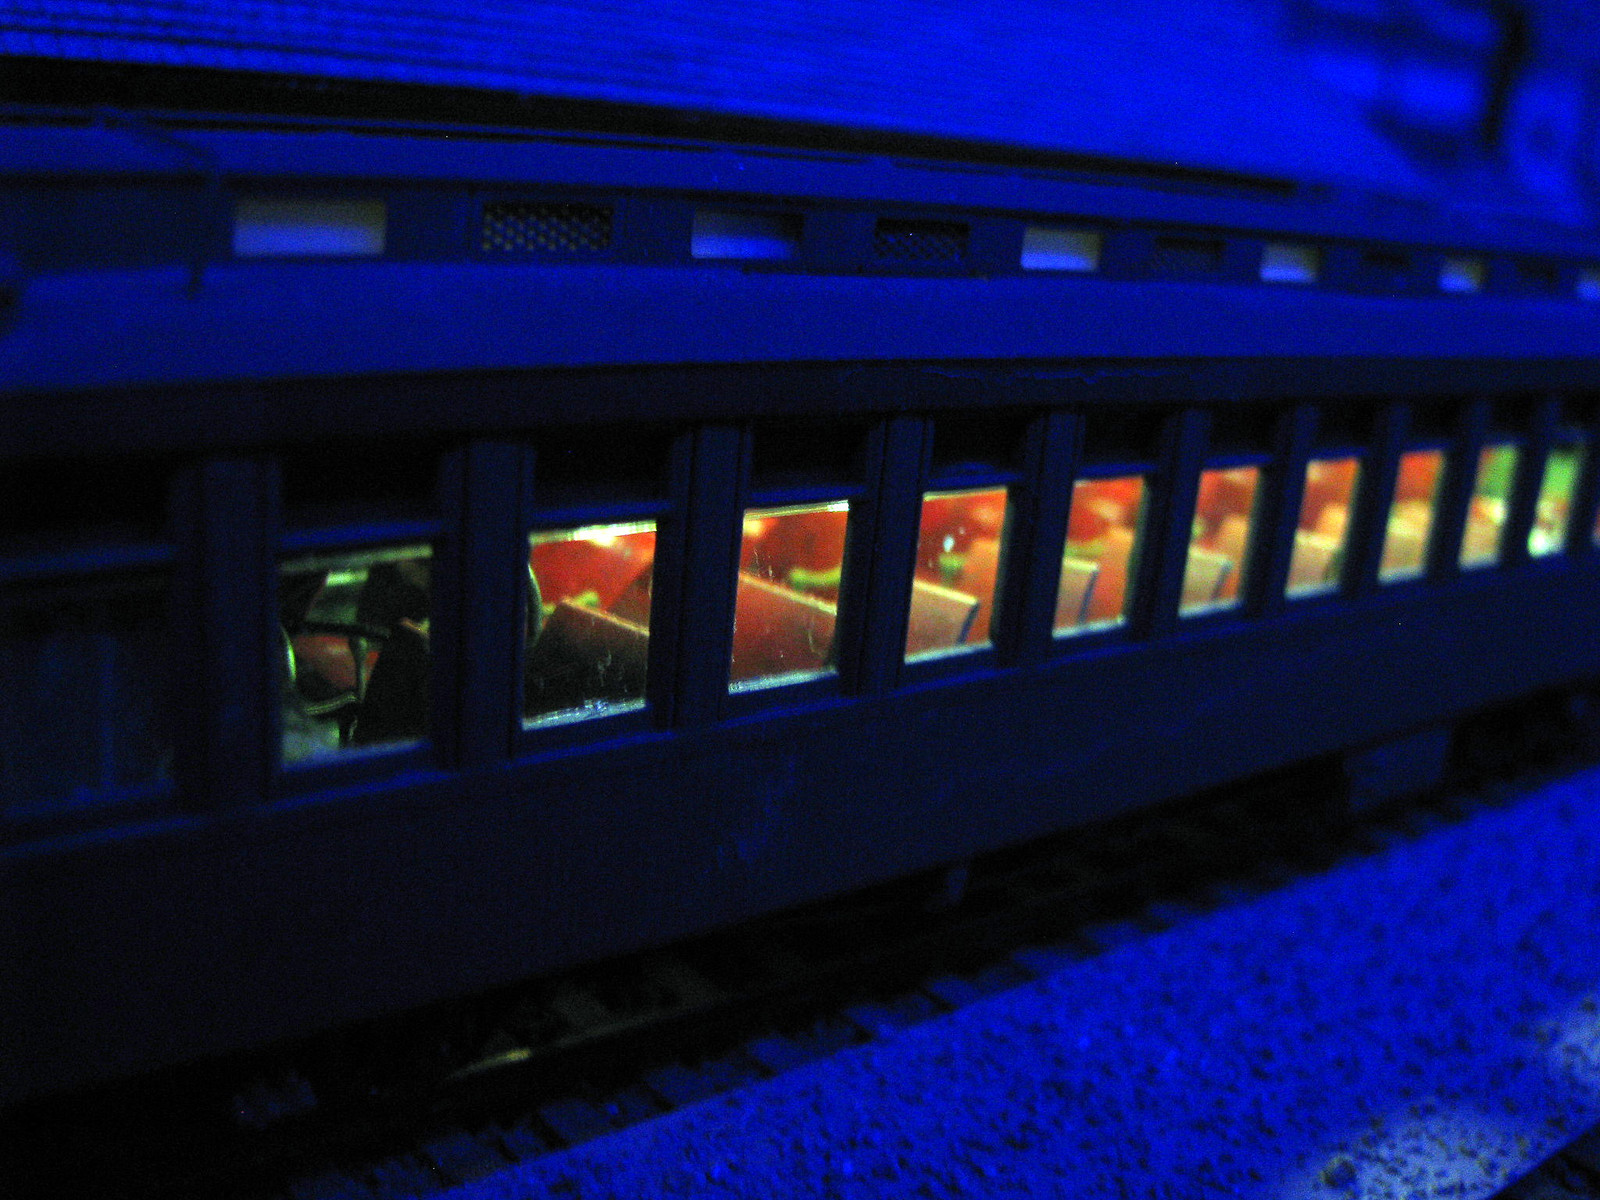
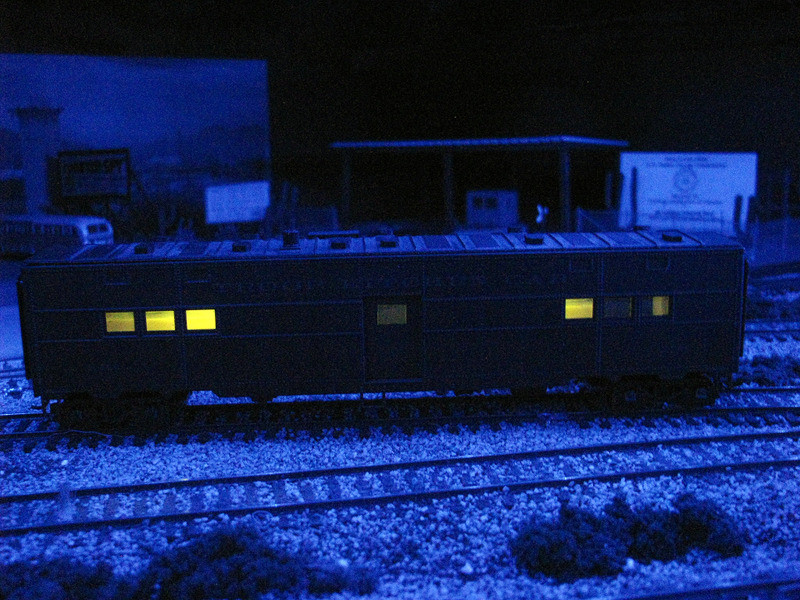
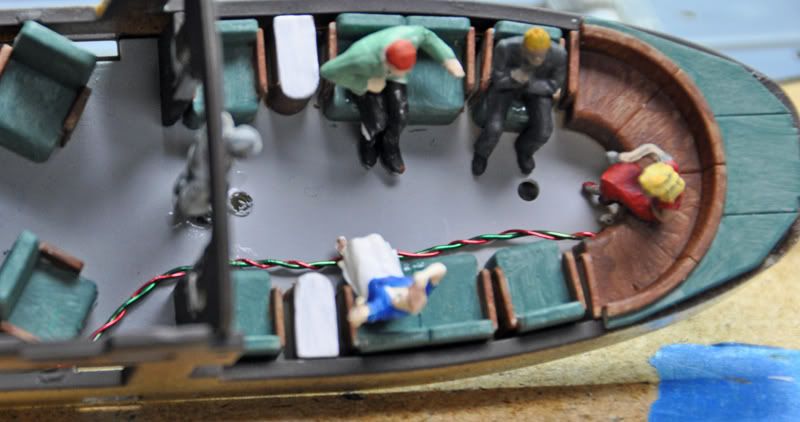
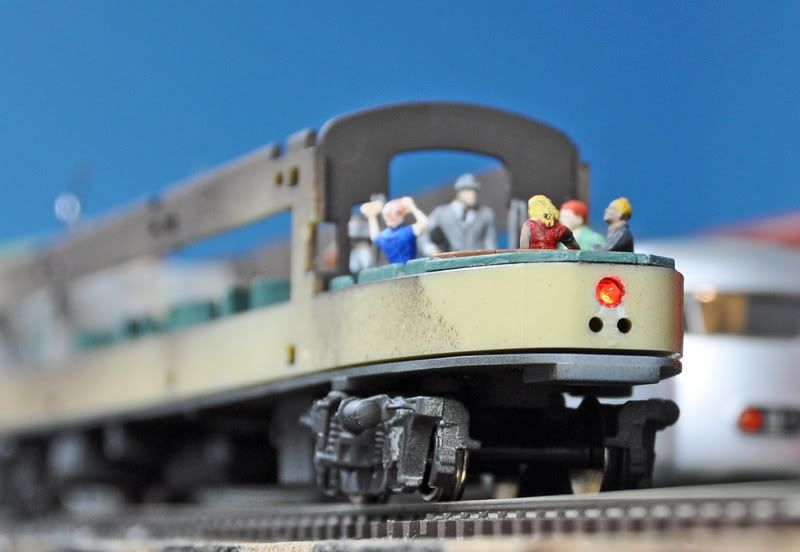
Scotty, Yeah, this is going to be an issue  I'm really getting complaints from the parlor car passengers who don't have anywhere to sit. Great for dancing, but it's one heck of a long ride if you're just standing around.  A few more... A sleeper (shown earlier in the install pics) 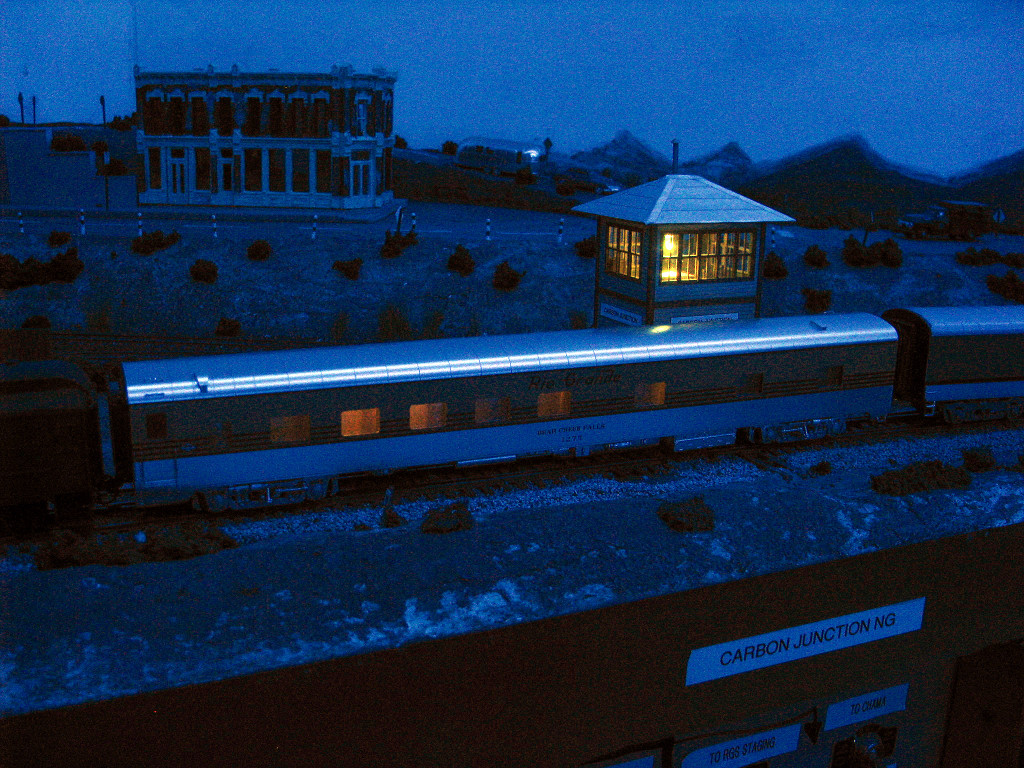 A Pullman 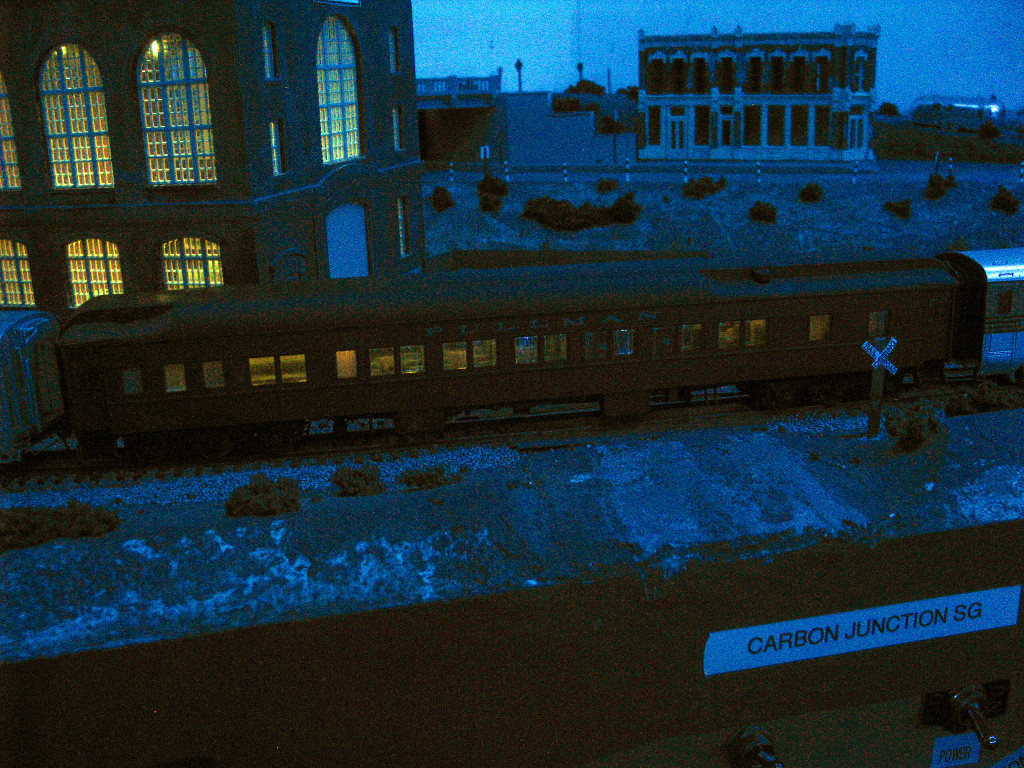 A coach 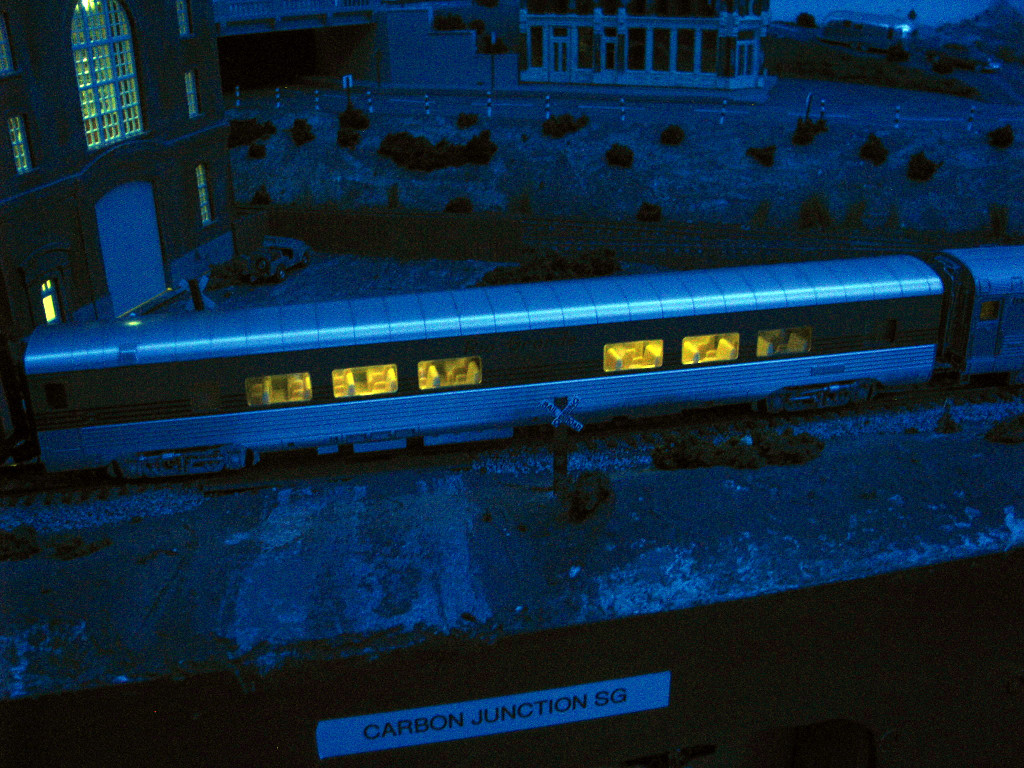 The obs/tavern 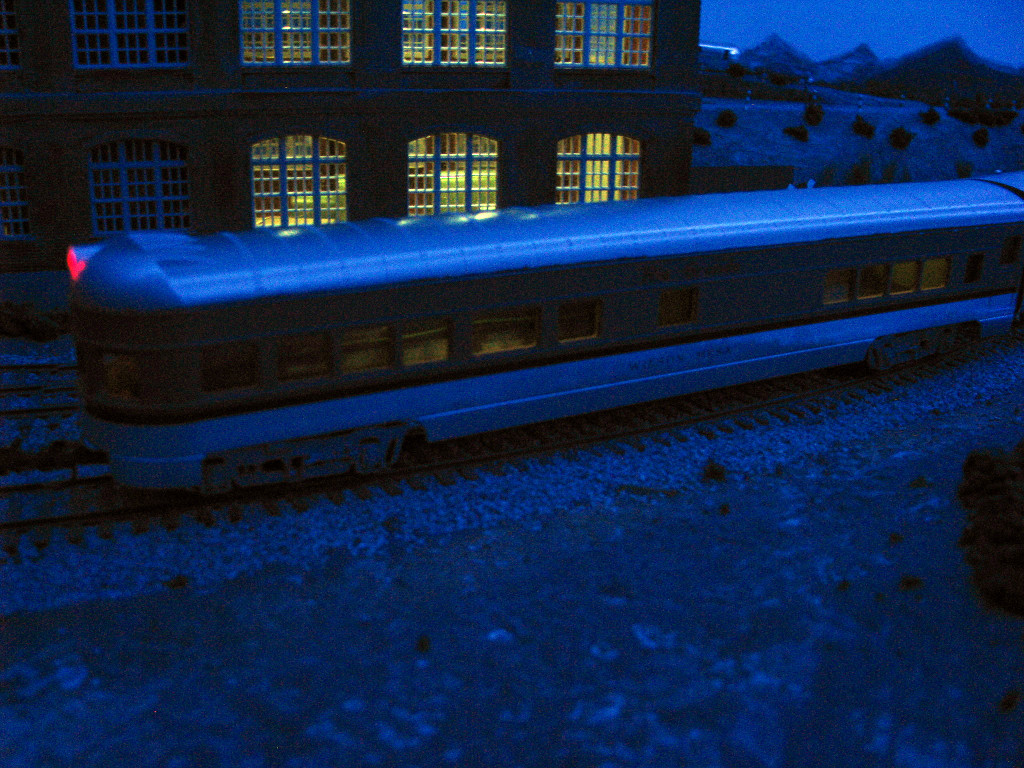 The train westbound from Dove Creek into Utah  |
|
|
|
Post by mlehman on Feb 6, 2014 20:27:44 GMT -8
|
|
|
|
Post by kentuckysouthernrwy on Feb 22, 2014 18:17:52 GMT -8
|
|
|
|
Post by mlehman on Feb 23, 2014 0:09:29 GMT -8
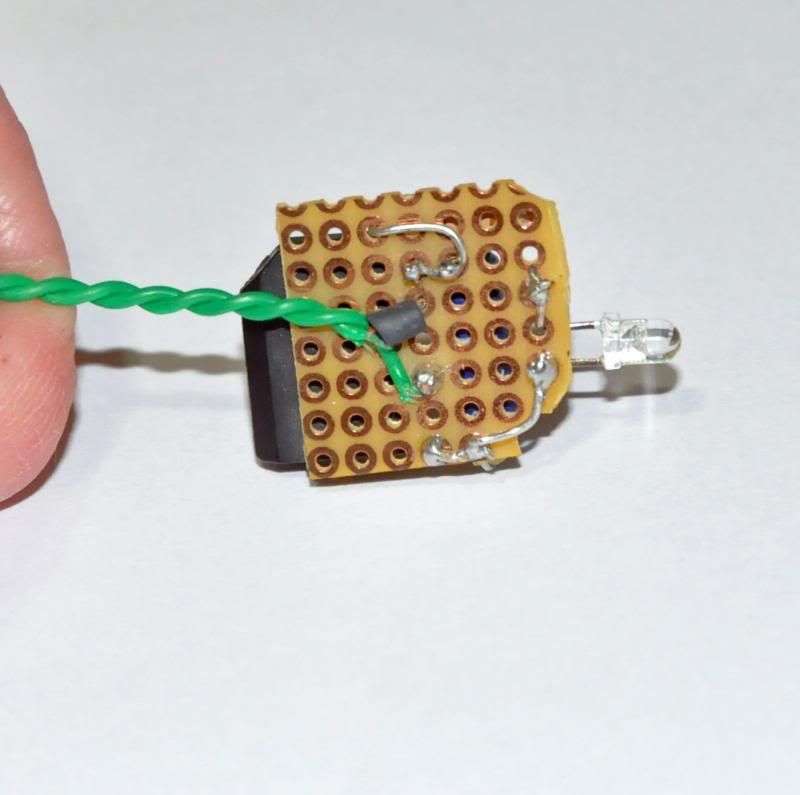
Karl, Nice work. That drumhead is a real classic, too.  Neat work, too, sort of toward the opposite extreme of my slapdash installs. I try and some do come out better looking. I started off with a circuit board, but found there just wasn't room to really do that in my narrowgauge passenger cars without going to a whole 'nother family of smaller components. Lazy me just refused to do that and decided to stay old school for now. I'm doing some Blackstone coaches right now and need to take a few pics. Biggest debate there was whether of not to do anything with the ones without the conduit that was used to set them up for electric lights. I decided to go ahead and do the gas-lit cars, but add a bunch more resistance to really soften the light, thus distinguishing them from the electric-lit cars. Any excuse to stick an LED in something  |
|
|
|
Post by kentuckysouthernrwy on Feb 25, 2014 15:51:08 GMT -8
|
|
|
|
Post by kentuckysouthernrwy on Feb 25, 2014 16:33:27 GMT -8
I agree with that, wholeheartedly
|
|
|
|
Post by mlehman on Feb 25, 2014 22:11:10 GMT -8
Karl, That circuit board is trick. I just haven't found a flat form bridge rectifier that will drive a LED yet at the local RS. I guess they need a half-phase one or something? [can you tell I'm easily confused yet by this electronic stuff sometimes?   ] Where did you get the one which obviously does drive LEDs? Maybe the little wave sign on the side is the clue I should look for? |
|
|
|
Post by kentuckysouthernrwy on Feb 26, 2014 6:56:22 GMT -8
I bought that rectifier from an electronics supply in Lansing, MI. if I recall. I went on eBay and bought smaller rectifiers and resistors from China to make this little bugger. The capacitor is the size limiting factor, that and eyesight. No hand shake issues here, tho, at 65 years. 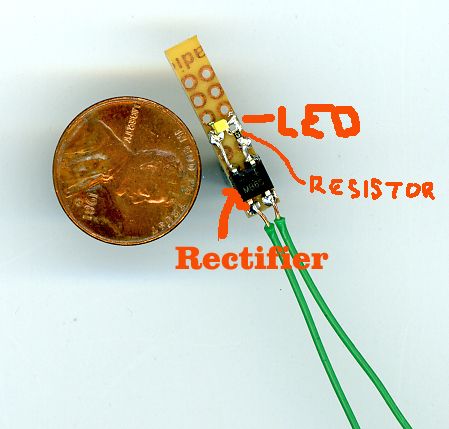 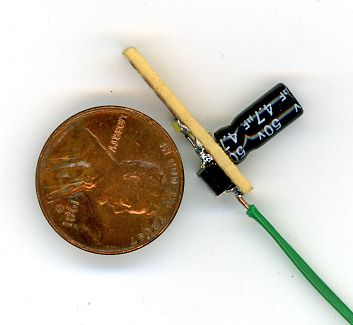 |
|
|
|
Post by Mark R. on Mar 1, 2014 19:28:59 GMT -8
Couple curiosities ....
Why are you using such a high voltage rating on your capacitors ? You could drop down to 25 volt or even 16 volt and be at a fraction of the size. The bridge rectifier is already absorbing 1.4 volts, so the 16 volt cap would handle a bit more than 17 volts. Speaking of size, does 4.7uf actually DO anything ? I've found 470uf is only good for a fraction of a second. (?)
Mark.
|
|
|
|
Post by mlehman on Mar 1, 2014 20:00:21 GMT -8
Mark, As for the voltage rating, that's just what the parts system pukes out. I wouldn't go lower the 25 volts in this application, though, even if that's what was available, as that would leave virtually no head room over the peak voltage in most people's DCC systems. I can't speak directly to Karl's application, but if all you want is to limit flicker, that may be all he needs. I my app, well, the stall is there, might as well fill it up.  Now that I'm putting so much resistance in, I've actually been thinking the big cap isn't needed, as I still get light from some of them for well over 30 seconds off the track, which is kind of crazy.  |
|
|
|
Post by kentuckysouthernrwy on Mar 2, 2014 8:13:40 GMT -8
The capacitor is just something I found, can't even remember where.
|
|
|
|
Post by Mark R. on Mar 2, 2014 14:29:07 GMT -8
I designed this simple little circuit for constant LED lighting in my cabooses using a super cap ....  The capacitor is a super cap with a rating of 5.5 volts @ 0.1 FARADS (not micro-farads ! - 0.1 farads = 100,000 uf). R1 is 1000 ohms which lowers the input to a safe level for the 5.5 volt capacitor. R2 regulates the output for the LED(s). In my cabooses, I use yellow LEDs for that older look and use a 470 ohm resistor for R2. I use two yellow LEDs and have a 470 ohm resistor on each LED. You can juggle the value of R2 based on the number and color of LEDs you are using. I've had a number of these in operation in my cabooses on my DCC layout for nearly fifteen years and have not had any problems with a single one of them. My cabooses will stay lit for well over three MINUTES with this simple set up ! As for physical size, these capacitors are quite small - about 1/4 of what you guys are currently using ....  Mark. |
|
|
|
Post by mlehman on Mar 2, 2014 19:23:02 GMT -8
Mark,
What's the source for those caps? They could prove useful.
I was familiar with using resisters to limit the charge applied to caps. In fact, someone thought resistors were actually needed to use caps, but really it's about how you spec things depending on what you want to accomplish.
I have an application that I do need something small and unobtrusive, ending the flickering onboard my BLI California Zephyr cars. They have plenty of light, in fact too much, so as part of what I'd like to do is add some more resistance to turn the lighting somewhat softer. The interiors offer relatively little in the way of hiding spots, especially near where the lighting circuit is in the middle of the domes. Since everything is so visible, whatever I use there needs to be unobtrusive.
These will need to drive the current lighting system, IIRC about 4 LEDs per car, as I'd like to be able to just install and not alter anything else.
|
|
|
|
Post by kentuckysouthernrwy on Mar 2, 2014 20:32:46 GMT -8
Thanks for the info, source?
|
|
|
|
Post by Mark R. on Mar 2, 2014 21:41:18 GMT -8
|
|
|
|
Post by mlehman on Mar 3, 2014 0:25:08 GMT -8
Ebay is a possibility, but less headaches to source them domestically IMO. Lots of info on that page, but couldn't see what physical size they were. I found these: www.allelectronics.com/make-a-store/item/CBC-19/0.22F-5.5V-MEMORY-BACK-UP-CAPACITOR/1.htmlThese pretty much equivalent? Are all these things pretty much the same in terms of their size (10mm diameter) and usefulness, just different capacity? I went through 40 pages of The Shack's caps and didn't see a one in this form factor. Do they come in different configurations or are they all pretty much that button config? Then there another issue that occurred to me. What is the output voltage of these super caps in your cicuit? I typically install LED strip light units that operate on 12 volts, not discrete LEDs, so would prefer a 12 volt solution. If they would work with the bridge rectifiers I use, which are these: www.allelectronics.com/make-a-store/item/FWB-15/1-1/2-AMP-400-PIV-FULL-WAVE-BRIDGE-RECTIFIER/1.htmlso much the better. I could see stacking them. But if the resistor is in the circuit ahead of the cap, doesn't that limit the output to something around ~5 volts or less? Of course, it's late and maybe I'm not quite remembering my very rusty barnyard electronics courses. That may still make them a good fit with my BLI CZ cars, which do use discrete LEDs, but not with my other car strip lighting apps. |
|
|
|
Post by Mark R. on Mar 3, 2014 9:51:25 GMT -8
Mike, yes, the resistor does limit the voltage to the capacitor, and hence its output - which in my design case works perfect for any number of single LEDs in parallel. However, there IS another reason for that resistor, and that is to clamp the inrush current to a capacitor of that large a value. A large value capacitor charging upon turning on your DCC system can fool your system into thinking it has a short.
I used the 1000 ohm resistor for two reasons - as mentioned, to restrict the inrush of current, and also to reduce the working voltage in order to use the smaller 5.5 volt rated capacitors.
That being said, you could wire three 5.5 volt super caps in series along with a 100 to 150 ohm resistor on the input and probably still be able to run your 12 volt strips. The TCS Stay Alive caps for engines are nothing more than five 2.7 volt super caps wired in series with a resistor and a diode. The five 2.7 volt caps in series give them a working voltage of 13.5 volts, but the resistor increases that to a 16 volt input and prevents the inrush of current you don't want your DCC system to detect.
If you were to use three of the 5.5 volt super caps in series along with the resistor on the input, they should be safe at up to nearly 19 volts on the rails and still provide over voltage than needed for your 12 volts strips. You would still need a small resistor on the output leg, which would require a bit of experimentation on your part based on the voltage / current requirement of your strips.
Mark.
|
|
|
|
Post by mlehman on Mar 3, 2014 10:39:47 GMT -8
Mark, That's something to think about. Sounds like a lot of the simplicity goes away if you need 12 volts, though. I know there are some finite limits to how many of my circuit could be accommodated at the same time because of the lack of limitation on in-rush current. However, no signs of that so far, although I have about 15 cars with these onboard with varying amounts of capacitance, about half of which are 470 uF. The layout is split between two 5 amp boosters and all my circuit breakers and auto reversers are PSX units designed to handle high inrush values. I also have the DCC output dialed back to 12.5 volts. It may just be that my system has been able to deal with the added load. Others may not experience the same luck if their system doesn't have the oomph to handle them. This is a great discussion in terms of assessing needs and choosing components and circuit design to fit specific situations. One size doesn't fit all and there are many ways to skin a a cat -- OOWWW! [one of our cats didn't like that!  ). I have some limited electronics background from an interest in radio and a few community college electronics classes, but mostly learn from others and my own hands on experience. LEDs in particular seem to baffle people, but I've found them rather easy to work with after little prior experience. |
|
|
|
Post by wendtsc on Mar 3, 2014 22:25:40 GMT -8
Mark,
How serious is the in rush current risk? I have seen and heard boatloads of talk about this issue. A lot of it from makers of circuit breakers and boosters, however considering my layout and the way I operate, I shouldn't even be able to turn it on, yet I have never had a shutdown even once.
I havee a small layout, basically a double track loop around the walls of a 10x12 foot room. I have four additional storage sidings, however I have started using one of my mains just for storage as well. The entire DCC system is still one giant power district because I am lazy and cheap and well, I would have to dig out my passport and buy a plane ticket to find a LHS that sells any DCC products.
That laziness also means that I don't like putting anything away. So, when I turn on my layout my one 5 amp booster is often powering up anywhere from 8 to 12 sound equipped locomotives as well as lighting up close to 40 passenger cars (most equipped with 12 volt bulbs) and a dozen switch decoders some SIC 24s that power about twenty signalheads and 10 lighting decoders in structures around the layout that are hardwired to the trackbus.
One thing I have often thought is that part of the in rush problem could come from how different DCC systems handle power and buses. So, for example if you have a system that has a bus for throttles, radio repeaters and accessories that is completely separate from the track bus, your boosters are only having to deal with whatever is on the track and not a whole bunch of aux circuits and interfaces with who knows how many capacitors on them.
Mike, I think you hit the $64,000 question. We love to see when people are able to DIY affordable solutions for things like lighting and you really can't ever have too many LEDS!!!
But, you're right. We all probably will have to ask ourselves will I be able to use these simple solutions on my own layout? Or, am I looking at a major upgrade to my layout's infrastructure before I start squeezing in keep alive circuits?
Let me know what kind of solution you come up with for the BLI CZ cars. I have a bunch (go figure) and I agree that they are way too bright out of the box.
Scott
|
|
|
|
Post by Mark R. on Mar 3, 2014 22:47:49 GMT -8
In all honesty, I've never witnessed an overload start-up due to too many items instantly drawing current. It's one of those "good practice" kind of things as the potential IS there .... it's just a matter of where that point is.
There are all kinds of electronic "rules" out there, and sometimes I think these so-called experts preach them to the point of over-kill. For example - I recently got involved in a rather heated argument on another forum about wiring LEDs in parallel using a single resistor. There was a couple guys spouting all sorts of technical data as to why you shouldn't do it. Well, I've been wiring two LEDs in parallel on a single resistor for my headlights for fifteen years and have never had a problem.
In another big no-no topic, they say you should never run your DCC buss around the room and tie in back in making a continuous loop. When I wired in my first DCC system some twenty years ago, that's exactly what I did - for no other reason than not knowing any different at that time. Well, guess what ? It's still wired that way ! I have had operating sessions for years with up to five operators running multiple consists and have never (seriously - NEVER) had any signal loss problems. And the experts will still claim I will have nothing but problems.
I love to experiment with electronics and try to find the better solution (read cheaper) to many things. I always chuckle to myself when I come up with something that works like a charm and somebody insists on shooting it down because "it won't work" ! There's always going to be those guys who are into the technical over-kill that insist on telling everyone how they should do things. That's fine, but I sometimes wonder if these guys have ever actually built anything or just like to spout off all the technical data they've absorbed. I prefer to experiment. If it works, great .... if it doesn't, step back and figure out why, fix it and carry on.
Mark.
|
|
|
|
Post by mlehman on Mar 3, 2014 23:03:38 GMT -8
Mike, I think you hit the $64,000 question. We love to see when people are able to DIY affordable solutions for things like lighting and you really can't ever have too many LEDS!!! But, you're right. We all probably will have to ask ourselves will I be able to use these simple solutions on my own layout? Or, am I looking at a major upgrade to my layout's infrastructure before I start squeezing in keep alive circuits? Let me know what kind of solution you come up with for the BLI CZ cars. I have a bunch (go figure) and I agree that they are way too bright out of the box. Scott Scott, Hard to say. I'd almost bet no significant upgrade will be needed, presuming you're switching from bulbs to LEDs in the process of installing lighting with the circuit I've been using. Bulbs use enough current that there will be surplus ampage available. Bulbs do behave differently, which is why they're used by some folks as fault circuit in DCC, as they come up to full brightness gradually. But LEDs represent such a smaller load there should be plenty of juice all other things being equal. Now, if you're talking about adding more loads, well, you've got a lot going on already...  But you'll never know until you try. Since the price of failure is simply removing a few items until upgrades come online, it'll be a small sacrifice to science if that comes to pass. I'm still thinking about the CZ project. Now that this discussion has clarified in my mind what some of the differences there are between 5 volt and 12 volt systems, I've got a better idea about how to do it. I just need to get my hands under the hood to see what fits. |
|
|
|
Post by mlehman on Mar 3, 2014 23:09:21 GMT -8
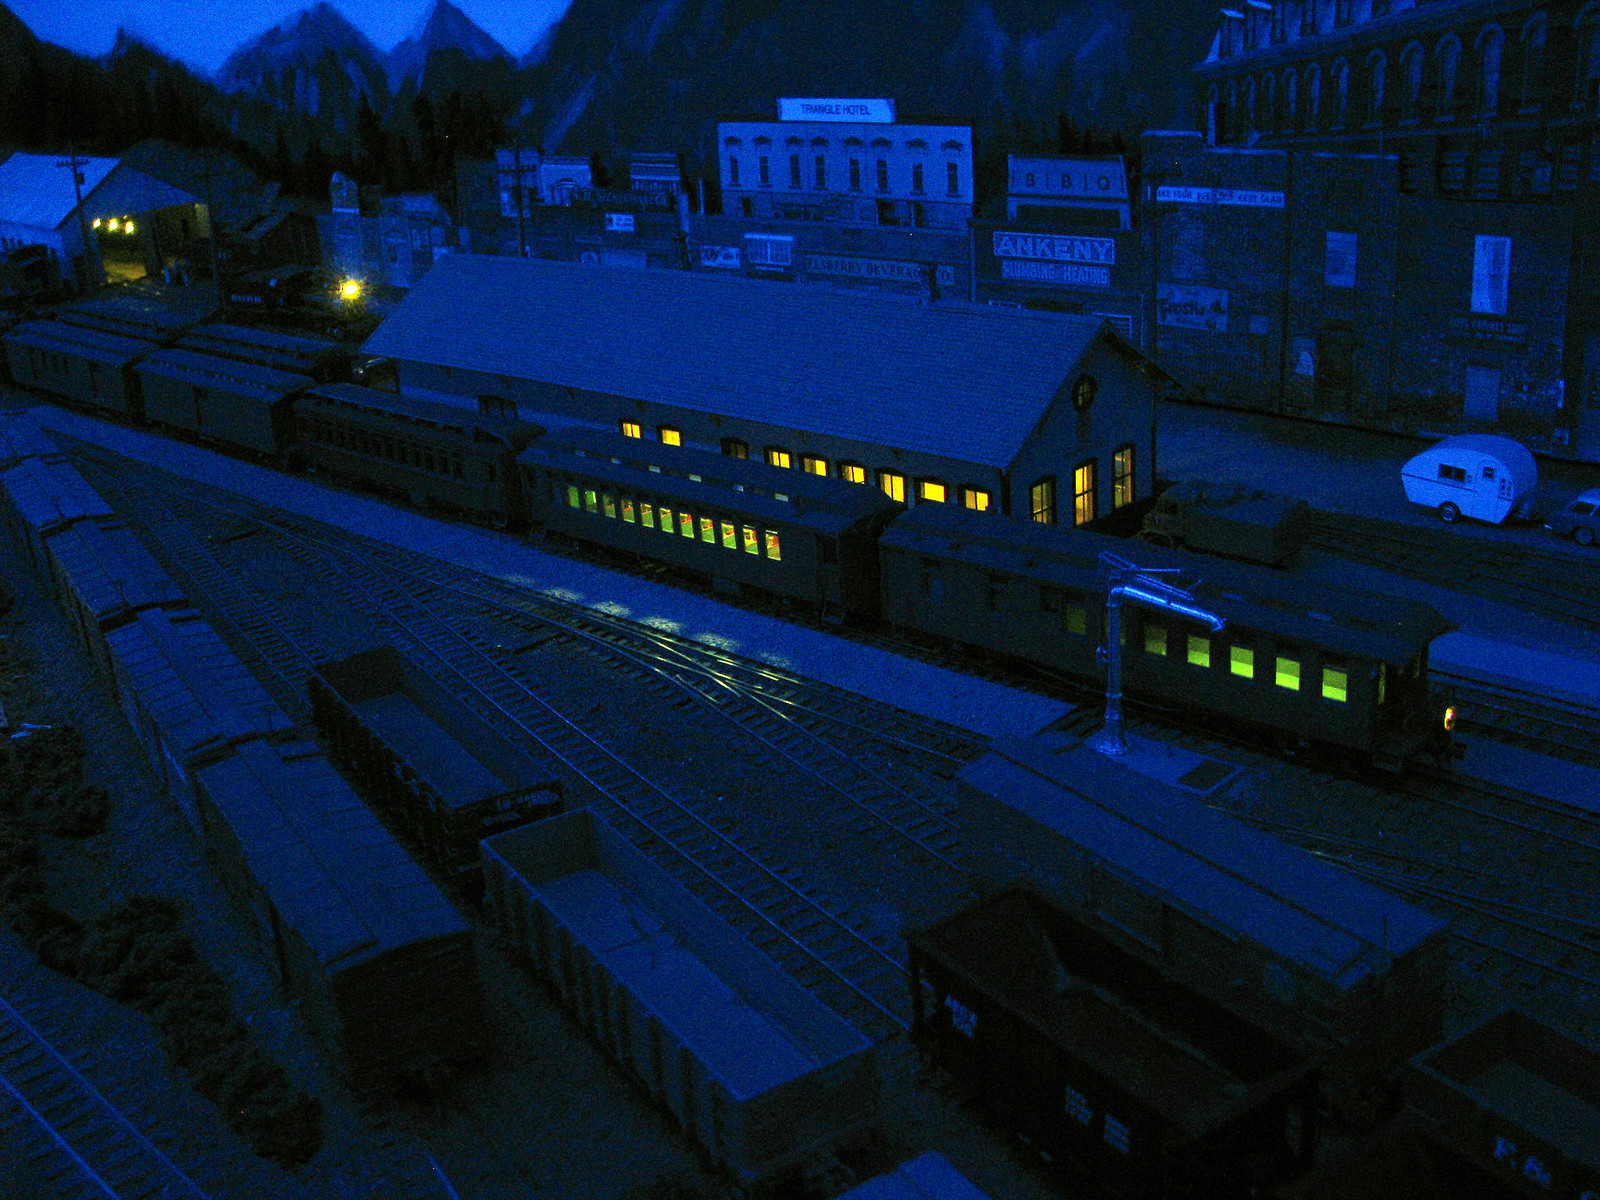
In all honesty, I've never witnessed an overload start-up due to too many items instantly drawing current. It's one of those "good practice" kind of things as the potential IS there .... it's just a matter of where that point is. There are all kinds of electronic "rules" out there, and sometimes I think these so-called experts preach them to the point of over-kill. For example - I recently got involved in a rather heated argument on another forum about wiring LEDs in parallel using a single resistor. There was a couple guys spouting all sorts of technical data as to why you shouldn't do it. Well, I've been wiring two LEDs in parallel on a single resistor for my headlights for fifteen years and have never had a problem. SNIP Mark, I tend to think of good practice things as the price you pay so you can stretch the rules some where else. I believe in them, then I exploit them as best I can.  Yeah, that parallel LED thing can get real complicated if you "follow the rules" so I mostly just ignore figuring and start soldering. I used a lot of that in lighting structures, etc around the layout, which is an ongoing thread of mine here at "The Night Scene": cs.trains.com/mrr/f/88/t/213765.aspx?page=1 |
|


 Here's the case for Tomar drumhead kit and one of the Rice Light LEDs. I did use a drill on the case to carefully open up the hole for leads a little.


 Here's the case for Tomar drumhead kit and one of the Rice Light LEDs. I did use a drill on the case to carefully open up the hole for leads a little.







 ). I have some limited electronics background from an interest in radio and a few community college electronics classes, but mostly learn from others and my own hands on experience. LEDs in particular seem to baffle people, but I've found them rather easy to work with after little prior experience.