|
|
Post by jonklein611 on Sept 18, 2020 5:11:24 GMT -8
It's so neat to see builds come together.
|
|
|
|
Post by cp6027 on Sept 18, 2020 7:06:28 GMT -8
^ There are experts out there (railfans and employees) who have an excellent memory of those operational details from decades past. I do believe WPG and MJ had CP 4349xx series vans assigned for this purpose so that the SOO cabooses remained on the US side. In my book I show a photo of CP 434950 parked at Thief River Falls for this type of service so it's possible they were swapped out there. I am reminded of a 1992 Glenn Courtney photo of CP 4710 beside a CAST container train headed east through Guelph Junction with a SOO caboose bringing up the rear. That photo was posted to railpictures.net at one time but I can't presently find it through a google search. I can't recall if this was normal practice as there are many photos and videos showing CP cabooses moving in and out of Chicago in this rough timeframe. Again, such prototype questions must be deferred to better sources than me. You live in WPG right? These are helpful comments. It makes sense that the CP international service vans would hold down these assignments instead of those from SOO for the reasons you and others have stated. Looking forward to the rest of this project. (Grew up in Winnipeg but have lived south of the border for the past 20 years.) |
|
|
|
Post by sd40dash2 on Sept 18, 2020 7:40:18 GMT -8
^ There are experts out there (railfans and employees) who have an excellent memory of those operational details from decades past. I do believe WPG and MJ had CP 4349xx series vans assigned for this purpose so that the SOO cabooses remained on the US side. In my book I show a photo of CP 434950 parked at Thief River Falls for this type of service so it's possible they were swapped out there. I am reminded of a 1992 Glenn Courtney photo of CP 4710 beside a CAST container train headed east through Guelph Junction with a SOO caboose bringing up the rear. That photo was posted to railpictures.net at one time but I can't presently find it through a google search. I can't recall if this was normal practice as there are many photos and videos showing CP cabooses moving in and out of Chicago in this rough timeframe. Again, such prototype questions must be deferred to better sources than me. You live in WPG right? These are helpful comments. It makes sense that the CP international service vans would hold down these assignments instead of those from SOO for the reasons you and others have stated. Looking forward to the rest of this project. (Grew up in Winnipeg but have lived south of the border for the past 20 years.) Glad the comments were helpful. I will continue posting updates on this project between 1-3x per day until finished. I have someone in mind in the WPG crowd who may be able to offer you more detailed, accurate specifics on your prototype question. If interested, please PM me. |
|
|
|
Post by sd40dash2 on Sept 18, 2020 7:44:41 GMT -8
Onto the shell stage -- 3 days into the alcohol bath and a lot of the paint seems to be really loosening up. Not sure about the printing though, so will let this soak a bit longer. My container is also sealed quite well as there has been very little evaporation.  |
|
|
|
Post by Christian on Sept 18, 2020 7:54:28 GMT -8
not standard 2-56s. Hard to know exactly how much material to trim from a screw Simply screw the box in place. Use your power tool with a cut-off disk to clip the screw. Then install the weight. Install first and then trim. It's a useful approach to lots of things that are hard to guesstimate. |
|
|
|
Post by sd40dash2 on Sept 18, 2020 8:16:26 GMT -8
^ LOL OK now I feel like a total idiot. Why didn't I think of that? Sigh, sometimes the simplest things escape me.  |
|
|
|
Post by Christian on Sept 18, 2020 8:49:04 GMT -8
^ LOL OK now I feel like a total idiot. Why didn't I think of that? Sigh, sometimes the simplest things escape me. Shall I list the simple things that escape me daily? |
|
|
|
Post by sd40dash2 on Sept 18, 2020 15:04:09 GMT -8
At the end of the 4th day, I opened up the container and checked for progress. It was immediately apparent that the paint was loose and shells ready for a scrub. So I took them out, poured the alcohol back into the bottles and then scrubbed the shells. All paint and printing came off in a matter of minutes. 99% alcohol for the win here. 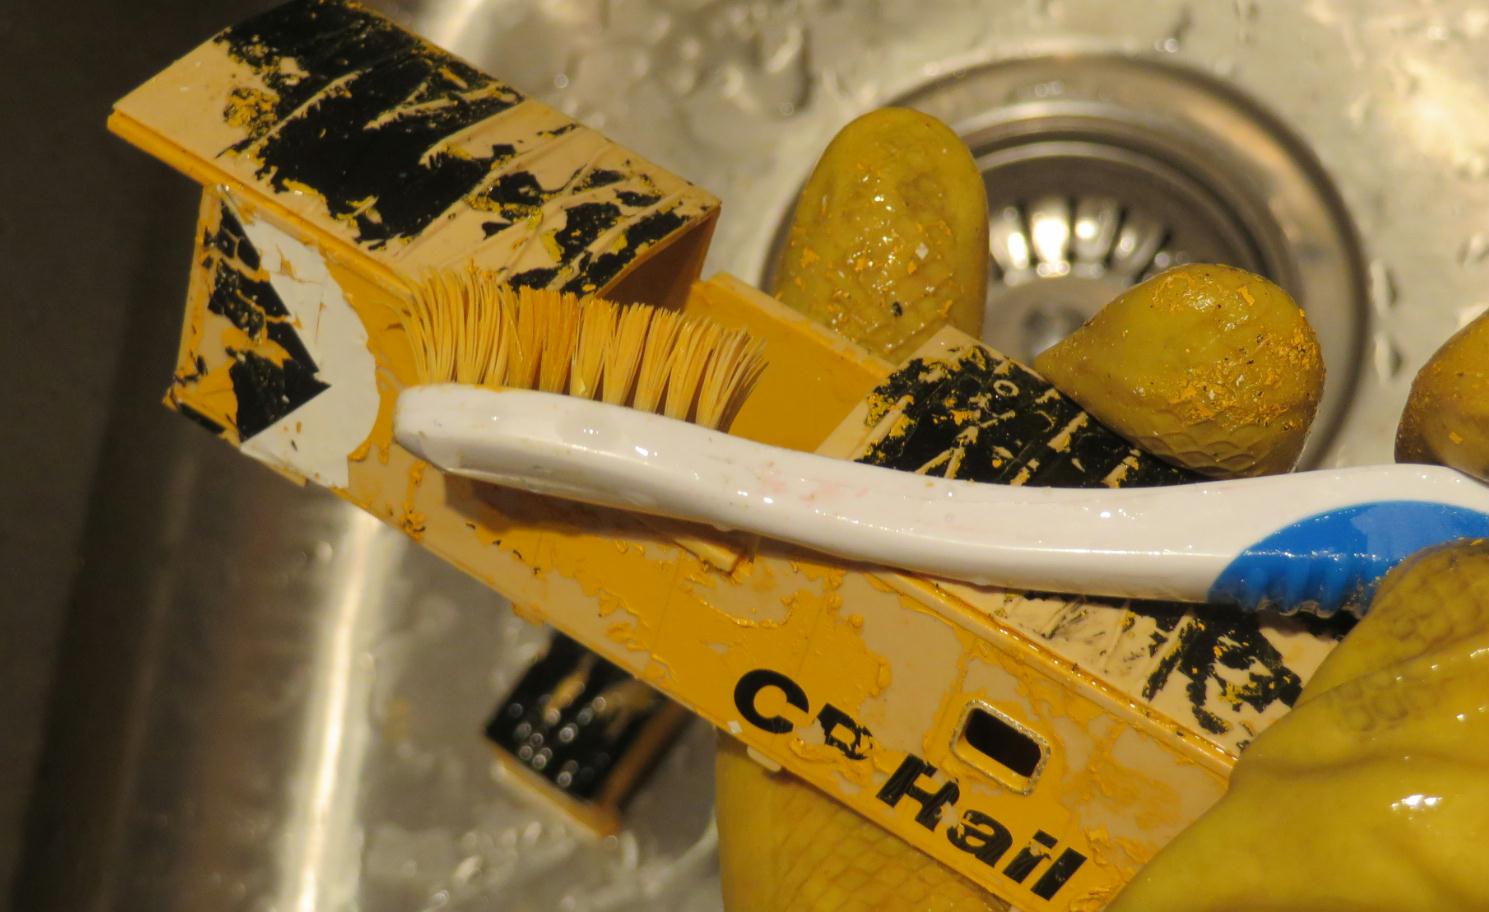 |
|
Deleted
Deleted Member
Posts: 0
|
Post by Deleted on Sept 18, 2020 16:25:37 GMT -8
Beautiful work.
|
|
|
|
Post by sd40dash2 on Sept 19, 2020 4:13:00 GMT -8
Paint has been stripped, shells have been washed and dried.  |
|
|
|
Post by sd40dash2 on Sept 19, 2020 7:11:01 GMT -8
Carefully remove the window frames on the body sides if you are modelling the post-1980 version with plated over windows. I have also removed the cupola face window frames because I will replace them with flush fitting windows and my own frame etchings. 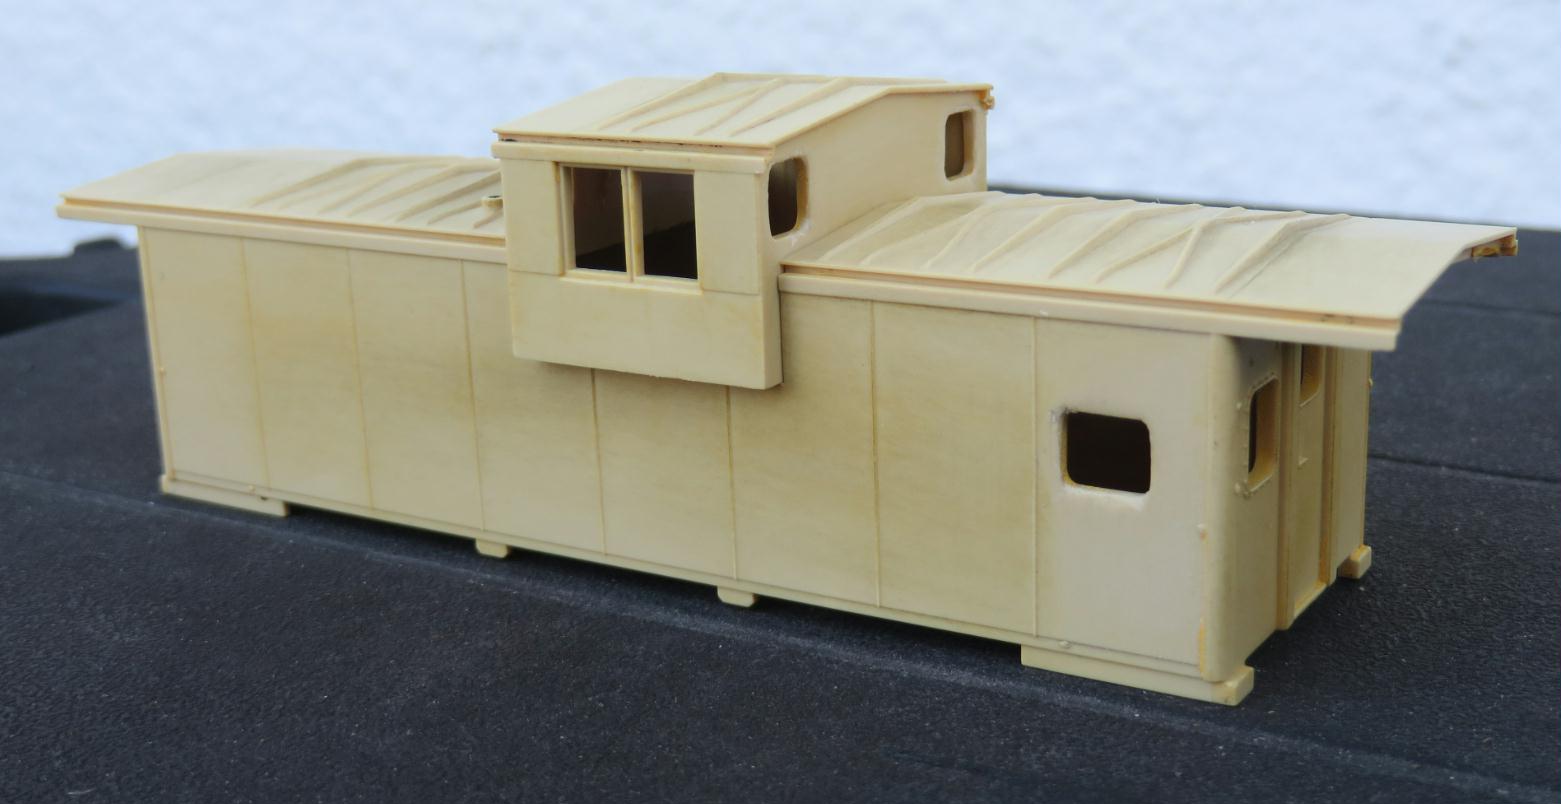 |
|
|
|
Post by sd40dash2 on Sept 19, 2020 10:11:03 GMT -8
The cupola side windows are too tall in my opinion. This can be fixed with two sizes of styrene strip.  |
|
|
|
Post by sd40dash2 on Sept 19, 2020 13:29:25 GMT -8
I have cut 4 pieces of new lower, inner window frame per caboose.  |
|
|
|
Post by sd40dash2 on Sept 19, 2020 15:32:25 GMT -8
Looking good, but I think you might have your A and B ends backwards. The brake cylinder always points toward the B end as far as I've seen. Having said that, there may be exceptions. Ryan, I took a closer look at this today. Can you double check on page 3; isn't the cylinder in fact pointing towards the A on my model? Let me know if I'm not understanding. |
|
|
|
Post by Christian on Sept 19, 2020 15:59:33 GMT -8
Looking good, but I think you might have your A and B ends backwards. The brake cylinder always points toward the B end as far as I've seen. Having said that, there may be exceptions. Ryan, I took a closer look at this today. Can you double check on page 3; isn't the cylinder in fact pointing towards the A on my model? Let me know if I'm not understanding. Yes it is pointing to the end you have marked "A." That mark should read "B." That is just a matter of changing the chalk marks on the floor. The plated window is at the "B" end on the side shown in the brown proto photo. Darned if I know why it is done this way on the prototype, but I do know that knowing the "A" and "B" ends is important for requesting maintenance. |
|
|
|
Post by thunderhawk on Sept 19, 2020 16:09:03 GMT -8
It's so the shop guys know which axle, coupler, etc to work on as an example.
Non cabooses are easy as the brakewheel is on the B end.
|
|
|
|
Post by sd40dash2 on Sept 19, 2020 20:44:21 GMT -8
Ryan, I took a closer look at this today. Can you double check on page 3; isn't the cylinder in fact pointing towards the A on my model? Let me know if I'm not understanding. Yes it is pointing to the end you have marked "A." That mark should read "B." That is just a matter of changing the chalk marks on the floor. The plated window is at the "B" end on the side shown in the brown proto photo. Darned if I know why it is done this way on the prototype, but I do know that knowing the "A" and "B" ends is important for requesting maintenance. Thanks to Ryan, Christian and Todd for this explanation. I have gone ahead and fixed this on both models. |
|
|
|
Post by sd40dash2 on Sept 20, 2020 4:13:38 GMT -8
Two thin strips per caboose were used to raise the window frame from the bottom.  |
|
|
|
Post by sd40dash2 on Sept 20, 2020 6:47:45 GMT -8
These are all the styrene pieces needed to update both body shells.  |
|
|
|
Post by sd40dash2 on Sept 20, 2020 12:09:07 GMT -8
Fuel filler has been added along with the window cover plates. 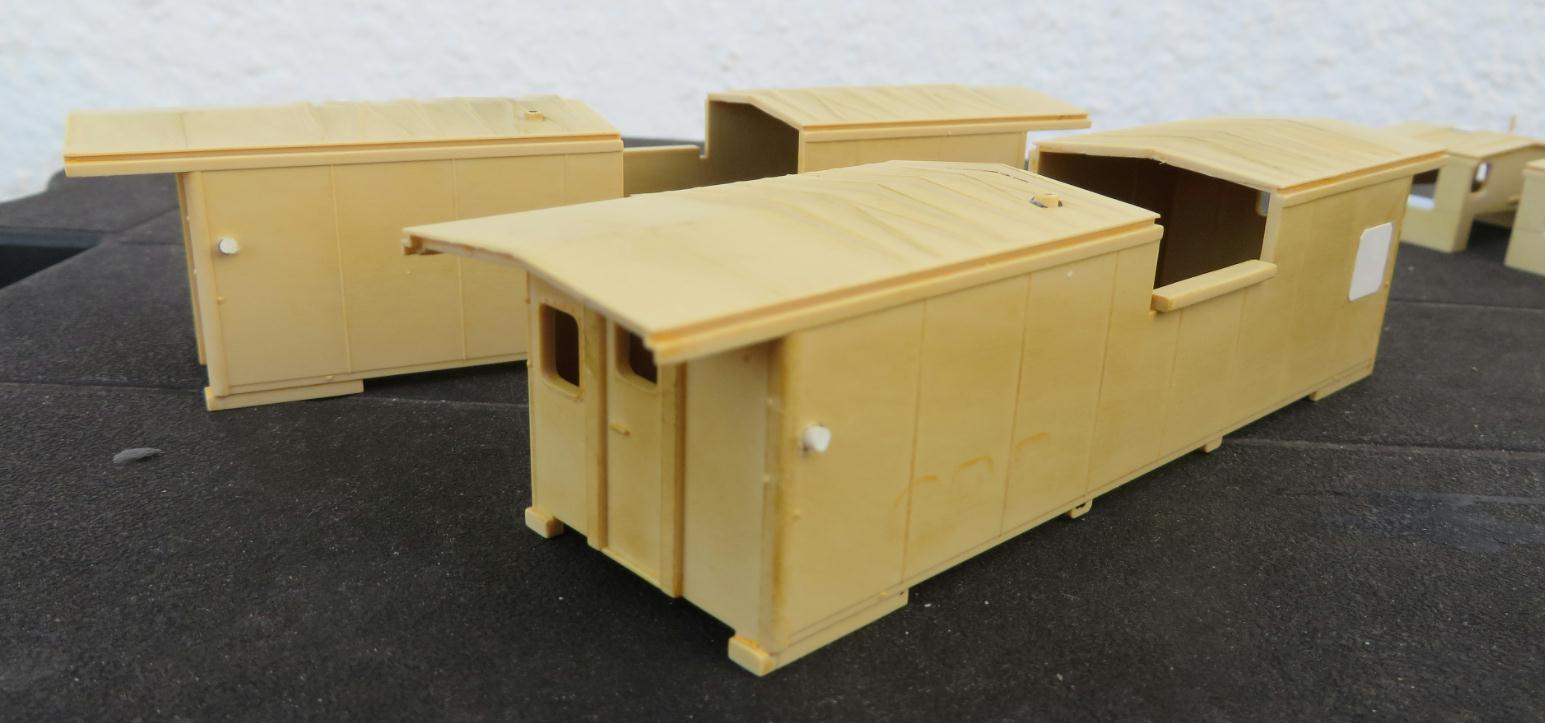 |
|
|
|
Post by sd40dash2 on Sept 24, 2020 9:11:14 GMT -8
Cupolas ready for paint after installation of radio antenna, beacon base and new lower window frames. 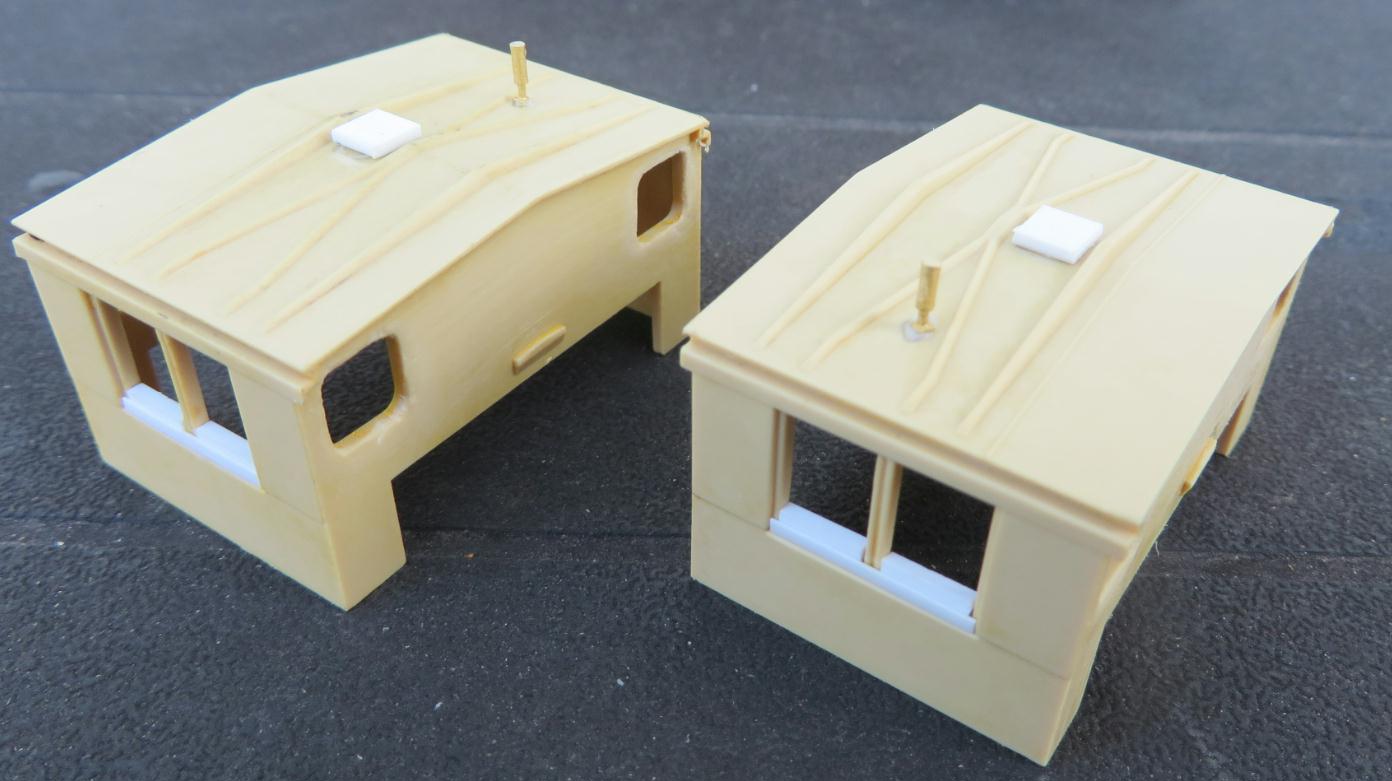 |
|
|
|
Post by edgecrusher on Sept 24, 2020 11:34:26 GMT -8
That is a really cleaver solution to the window issue. Well done.
|
|
|
|
Post by sd40dash2 on Sept 24, 2020 11:56:02 GMT -8
Thanks Evan! Shells and cupolas have been modified and detailed. Next step will be drilling for all grabs, followed by paint.  |
|
|
|
Post by sd40dash2 on Sept 24, 2020 15:00:00 GMT -8
Smoke jacks have too much flash, so that has been removed. I have also drilled through the main pipe for guy wire. 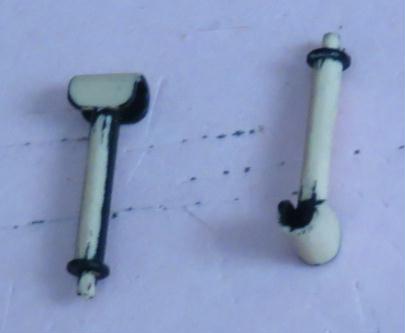 |
|
|
|
Post by sd40dash2 on Sept 24, 2020 20:16:56 GMT -8
These are the grabs I'll be using on the body shells. The L grabs were hand-bent by me using Tichy wire as the DA part has gotten too expensive and stingy on qtys.  |
|
|
|
Post by sd40dash2 on Sept 25, 2020 3:05:23 GMT -8
All grabs and railings have been added, except for the curved railings to accommodate the sill decal on the future brown caboose at left. P.S. Here we can see one of the L grabs is misaligned -- that has since been fixed. 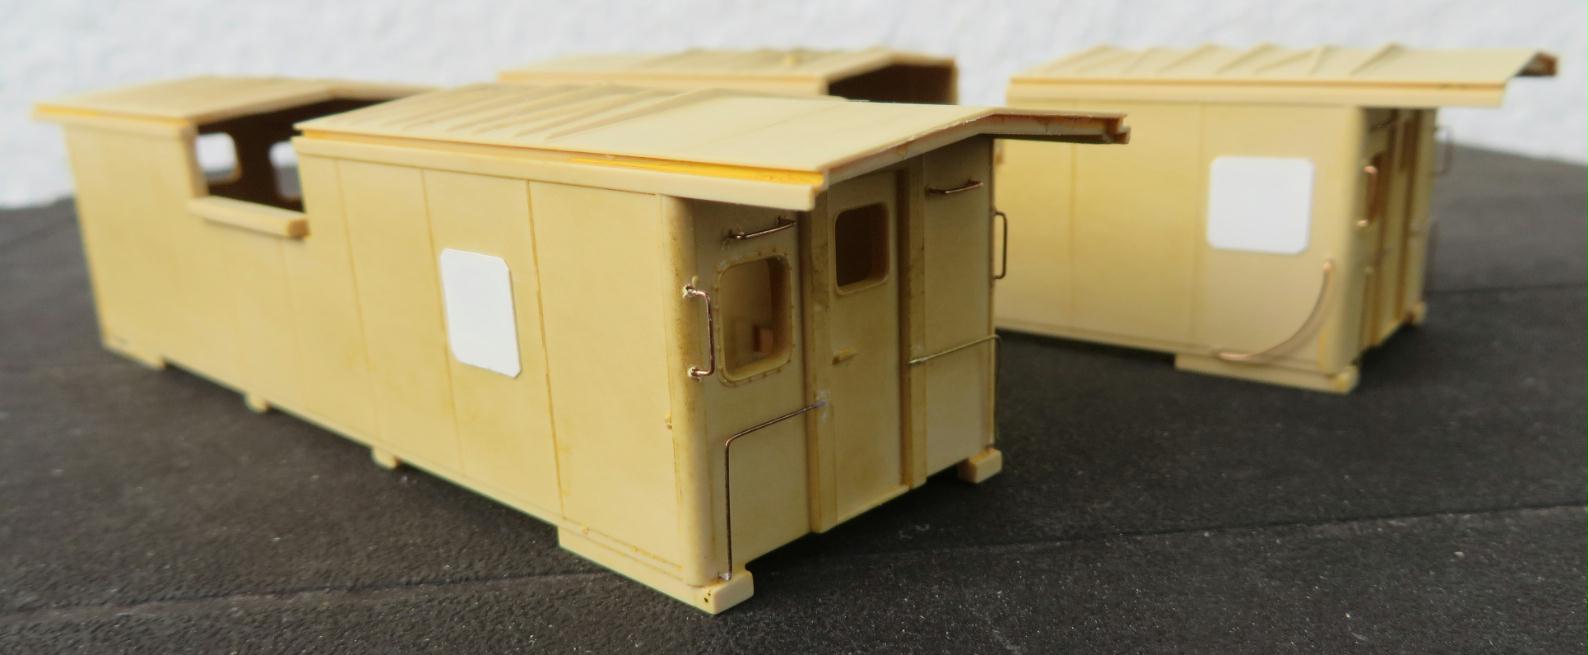 |
|
|
|
Post by brammy on Sept 25, 2020 3:18:35 GMT -8
This is really amazing stuff. I love these posts.
|
|
|
|
Post by sd40dash2 on Sept 25, 2020 3:27:12 GMT -8
This is really amazing stuff. I love these posts. Thanks for this encouragement, brammy! I am glad you are enjoying the posts. I will continue with the thread as long as the interest remains. |
|
|
|
Post by sd40dash2 on Sept 25, 2020 6:50:00 GMT -8
Soldiers at the ready!  |
|
|
|
Post by sd40dash2 on Sept 25, 2020 9:12:23 GMT -8
Shells painted and dry, now time for glosscote. This was the last hurrah for the can. Cost me $9.50 plus tax and 25 cent eco fee back in March 2018, giving me 2.5 years out of this small can. Hard to believe it has been that long.  |
|


