|
|
Post by mlehman on Feb 20, 2014 21:48:11 GMT -8
Jim, You're making good progress there.  This is a motive power Before and After. I converted a couple of Bachmann 70-tonners to HOn3 per the Hauff brothers method in the July 2008 RMC. However, I did not lower the cabs as they did, because I kind of liked the high cabs and, well, I'm a busy guy. This week, after some struggle with crumbling drivetrain parts, I managed to convert another one. There's only about one foot difference in height, but the lowered cab really gives the locos that hunkered down narrowgauge look. Before -- #98 with the high cab 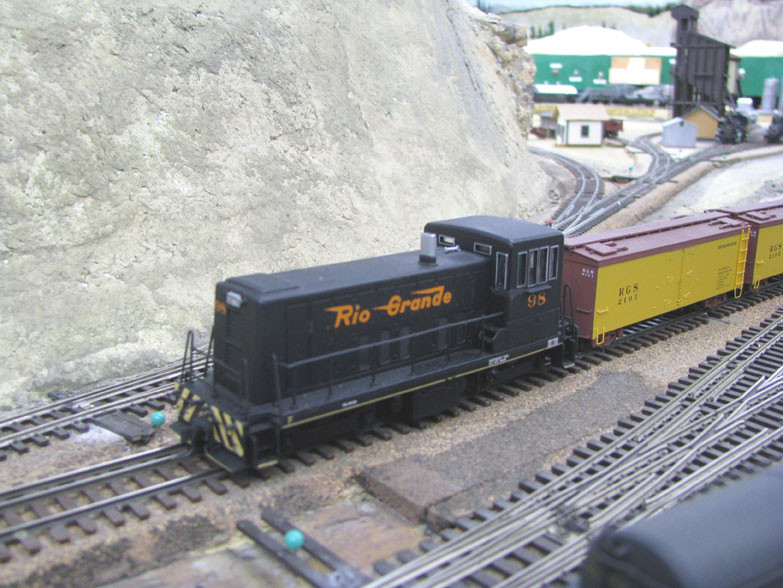 After -- #98 with cab lowered one foot 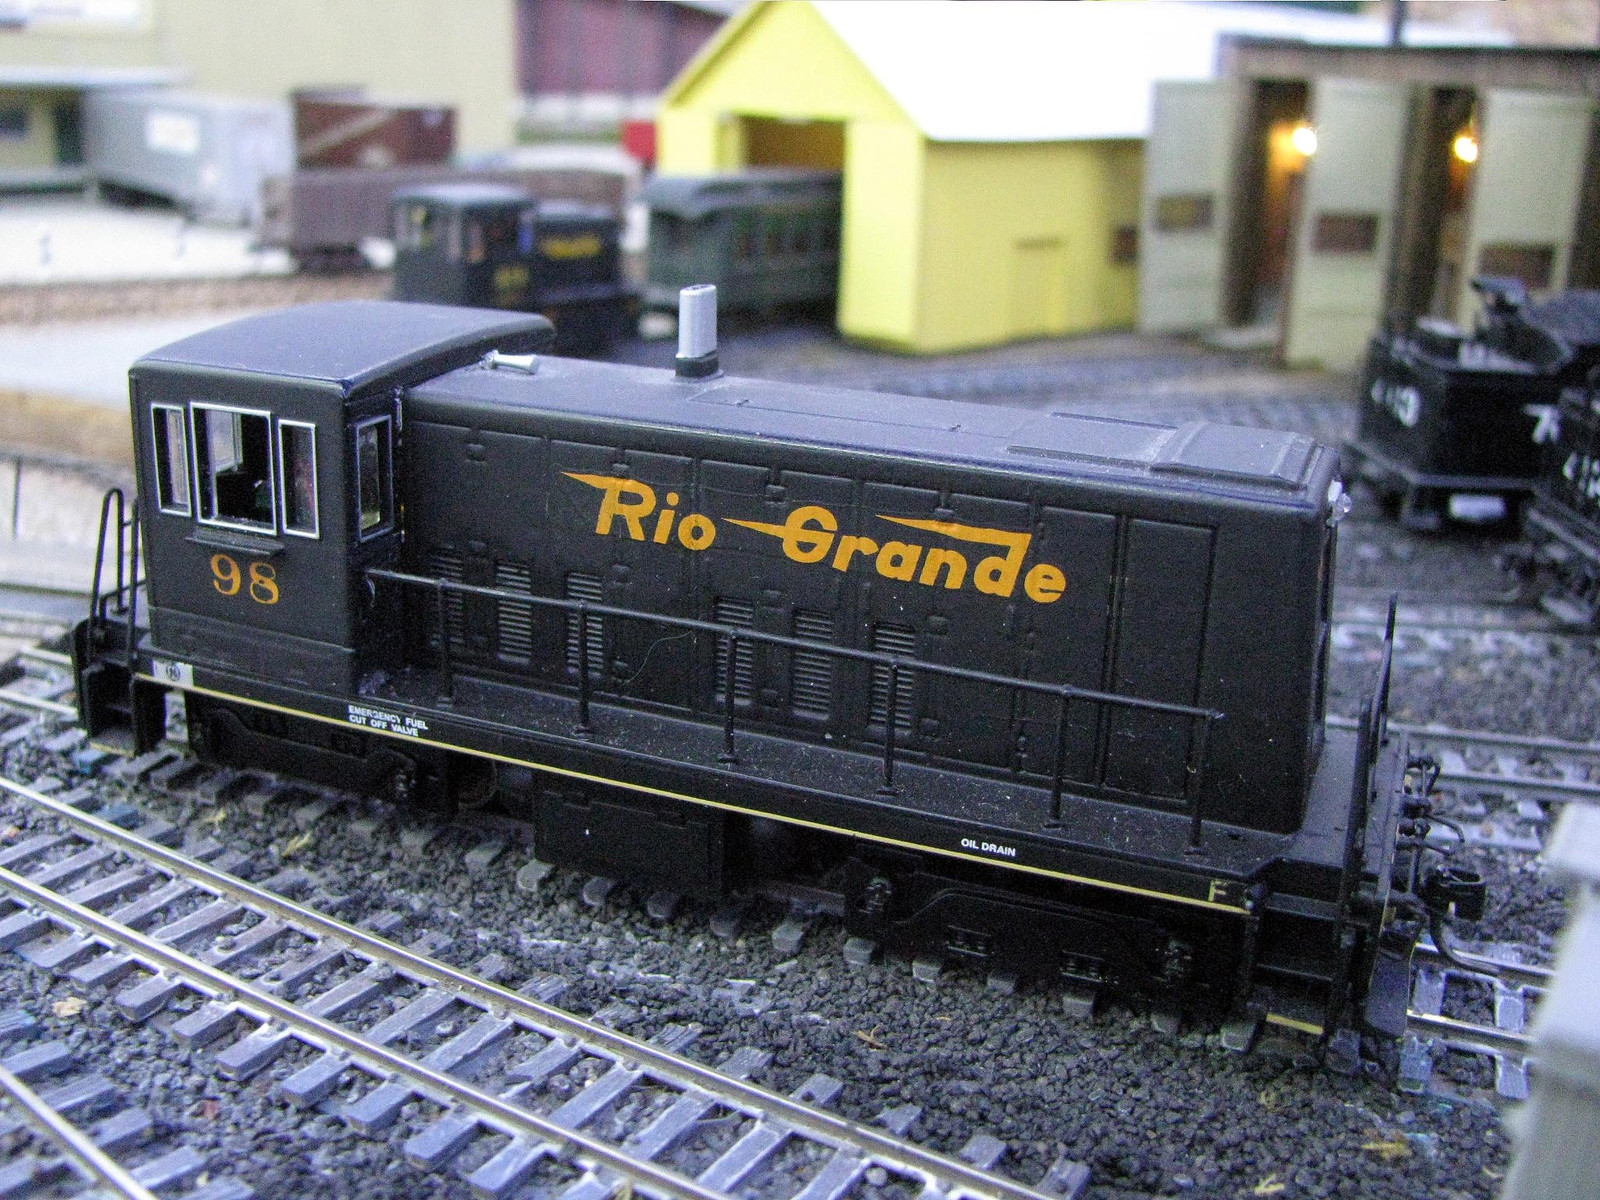 |
|
|
|
Post by riogrande on Feb 21, 2014 4:40:27 GMT -8
Jim, looks great. Probably doesn't hurt to have a lower center of gravity either! hah hah.
|
|
|
|
Post by ambluco on Feb 25, 2014 6:51:39 GMT -8
Question on the corner from someone contemplating upgrading their own layout. It seems that a 24" abutting a 24" section at the corner at 90 degrees limits the radius of track there and then limits what you can do number of track-wise. To stay up at <= 24" radius, you'd have to stay in the outer half of where they meet. Have you considered a fillet between the two sections to give you some more space for turning the corner? Or are you only planning one track through there? Progress report: Finished painting the train room proper. Bench-work is going up now, have three modules assembled and plan to go get some lumber as to do a 4th for the wall left of the windows. Only track planned so far is the storage/staging yard on the bottom level under the windows. Once the two outside modules are in place, I'll put down the wood and Homosote sandwich. 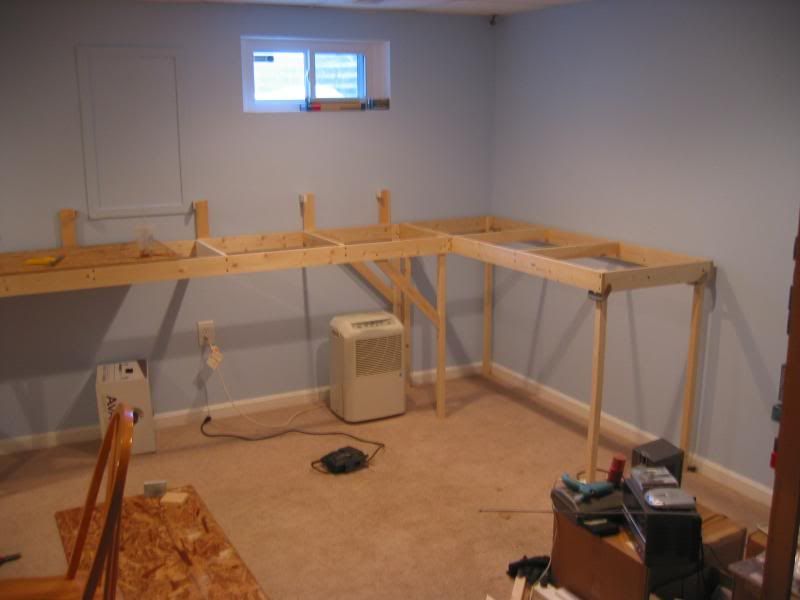 |
|
|
|
Post by riogrande on Feb 25, 2014 7:26:01 GMT -8
ambluco,
Yes true. What you are seeing in the photo's are the basic benchwork modules in their barest of bones state; as you've noted, elements necessary for adequate curve radius are not present yet; the old staging yard I plan on copying had curves in the 32-36 inch range of radius. I've arranged the rear support risers with the "fillets" in mind so the upper level outer supports will clear the triangular sections - not yet added. If I can manage to remember to bring my old track plan hard copy to work to scan, and upload, you'll have rough idea what I am going to adapt to my current space!
Cheers, Jim
|
|
|
|
Post by ambluco on Feb 25, 2014 10:56:18 GMT -8
Thanks.
|
|
|
|
Post by riogrande on Feb 25, 2014 11:45:26 GMT -8
No problem. Alot of stuff is in my head right now and since I have built two layouts prior to this, I am sort of "flying by the seat of my pants. In the past I put everything down on graph paper all to scale but having done that a couple of times, I have a pretty good idea of what will fit in this space - which is nothing terribly elaborate.
One thing I've planned is a second level above the first on the back wall. It's going to be fairly tight with about 7-inches over the rails to the bottom of the support plywood - I limited the clearance to keep the grade reasonable. I did a rough calculation and it's about 2.6% with that separation. I know the more the merrier.
Any feedback/comments/recommendations are welcome... I'd rather catch something early and have the chance to correct or add/incoporate!
Thanks!
|
|
|
|
Post by riogrande on Mar 7, 2014 18:22:08 GMT -8
Here are a few more photo's from last weekends work. 
  Put in a fluorescent light - going to add one or two more soon. |
|
|
|
Post by railfan4life on Mar 19, 2014 20:30:38 GMT -8
Jim,
Looks like it is progressing nicely. Do you have a rough sketch or track plan yet?
Cheers,
|
|
|
|
Post by riogrande on Mar 24, 2014 5:28:53 GMT -8
I have procrastinated track planning beyond the staging yard. I only have a rough idea in my head but basically I'm looking at doing a simple around the room twice plan. Basically the track leaves staging, gains altitude as it goes around the room and then over top the staging will be visible yard - plan on piggy pack terminal, a few sidings for switching, then back around and under. Operationally mainly a rail-fanning layout to try my hand at some scenery since my past layouts didn't get beyond the plywood stage.
Track laying has begun in staging. I've got the left side turnout ladder more or less configured and fit - some of the turnouts are spiked to the homosote and 3 layers of flex track attached and soldered and down with Atlas track nails.
I recently received a couple of Peco curved turnouts; a right hand allows me to squeeze in a ladder that expands to 10 tracks staging from the left side - still trying to figure in an 11th track somehow (maximum that can fit from front to back). I'll try to get some photo's up soon - it's a little messy. I still need to work out the right hand turnout ladder and how it will all fit together. I do have 3 #8 Shinohara LH curved and 1 Peco LH curved turnout to help me try to work up a ladder expanding to 10 staging tracks on that end too. It looks like I should have a least 18 feet capacity on a number of the staging tracks, and a lessor length on the inner. I do want to be able to handle some decent sized trains - it's a small layout trying to squeeze in decent amount of capacity.
|
|
|
|
Post by mlehman on Mar 24, 2014 6:58:17 GMT -8
SNIP It looks like I should have a least 18 feet capacity on a number of the staging tracks, and a lessor length on the inner. I do want to be able to handle some decent sized trains - it's a small layout trying to squeeze in decent amount of capacity. Jim, I know what you mean about getting capacity to run decent sized trains. I've got somewhat more room than you, but a narrowgauge railroad superimposed above it. My max train length is between 11' and/or roughly 16 to 18 car lengths. This has worked out well visually when running trains, as it's a train that's long enough to occupy the field of vision, depending upon how far back you are able to view a particular scene. So there's a point of diminishing returns once you've occupied the area you can see with a moving train. Your imagination inflates the middle part of the train, so as long as the front and rear aren't seen together in your field of vision, it fools you into thinking the train is longer than it is. Which is not to say you can't run longer trains. I have one hidden "staging" siding that maxes out around 24 cars (or roughly the greatest train length you anticipate.) It holds trains that require helper service. I cut in the swing helper at the first station out of staging and cut it out at the last. This provides lots of work that reproduces prototype ops with minimal facilities needed. Keep in mind the simplicity of Tennessee Pass, but which yielded both a great ops scheme and great scenery. Since you're going to have some serious grades, you may even need helpers to get the longest trains possible up the hill. I don't actually need to, because I don't have that great a grade with the NG above, as I power it usually with three Tunnel Motors, but it's such great action it's worth doing anyway. |
|
|
|
Post by riogrande on Mar 24, 2014 8:58:09 GMT -8
It's a challenge, but part of the difference is I've got somewhat more modern longer equipment like a bunch of 89' flat cars, 89' auto-racks, and a good deal of 60' box freight cars too, so the longer capacity is needed as much as I can manage. It definitely affects what you can fit and what visually makes up a decent looking train.
My first layout was in 16x19 feet in a garage - a hollow L-shaped layout with two tier drop return loops stacked at one end of the L and grades of about 2.5% going up and down. Each tier drop was basically a reverse loop that had a nest of 3 tracks to provide some storage/staging with capacity ranging from 13 to 15 feet and radii of 28, 30.5 and 33 inches, similar equipment - so the schematic plan was loop to loop operation with a single track mainline, one 15' siding and a yard. The last layout some years back had much longer capacities - 18-24 feet in storage and in plan was a continuous loop layout with staging underneath, an 18' foot siding and a sizable yard. I have a sketch of it on graph paper as a PDF. I'll see if there is a way to post a PDF.
For this layout it looks like I may be able to fit 15-18 feet capacity for most of the staging tracks and the grade depending on vertical clearance will be around 2.6 to maybe 3%. Since this is a mountain RR and trains would be powered by 3 to 4 diesels, I'd expect them to be able to pull the trains up-grade. My experience with the 2.5% grade before was that 2 powered engines could just manage a 12-14' foot long train - I don't recall how many cars. I could also design in a small helix to gain grade too - a one turn helix.
|
|
|
|
Post by mlehman on Mar 24, 2014 11:10:58 GMT -8
Yeah, modern rolling stock eats up space. Sounds about right for the motive power (2 locos handle a 12' to 14' train on the grade) on shorter trains. It's between 2% and 2.5% on my SG main and that sounds about right. The way the "helper grade" works for me is that all passenger, fast and local freight, and intermodal (really just TOFC, with a very rare sea container in my era) are powered to make it over the road, while my manifest and coal trains require a eastbound helper. This is only 1 or 2 trains in an ops session, though, so works well with my limited SG facilities, which consists of Durango and Dove Creek at the ends of the modeled section of line, with Hesperus and its coal mine situated in between in the visible section and East/West staging completing the connection behind the scenes. I wish it was more of a run and more places to meet, as Hesperus can't accommodate anything except a meet with a local. Something had to be sacrificed to the Gods of Narrowgauge.  |
|
|
|
Post by riogrande on Mar 24, 2014 13:00:23 GMT -8
I remember pulling a fairly long train up the 2.5% grade with say two Atlas G7's (KATO drives) and they were just on the verge of slipping - if you goosed the throttle the wheels would slip, but if you were easy on it, they would pull. Since Rio Grande ran power heavy trains for mountain grades, I can do the same thing for that "look" and manage to run trains up/down grade mostly without helpers. That's the plan anyway.
One of the cool things about the 1970's Rio Grande is the short frequent fast freight trains - if you watch the Green Frog Rio Grande Odyssey DVD, you can really see where "The Action Road" logo came from. The early-mid 1970's scenes show relatively short freight trains rushing across the system with an average of 4 geeps on the point. D&RGW reportedly had a philosophy of powering most trains so they could get across the system without helper power and maintain track speed.
|
|
|
|
Post by mlehman on Mar 24, 2014 13:29:04 GMT -8
Yeah, exactly. I can keep the line fluid with fast trains and still work in something more complex than just getting from Point A to Point B the fastest. I guess I've just been rather excited about helper ops since I figured out I could do them, they would deliciously slow traffic and add complexity, but if I planned it right this would only be once or twice per session. Took me 20+ years to figure this out when it was sitting in front of me the whole time as an operating concept. Right now, I schedule a unit coal train out of the mine at Hesperus,it goes to staging, where I swap power, caboose and add another 10 cars. Then it continues around the hidden part of the dogbone and emerges from staging after originating further "west" on the line, headed east again. It picks up the helper at Dove Creek, pushes on east through Hesperus over the top of the grade to Durango, where the helper is dropped. Train then continues on back to staging. So I get a two-for-one out of it, in addition to the helper action. The president of the Rio Grande is very pleased I've managed to increase coal traffic so dramatically.  Then the other helper is required on the long manifest freight that holds in a special long siding on the hidden part of the dogbone I mentioned earlier. This is facilitated by the fact that my imaginary line is a very secondary main, so has a much slower pace than the Moffat or Tennessee Pass, but shares the characteristics that I could fit in. Other than that, it's all short fast trains on the SG, except the ones that are short slow trains.  |
|
|
|
Post by riogrande on Apr 2, 2014 3:18:34 GMT -8
Question about turnouts - specifically Shinohara. I have a mix of Shinohara and Atlas #6 turnouts in my staging yard ladder. Because the Shinohara have a metal throw bar on the points, there will be a short if everything is connected electronically because of the "power routing" nature of the points correct? If that's true aren't I going to have to insulate the diverging end of the turnout on both sides to prevent a short with an adjacent track if all tracks are connect to the same power bus? I've actually mounted the ladder but it's only spiked in place so I can remove the turnouts and then remove the metal track connectors and replace them with insulated ones (Shinohara only), or cut gaps.
|
|
|
|
Post by mlehman on Apr 2, 2014 5:13:21 GMT -8
Jim,
That is true. The Shinoharas require either a gap or plastic rail joiners on the inside rails past the frog divergence. Good that you caught this before starting to spike things down.
What I do is solder a green wire to the web on backside of whichever of those two rails that is closest to the aisle. That way it's usually hidden. You can also carefully cut away part of the web holding the ties together underneath and solder to the bottom of the rail, which is a bit more trouble but totally hides the feeder. The green wire then goes to one set of contacts on your Tortoise or whatever you use for a switch machine.
I'm a bit dyslexic, so when wiring I attach the two power leads to the feeder contact on the switch machine temporarily, then use the continuity checker on my multimeter to determine if that set a short circuit with the points in that position. If not, wire it that way. If so, wire it the opposite way. The track is unpowered at this point, but should show a short circuit if that would occur with the power on.
|
|
|
|
Post by nebrzephyr on Apr 2, 2014 6:40:02 GMT -8
Yes, the Shins need to be "isolated". I use a Dremel with a cut off disk and cut through the rails just past the frog. Then ACC'd in thin pieces of styrene and carved to the shape of the rail.
The newer Shins are pretty good on powering the 2 fixed rail sections leading away from the points. They have what looks like a rail joiner connecting the fixed and moveable portions of the rails. On the older Shins this connection was based on a contact strip UNDER the joint. On those I soldered a wire to the fixed section and used the AUX contacts on the Tortoise to give reliable power.
Bob
|
|
|
|
Post by riogrande on Apr 2, 2014 12:23:34 GMT -8
Thanks both for the feedback.
Some of the turnouts are spiked down but I can pull the spikes up easily and do some revision. This is exactly why I don't like to use adhesives when putting track down but use nails or spikes. I've already had to pull some back up and redo some things.
|
|
|
|
Post by mlehman on Apr 2, 2014 15:08:49 GMT -8
Amen to that. I rarely glue track, as I move it as needed to revise and modify alignments in the process of building the layout.
|
|
|
|
Post by riogrande on Apr 4, 2014 3:57:38 GMT -8
Gluing track seems to be THE major method these days - but I guess people can learn the hard way. One thing I've learned and I'm not that experienced (only 2 layouts prior to this one) is that when you are laying track, you nearly always need to redo some parts, especially in yards. I didn't think of the gapping for the Shinohara for example, yes, it's been a long time so I simply forgot - I actually did that on the last layout - gapped them. That's the next step before track goes down. I've got a batch of re-railers on the way - but MBK is slow sometimes at getting them in the mail! Ordered Wed early morning and Fri still no shipping noticed. Maybe Monday?
|
|
|
|
Post by nebrzephyr on Apr 4, 2014 11:58:22 GMT -8
I've got a batch of re-railers on the way - but MBK is slow sometimes at getting them in the mail! Ordered Wed early morning and Fri still no shipping noticed. Maybe Monday? My experience in the last 6+ months with MBK is the package arrives before I get any tracking email. You might look in your MBK "account", as sometimes tracking shows there, but not always. Bob |
|
|
|
Post by riogrande on Apr 7, 2014 11:39:19 GMT -8
As it happens, I ordered 4 packages of re-railers from MBK on Wed. They arrived on Sat. Usually if I get a notification that something was mailed, it either arrives the next day or 2 days at most. I've about 90 minutes drive from MBK for what it's worth.
I've got the left hand ladder completed after pulling the Shinohara turnouts out and adding insulated rail joiners to the bifurcating ends, and soldering wires to the other end so they will have power coming from the power buss.
I really can't believe how much track I had saved. By some standards, not a ton, but I may not have to buy any flex track due to the modest size of this layout vs. the last one I salvaged the track from. I'll try to get a few progess photo's up soon. Today I built a 2.5' x 6' module. There should only need to be one more built - the only question is am I going to duck under or have a lift-out gate.
|
|
|
|
Post by nebrzephyr on Apr 7, 2014 12:34:29 GMT -8
As it happens, I ordered 4 packages of re-railers from MBK on Wed. They arrived on Sat. Usually if I get a notification that something was mailed, it either arrives the next day or 2 days at most. So, just curious, did you get an shipping email? And if so, did it arrive before the package itself? Thanks. Bob |
|
|
|
Post by riogrande on Apr 8, 2014 3:53:04 GMT -8
Hi, yes. I don't think I've never gotten a shipping email from them. If any go missing, maybe they went to a spam folder? Occasionally I will have email that normally went to the inbox get diverted to the spam folder but MBK usually don't.
So I have some Peco turnouts installed in my ladders of the staging/storage yard. They have the sprung points which take a bit of pressure to throw them, but of course that holds them in place without a add on part, which is usually required for Atlas or other brand turnouts. With the pressure it takes to throw the points, that seems to eliminate adapting inexpensive switch machines like Atlas machines for remote control? So how do the Peco switch machines work to over come that extra pressure and which motor would be necessary to mount under the table to clear a sandwich of half inch plywood and homosote? Also, is there an above ground switch machine which will work with Peco turnouts? This is staging so looks aren't that important.
|
|
|
|
Post by nebrzephyr on Apr 8, 2014 5:39:53 GMT -8
So I have some Peco turnouts installed in my ladders of the staging/storage yard. They have the sprung points which take a bit of pressure to throw them, but of course that holds them in place without a add on part, which is usually required for Atlas or other brand turnouts. With the pressure it takes to throw the points, that seems to eliminate adapting inexpensive switch machines like Atlas machines for remote control? So how do the Peco switch machines work to over come that extra pressure and which motor would be necessary to mount under the table to clear a sandwich of half inch plywood and homosote? Also, is there an above ground switch machine which will work with Peco turnouts? This is staging so looks aren't that important. Last year I helped a friend install Peco's on his new layout......Homosote over plywood. We used Tortoise switch machines and left the PECO spring installed. Though we did substitute .032 wire for the Tortoise throw wire. Bob |
|
|
|
Post by riogrande on Apr 8, 2014 6:07:39 GMT -8
I could use Tortoise, but at $10.60 ea for the Peco vs. $16 ea for the Tortise... it's a significant difference.
While on the subject, in the olden days I used the Atlas switch machine controllers (momentary contact) but time to graduate into buttons which could be used on a ladder diagram for controlling the turnouts. I used to go to Radio Shack for electronic parts and solder etc. Do we have to go mail order now and if so, I've heard of Mouser. Are there any brick and mortar stores which sell these things?
|
|
|
|
Post by riogrande on Apr 8, 2014 9:19:48 GMT -8
I was searching and reading up on solutions for my Peco turnouts, and it looks like some used Tortoise had to remove the centering spring. I'd like to leave that in place but the mounting of the Peco under switch twin coil machines say they need a large rectangular cut-out. However, it looks like you can adapt them to a more conventional under the table arrangement with a simple hole drilled under the turnout like used for Atlas machines - yea I'm cheap and if they work, that's good enough for me. I don't have to go with the expensive machines necessarily. I do have a couple of older Switch Master slow motion motors I'm going to use for my more stubborn Shinohara turnouts. Abyhow, I found the following comments on alternate mounting for Peco that may work for me and save money too:
Also the following comment:
|
|
|
|
Post by riogrande on Apr 13, 2014 9:18:34 GMT -8
|
|
|
|
Post by riogrande on Apr 21, 2014 10:30:20 GMT -8
Area where the other end of the yard has it's approach: 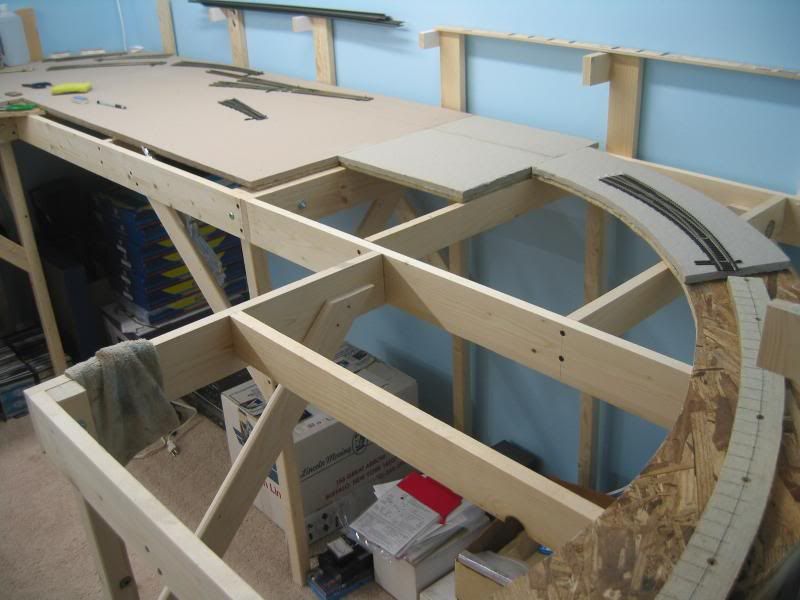 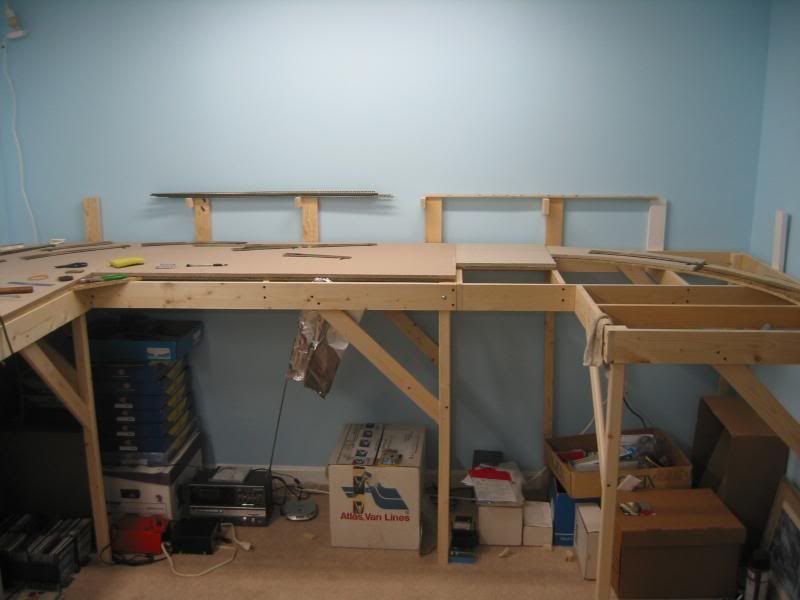 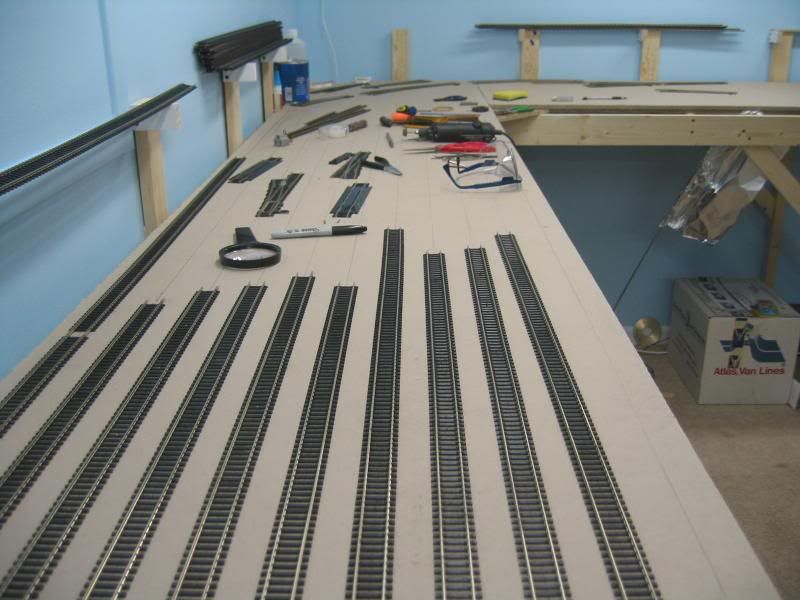 As it turns out, all the code 100 Atlas flex track I saved from the old layout I tore down about 15 years ago has been enough to complete the 11 track staging yard and lead tracks with a few pieces left over. I've had to buy a couple turnouts and will need some switch machines but this has been a big help for keeping costs down cause track has gone up a lot in price since I last bought most of my flex track and turnouts. I have quite a number of bundles of code 83 flex track waiting for the rest of the layout, with any luck I may not need to buy any flex track at all and maybe only a few odd switches. This layout is somewhat smaller than the last one so all the track saved is more or less covering this one. The Walthers bright boy is getting a good work out to clean the long stored track - it's working well and shining the rails with a minimum of abrasiveness. It's going to be pretty ragged when I get done! Next up, soldering the feeders and wiring the bus under the staging yards and getting the switch machines installed and working, then the end of track will get extended to the up grade above. |
|
|
|
Post by riogrande on May 3, 2014 18:57:17 GMT -8
|
|