Deleted
Deleted Member
Posts: 0
|
Post by Deleted on Jun 29, 2013 18:16:23 GMT -8
|
|
|
|
Post by onequiknova on Jun 29, 2013 19:49:06 GMT -8
Looking good Jim. I got the brake rigging done on my RI coach. There is a lot going on under there. The steam line runs between the frame rails the entire length of the car, so I just omitted it. 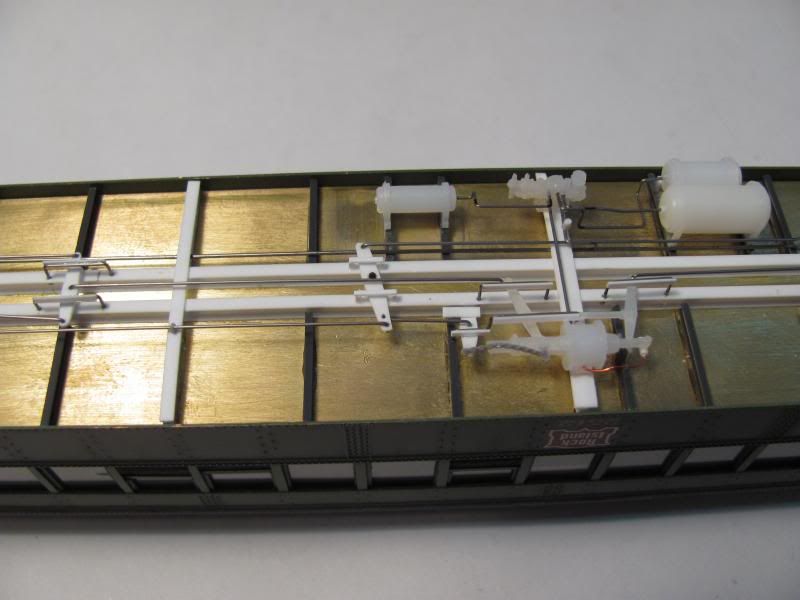 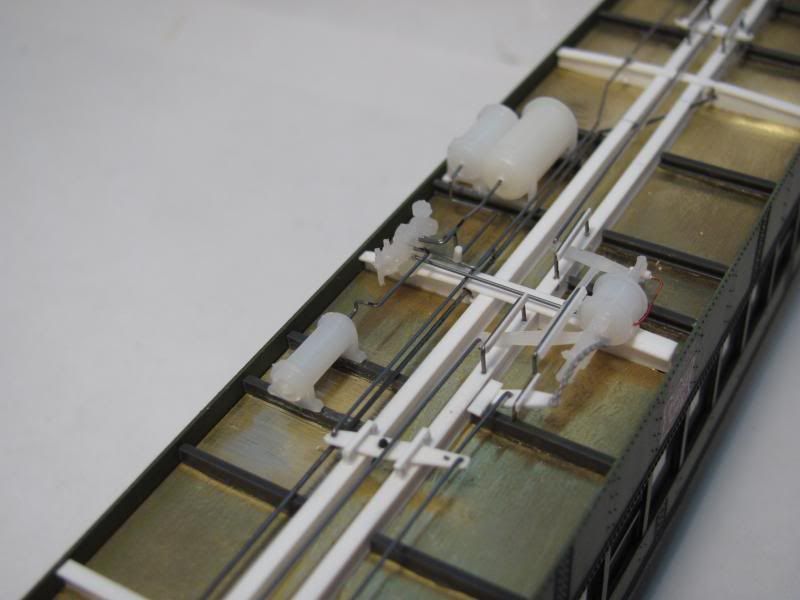 I tried to thread the brake linkage into eye bolts installed on the inside of the trucks, but it didn't allow for enough truck swivel, so I glued them to the bolsters instead. 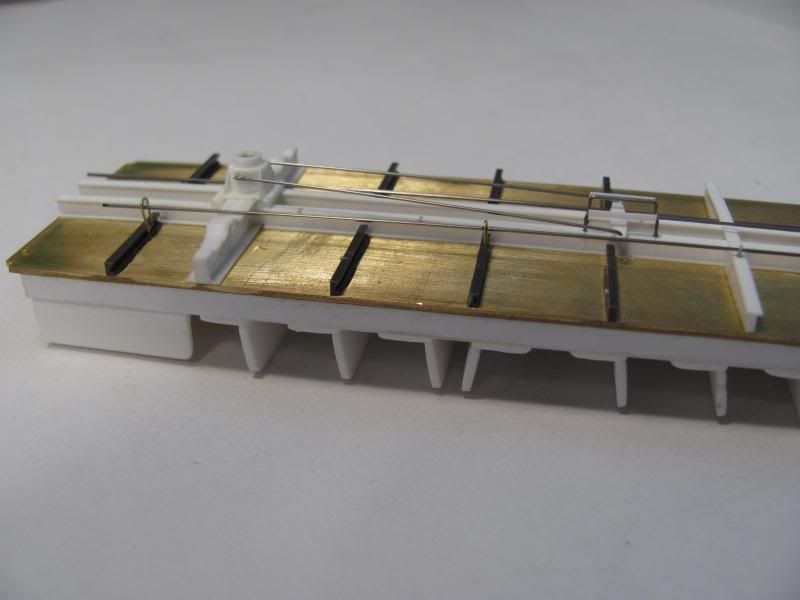 I also test fit my resin seats. 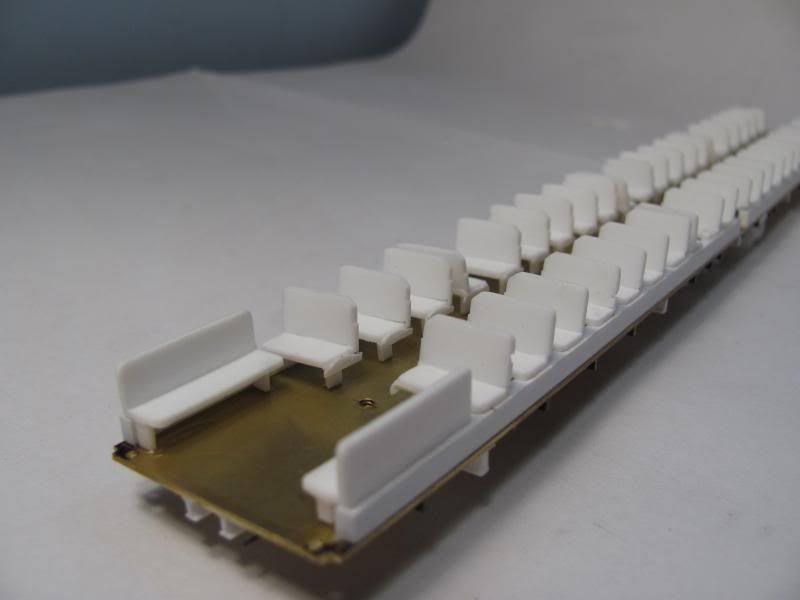 |
|
Deleted
Deleted Member
Posts: 0
|
Post by Deleted on Jun 29, 2013 20:03:35 GMT -8
John, are you adding the signal line?
|
|
|
|
Post by onequiknova on Jun 29, 2013 20:10:54 GMT -8
John, are you adding the signal line? I'm embarrassed to say I didn't even realize I omitted it until I went to add the Cal Scale steam/signal/airlines to the ends of the car. I'm not too savvy when it comes to the underside of rail cars. I've got to go back through my many pictures to see where it's routed. It should be routed right along side the air line. If that's the case it shouldn't be a problem to add it. |
|
Deleted
Deleted Member
Posts: 0
|
Post by Deleted on Jun 29, 2013 20:36:23 GMT -8
John, are you adding the signal line? I'm embarrassed to say I didn't even realize I omitted it until I went to add the Cal Scale steam/signal/airlines to the ends of the car. I'm not too savvy when it comes to the underside of rail cars. I've got to go back through my many pictures to see where it's routed. It should be routed right along side the air line. If that's the case it shouldn't be a problem to add it.  In this photo you see three pipes running along side the center sill. One is the brake line largest diameter, the second is the signal line and the third is electro-pneumatic brake pipe which is the smallest. The signal line should divert up through the car floor on both ends. There is a valve under the car where it t's up through the floor for the signal line, if I remember correctly. |
|
|
|
Post by mlehman on Jun 29, 2013 21:32:20 GMT -8
Everybody loves a Rio Grande PA...well, almost everybody  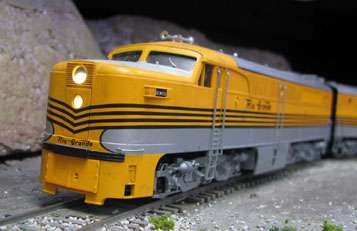 And I do operate standard gauge. I originally included SG fearing it would take me forever to build enough narrowgauge rolling stock to operate. Well, thank you Blackstone! But I'm still glad I included the SG, as operating the dual-gauge can be a challenge. I have a pair of Rio Grande Models idler cars, but the short wheel base makes them a bit dodgy. Still it works and is fun to run a train of mixed gauges together. I'll have to work on getting some pics of that. For right now, a pic taken at Hesperus, where the dual-gauge ends and the May Day Coal Mine is located. I happened to be there when a brace of Alcos went thundering by with the La Sal Flyer, the local accommodation on this little know Rio Grande secondary main. 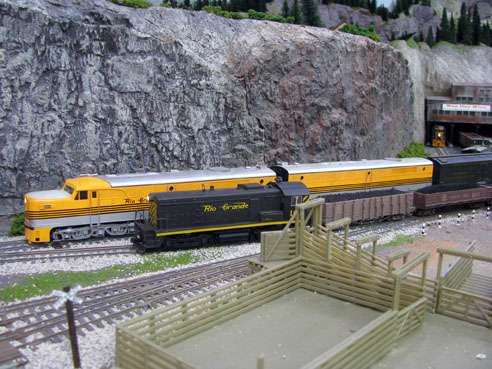 A friend happened to be in Durango a little later when it arrived there.   |
|
|
|
Post by dti406 on Jun 30, 2013 5:44:21 GMT -8
Jim; It's never too early! Here are three cars that I finished this week!  Eastern Car Works Airslide Covered Hopper Kit, added airlines and sill steps, painted Scalecoat II Aluminum Paint and lettered with Microscale Decals.  IMRC ACF 4650CF Late Phase Covered Hopper. I used this car as it had the circular hatches and the correct discharge gates that the prototype had. Added A-line Sill Steps, painted with Scalecoat II MOW Gray and lettered with Islington Station Products Decals.  Exactrail Evans 4780CF Covered Hopper Kit, painted with Floquil Reefer White and lettered with Herald King Decals. I especially wanted to do this car as the RTR Car had the completely wrong color green stripe. Thanks for looking! Rick J |
|
|
|
Post by surlyknuckle on Jun 30, 2013 5:59:34 GMT -8
Lookin' good, guys. Haven't done any modeling for a long stretch...but I did pick up my Athearn FGE reefer and add Kadees while also painting the wheels and trucks.  |
|
|
|
Post by bncr78 on Jun 30, 2013 6:49:01 GMT -8
Here are a couple of HO scratchbuilt models that I did three years ago. They are both of styrene, except the roof of the reefer which is brass sheet. I built them using general arrangement diagrams found online and info in a recent ORER. The loading straps are made from yellow electrical tape.   Thanks for looking. |
|
|
|
Post by mlehman on Jun 30, 2013 8:36:26 GMT -8
Jim,
Nice work!
Got a question about the centerbeam. I noticed the bulkheads are considerably taller than the max load height indicated by the white line. Were these rebuilds of cars with tall bulkheads, but no centerbeam? Kind of odd, but a very distinctive identifying feature.
|
|
|
|
Post by bncr78 on Jun 30, 2013 9:42:17 GMT -8
|
|
|
|
Post by mlehman on Jun 30, 2013 9:50:21 GMT -8
|
|
|
|
Post by tankcarsrule on Jun 30, 2013 9:52:34 GMT -8
Two great looking cars Jim!
Bobby
|
|
|
|
Post by valenciajim on Jun 30, 2013 17:42:01 GMT -8
Great models. Jim, where did you get the decals for the BNSF reefer?
|
|
|
|
Post by onequiknova on Jun 30, 2013 19:23:52 GMT -8
I'm embarrassed to say I didn't even realize I omitted it until I went to add the Cal Scale steam/signal/airlines to the ends of the car. I'm not too savvy when it comes to the underside of rail cars. I've got to go back through my many pictures to see where it's routed. It should be routed right along side the air line. If that's the case it shouldn't be a problem to add it. In this photo you see three pipes running along side the center sill. One is the brake line largest diameter, the second is the signal line and the third is electro-pneumatic brake pipe which is the smallest. The signal line should divert up through the car floor on both ends. There is a valve under the car where it t's up through the floor for the signal line, if I remember correctly. It looks like I've got some good photo's of the signal line. It runs along side the air line and Tee's off near the end like you described. 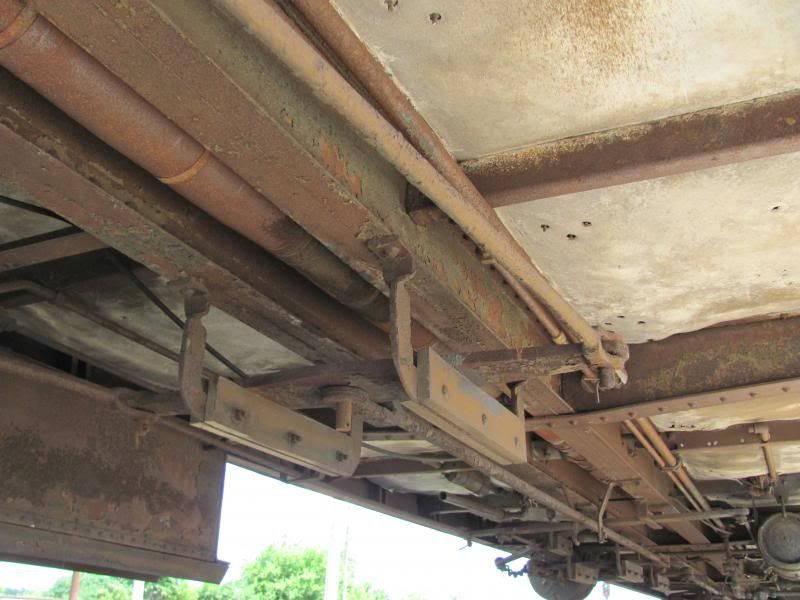 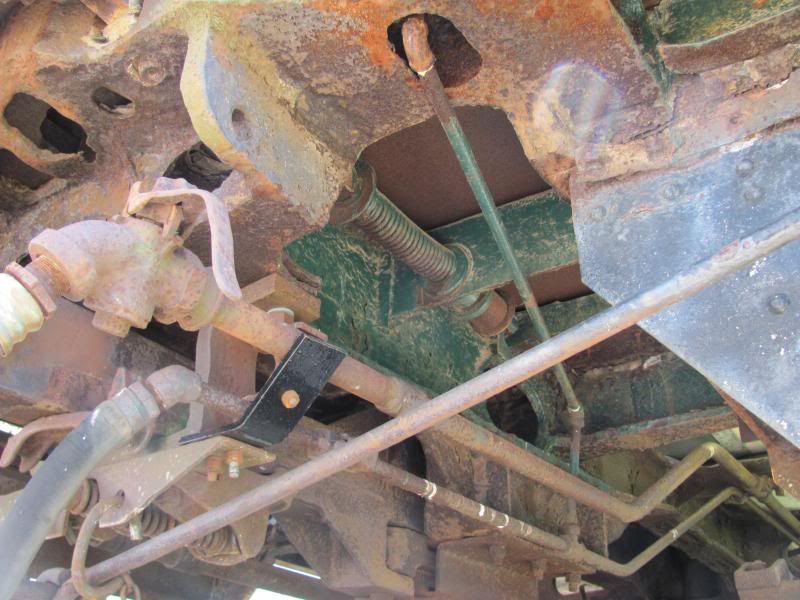 |
|
Deleted
Deleted Member
Posts: 0
|
Post by Deleted on Jun 30, 2013 19:42:07 GMT -8
In this photo you see three pipes running along side the center sill. One is the brake line largest diameter, the second is the signal line and the third is electro-pneumatic brake pipe which is the smallest. The signal line should divert up through the car floor on both ends. There is a valve under the car where it t's up through the floor for the signal line, if I remember correctly. It looks like I've got some good photo's of the signal line. It runs along side the air line and Tee's off near the end like you described. The valve to activate the signal on the Rock Island coaches is located in the vestibules and bolted to car body. Little bit of rust under that car. With the bubbling original Rock Island paint under that car, I hope you took the opportunity to "procure" a hunk of the paint for matching purposes later. |
|
|
|
Post by bncr78 on Jun 30, 2013 21:45:50 GMT -8
Great models. Jim, where did you get the decals for the BNSF reefer? Jim - Thanks for the compliment. The BNSF reefer decals are Microscale (87-1235). |
|
|
|
Post by calzephyr on Jul 1, 2013 11:35:27 GMT -8
|
|
Deleted
Deleted Member
Posts: 0
|
Post by Deleted on Jul 1, 2013 14:02:36 GMT -8
Larry,
Love the train, especially the finished interiors and the effect of the tinted windows.
Must not be diner time in the diner. No people, place settings, waiters......midnight on the El Cap?
|
|
|
|
Post by calzephyr on Jul 2, 2013 13:11:16 GMT -8
Larry, Love the train, especially the finished interiors and the effect of the tinted windows. Must not be diner time in the diner. No people, place settings, waiters......midnight on the El Cap? Jim Thanks Jim. Yes, the diner is empty but I will get some more riders soon. Good to know you missed the passengers! I am out of people at this time and will have to purchase more to install in the diner. The diner was done so I just put it together so I could see how it looked. This has been a fun project, but I never expected to get this far with the installation. The Alclad window tinting does add a lot to the effect and they really photograph out side very well. I can thank Antonio for his contribution of the Alclad process. It really does make it easy to get the tint looking good. I am still in the process of changing out the roller caps on the trucks and adding Decelostats to the train. It seems the details are never finished. When I think back on the process, the Dulex train would have been less money. The cost of the passengers and lighting plus the kits add $110 per car without the labor!! The great thing about the kits is the fact there are extra table covers for each occasion. I used one set to add table covers to one of my Overland diners. Those little guys have cost a bundle so far and I have the three addtional coach cars to fill along with the diner, so the diner may only have a few passengers. I did purchase some standard people so waiters and a few other will be added to the train. The picture below is the Overland diner with a few passengers. Larry  |
|
Deleted
Deleted Member
Posts: 0
|
Post by Deleted on Jul 2, 2013 13:28:17 GMT -8
I am still in the process of changing out the roller caps on the trucks and adding Decelostats recorders to the train. Larry The roller bearings on the cars as built are Timken grease bearings. At one time Custom Finishes made a brass detail part of this type of bearing. Decelostats are not recorders. They are an electro-pneumatic part of the brake system and designed to prevent skid flat wheels. More information on decelostats.....http://www.atdlines.com/pdf/trucks/pv_64.pdf |
|
|
|
Post by calzephyr on Jul 2, 2013 14:19:19 GMT -8
You are correct. I copied the name from the Train Station package which is not correct. The equalizer and piping is detail that have to scratch build. The Decelostats go directly on the truck after I file off the newer roller type cap. I have the timken caps which go on the oposite side of the truck from the Decelostat.  The detail on the truck below.  |
|
|
|
Post by onequiknova on Jul 2, 2013 14:30:19 GMT -8
Are those Sharpie window gaskets on the Overland car?
|
|
|
|
Post by tankcarsrule on Jul 2, 2013 17:41:09 GMT -8
 [.100T southern cement hopper conversion like the prototype. |
|
|
|
Post by mlehman on Jul 3, 2013 7:17:47 GMT -8
That's a wonderful little car I doubt we'll ever see in plastic. Awesome work, tankcarsrule.
|
|


