|
|
Post by dti406 on Jan 4, 2015 7:52:56 GMT -8
Since I did not participate last week I guess I will start off this week! I was extremely sick the last week and a half, and did not participate in last weeks SPF, I have some in progress shots of some cars I am building.   I started on this Sunshine kit of a PRR X37B boxcar, and got sidetracked before attempting the underbody detail which was trying to match the photograph as there was no real instructions on how to install all this detail. Luckily the building of my Moloco and IMRC kits with full underbody detail taught me how all this stuff should go together.  This is the roof of the next Eastern Car Works 1958CF Covered Hopper I am building. I am trying to upgrade the kit with a Plano Roofwalk, but Plano does not make one for this car, I did use the one for the Bowser car, but as the ECW kit does not have roofwalk supports, I purchased the roofwalk support brackets for boxcars that have had their roofwalk removed and these supports were installed on the roof and then the roofwalk was glued to these supports with Goo.   And finally a couple of more shots of my Stewart C628 & C630 hauling a 36 car ore train on the Strongsville, OH club layout. Thanks for looking! Rick J |
|
|
|
Post by Canadian Atlantic on Jan 4, 2015 9:51:13 GMT -8
And finally a couple of more shots of my Stewart C628 & C630 hauling a 36 car ore train on the Strongsville, OH club layout. Thanks for looking! Rick J Nice pictures Rick. Are the Bowser ore cars well detailed? My plywood central has a soon to be stripped LV C628 pulling a load of pulp from the team track.  |
|
|
|
Post by tankcarsrule on Jan 4, 2015 11:04:41 GMT -8
  BLI AC60CW lots of corrections. |
|
|
|
Post by TBird1958 on Jan 4, 2015 11:24:14 GMT -8
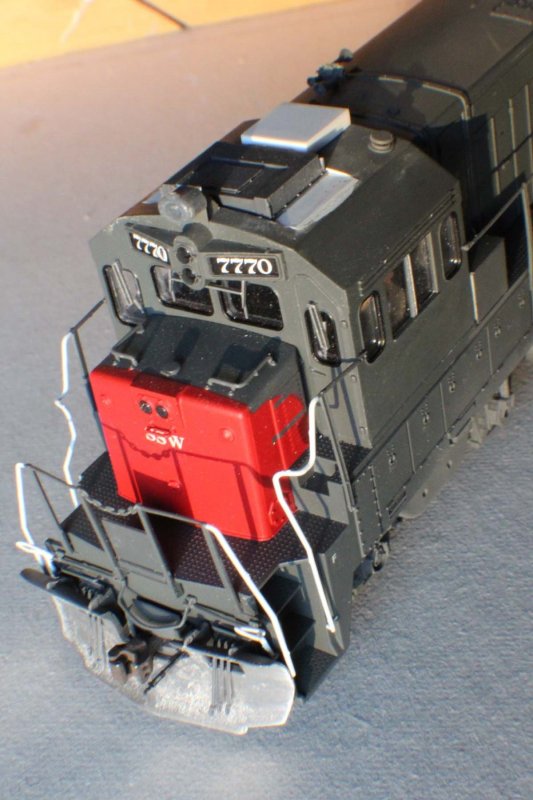
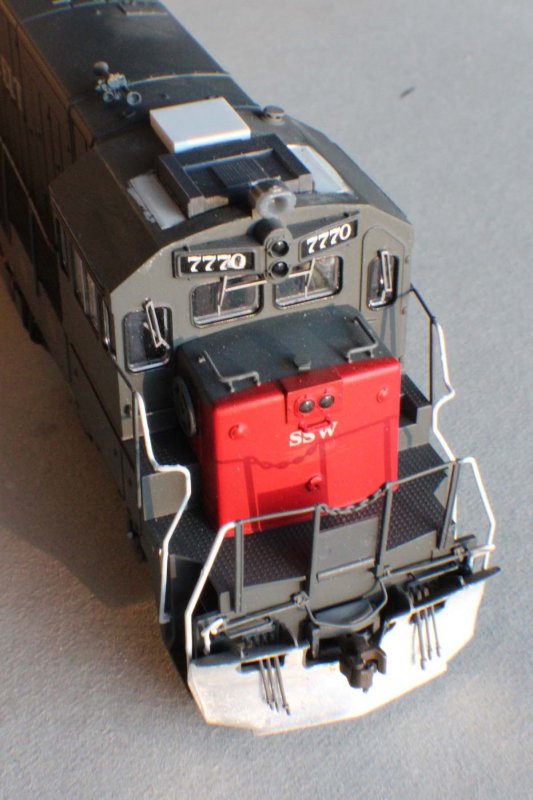
Great looking GE, Bobby! A three day road trip with my band meant I made just a little progress on two Atlas ACF 4650s this week, the SP is complete on both sides, the SSW only half way. SP/SSW cars are common on the D&RGW, being interchanged at Ogden, Ut.  |
|
|
|
Post by mlehman on Jan 4, 2015 11:29:22 GMT -8
Nice work, fellas. After some testing runs, piggyback service between Durango and Silverton is now on the schedule, rinning as the Expediter in the morning, with the platforms returning to Durango on one of the later freight extras after they are unloaded/reloaded. Here's a pic of the first official run of the Expediter. 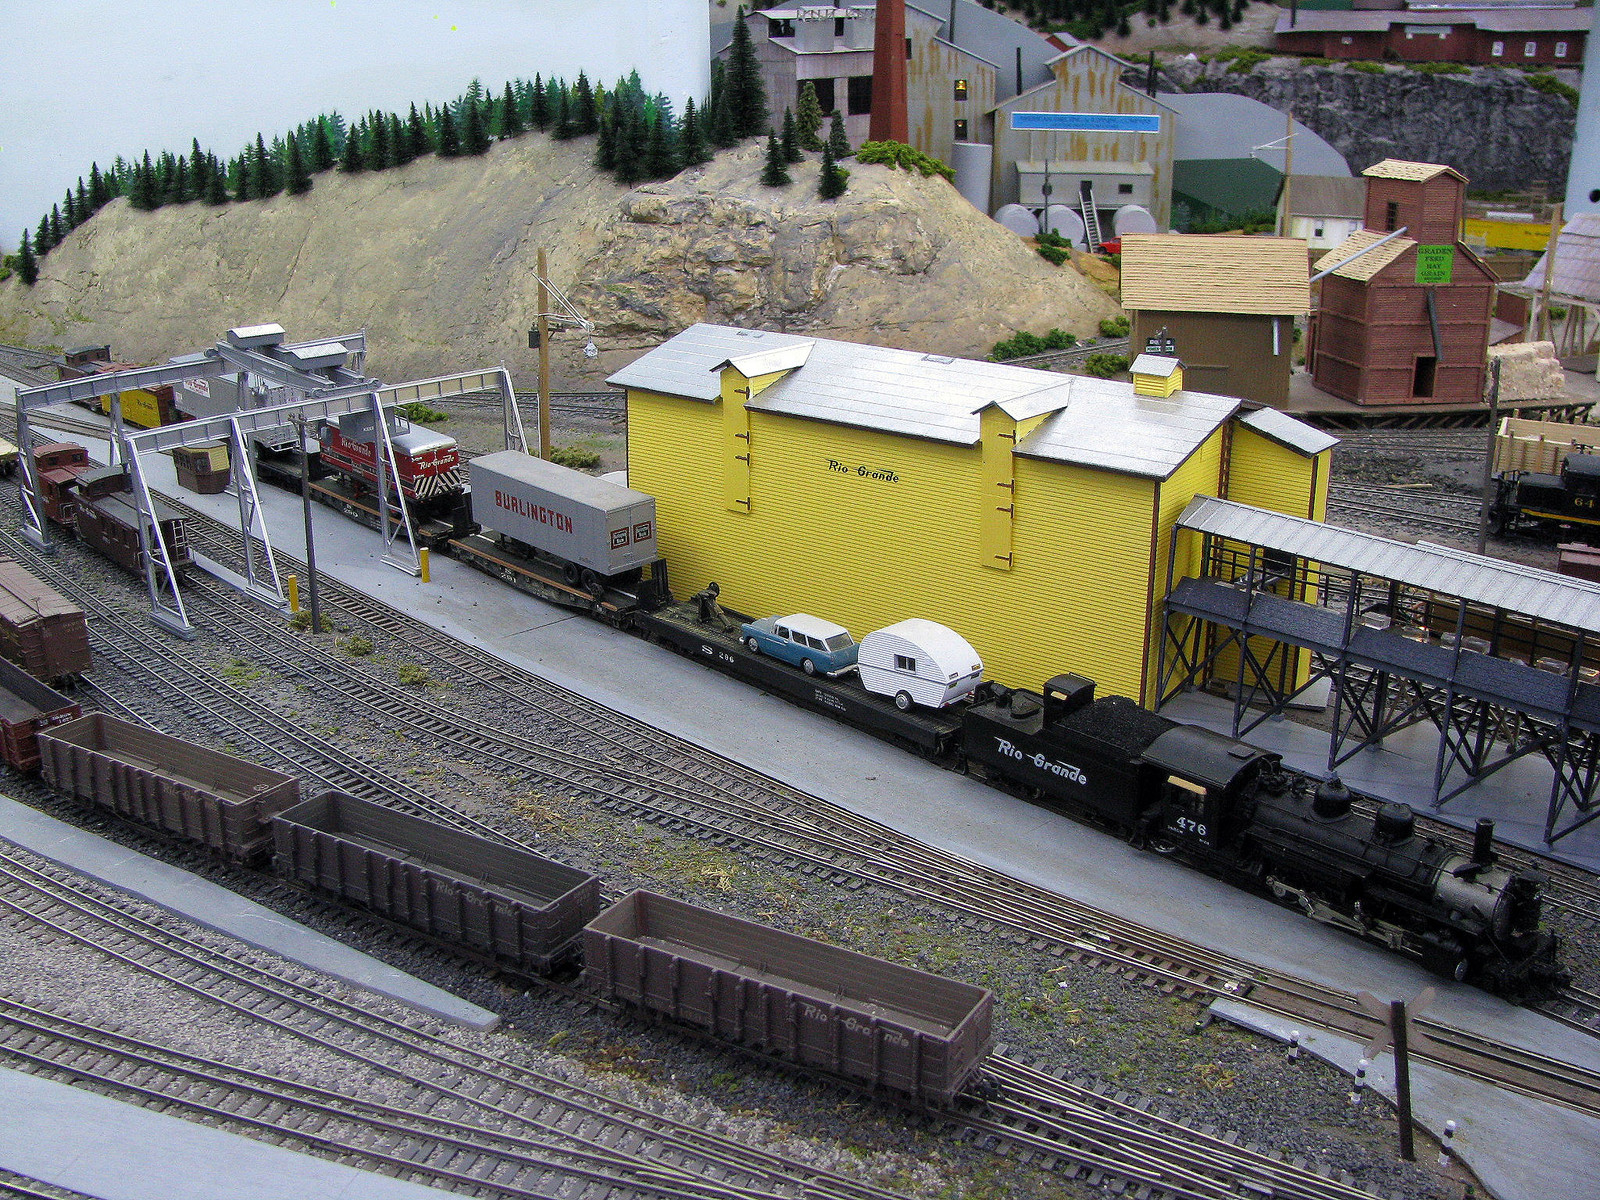 You'll notice a reefer tacked on, as the train is also useful in taking high priority loads and delivering them sooner, usually perishable loads. And tourists are able to ship their rigs into Silverton, avoiding the need to traverse that cowpath known as Highway 550. Here the Expediter is passing the sawmill at Rockwood.  Arriving in Silverton, a railfan checks out the improved landing gear on the 40' RRGZ trailer.  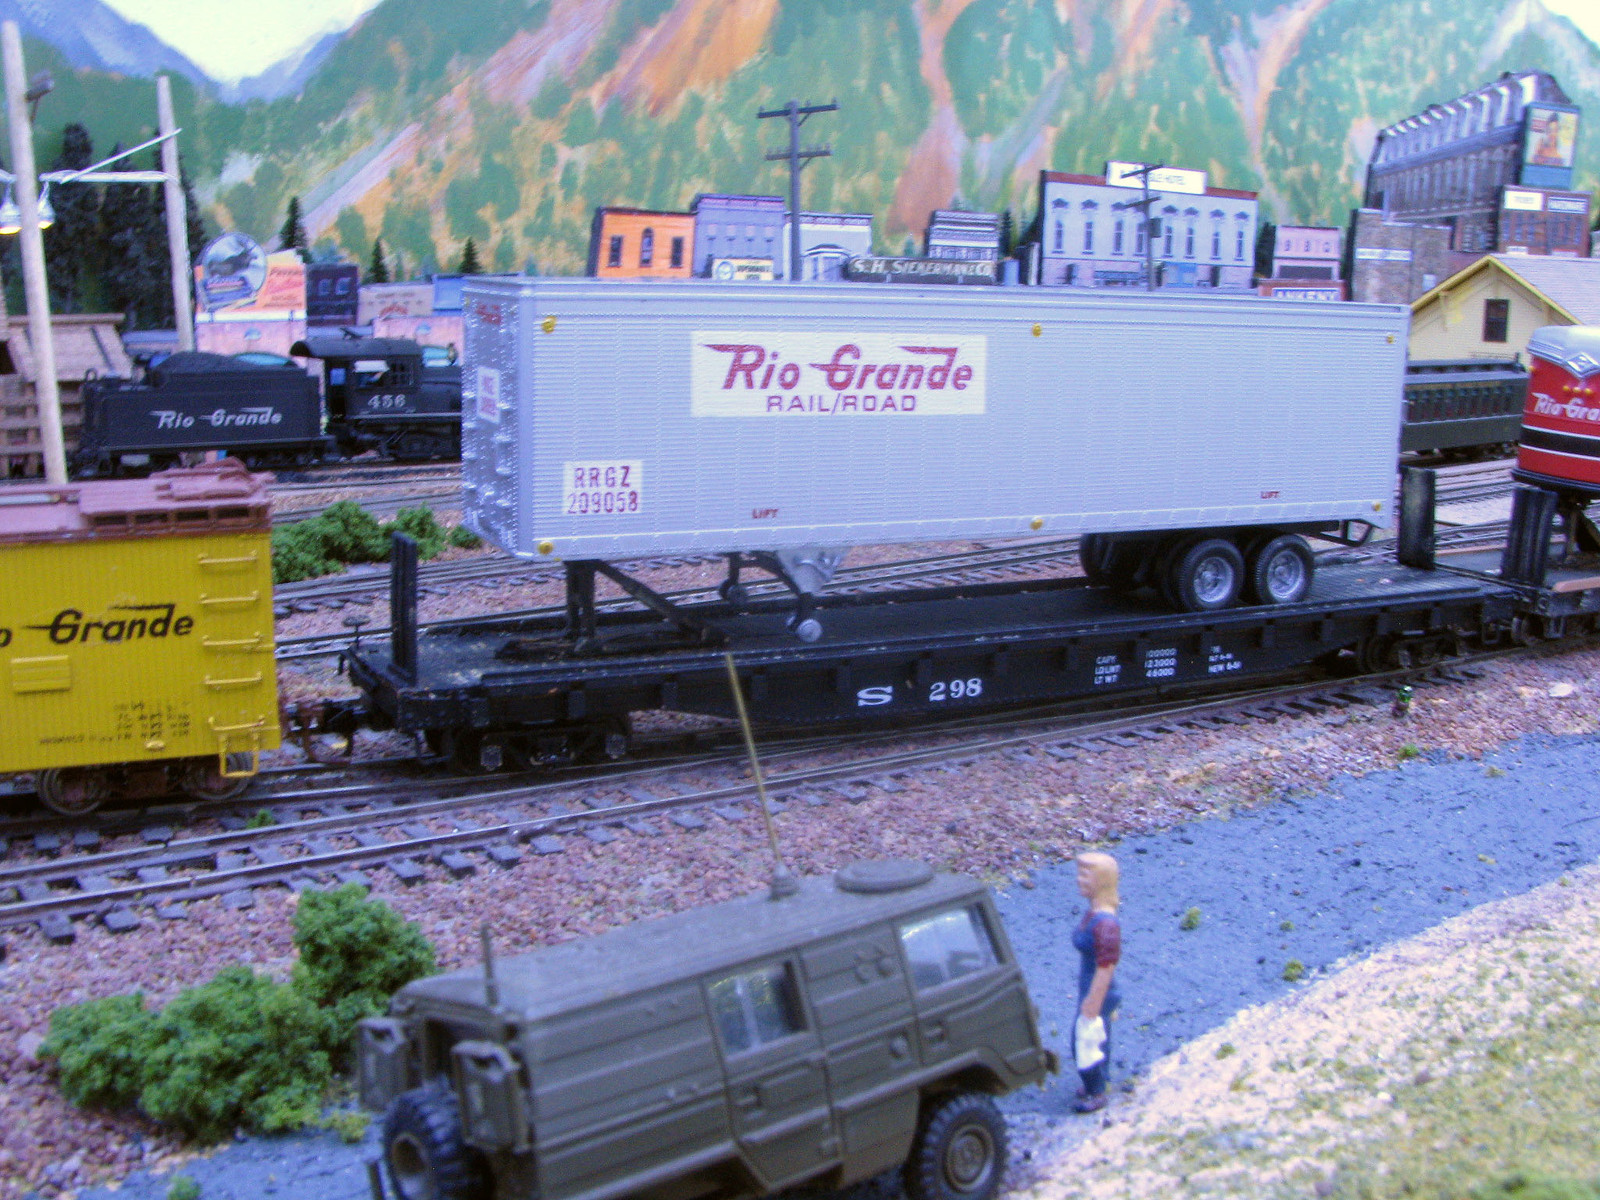 At Purgatory, I decided to spice things up some by getting most of the buildings out of parallel with the track, except for the dock and overhead crane. This makes it look larger and avoids the boring if easy sight lines of having everything squared up. I also added track to the mill's tramway used for handling the big stones after rearranging it and built three small cars. 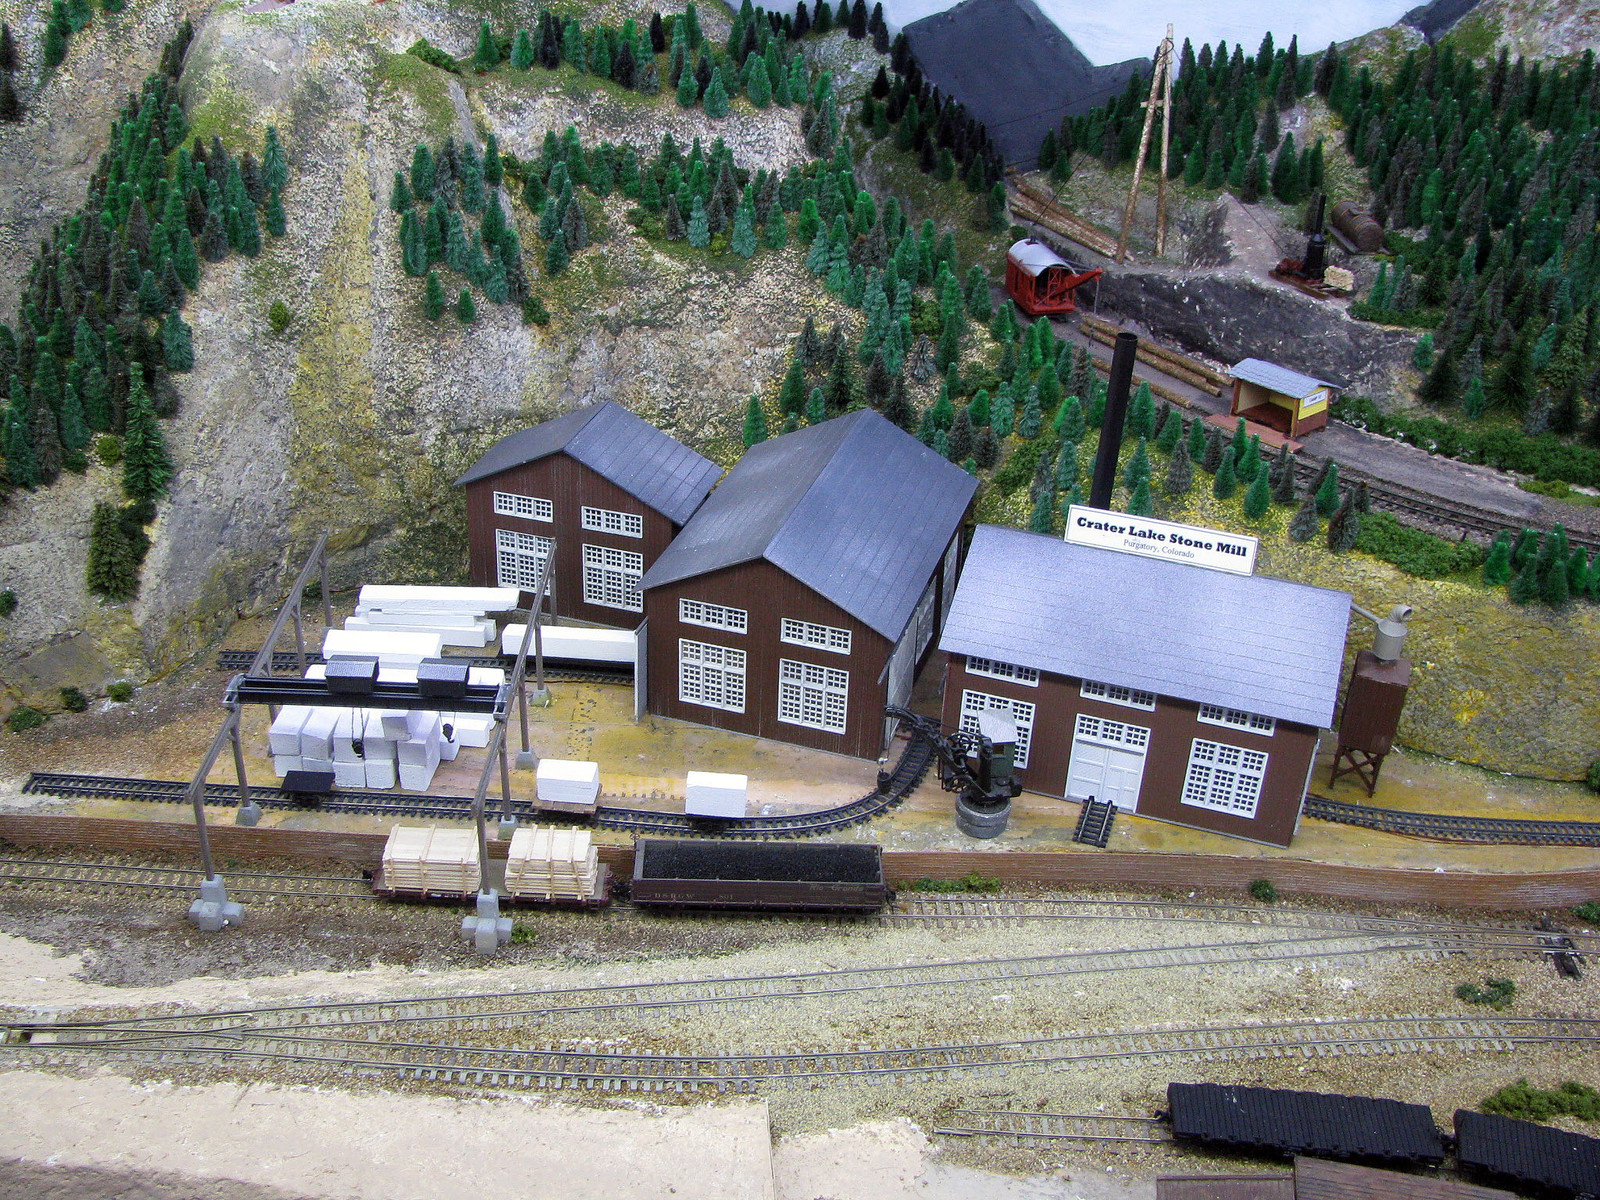 Finally, the heavy equipment used to grade the spur up to Camp 13 were retrieved in a very delicate move to bring it down without tipping the precarious loads off into the chasm, etc. 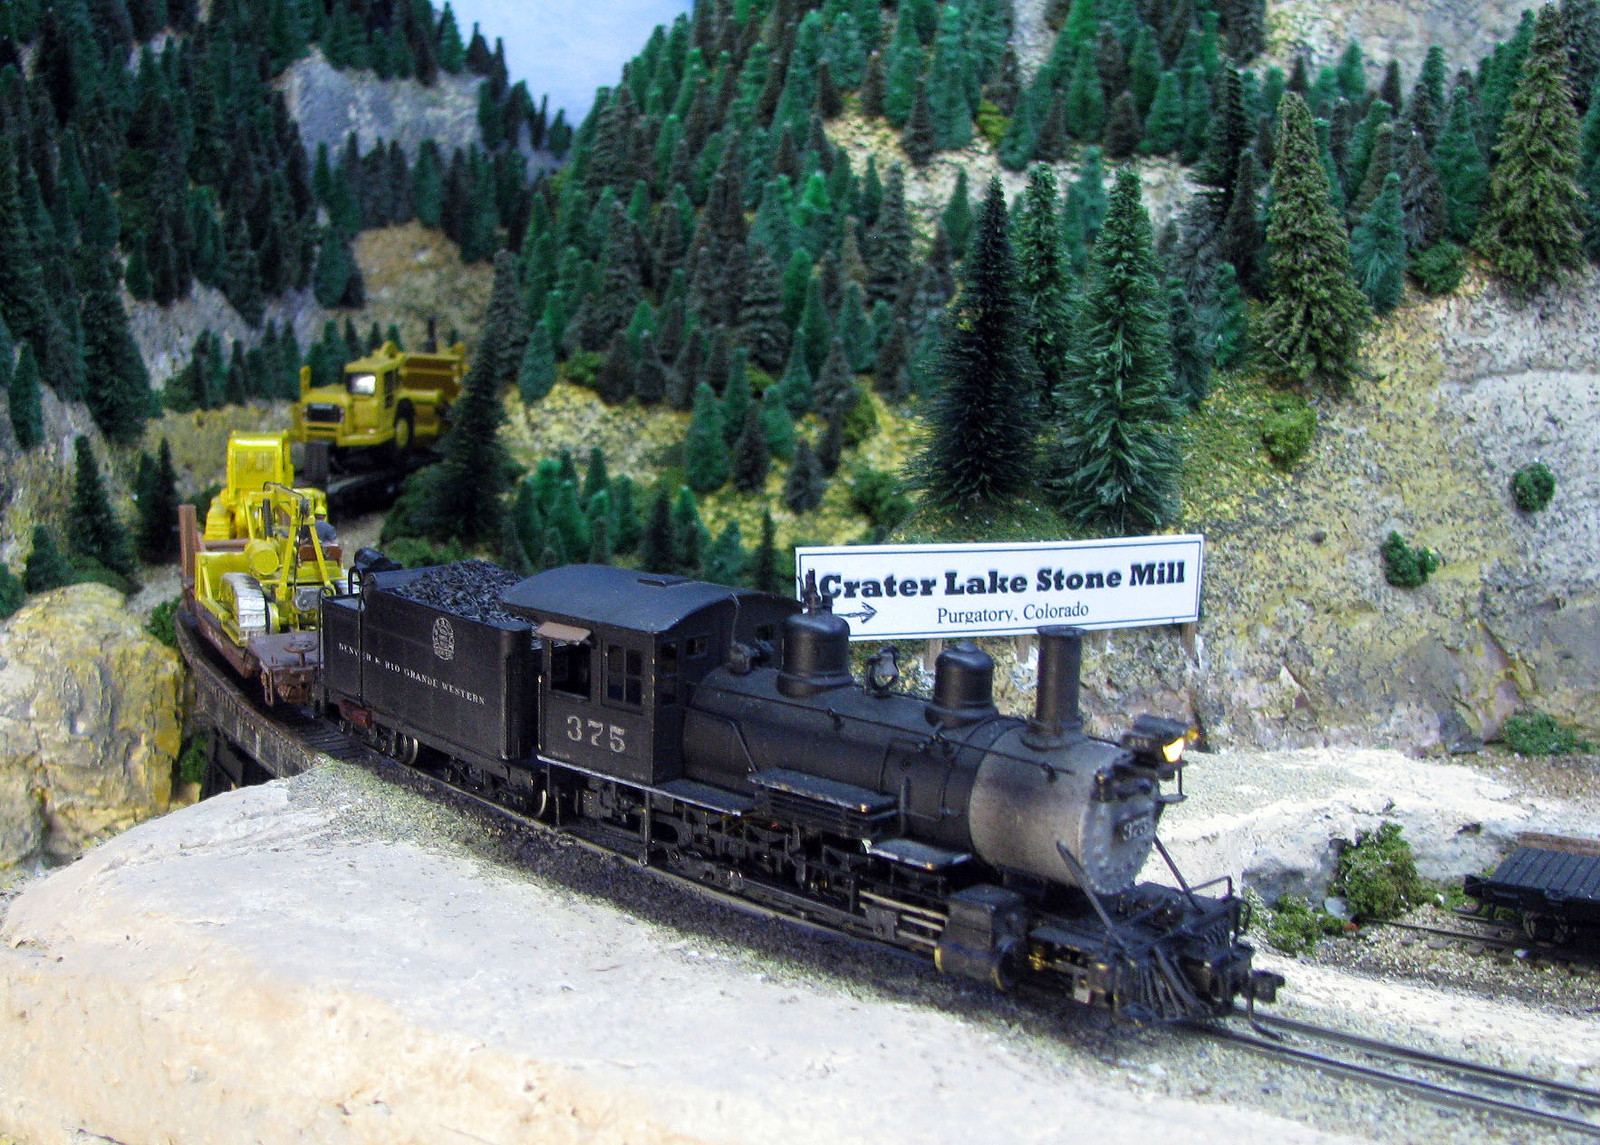 |
|
|
|
Post by mrsocal on Jan 4, 2015 11:43:50 GMT -8
|
|
|
|
Post by fr8kar on Jan 4, 2015 13:34:51 GMT -8
Nice trailer, but I also like your Pinzgauer. When I lived in Durango my neighbor had a couple of those, one 4x4 and one 6x6. He used them to give "Jeep tours" around the area. They are fun little vehicles. |
|
|
|
Post by tankcarsrule on Jan 4, 2015 13:49:39 GMT -8
All great looking stuff for the 1st SPF of the new year. TBird I feel ya man, I spent the better part of a couple of days decaling the first of the three tank cars. I did also get an order in to MicroScale for enough decals to get the other two cars done hopefully next weekend. It is to cool to paint out in the garage so waiting for a warm up. I the mean time I continued working on the Stabilizer project almost have the shell done.    Everyone model well and above all.... Have a good and safe week.  Great looking tanker Scotty. Thank you Mark. The AC60CW is my favorite loco. Regards, Bobby |
|
|
|
Post by emd16645 on Jan 4, 2015 15:04:51 GMT -8
It's been awhile since I've posted anything for the SPF. A couple completed Branchline 50' boxcars. Nothing fancy, pretty much shake the box and done. 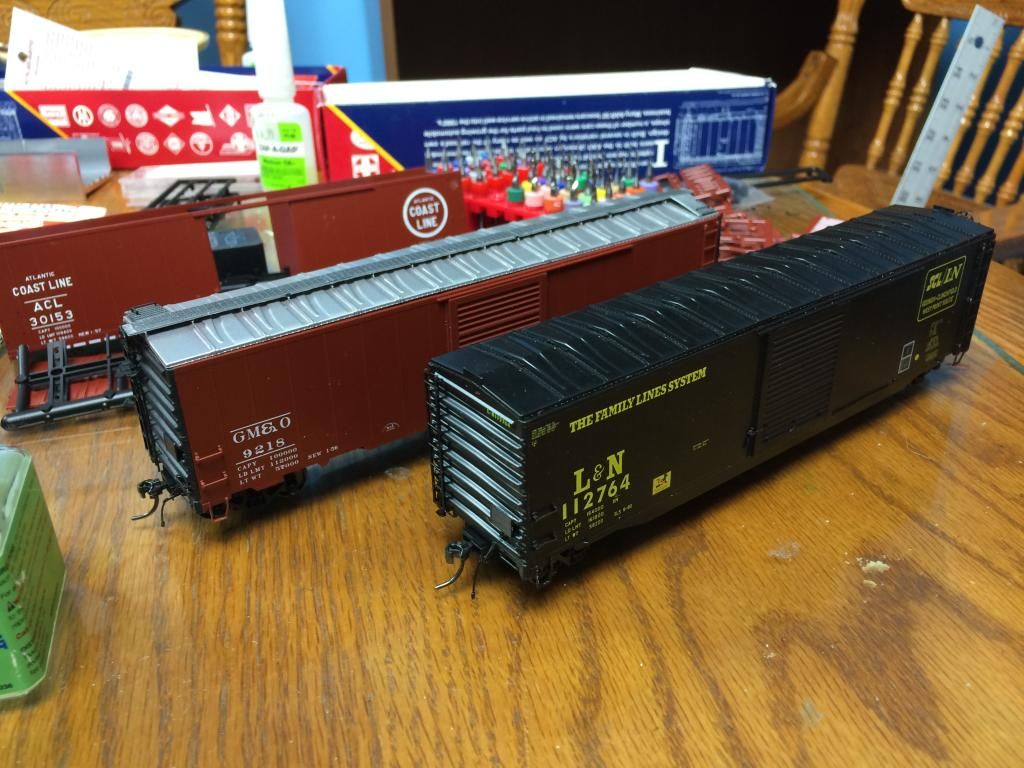 And another is on the workbench, although planning a few mods per prototype photos. 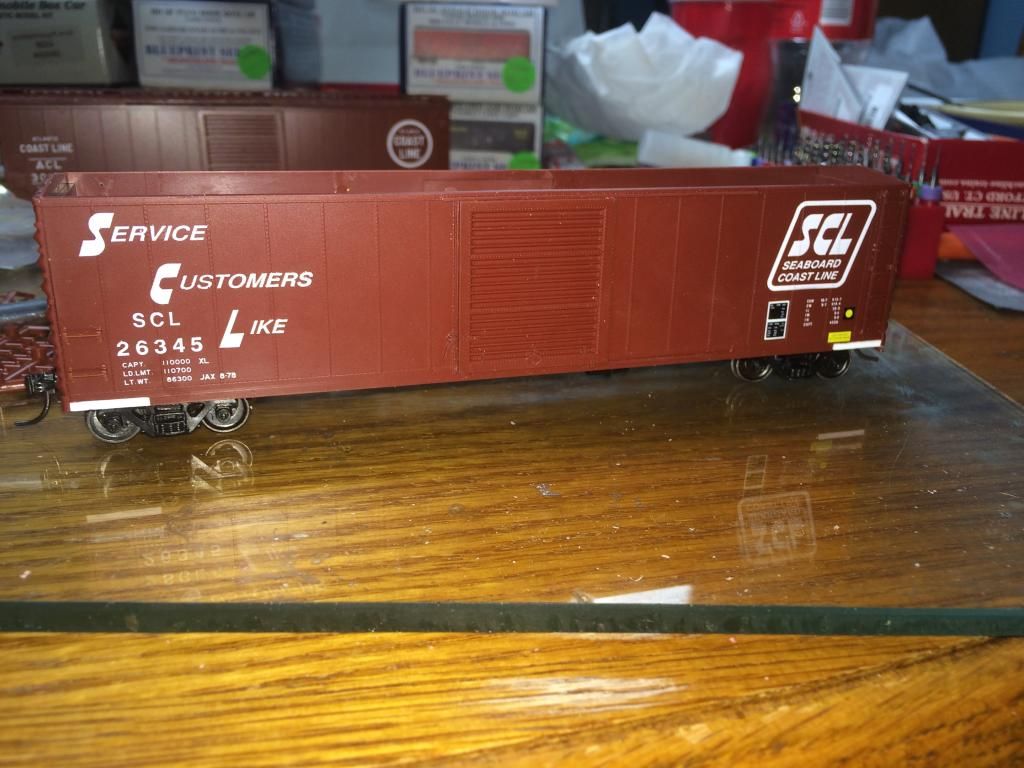 |
|
|
|
Post by riogrande on Jan 4, 2015 15:05:35 GMT -8
Great looking GE, Bobby! A three day road trip with my band meant I made just a little progress on two Atlas ACF 4650s this week, the SP is complete on both sides, the SSW only half way. SP/SSW cars are common on the D&RGW, being interchanged at Ogden, Ut. Were those undecs? I too noticed SSW CF4650 hoppers common on the D&RGW and bought both the sets that were offered by Atlas - they did two numbers of Cotton Belt (in-line logo) and two numbers of the stacked Cotton Belt two-line logo. The only thing about the Atlas cars was that the gray was a tad dark for my liking but pretty good. I've also picked up a couple numbers of the Intermountain Cotton Belt CF4650 version too; those are a bit lighter shade of gray. Cheers, Jim |
|
|
|
Post by mlehman on Jan 4, 2015 15:14:24 GMT -8
Nice trailer, but I also like your Pinzgauer. When I lived in Durango my neighbor had a couple of those, one 4x4 and one 6x6. He used them to give "Jeep tours" around the area. They are fun little vehicles.  Not MY Pinzgauer, but Captain Honey Hotz's Pinzgauer. She's the railfan checking out the new piggyback service. She flies the Western Federation of Miners Union's Beaver. It's used for medevac in cases of emergency, sort of a flying "Casey Jones" like the Sunnyside built to use on the Silverton Northern. Most of the time, it just hauls beer and fresh shrimp for the big Friday happy hour buffet down at the union hall in Red Mountain. 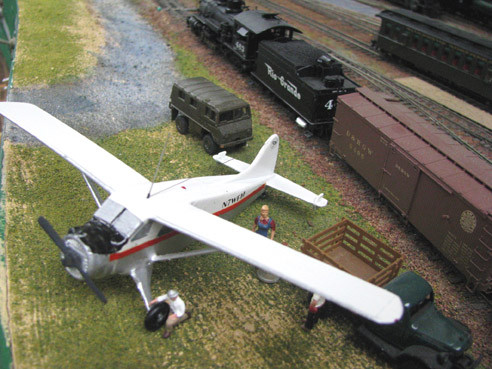 I do love the Pinzgauer and have wanted one for maybe two decades since I first saw it written up in a 4x4 magazine. They are amazing vehicles. You used to be able to find one for fairly reasonable, although parts could get expensive. The only time I had a chance for a close-up inspection of one was when I went to a conference in Kansas City about ten years ago. Parked behind the hotel was the Red Bull Pinzgauer. IIRC it was a dual rear axle hardtop. I've got pics somewhere just can't find them. Thus I have several Pinzgauers on the layout. They just fit Colorado so well. |
|
|
|
Post by fr8kar on Jan 4, 2015 15:28:12 GMT -8
I've also been fascinated with them since the first time I saw them. Last time I looked you could get a nice 6x6 for under $15k, but I have no idea what they go for now. My wife insists that she can tolerate a lot of things, but having a Pinzgauer in the driveway is not one of them. Someday we'll just have to see about that. After all, can you imagine how many Free-mo modules could fit in the back?
|
|
|
|
Post by mlehman on Jan 4, 2015 15:44:42 GMT -8
Get a soft top. Then you can stack them up, throw a tarp over them, and haul those modules Beverly Hillbilly style.
|
|
|
|
Post by TBird1958 on Jan 4, 2015 15:59:45 GMT -8
Great looking GE, Bobby! A three day road trip with my band meant I made just a little progress on two Atlas ACF 4650s this week, the SP is complete on both sides, the SSW only half way. SP/SSW cars are common on the D&RGW, being interchanged at Ogden, Ut. Were those undecs? I too noticed SSW CF4650 hoppers common on the D&RGW and bought both the sets that were offered by Atlas - they did two numbers of Cotton Belt (in-line logo) and two numbers of the stacked Cotton Belt two-line logo. The only thing about the Atlas cars was that the gray was a tad dark for my liking but pretty good. I've also picked up a couple numbers of the Intermountain Cotton Belt CF4650 version too; those are a bit lighter shade of gray. Cheers, Jim
Hey Jim,
They were actually a couple of NYC's that I picked up for about $14 apiece on fleabay, 3 minutes a side with some 2000 grit wet/dry automotive paper removes all the lettering without the chemical mess - just clean in soap and water with a toothbrush. IIRC the decals are Microscale 87-1253, lots of great little data etc. I'll be doing a couple of the Intermountain cars as well.
|
|
|
|
Post by fiend540 on Jan 4, 2015 17:13:00 GMT -8
First time posting to SPF, I finally got of my butt and made my first layout. It's a 84"x 18.5" pine 1x4 framed box with 2" foam for the base, It's a copy of a Lance Mindheim design but is basically the same layout as the small prototype I wanted to model anyways. It's going to be Conrail from about 1979 to 1985, based on the Western/Central NY areas I grew up in. Not the best pictures, the lighting in my living room was pretty bad ha 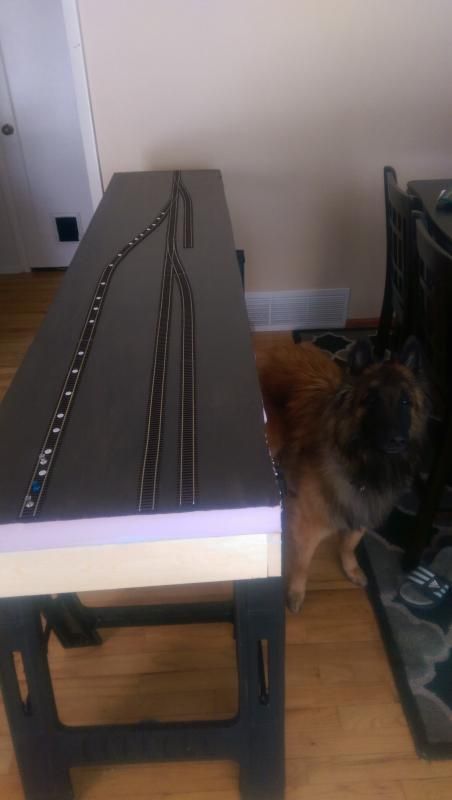 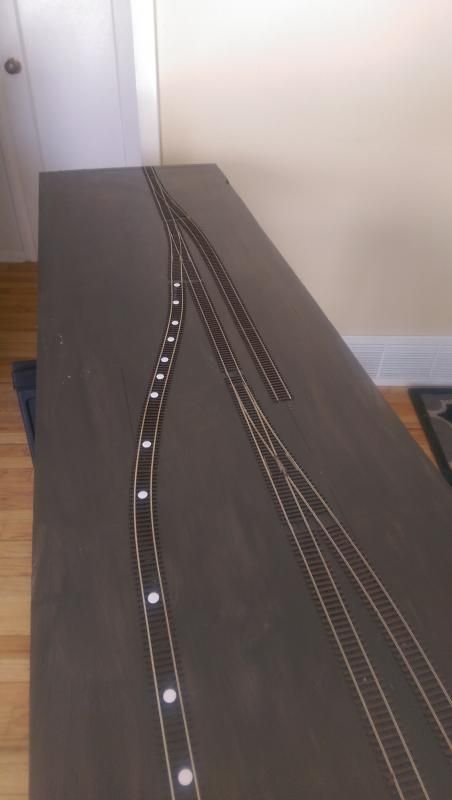 My first motive power for the layout is this Athearn RTR sw1500, I must say these things are super nice I hope it runs as well as it looks. 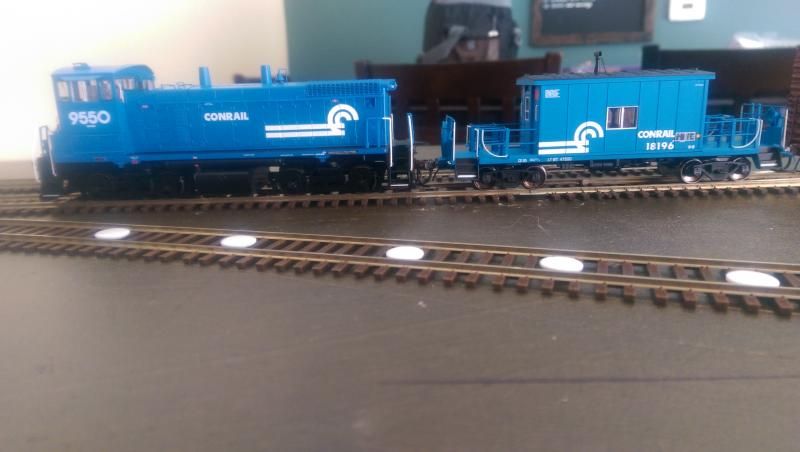 |
|
|
|
Post by wp8thsub on Jan 4, 2015 18:06:56 GMT -8
It's been awhile since I've posted anything for the SPF. A couple completed Branchline 50' boxcars. Nothing fancy, pretty much shake the box and done. Since you're building these from kits, it's easy to get the A end ladders corrected. The 1966 safety appliance regulation mandated that ladders on the A end be shortened to four rungs. Cut the Branchline ladders just above the center mounting pins, and shave off the top ones flush with the body so the pins fill the holes. On the B end, use one of the L-shaped roof grabs to add the required grab occupying the same location as the one that would have been on the running board extension. Drill some holes and mount the part to the corner of the roof, or fabricate a new one from wire and an eye bolt. Last, the side of the car adjacent to the B end ladder should receive a yellow label stating "keep off roof no running board." On many Branchline kits, including the L&N and SCL cars you have, there is already such a label included. Unfortunately it's on both sides. For the one adjacent to the A end, remove or patch it over. 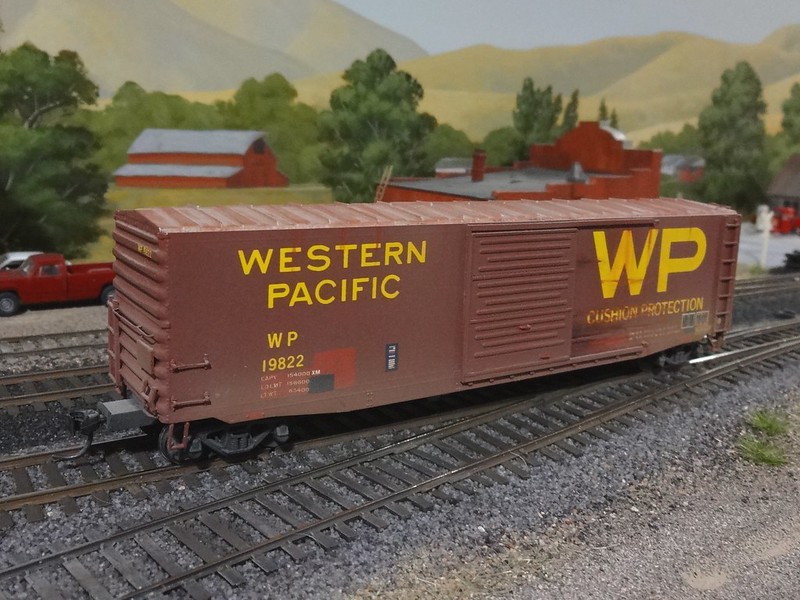 In most cases you'll also need some horizontal end grabs. The above car was built from a Robins Rails kit, and includes a common WP variation on the extra grabs on the A end. They typically used a single grab on the B end. |
|
|
|
Post by emd16645 on Jan 4, 2015 19:41:08 GMT -8
It's been awhile since I've posted anything for the SPF. A couple completed Branchline 50' boxcars. Nothing fancy, pretty much shake the box and done. Since you're building these from kits, it's easy to get the A end ladders corrected. The 1966 safety appliance regulation mandated that ladders on the A end be shortened to four rungs. Cut the Branchline ladders just above the center mounting pins, and shave off the top ones flush with the body so the pins fill the holes. On the B end, use one of the L-shaped roof grabs to add the required grab occupying the same location as the one that would have been on the running board extension. Drill some holes and mount the part to the corner of the roof, or fabricate a new one from wire and an eye bolt. Last, the side of the car adjacent to the B end ladder should receive a yellow label stating "keep off roof no running board." On many Branchline kits, including the L&N and SCL cars you have, there is already such a label included. Unfortunately it's on both sides. For the one adjacent to the A end, remove or patch it over. In most cases you'll also need some horizontal end grabs. The above car was built from a Robins Rails kit, and includes a common WP variation on the extra grabs on the A end. They typically used a single grab on the B end. Thanks for the info, I think I probably will go back down the line and tweak the ones already done. I've only recently backdated to modeling the late 70s to early 80s, so I'm not very familiar with these things. Thanks again! |
|
|
|
Post by mlehman on Jan 5, 2015 0:13:26 GMT -8
First time posting to SPF, I finally got of my butt and made my first layout. It's a 84"x 18.5" pine 1x4 framed box with 2" foam for the base, It's a copy of a Lance Mindheim design but is basically the same layout as the small prototype I wanted to model anyways. SNIP My first motive power for the layout is this Athearn RTR sw1500, I must say these things are super nice I hope it runs as well as it looks. fiend, Welcome, good to see someone new adding to SPF. Your layout may be barren right now, but I'm sure something will soon be growing Conrail was one of our local lines until maybe sometime in the 90s on the old P&EI line. It's now being turned into a trail. Oh well. But I've always had a soft spot in my heart for it, despite being more of a Western modeler and all prior to Conrail's existence for the most part, because I had kin who worked for predecessor RRs. Your train looks pretty good. It's always good to get something running, even if there are limits. You''ll figure out a way to acquire more real estate and right of way.  |
|
|
|
Post by fr8kar on Jan 5, 2015 18:46:02 GMT -8
|
|
|
|
Post by stevef45 on Jan 8, 2015 1:38:32 GMT -8
Nope not today.... things would not be easy on this day as the lil one, Reba was making it known she wanted some lovin.  and she got it...LOL 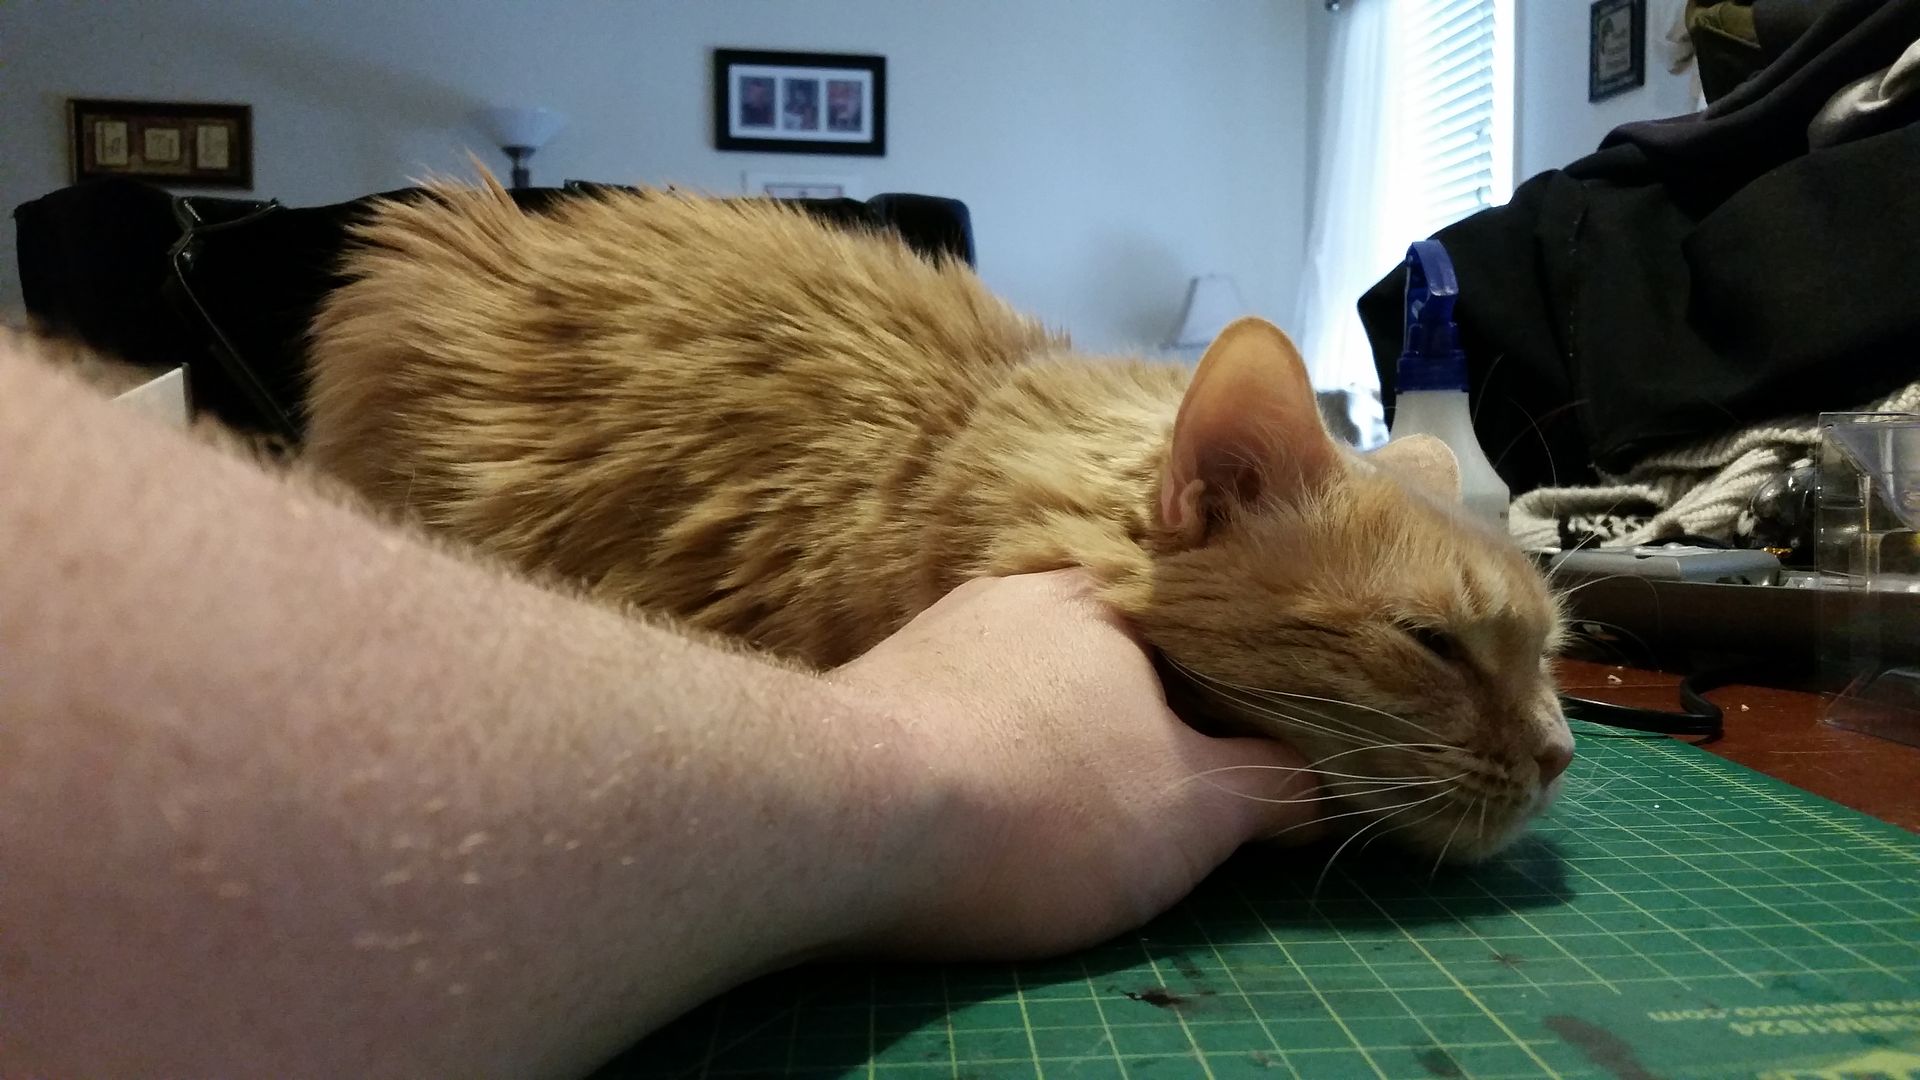 I had plans to work on some minor stuff. I did get the other Athearn PTC roof assembled and just need to test fit it to the already pained SD70M-2. The sucky thing about these roofs is the magnets are not installed, you have to do it and the opening is extremely tight. I had to file and scrape the opening wide to get it in. One magnet got glued in lopsided and I had to file it flat to make the roof stay down properly. I also said screw it to the brass stanchions on my SD60's. Im fed up trying to get them to work. So i removed the stanchions and tossed them. I have 3 pair of grey factory athearn handrail kits for the SD60 that I found in my closet and also checked the factory boxes and found 3 good sets I can use. I just need to get that paint adhesion stuff from autozone so the paint will stay on it. Plans for the weekend include assembling the etched coupler holders and soldering them together...........hopefully. 11 more of these to go. 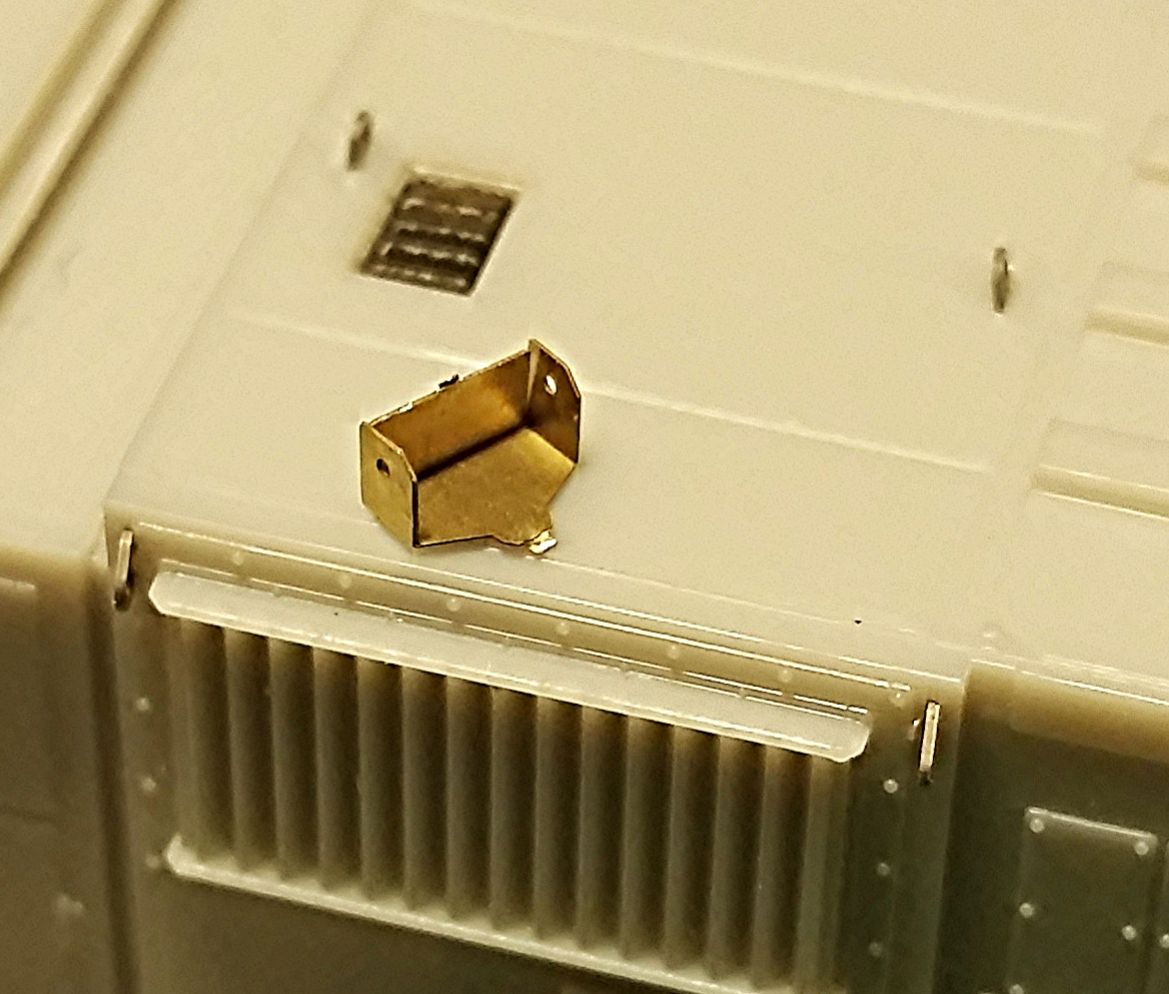 |
|
|
|
Post by jbilbrey on Jan 10, 2015 23:28:13 GMT -8
It's been awhile since I've posted anything for the SPF. A couple completed Branchline 50' boxcars. Nothing fancy, pretty much shake the box and done. Since you're building these from kits, it's easy to get the A end ladders corrected. The 1966 safety appliance regulation mandated that ladders on the A end be shortened to four rungs. Cut the Branchline ladders just above the center mounting pins, and shave off the top ones flush with the body so the pins fill the holes. On the B end, use one of the L-shaped roof grabs to add the required grab occupying the same location as the one that would have been on the running board extension. Drill some holes and mount the part to the corner of the roof, or fabricate a new one from wire and an eye bolt. Last, the side of the car adjacent to the B end ladder should receive a yellow label stating "keep off roof no running board." On many Branchline kits, including the L&N and SCL cars you have, there is already such a label included. Unfortunately it's on both sides. For the one adjacent to the A end, remove or patch it over. <snip>
More bad news on the L&N boxcar. The prototype was built by GATX and differed from the Branchline kit (and the ACF boxcar) in at least two aspects. First, Branchline car has one fewer panel on either side of the door than the prototype. Second, the stirrups were attached to the sides differently. The side sills near the ends were not present, and the stirups were attached underneath the sides. There isn't much you can do about the first issue short of scratch-building new sides. On the car that I built, I carved off the sills on the ends as well as the "wrap-around" portion on the ends and replaced the stirrups with A-Line parts.
The above isn't a criticism of your work. I'm just throwing the stirrups comment out since you took the time to correct the sills on the SCL boxcar. I don't believe there are photos of the class of L&N boxcar on the net; I found the photos I worked from in Morning Sun's L&N Color Guide.
James Bilbrey LaVergne, TN |
|
|
|
Post by emd16645 on Jan 11, 2015 5:42:32 GMT -8
James,
Thanks for the comments. The L&N and GM&O cars were built by the kit instructions to practice building these cars. The SCL car I was trying to step up my modeling to the next level, so I'm doing a bit more. I think I will revisit at least the L&N car in the future.
If you (or somebody) could scan a copy of the picture in the Morning Sun book Id greatly appreciated. I don't know anyone who has a copy.
|
|
|
|
Post by jbilbrey on Jan 11, 2015 9:05:45 GMT -8
James, Thanks for the comments. The L&N and GM&O cars were built by the kit instructions to practice building these cars. The SCL car I was trying to step up my modeling to the next level, so I'm doing a bit more. I think I will revisit at least the L&N car in the future. If you (or somebody) could scan a copy of the picture in the Morning Sun book Id greatly appreciated. I don't know anyone who has a copy. I'm planning on taking a photo of my car today as part of this week's "Sunday Photo Fun", if that will help.
James Bilbrey LaVergne, TN
|
|
|
|
Post by emd16645 on Jan 11, 2015 10:55:04 GMT -8
James, Thanks for the comments. The L&N and GM&O cars were built by the kit instructions to practice building these cars. The SCL car I was trying to step up my modeling to the next level, so I'm doing a bit more. I think I will revisit at least the L&N car in the future. If you (or somebody) could scan a copy of the picture in the Morning Sun book Id greatly appreciated. I don't know anyone who has a copy. I'm planning on taking a photo of my car today as part of this week's "Sunday Photo Fun", if that will help.
James Bilbrey LaVergne, TN
That would be great James! |
|