|
|
Post by mlehman on Jan 25, 2015 7:01:20 GMT -8
Not sure my pic mojo is working this morning, so let's give it a try... One of those pics that say something is just a little different about this narrowgauge... 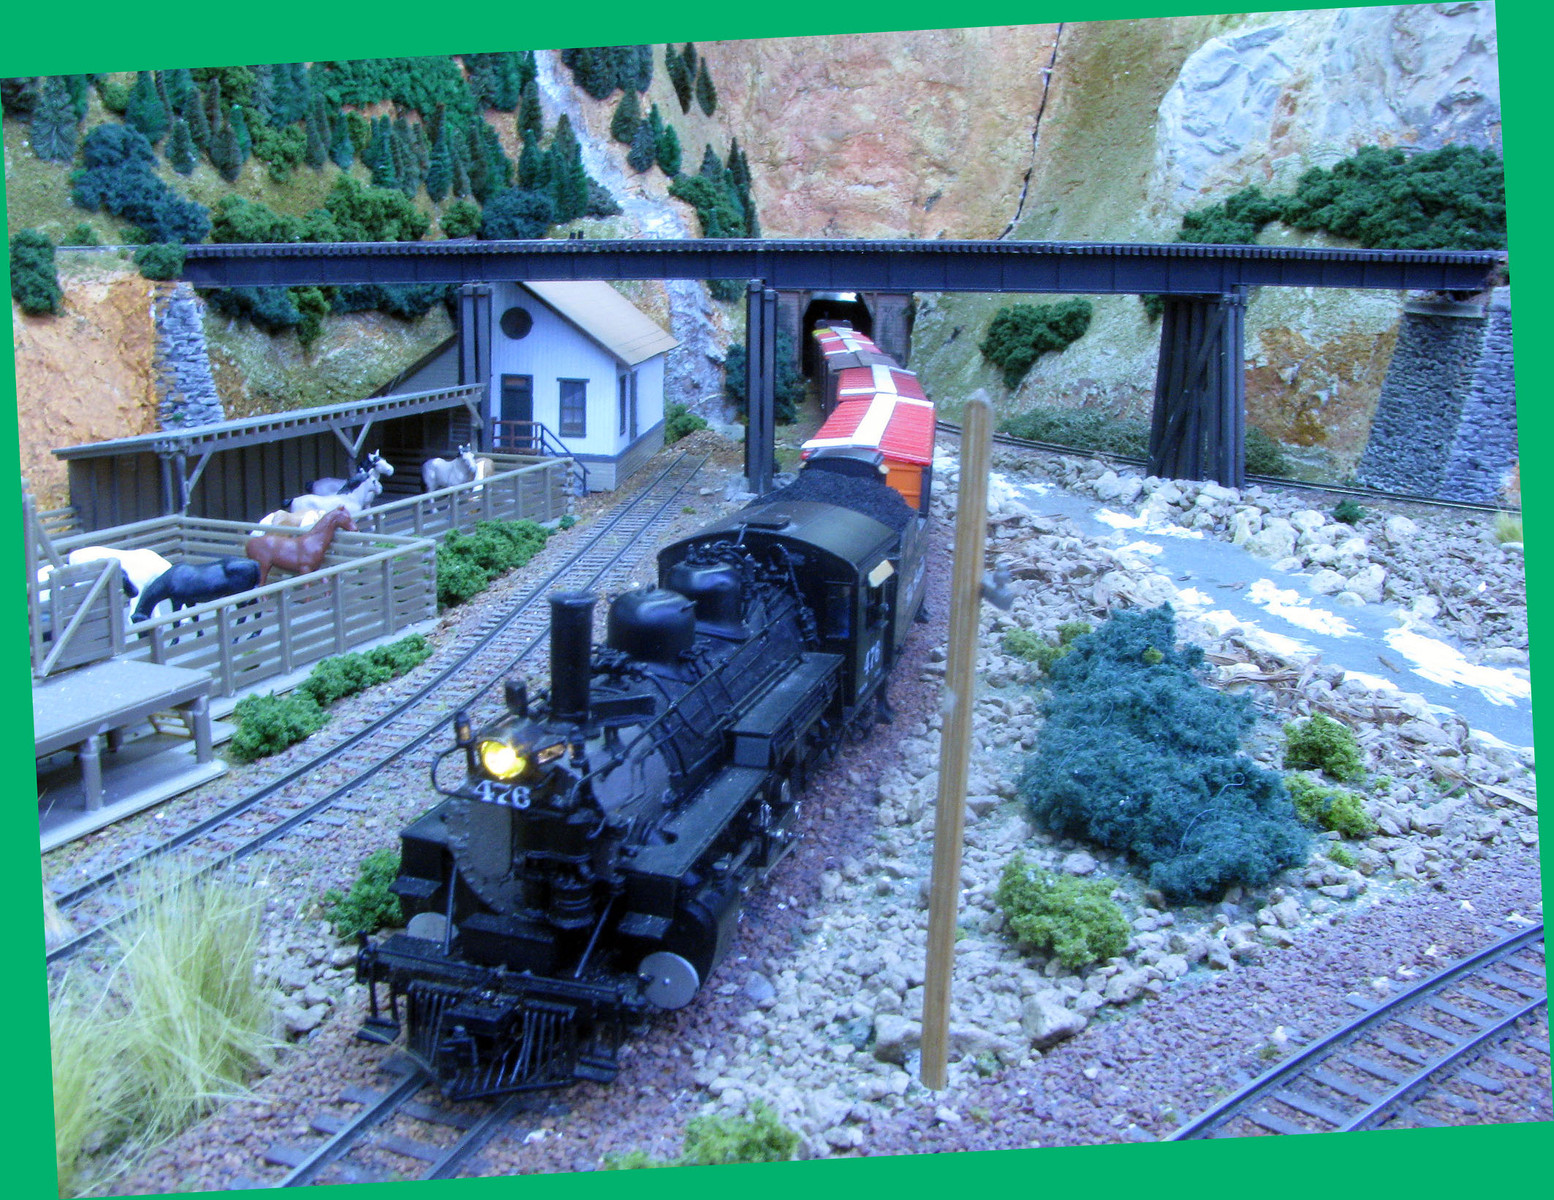 It's a final shakedown run for my 5-car batch of RBL and XL modern freight cars, necessary to handle the increased traffic levels on the Four Corners Division. Here's a shot of the class car, built sometime ago, with one of the new cars. 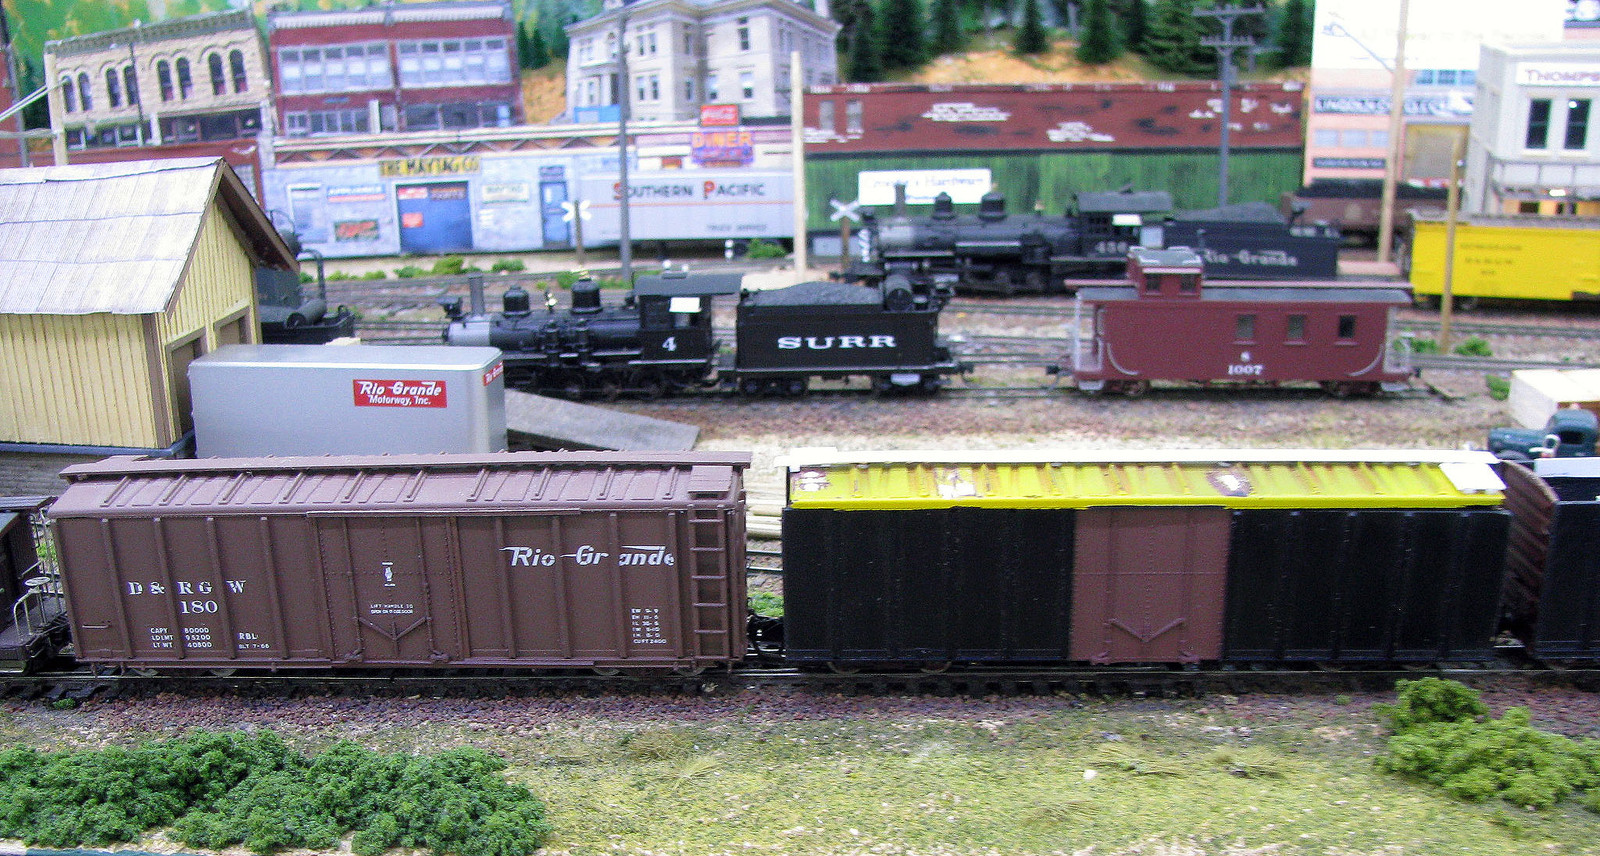 They are simple things, with sides cut from LOs, vintage Athearn IIRC, and doors, ends (actually recycled doors, too), and other parts from my extensive scrap box.  Here's a look at that last test train before the final details and paint... 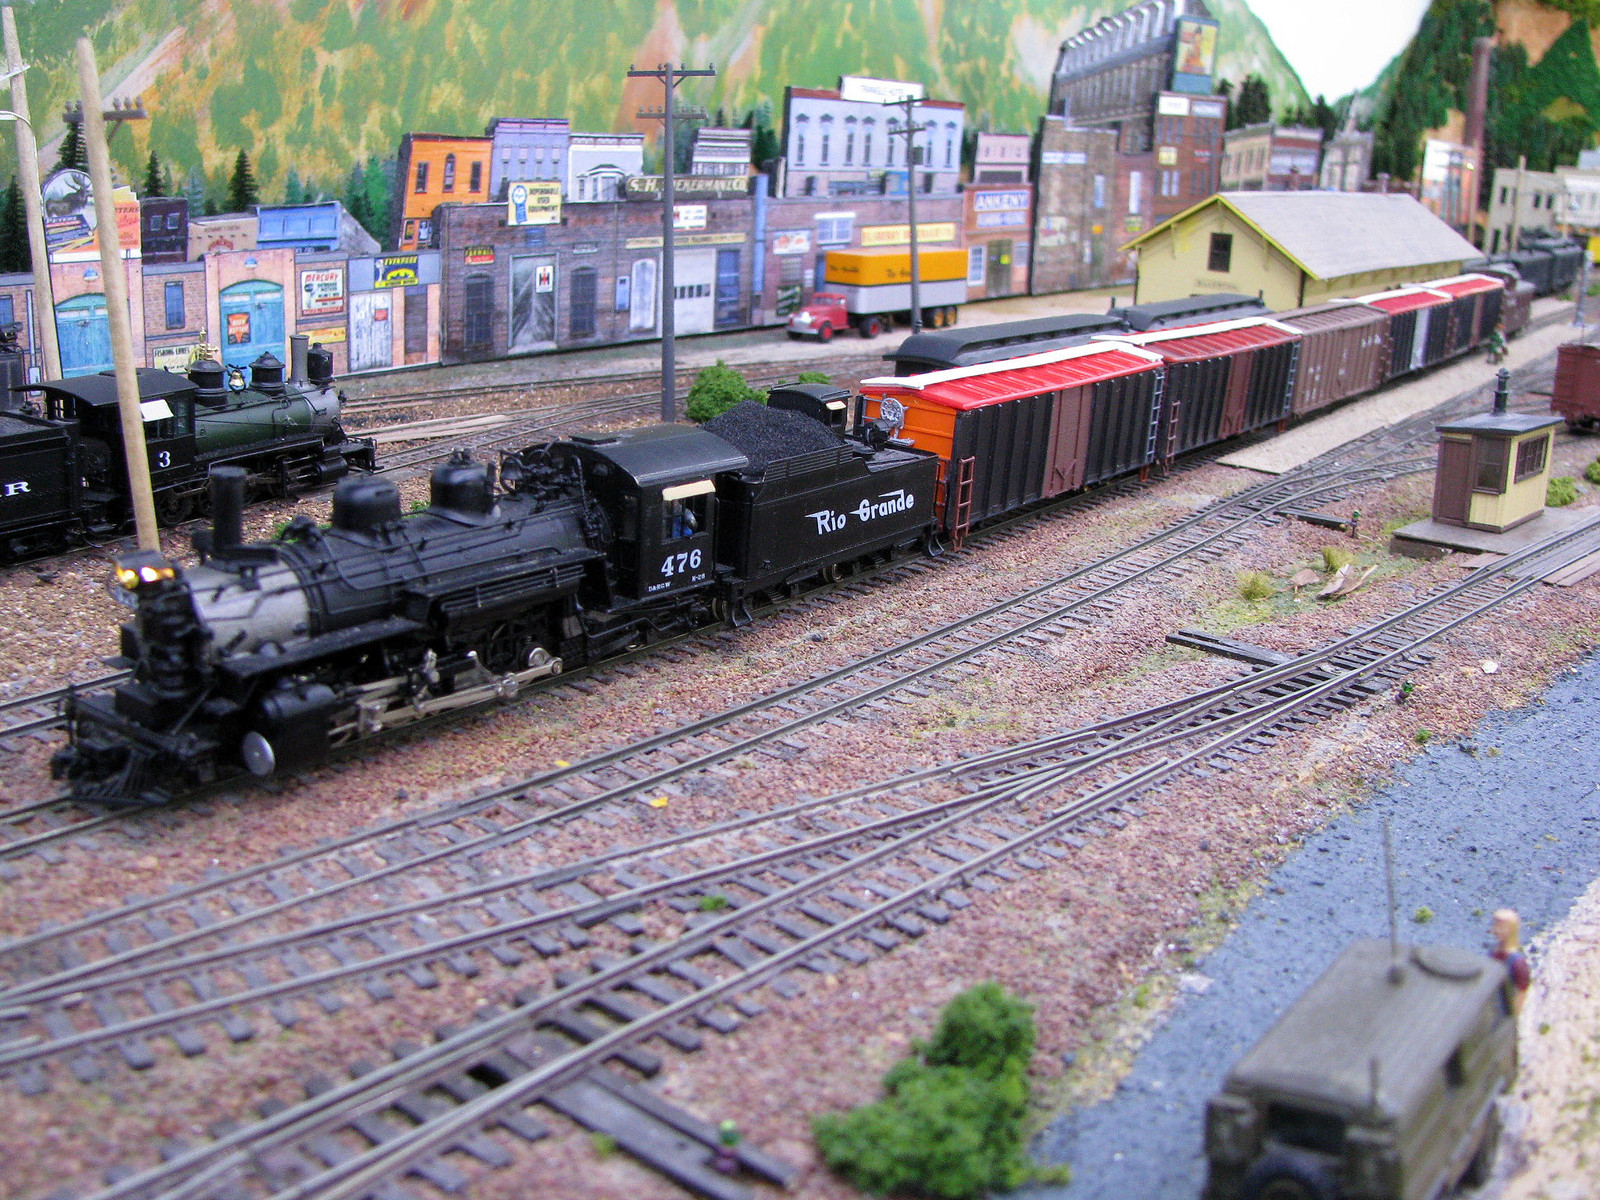 Now they are sleeping off that intoxicating beauty treatment. 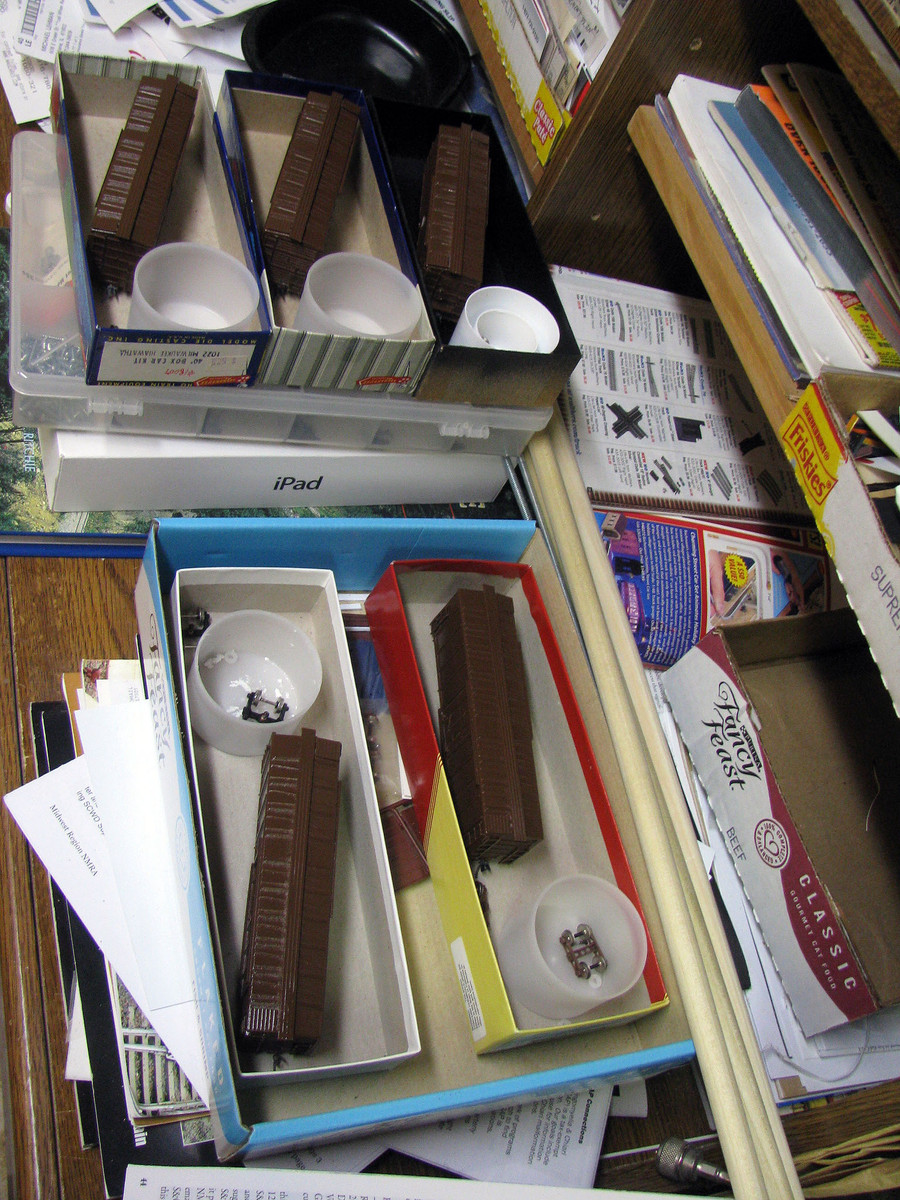  |
|
|
|
Post by dti406 on Jan 25, 2015 7:07:21 GMT -8
First of all Scotty (Mr. Socal) I do apologize for that last picture last week, I did not realize how bad it was before I had moved along to the next steps in building the car, but I figured a bad picture was better than no picture. I also now take numerous pictures of each step as I have plenty of memory in the new camera compared to my old one. Did some more work on the P&LE Hot Coil Car this week.  Here I have installed the Large Tank and two evergreen strips along the main frame member.  Installed some more of the Adair weights along the inside of the main frame members.  Installed more of the Adair weights in the center of the underframe.   Two views of the underframe after adding the cushion support assembly in the center of the picture, Six cross bearer caps over the frame cross bearers, mounting bracket for the air reservoir and air reservoir. Drilled numerous holes for the airlines in the air reservoir, brake valve and relay valve, then installed the brake valve and relay valve and ran piping to connect all these brake components. Thanks for looking, Rick J |
|
|
|
Post by mlehman on Jan 25, 2015 7:11:26 GMT -8
Rick,
Nice work! Those Adair weights sure tuck up nice and neat. You really have to stare at some of the pics to see them lurking in the shadows as they do their thing.
|
|
|
|
Post by carrman on Jan 25, 2015 9:18:13 GMT -8
Very unhappy with the lettering on the Bowser C636's for BN. Utilized the paper towel method posted elsewhere, but had to soak for over 20 minutes, then very gently poke at it with an exacto #11 blade. Utilized scotch tape to pull of a majority of the number, and the knife blade and Q-tip for the rest that was left. Once this one is relettered, I'll post a couple comparison pics. When they are both decaled, I'll do some secret stuff, and performance test them..  |
|
|
|
Post by TBird1958 on Jan 25, 2015 9:57:53 GMT -8
A bit progress and process from me this week..... Finished Atlas SP 4650 and Intermountian 6 hatch version, I'm going to re shoot these out in the Sun (when it returns!)  Here's some in process shots of the second BN car, I'm using chalks various chalks, colored pencils and dullcote to build tooth in between colors.  Only one side of the roof is done is this shot.  And a side shot, still have to straighten that janky roofwalk!  |
|
|
|
Post by kcjones on Jan 25, 2015 10:47:56 GMT -8
Well, now that Rapido has announced their new RDC, I guess I'll have to retire this old girl. Yep, rubber band drive and all. 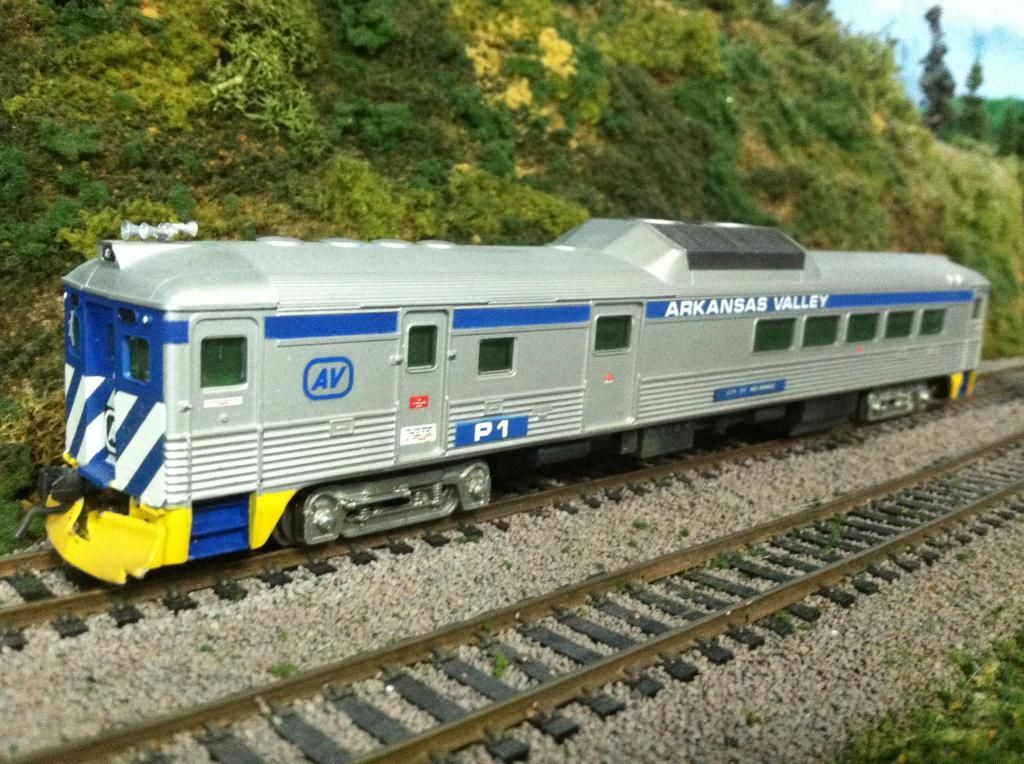 The AV runs a summer tourist train each weekend between Little Rock and Hot Springs using a couple of RDCs. I never got around to painting the second one. JL |
|
|
|
Post by dtinut on Jan 25, 2015 11:08:02 GMT -8
I started modifying a Walthers Russell Snowplow to be more like what the DT&I had. I pretty much cut up the entire body and reconfigured all the parts narrowing the body and building a front coupler. This is where i am currently...  |
|
|
|
Post by ssw on Jan 25, 2015 14:10:23 GMT -8
 been working on a kitbash of an Atlas ACF 3 bay cylindrical into a MoPac car. Mop didn't have the end cages on some of theirs. It's painted now, after chopping most of the end cage away, and cutting a fair bit on the roofwalk. Waiting on the decals to arrive, then it'll get a big screamin' eagle on the side. Bradley |
|
|
|
Post by wp8thsub on Jan 25, 2015 16:03:15 GMT -8
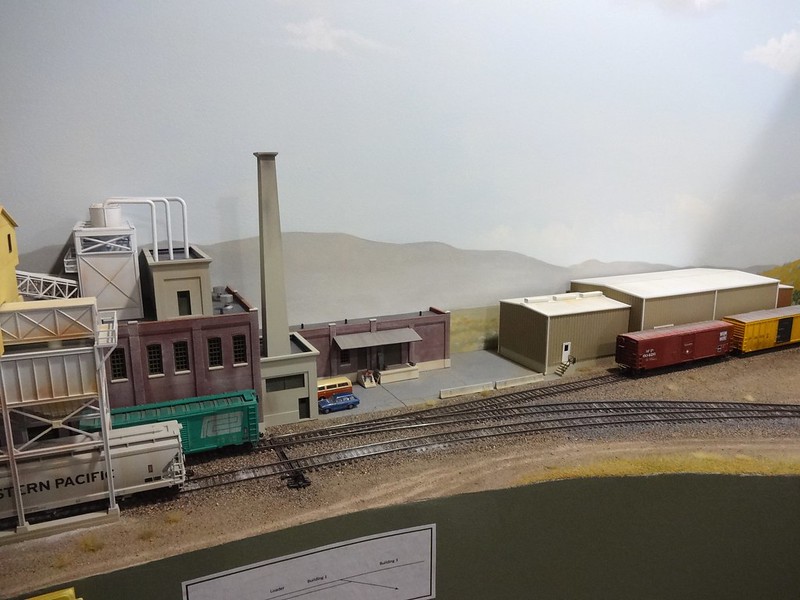 My salt plant received a parking lot and some additional weathering this week. |
|
|
|
Post by fr8kar on Jan 25, 2015 18:08:10 GMT -8
View Attachmentbeen working on a kitbash of an Atlas ACF 3 bay cylindrical into a MoPac car. Mop didn't have the end cages on some of theirs. It's painted now, after chopping most of the end cage away, and cutting a fair bit on the roofwalk. Waiting on the decals to arrive, then it'll get a big screamin' eagle on the side. Bradley Welcome to the forum Bradley. I would like to see more of this project if you don't mind. I would also like some details on what you changed from the factory model. And I'm excited to see how it looks when you finish it. Great work so far! |
|
|
|
Post by kentuckysouthernrwy on Jan 25, 2015 18:47:23 GMT -8
I spent much of the week's spare time designing and installing a single turn helix for my layout. It is 30" radius and raises just over 5 1/2" in the one turn. It will lead to the second deck in my new construction. 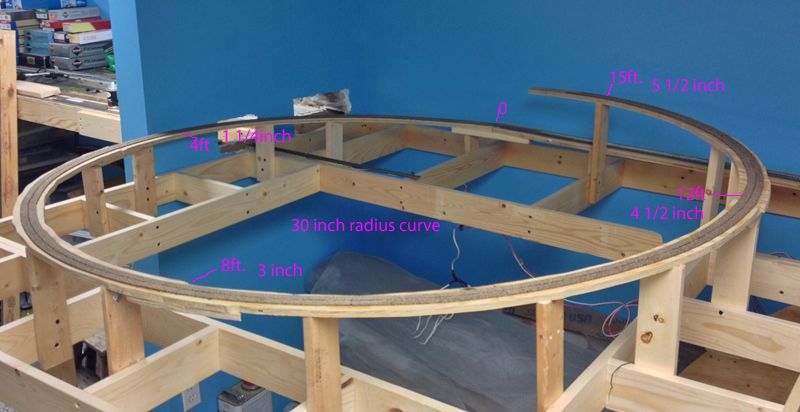 |
|
|
|
Post by kentuckysouthernrwy on Jan 25, 2015 18:49:20 GMT -8
I started modifying a Walthers Russell Snowplow to be more like what the DT&I had. I pretty much cut up the entire body and reconfigured all the parts narrowing the body and building a front coupler. This is where i am currently... Is that the current run of Walthers snowplow or the earlier one? I have one of the earlier ones still in the box under the layout somewhere. Good looking work so far. |
|
|
|
Post by stevef45 on Jan 25, 2015 20:21:45 GMT -8
What is that paper towel method for letter/number removal? What was used with the towels?
|
|
|
|
Post by dtinut on Jan 25, 2015 21:49:59 GMT -8
[/quote]Is that the current run of Walthers snowplow or the earlier one? I have one of the earlier ones still in the box under the layout somewhere. Good looking work so far.[/quote]
Its the older one. I got a CR one many moons ago for like 10 bucks. Thanks
|
|
|
|
Post by emd16645 on Jan 26, 2015 6:49:09 GMT -8
I started modifying a Walthers Russell Snowplow to be more like what the DT&I had. I pretty much cut up the entire body and reconfigured all the parts narrowing the body and building a front coupler. This is where i am currently... Looks great so far! Can you explain the modifcations to the body a bit more. I have a few of these that I am slowly working on upgrading and would seriously consider narrowing the body if I understood better. Thanks, Chris |
|
|
|
Post by dtinut on Jan 26, 2015 10:17:26 GMT -8
Hi Chris,
Sure.... I began by examining the prototype photo to understand the differences tween the model and it.
2nd, determining a plan of attack.
I started with moving the rear truck back to locate it centered on the door, 2 cuts to underframe (uf), rotate the bolster section and glue back together.
Next - the body doesn't have the alcove for the wing to tuck into, and the step is a ladder that juts out to allow truck clearance - so i determined the body is approximetly as wide as the section where the model has alcove for wings.
1st cut - at back of plow section, just ahead of the where it makes right angle into the alcove for wing.
2nd cut - split rest of body down centerlime (peake) of roof.
3/4 cut- cut alcove from side.
Narrowed rear section to be as wide as the alcove sides were before cutting apart - the floor can be used to reference internal wall width.
Splice rear section back together.
Trim floor so rear section fits into body.
Cut alcove sides from roof.
** use single edge blade to make cuts so no material is lost
Determine wing location - Trim alcove sides to length, glue to rear section
Measure and trim mid roof pieces to fit and glue to body.
Align plow to body and glue together.
Determine cab location, cut/fit cab.
HTH
Brian
|
|
|
|
Post by emd16645 on Jan 26, 2015 10:34:50 GMT -8
Thanks Brian, I'll take a look at my plows and see what I'm going to do. Thanks for the info!
|
|
|
|
Post by stevef45 on Jan 26, 2015 20:33:39 GMT -8
I started modifying a Walthers Russell Snowplow to be more like what the DT&I had. I pretty much cut up the entire body and reconfigured all the parts narrowing the body and building a front coupler. This is where i am currently... just curious how come your building the front coupler pocket and not adding that cast metal one? |
|
|
|
Post by stevef45 on Jan 26, 2015 20:47:02 GMT -8
Haven't been able to finish my SD70M-2 thanks to Athearn and there horrible customer service and now parts department. Told them i was missing coupler pockets in my undecorated kit. They said give them my address and they'll ship them out..........that was the middle of December. Now they dont even respond to me. I'de call them, but I work midnights and they aren't open during the night and i sleep during the day. So I've started on another project. When I was given a set of numberboards from former DME 6054 I decided to model what it was painted into, RCPE 3480. Model is a Athearn older release SD40 that was originally painted UP 3073. I wanted to use this model since the DME unit was originally a UP SD40. Not going crazy with this one with detail parts. Will be ordering a-line brass steps, plano roof hatch if I can find it, some dw stuff to clean up the pilots, horn etc. Fans will remain factory, the radiator screens i might just leave and not replace with the cannon version unless the cannons look that much better. Thankfully i have probably most of the stuff I need. Also already got the decals from highball to do it along with the true color paint. Prototype:   The model: it came with its cab, its in another baggie.    Getting ready for the 91% alcohol dip  A few hours later..............I really wish all paint came off as easily as atheans did. This just slid right off with little effort.    |
|
|
|
Post by nebrzephyr on Jan 27, 2015 6:18:51 GMT -8
Interesting ditch light mounting on the prototype.
Steve....are you going to be adding ditch light on the model?? Bob
|
|
|
|
Post by Spikre on Jan 27, 2015 16:01:29 GMT -8
another nice week !! Mike, still getting the Lego Grid on Your pics ?? Walthers Russell Plow: has any one figured out an easy/painless way to convert the Plow to a Double Track Plow ? know it should be possible,but havnt come up with an easy solution yet. Brian, nice job on the DT&I plow !! removing lettering: used a piece of tissue soaked in Fantastic,removed Athearn and many others lettering if soaked over nite.just have to keep the tissue wet. if the lettering wouldn't come off more drastic measures would have to be used. rarely try to remove lettering any more,best to start with undecs if possible. Spikre 
|
|
|
|
Post by stevef45 on Jan 27, 2015 20:49:40 GMT -8
Interesting ditch light mounting on the prototype. Steve....are you going to be adding ditch light on the model?? Bob Sure do. I plan on using these detail west ditch lights. I thought I had a pair in my parts bin, i'll have to double check as i rushed through it before work.  Can anyone tell me what horn is on the cab roof, its a 3 chime just can't tell what. |
|
|
|
Post by sd80mac on Feb 2, 2015 12:49:54 GMT -8
It's a Nathan K3. The bells of the horn may be arranged in a way that hasn't been reproduced in HO yet.
|
|


