|
|
Post by riogrande on Mar 9, 2015 9:03:11 GMT -8
While I was born at Brooks Army Hospital in San Antonio, my dad was stationed at Randolph from 1959-1963, so I and my two younger sisters were born in Texas. So from Texas to Indiana (Bunker Hill - SAC squadron KC135, B58 and B52), then to Karat Thailand and finally Travis AFB, CA). Especially when my dad was flying over to Thailand and through the various bases and islands over there, he was bringing back stereo's for relatives and wood carvings right and left cause the prices were so cheap. BTW, I had a little fun on Saturday while running trains and shot a little video with my cheap smart phone - it had trouble focusing so maybe the train was running too fast? Video is 720p but ...   |
|
|
|
Post by canrailfan on Mar 9, 2015 11:15:53 GMT -8
Hi Mike,
Both your pictures taken in Auto Mode, blue LEDs on or off, have better colour rendition than the pictures processed with Photoshop. Does your camera have built-in colour correction when in Auto mode?
I can understand why you want to use AP mode, is there a way to have the camera apply the built-in colour correction other than using Auto mode?
Always enjoy your photos, and the story lines that go with them.
Cheers,
David
|
|
|
|
Post by mlehman on Mar 9, 2015 11:38:58 GMT -8
David, Thanks for your kind comments. I do enjoy the story lines, but I like those old Model Railroaders crammed with words, too. Imagine that?  I'd almost bet that the camera may have some correction capability. But solving this problem has been way down my list of prioroities. Trying to get my diss finished up (handed in draft last week found acceptable after some comments are addressed -- yippee!) but this late 50s brain can only hold so much info -- and I'm just now trying to figure out how to throw turnouts on my WiThrottles in JMRI. That will probably take up most of my extra synapse elbow room for the next two months before my defense. I've got a few project like this....  Still looking forward to what Mark has to say, although a consensus seems to be building it's not the blue LEDs, but the AP mode setting. |
|
|
|
Post by mlehman on Mar 9, 2015 11:49:03 GMT -8
While I was born at Brooks Army Hospital in San Antonio, my dad was stationed at Randolph from 1959-1963, so I and my two younger sisters were born in Texas. So from Texas to Indiana (Bunker Hill - SAC squadron KC135, B58 and B52), then to Karat Thailand and finally Travis AFB, CA). Especially when my dad was flying over to Thailand and through the various bases and islands over there, he was bringing back stereo's for relatives and wood carvings right and left cause the prices were so cheap. SNIP More small world department then. We were both at Randolph at the same time. We were there from 61-63, then to Williams in AZ, then back to Randolph for most of the rest of the 60s. Not quite sure what he was up to. A lot of hush-hush stuff, I think. I found one of his bosses at Randolph name's while he was assigned to the 4080th SRW at Laughlin prior to coming to Randolph. They were the AF U-2 outfit (in comparison to the CIA's) but their primary operations were centered on nuclear intelligence sampling at high altitude before that Cuba thing went down. Long story there in my diss...  Yes, you did not want to miss out on the good stereos while overseas back in the day. I saved up and bought mine right before we returned from Germany. |
|
|
|
Post by bdhicks on Mar 9, 2015 16:37:18 GMT -8
|
|
|
|
Post by mlehman on Mar 9, 2015 17:12:23 GMT -8
Brian,
Thanks, that seems to be helpful, at least what I see in the LCD screen seems to change some. Will experiment.
|
|
Deleted
Deleted Member
Posts: 0
|
Post by Deleted on Mar 11, 2015 17:56:39 GMT -8
I decided to tackle something completely different and try my hand at structure building. It is a model of UD Tower in Joliet IL. I cheated and used my mill to make most of the parts. The bay windows were scratch built, but luckily I designed photoetched windows for the rest of the tower. Scratch building windows sucks! 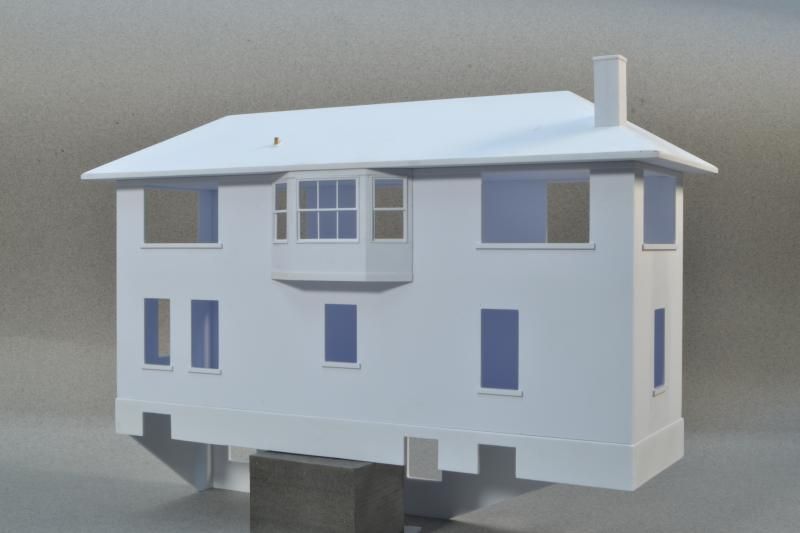 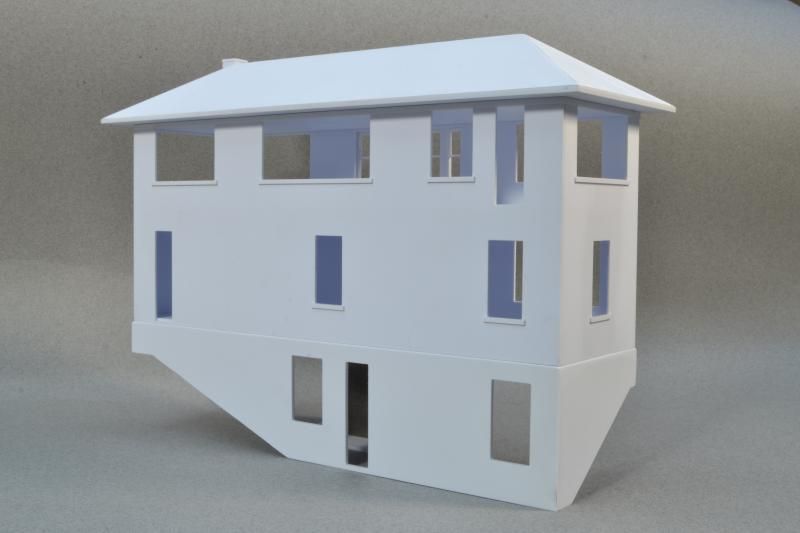 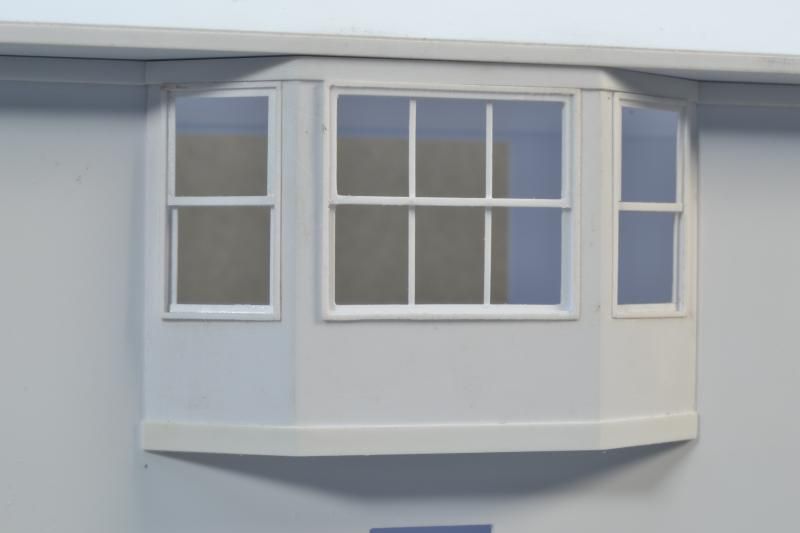 A great looking model. How did you build the bay windows? Styrene strips, machined, or?? What were the prototype exterior walls made of? |
|
|
|
Post by onequiknova on Mar 11, 2015 19:43:21 GMT -8
A great looking model. How did you build the bay windows? Styrene strips, machined, or?? What were the prototype exterior walls made of? Thanks. Are you asking about the windows themselves? The small outer windows were stick build with various sizes of strip styrene. The larger middle window was machined from a square of .060 sheet styrene. As long as it took me to figure out all the math and machine the window, I probably could have stick built two of them. It was a fun exercise though. The thin strips that divide the window pains were added from strips.  The prototype is build from what appears to be very tight fitting blocks of stone. I felt scribing the joints into the styrene itself would create an overly large line, but I have a trick up my sleeve I learned from the aircraft guys doing fine panel lines. I'll show how it's done when I get to it. |
|
gnfan
Full Member

Posts: 109
|
Post by gnfan on Mar 12, 2015 8:46:49 GMT -8
Do you intend to do some "panel shading"? That would work quite well on this. I'm looking forward to seeing the results.
David
|
|
|
|
Post by TBird1958 on Mar 12, 2015 8:50:07 GMT -8
A great looking model. How did you build the bay windows? Styrene strips, machined, or?? What were the prototype exterior walls made of? Thanks. Are you asking about the windows themselves? The small outer windows were stick build with various sizes of strip styrene. The larger middle window was machined from a square of .060 sheet styrene. As long as it took me to figure out all the math and machine the window, I probably could have stick built two of them. It was a fun exercise though. The thin strips that divide the window pains were added from strips. The prototype is build from what appears to be very tight fitting blocks of stone. I felt scribing the joints into the styrene itself would create an overly large line, but I have a trick up my sleeve I learned from the aircraft guys doing fine panel lines. I'll show how it's done when I get to it. The Santa Fe never looked better! Awesome F45's |
|
|
|
Post by onequiknova on Mar 12, 2015 20:06:17 GMT -8
Do you intend to do some "panel shading"? That would work quite well on this. I'm looking forward to seeing the results. David I plan to use the third technique described in this video. Basically, you paint the model with one color, then another on top. You then scribe through the top layer of paint, exposing the first. It should hopefully give me the thin lines I'm looking for. BTW, if you have time, check out that guys videos. He's a military modeler, but offers some interesting techniques and tips that transfer to any kind of modeling. |
|
|
|
Post by mrsocal on Mar 13, 2015 7:50:28 GMT -8
Thank you John, there are several great tip videos here. This one you are referring to is one I already use in the hair spray technique to reveal and chip out rust patterns and flaking paint.
|
|
|
|
Post by Mark R. on Mar 13, 2015 8:05:59 GMT -8
Sorry for the delay Mike ....
Yes, 1 and 3 definitely look better. The thing to look at are the known colors. We know the engine is pure black, not blue black. We also know the color of cork roadbed, and it doesn't have a blue cast to it. Things like your backdrop and the roof of the water tower are harder to judge because they "could" have a blue cast to them - we, as viewers, don't know that, only YOU would know that. It's when colors we as viewers KNOW what they are, we can see what is wrong.
Stick with what you did in photos 1 and 3 and I think you will be much happier with the results.
Mark.
|
|
|
|
Post by mlehman on Mar 13, 2015 22:20:11 GMT -8
OK, good to know the examples (1+3) worked for you. But I really need a setting on the camera to compensate. It's a real PITA to try to turn off the blue lights, which is why I picked the end of the line in Crater lake to do it by just disconnecting the last string of them. Brian since supplied me with specific instructions on how to adjust the color balance. I'm sure I could do this in Photoshop, too, but just would rather have it native to the camera. I simply used the Auto Color as the simplest, repeatable means to deal with it and didn't want to bother setting up a custom correction. Anyway, here's a test shot or two showing the adjustment I set according to the instructions Brian pointed me to. 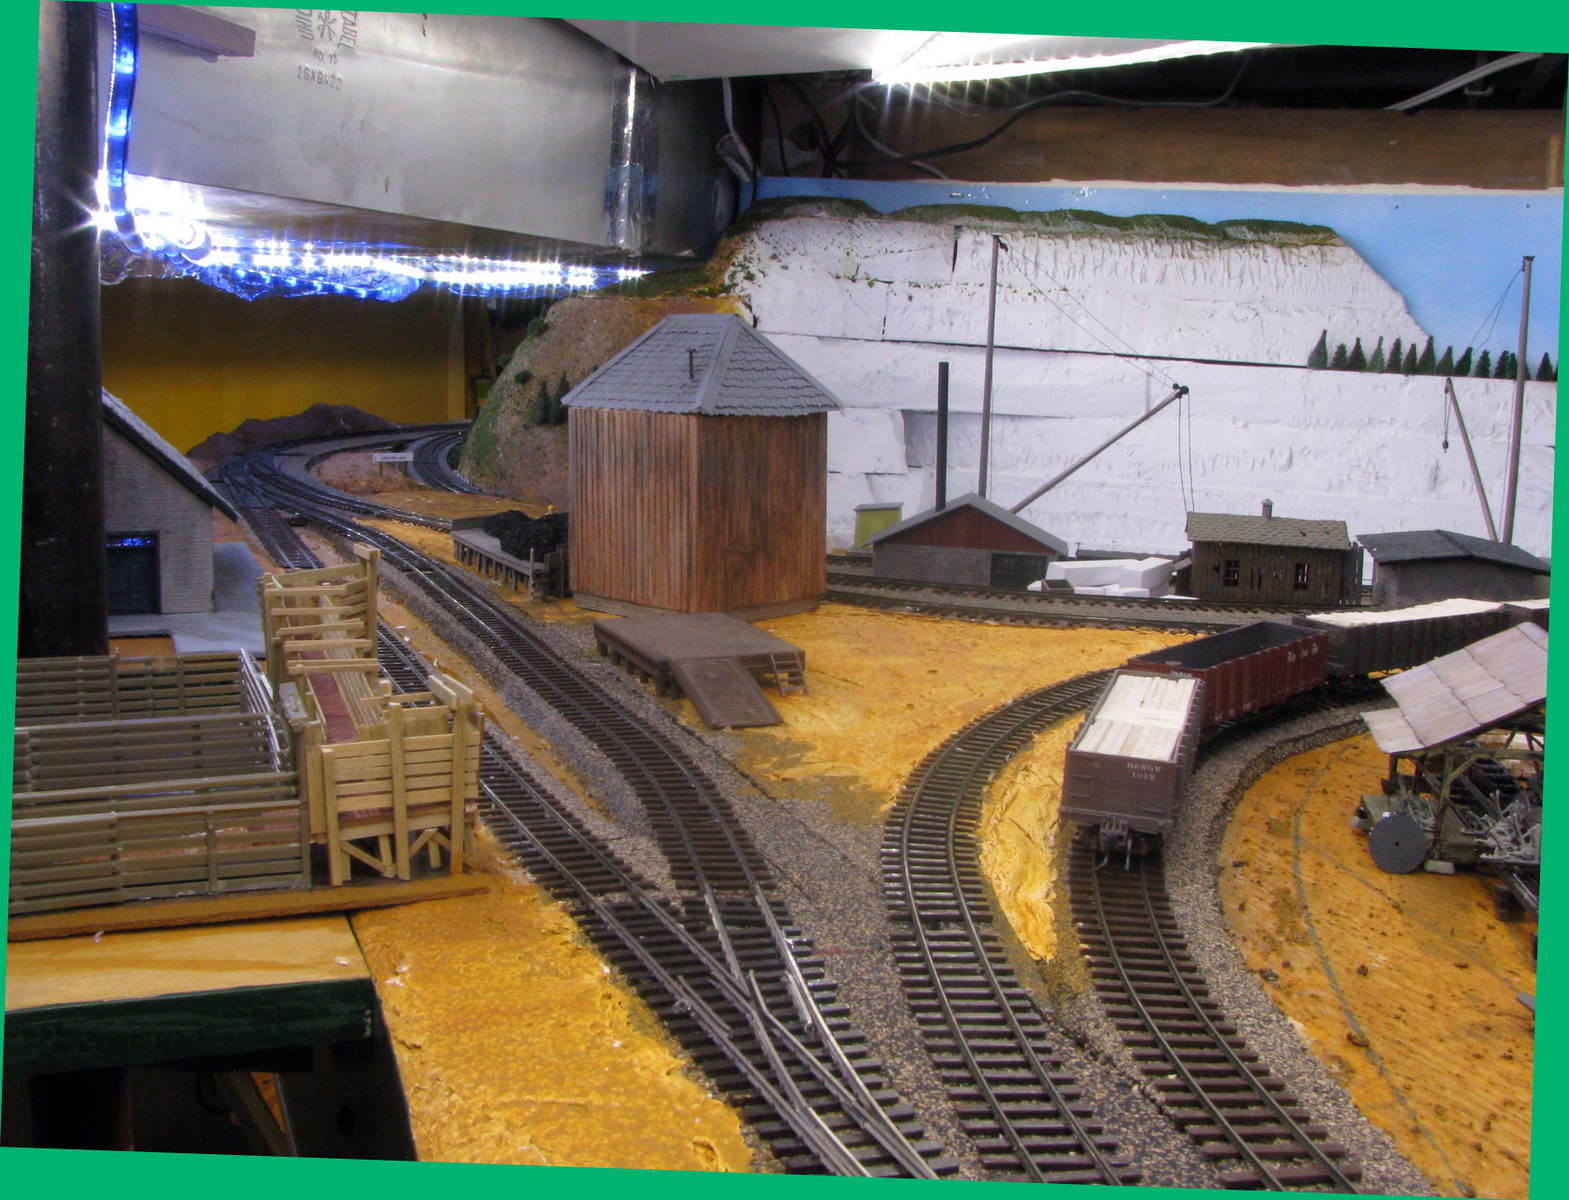 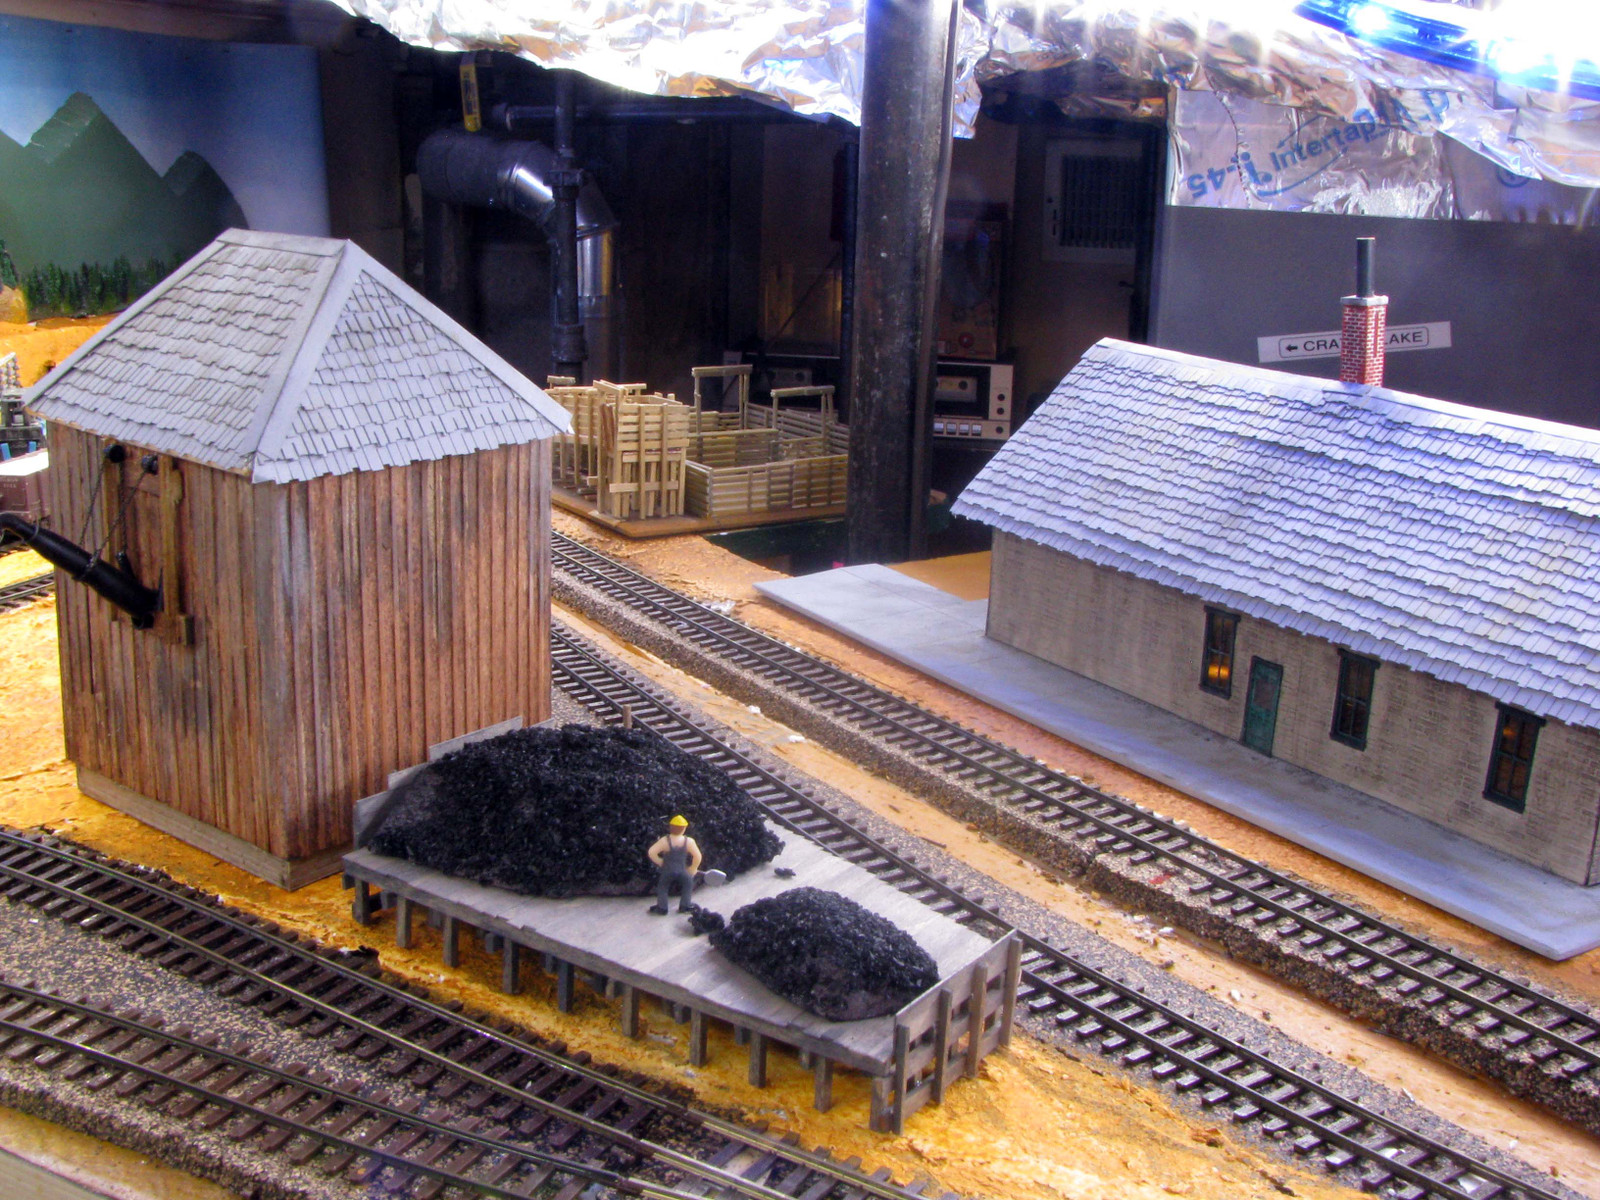 |
|
|
|
Post by nebrzephyr on Mar 14, 2015 5:21:44 GMT -8
Mike.....I think this may have already been mentioned, but look to see if your camera supports "custom white balance". If so, take a piece of something as white as you can find, focus the camera on it and set the custom white balance. Of course you would want to do this under the lights on the layout. Hope that helps. Bob
|
|
|
|
Post by Mark R. on Mar 14, 2015 9:49:46 GMT -8
Of the last two pictures, the first one is better for true colors. Most notable with your ceiling ductwork. We KNOW it's a silvery gray and it should not have ANY blue tint to it .... which it doesn't. The second picture has a bit of blue cast creeping back in (also looks to be slightly over-exposed which will cause the blue overcast), but not nearly as bad as your earlier pictures.
The idea of a custom white balance is an excellent idea if your camera supports it.
I think once you get this color balance worked out, your night shots will be much more dramatic as well .... night time isn't blue !
Mark.
|
|
|
|
Post by mlehman on Mar 15, 2015 0:35:09 GMT -8
Bob, Brian link discusses the manual white balance setting for my camera. It can be applied to any mode except for Auto. I set it for Aperture Priority and it helps substantially. Here's the shot I took of a white page with it. 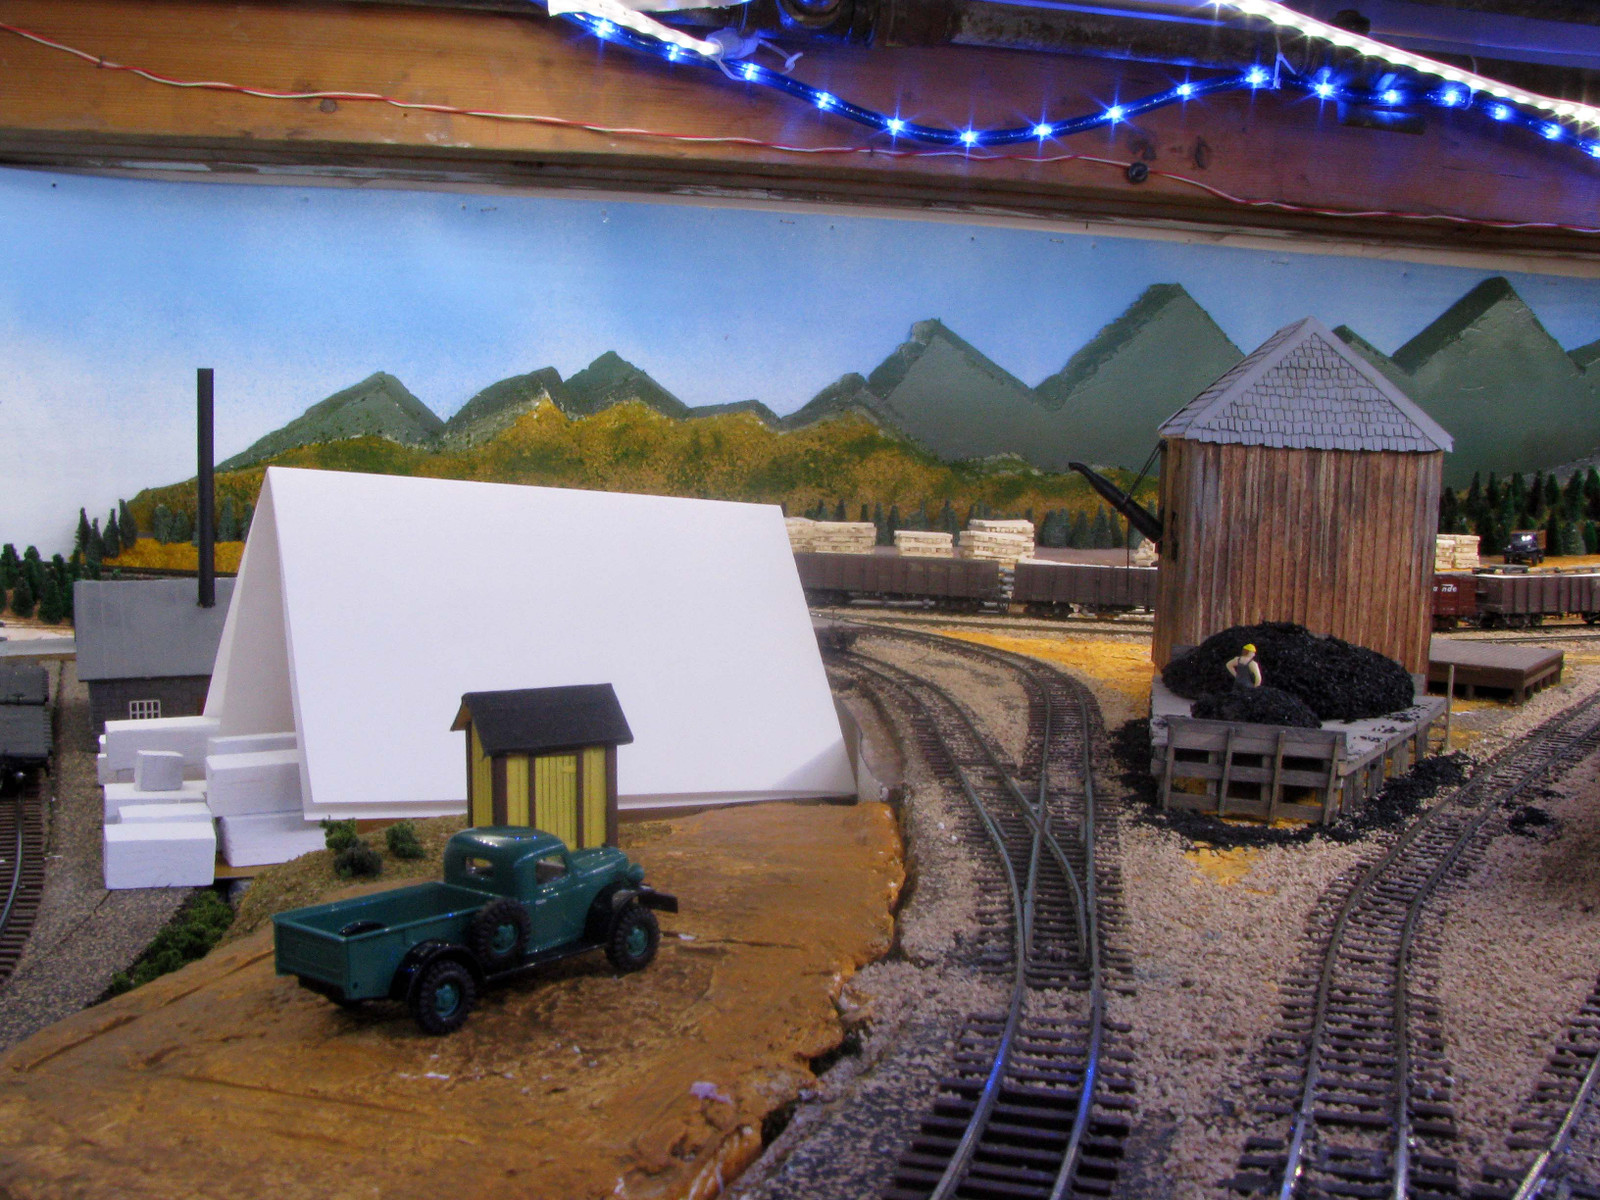 Mark, Both pics were taken in AP Mode with the white balance turned all the way in whichever direction seemed to help more. I wanted the first pic in because you can see the blue LEDs and they're not making everything blue with that setting. The blue you're seeing in the second set is probably due to the Tamiya weathering powder on the roof of the station as much as anything. The roof takes on a blue cast to the naked eye, so I suspect the camera is only recording what it sees fairly accurately. Blue lighting for night scenes is the option that works best for me. Yeah, that's not what the moon and stars give, but it makes the markings I've highlighted visible. And there's enough light that white lighting isn't needed except what emanates from the lighting on the layout. I've found in discussing this issue with folks that everyone has an opinion on it, some bad, some good. Short of buying my crews night vision, it works. |
|
|
|
Post by nebrzephyr on Mar 15, 2015 6:13:37 GMT -8
Mike.....that shot look pretty darn good. The color of the floor/ceiling joist looks good, so I'd say the colors are pretty spot on. Bob
|
|
|
|
Post by Mark R. on Mar 15, 2015 7:58:52 GMT -8
Yep - that last shot looks spot on. As I mentioned before, when known objects - floor joist, ductwork, white board - are displaying their true KNOWN colors (to the viewer), everything else will just be assumed correct.
Mark.
|
|


