|
|
Post by ssw on Mar 22, 2015 4:30:35 GMT -8
Hope no one minds me jumping in and starting this this week, I'm fixing to be out of pocket for the day and not sure if I'll be around my computer later. Finished another cylindrical hopper this week. Bought 3 Atlas ACF undecorateds from a club member for $5 each, the first one became the Mop car from a couple weeks ago. I decided since I didn't have any PC equipment, a green covered hopper was in order. Polly Scale PC Green paint, with Highball Graphics decals.  Bradley |
|
|
|
Post by dti406 on Mar 22, 2015 5:22:27 GMT -8
Bradley, thanks for starting and a good effort, nice neat lettering on that car. I have also been working on some other kits while building that hot coil car.  ExactRail PS 5344 Boxcar Kit, painted with Scalecoat II Boxcar Red and Floquil Platinum Mist (Roof). Car was then lettered with Oddballs Decals.  Intermountain Railway ACF 2980CF Covered Hopper Kit, substituted A-Line Sill Steps for the plastic kit sill steps. Painted with Scalecoat II MofW Gray Paint and lettered with Herald King Decals.  Intermountain Railway 50' PS1 Boxcar Kit with Two Plug Doors, substituted A-Line Sill Steps for the cast plastic steps, painted with Scalecoat II Black and lettered with Herald King Decals. Thanks for looking, and I can't wait for the other contributions I know will be coming. Rick J |
|
|
|
Post by mlehman on Mar 22, 2015 5:25:04 GMT -8
Bradley, Nice looking PC car. I always have a soft spot for the underdog, plus I just like the logo.  I spent much of my modeling time this week finishing up the initial build-out at Crater Lake at the end of the Cascade Branch. There's a quarry there, but the stone is hauled to the mill at Purgatory, because the altitude and general atmosphere in Crater Lake mean most with families prefer to live at lower elevations. Additional traffic is provided by a tie mill and fuel dealer, plus the usual assortment of freight found bound to and from a small town dependent on the RR. Timber is brought to the mill by trucks and dozers with arches. It must be Sunday, because the trail into town the loggers use is quiet, except for the boss's PowerWagon. 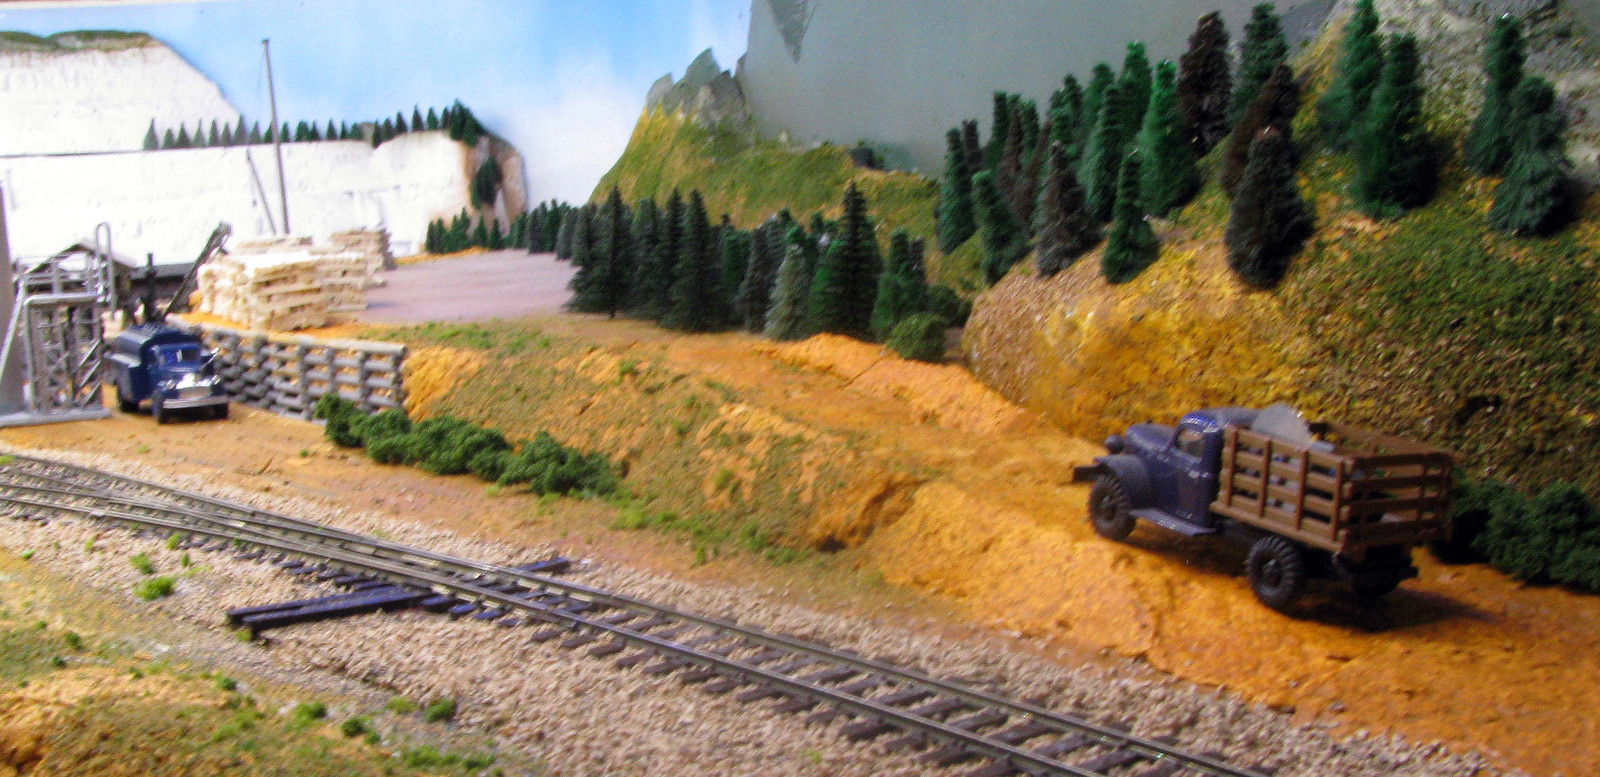 The tie mill is right in front of "downtown" Crater Lake, which has a handy nearby saloon, among other amenities provided by my low-budget AHM paper Ministructures. I paid less than $15 for three of them and still have lots of structures and details left over. They're not really foreground models, but work quite well in the background. 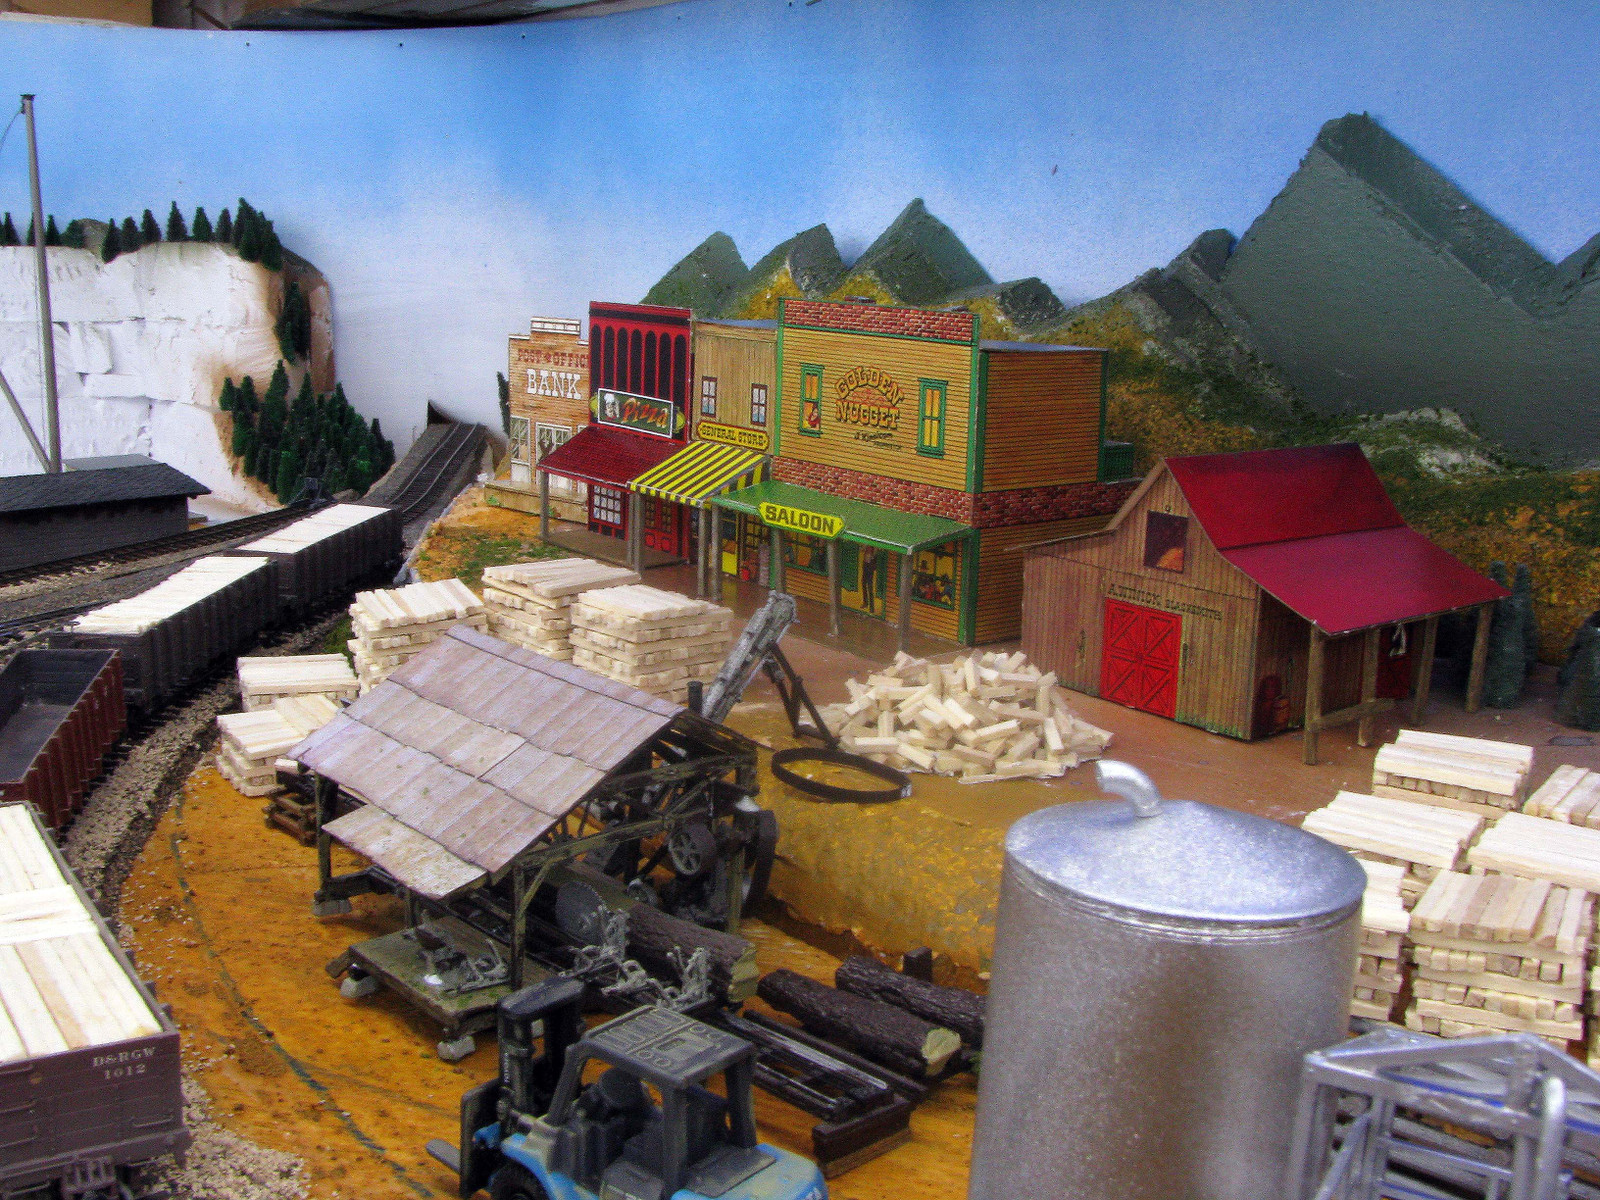 On the other side of the wye are the limited service facilities, including even more coal for James on what appears to be a bright spring day. 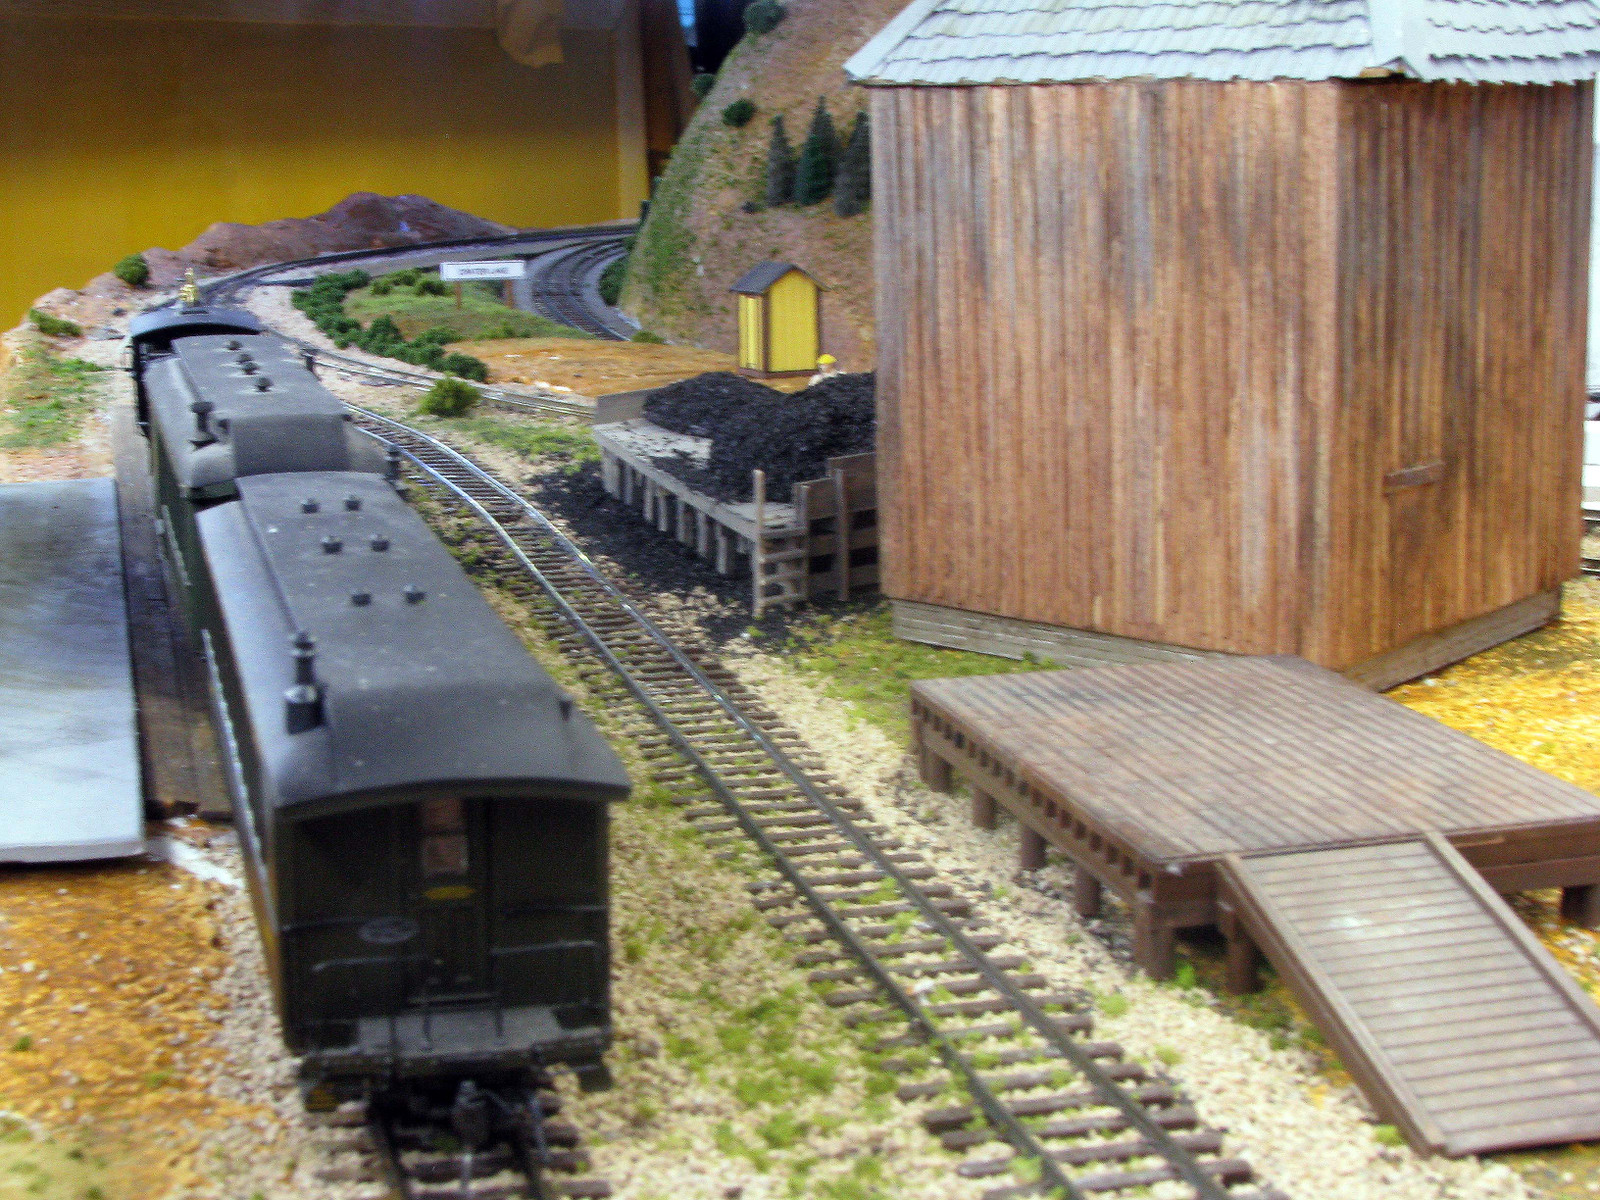 I built a light bar/fascia to hold the LED lighting at a better angle and got rid of the ugly duct tape holding it up in this overview. 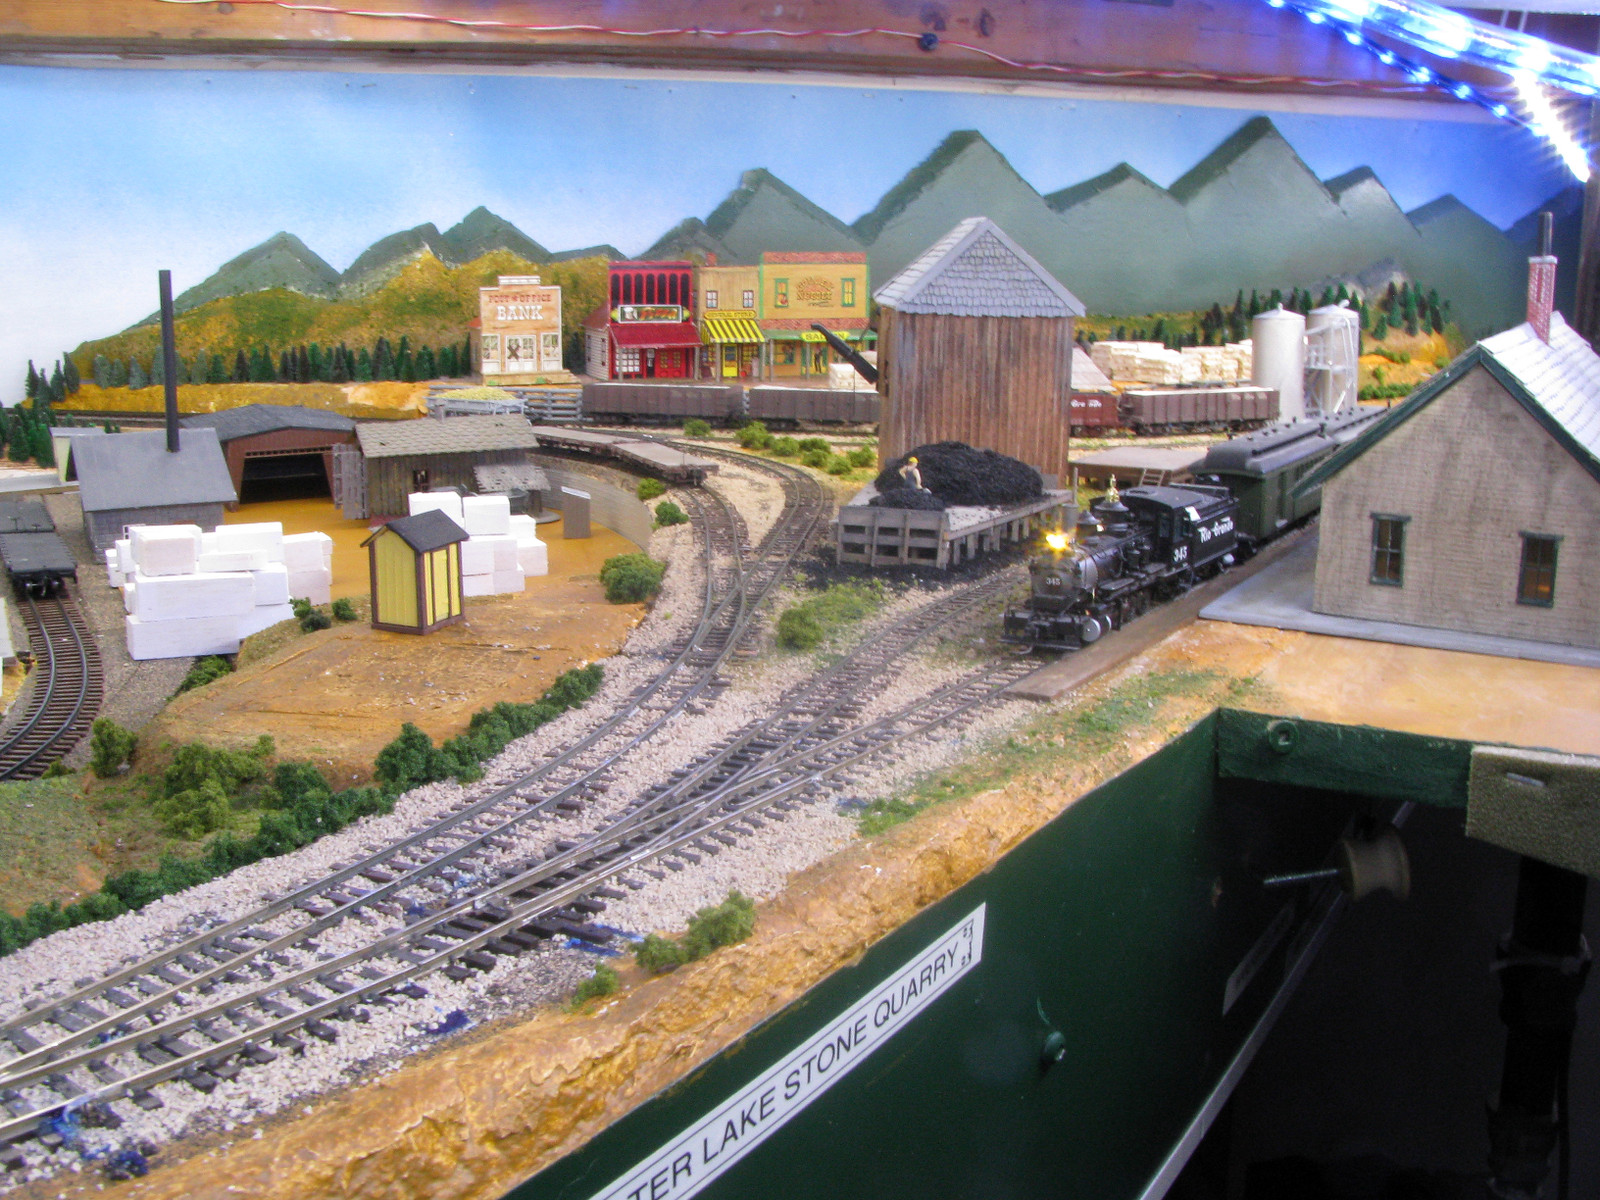 Finally, having bought a glider at the local train show last weekend, I modified the miner's union Beaver to act as its tug. 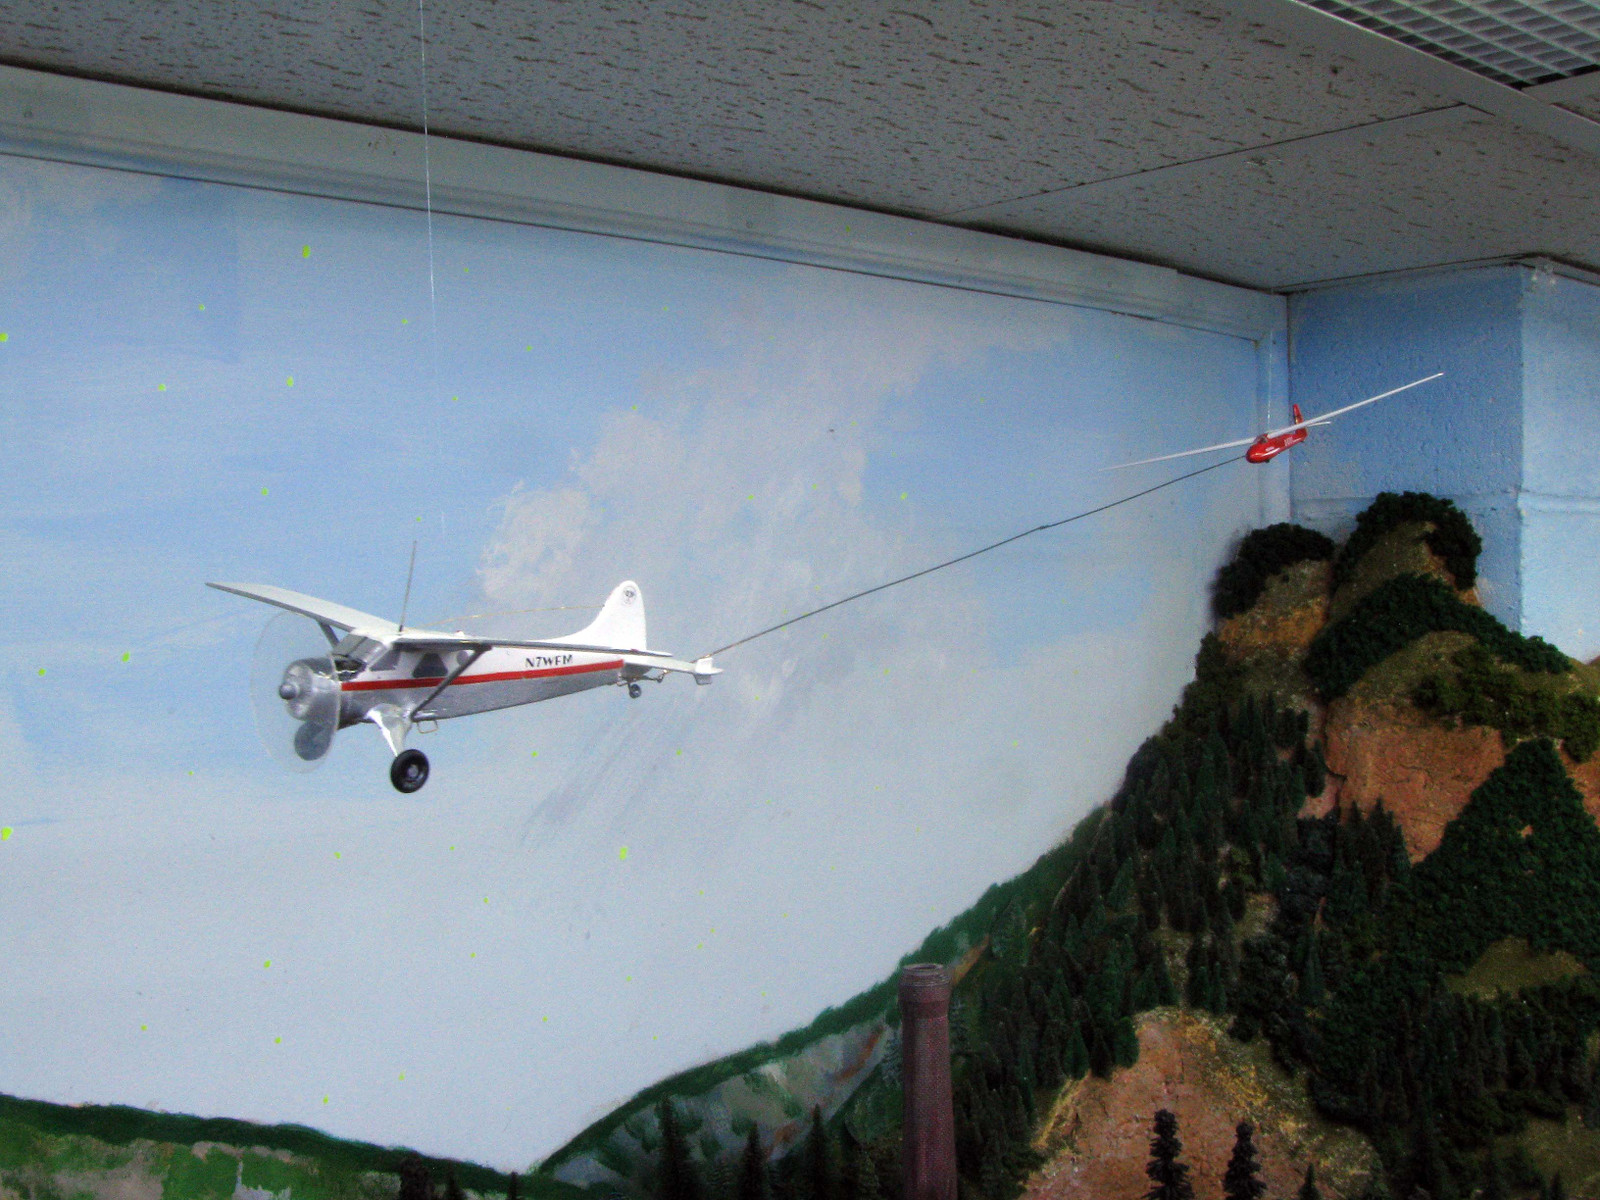 |
|
djh4d
Full Member

Posts: 205
|
Post by djh4d on Mar 22, 2015 5:55:56 GMT -8
Nothing much for me, but I did catch the latest addition to the fleet cruising the yard: CSXT 1115 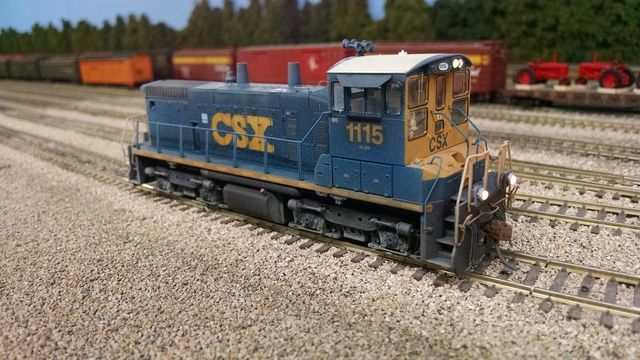 Mike, your pictures look much brighter since you changed your camera settings. Enjoy, -Dave |
|
|
|
Post by brotherlove on Mar 22, 2015 6:17:05 GMT -8
Very nice work here this morning!
I finished several GM&O cabooses this week.
|
|
|
|
Post by mlehman on Mar 22, 2015 7:08:32 GMT -8
SNIP Mike, your pictures look much brighter since you changed your camera settings. Enjoy, -Dave Nice work on that car loco, Dave. The camera adjustments helped, but I rearranged the lighting a little less haphazardly, too. I made a small, skinny fascia for the LED lighting out of 1x2s. You can see it here along the edge of the duct work above the layout. 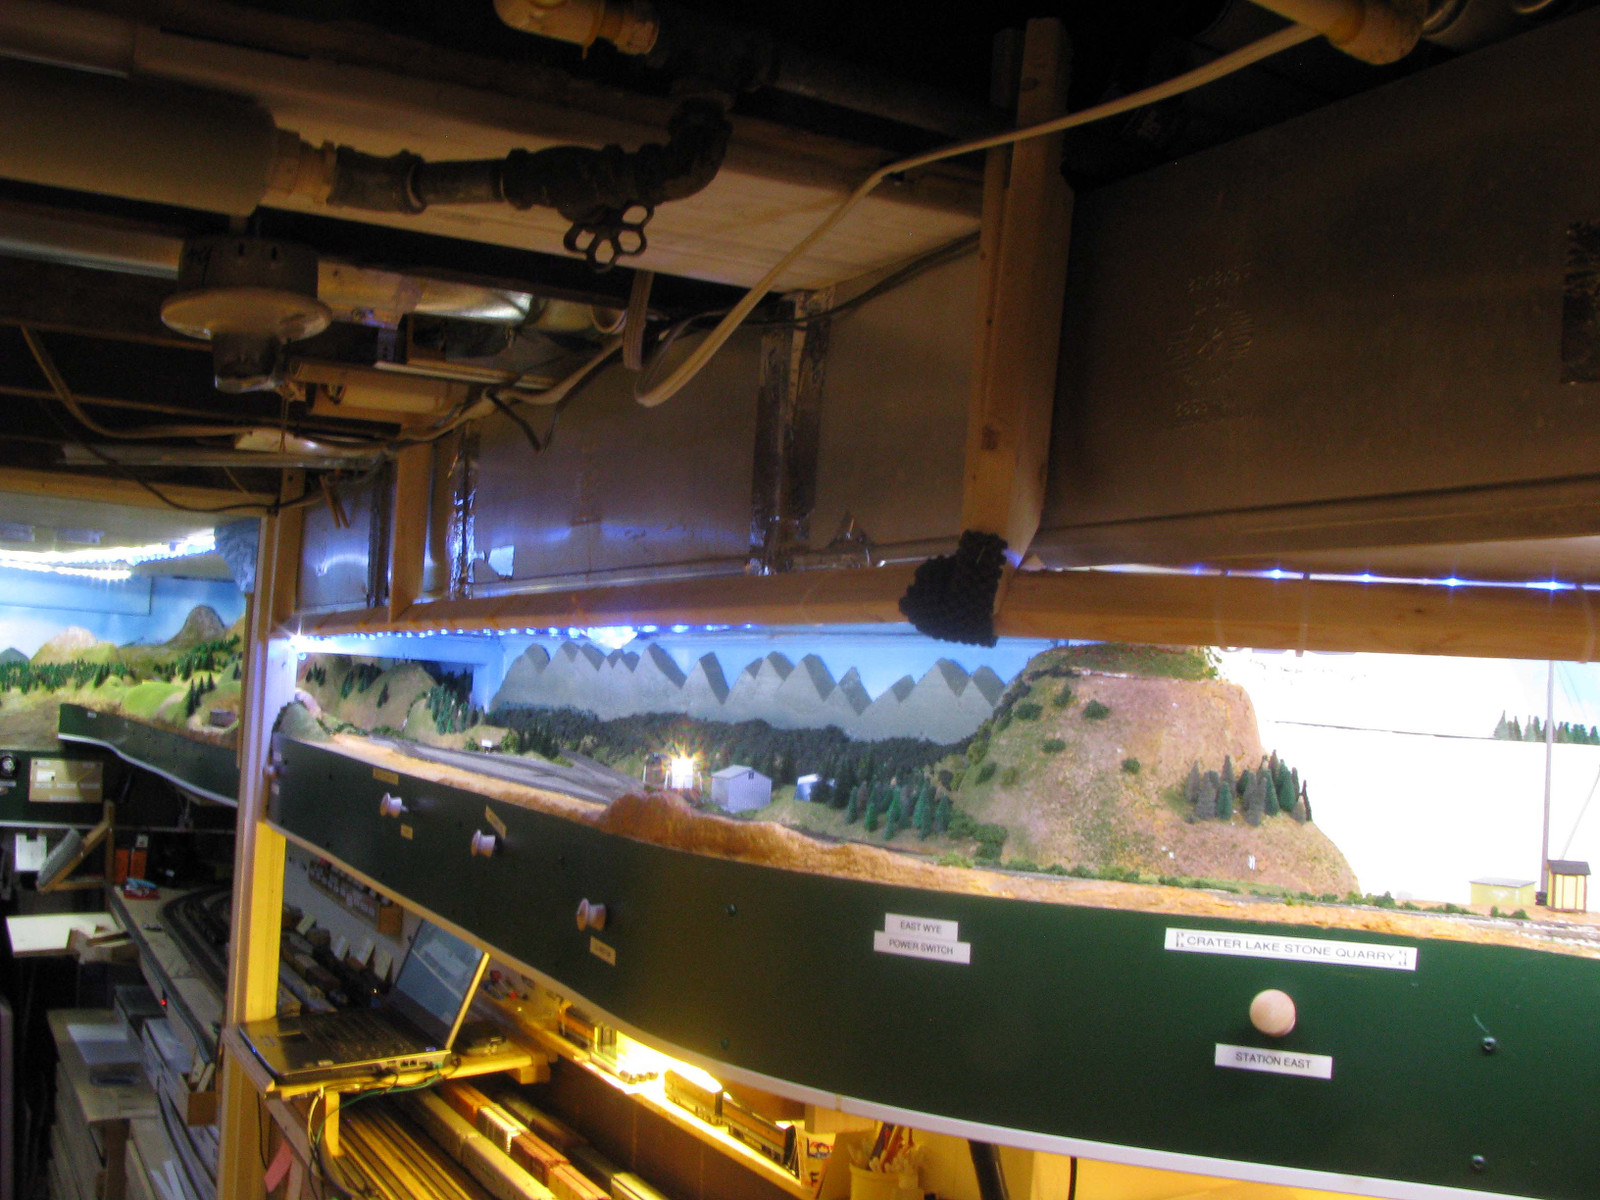 |
|
|
|
Post by TBird1958 on Mar 22, 2015 8:15:31 GMT -8
Nice work work everybody! Here's what's on the bench for me this week - I have to give credit to Bradley (SSW), he posted an in process shot, then a pic of his finished model last week, and of course Bobby Pitts' finished Flexi Flow both served as inspiration to build this Missouri Pacific ACF 3700. Thanks guys! I really thought I had the decals laying around, wrong! So I'll need to find some this week, question is: Since it's supposed to be 1975, what would be most appropriate? A well worn large buzzsaw herald, or perhaps repainted with the eagle/buzzsaw (my fave)I prefer Microscale but if someone else is producing the correct ones that's cool too. Hopefully I'll hear from some of you MoPac guys. Fun with Plano parts!  Here's a couple more from the last time I got to shoot.....Still not sure about this pic tho, I think I'll need to take this car outsude to get the shot I really want of it.  |
|
|
|
Post by tankcarsrule on Mar 22, 2015 10:10:56 GMT -8
Mark, that hopper looks great!!! The Seaboard box is a treat for the eyes, great work and photos.
Regards, Bobby
Savannah RPM----3-27-15 Christmas comes early!
|
|
|
|
Post by gtws00 on Mar 22, 2015 11:18:12 GMT -8
Nice work so far everyone. Here is a photo of a Milwaukee Road Tower in North Milwaukee, Wis. It is still in progress and complete from scratch. Windows are made up using Evergreen Styrene strips and Brick is from Proto87. You will see some things crooked are not aligned as windows and Brick to foundation will all be glued after painting.  Next up is chimney, gutters, shingles, stairs, paint and interior w lights George Toman |
|
|
|
Post by TBird1958 on Mar 22, 2015 12:11:00 GMT -8
Thanks Bobby!
|
|
|
|
Post by peoriaman on Mar 22, 2015 12:26:37 GMT -8
Progress on the Tichy tank I posted undecorated a couple weeks ago. I used Champ decals on this because the Tichy decals had a weird 3-d thing going on with them (kind of like Archer rivets, except its lettering!). I dusted it with Grimy Black but may revisit the weathering later. 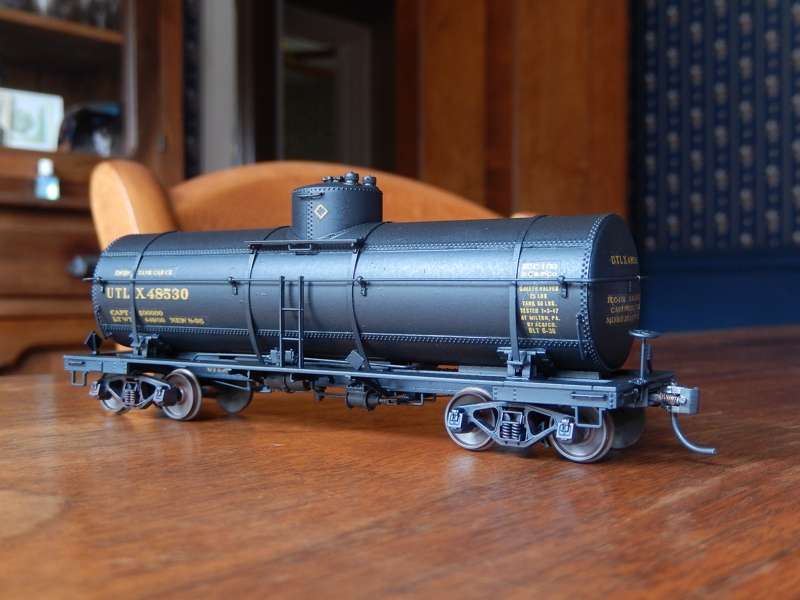 |
|
|
|
Post by brotherlove on Mar 22, 2015 12:33:07 GMT -8
Peoriaman, I love tank cars and that is a beauty. Is the Tichy kit difficult? I tried the wrecking crane and it took forever to build.
Malcolm
|
|
|
|
Post by onequiknova on Mar 22, 2015 12:38:03 GMT -8
|
|
|
|
Post by peoriaman on Mar 22, 2015 12:52:03 GMT -8
Peoriaman, I love tank cars and that is a beauty. Is the Tichy kit difficult? I tried the wrecking crane and it took forever to build. Malcolm Thanks! The Tichy kits have tons of parts but they are manufactured perfectly and since they're styrene they glue easily with solvent cement. I bet there's close to a hundred parts in that tank car! But aside from a few tiny parts which are hard to hold (such as the handrail stanchions), they go together pretty easy. Everything fits correctly which goes a long way towards making a pleasant project. |
|
|
|
Post by TBird1958 on Mar 22, 2015 13:01:30 GMT -8
That's a great technique to bring up the brick work - very impressive result!
|
|
|
|
Post by peoriaman on Mar 22, 2015 13:07:00 GMT -8
That's a great technique to bring up the brick work - very impressive result! Took me a minute to realize its a model and not a computer generated image!  |
|
|
|
Post by onequiknova on Mar 22, 2015 13:26:39 GMT -8
Nice work so far everyone. Here is a photo of a Milwaukee Road Tower in North Milwaukee, Wis. It is still in progress and complete from scratch. Windows are made up using Evergreen Styrene strips and Brick is from Proto87. You will see some things crooked are not aligned as windows and Brick to foundation will all be glued after painting. Next up is chimney, gutters, shingles, stairs, paint and interior w lights George Toman Who's gutteres do you plan to use? |
|
|
|
Post by SOMECALLMETIM on Mar 22, 2015 15:08:44 GMT -8
Great looking Mopac 3700 covered hopper. I have two of these cars on my future to-do list. For 1975 the cars would have still been painted in the large buzzsaw logo. The earliest repaints I have for the 3700 covered hoppers with the screaming eagle buzzsaw is Feb 1978. Interesting to note is that in that month DeSoto repainted some with the large buzzsaw while painting several others with the screaming eagle scheme. The Mopac was still taking cars delivered new with the buzzsaw logo in 1977. Most photographic evidence that I've seen has shown the repaint with screaming eagle buzzsaw logo for Mopac cars in general started in 1978 and continuing through 1982. Oddball decals produced a decal for these scheme that did two cars. I believe the number is 321. I was lucky to find one of these decals. I want to say Herold King also produces the decal. If I had a choice it would be to see if Mask Island would produce a newer decal. I recently purchased a few slides and I'll get them scanned and see if Mask Island will consider producing the decal. Nice work work everybody! Here's what's on the bench for me this week - I have to give credit to Bradley (SSW), he posted an in process shot, then a pic of his finished model last week, and of course Bobby Pitts' finished Flexi Flow both served as inspiration to build this Missouri Pacific ACF 3700. Thanks guys! I really thought I had the decals laying around, wrong! So I'll need to find some this week, question is: Since it's supposed to be 1975, what would be most appropriate? A well worn large buzzsaw herald, or perhaps repainted with the eagle/buzzsaw (my fave)I prefer Microscale but if someone else is producing the correct ones that's cool too. Hopefully I'll hear from some of you MoPac guys. Fun with Plano parts! Here's a couple more from the last time I got to shoot.....Still not sure about this pic tho, I think I'll need to take this car outsude to get the shot I really want of it. |
|
|
|
Post by gtws00 on Mar 22, 2015 15:55:05 GMT -8
John, I am using Rix Gutters  George |
|
|
|
Post by hifibri on Mar 22, 2015 16:01:18 GMT -8
Nice work so far everyone. Here is a photo of a Milwaukee Road Tower in North Milwaukee, Wis. It is still in progress and complete from scratch. Windows are made up using Evergreen Styrene strips and Brick is from Proto87. You will see some things crooked are not aligned as windows and Brick to foundation will all be glued after painting. Next up is chimney, gutters, shingles, stairs, paint and interior w lights George Toman Nice! I'm originally from north suburban Milwaukee. Where was this building located? |
|
|
|
Post by gtws00 on Mar 22, 2015 16:26:50 GMT -8
This North Tower was located at the Wye at the beginning of the Beer Line. I worked from photos as the tower has been torn down.
George
|
|
|
|
Post by onequiknova on Mar 22, 2015 16:48:24 GMT -8
John, I am using Rix Gutters George OK. I used Pikestuff, which I assume is the same thing. I like the profile, but wish they were a bit longer. I found the size of the gutters vary slightly, making seamless splicing impossible. I originally ordered Micro Engineering gutters, but they're huge and have no shape to them. |
|
|
|
Post by gtws00 on Mar 22, 2015 17:16:51 GMT -8
John, yes those are the same. I had the same problem with the short length and varying size. I also got a pack of the way oversized micro engineering gutters. I do like the appearance of the Pikestuff.
George
|
|
|
|
Post by ssw on Mar 22, 2015 18:59:39 GMT -8
Very nice work as usual everyone!
TBird- I used a Microscale set for 2 bay MP/TP/C&EI Cement hoppers - my screaming eagle is from that set - turned the numbers into a number jumble. Data I used from another MS set.
|
|
|
|
Post by nsfantodd on Mar 23, 2015 7:24:42 GMT -8
|
|
|
|
Post by drolsen on Mar 23, 2015 7:30:12 GMT -8
Nice work so far everyone. Here is a photo of a Milwaukee Road Tower in North Milwaukee, Wis. It is still in progress and complete from scratch. Windows are made up using Evergreen Styrene strips and Brick is from Proto87. George, your tower and John's look fantastic. I can't wait to see the finished models. I hadn't realized that the Proto:87 Stores were selling brick sheet now. Does the brick size look good to you? I know that some brands have an undersized brick pattern, so I've hoping to find some that are sized correctly so I can count the brick rows to help determine structure dimensions. Thanks for sharing! Dave |
|
|
|
Post by TBird1958 on Mar 23, 2015 8:04:09 GMT -8
Thanks Rick, Nate and Bradley for the MP decal info and paint dates - I'll probably make it the original Buzzsaw herald even though I like the Eagle better, it'll fit my time line and offer the chance to weather the car and include an ACI plate.
Todd - I used that very pic to model the "A" end of the car! Had it up on my laptop next my desk as visual reference, the internet is quite useful at times. We modelers owe all of you photogs a great debt for the pics that make our projects possible - Cheers, and thank you.
|
|
|
|
Post by gtws00 on Mar 23, 2015 9:21:45 GMT -8
Dave, I really enjoyed working with the brick sheets. The styrene sheets are about .022 thick allowing me to put a 45 degree bevel to get nice corners. It also cuts nicely.
George
|
|
|
|
Post by fr8kar on Mar 24, 2015 8:48:30 GMT -8
Wow, I love the interlocking towers this week. Seems like some of us are on the same wavelength or something like that. One of my friends has decided to build a model of Dallas Union Terminal in the form of a Free-mo module. I've been helping him finalize the design in AutoCAD (it's going to be 21' x 55'!). When it came time to figure out which kit to use to build the nearly identical interlocking towers at each end of the terminal - Tower 106 on the north end and Tower 107 on the south end - it became obvious scratchbuilding was the only option. After using Shapeways to 3D print a few things for myself, I decided to take a couple field trips to photograph and measure the prototype towers, which are rare for Texas interlocking towers since both are still standing largely unmodified in their original locations. After several revisions, I have the two towers ready to print. Here are the preview images of the assembled kits: Tower 106 "North Tower"  Tower 107 "South Tower" 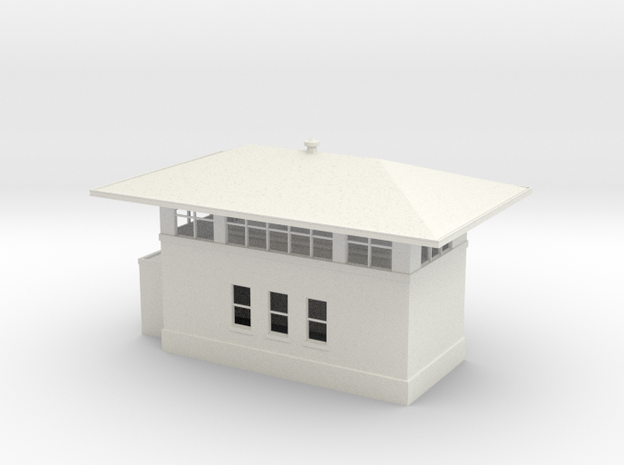 Although they look quite similar in size, Tower 107 is a bit smaller (2 feet shallower in depth and 7 shorter in length). Both feature a simple interior with an electric interlocking machine (small knobs and levers on a big "table" instead of the large levers you might expect) and a large vertical panel display, which is based on a 1917 photo of the interior of Tower 106. I'm looking forward to getting these in the mail soon. It should be a fun project to paint them, add shingles, chairs, desks and glazing. |
|
|
|
Post by gtws00 on Mar 24, 2015 9:19:45 GMT -8
Ryan, those look very nice. Please post updates as you progress
George
|
|


