|
|
Post by kentuckysouthernrwy on Oct 23, 2012 9:55:14 GMT -8
I have lighted the drumhead and tail light on the tail end car on my El Capitan train 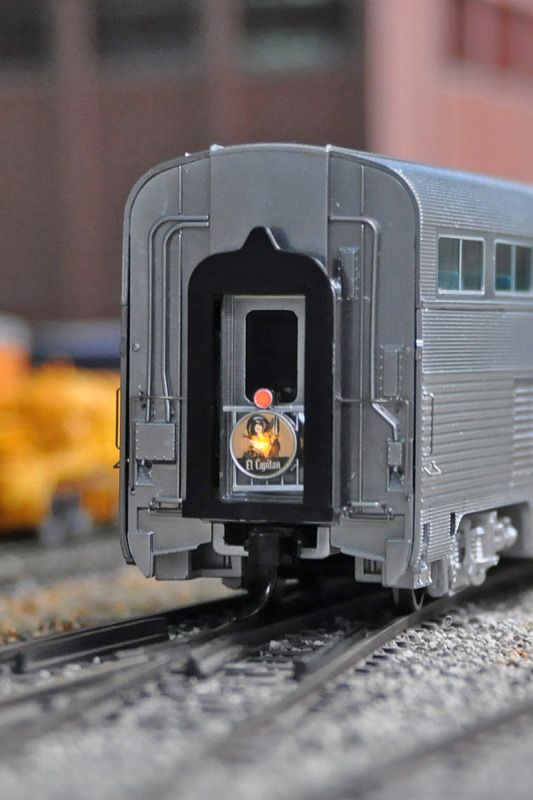 To do the project I had to disassemble the car 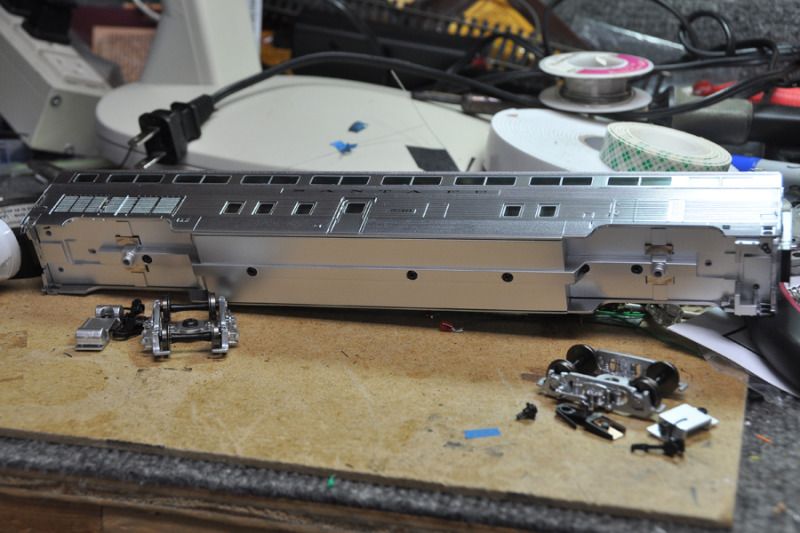 The tail piece removed shows the modifications to hold the fiber optics that pass through holes drilled through the 'door' and attached to the back of the red tail light and the El Cap drumhead. Sorry no photos of that step. 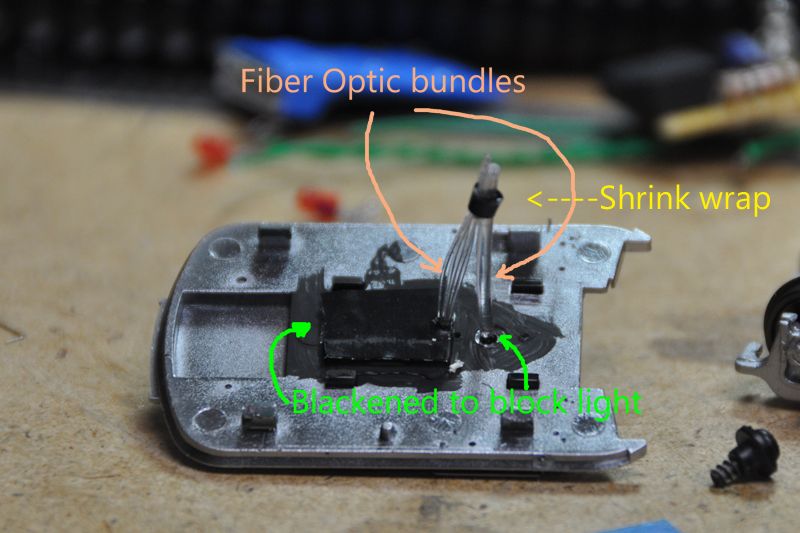 Inside the rear I drilled a hole through the steps 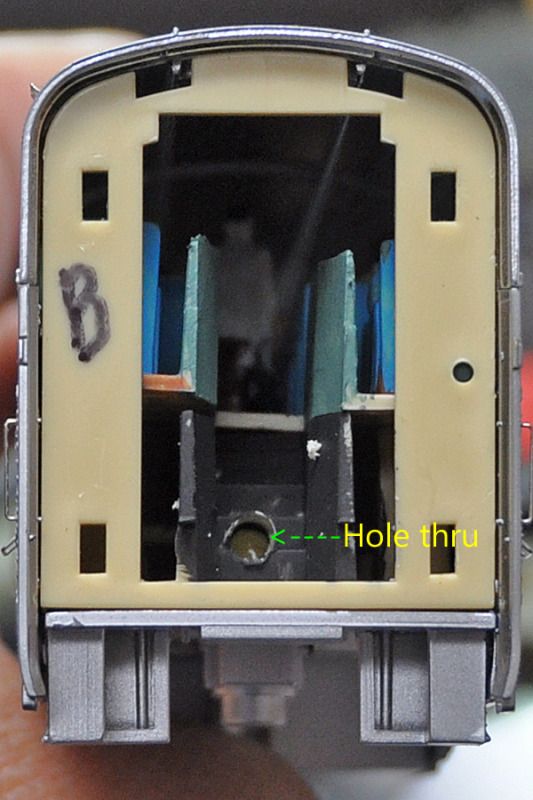 This shows the circuit board I made up 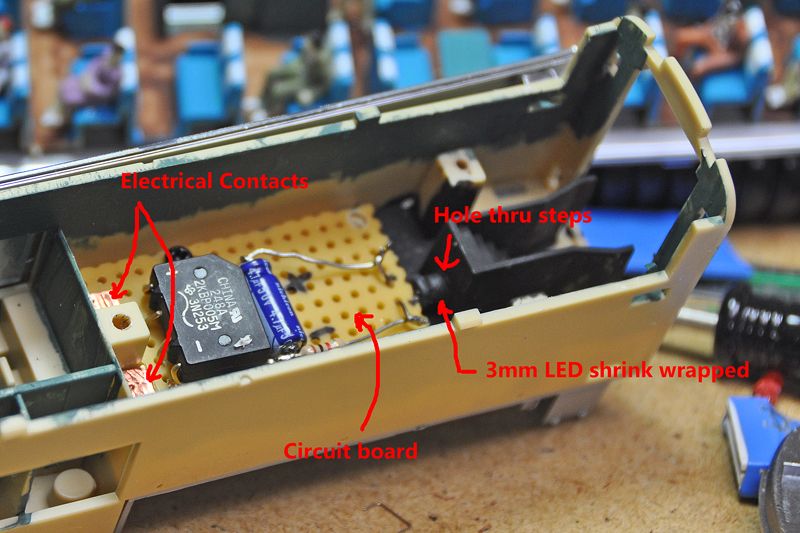 Bottom of circuit board 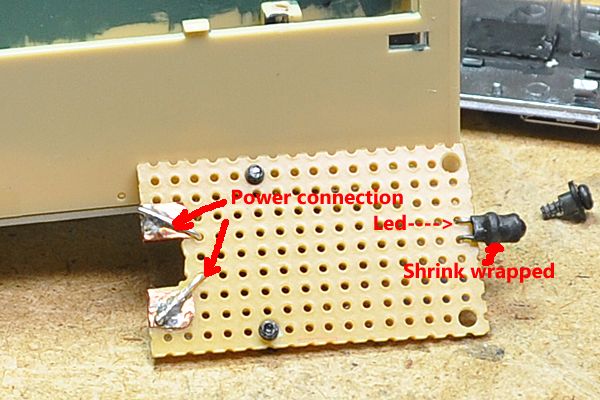 Factory contacts to track power 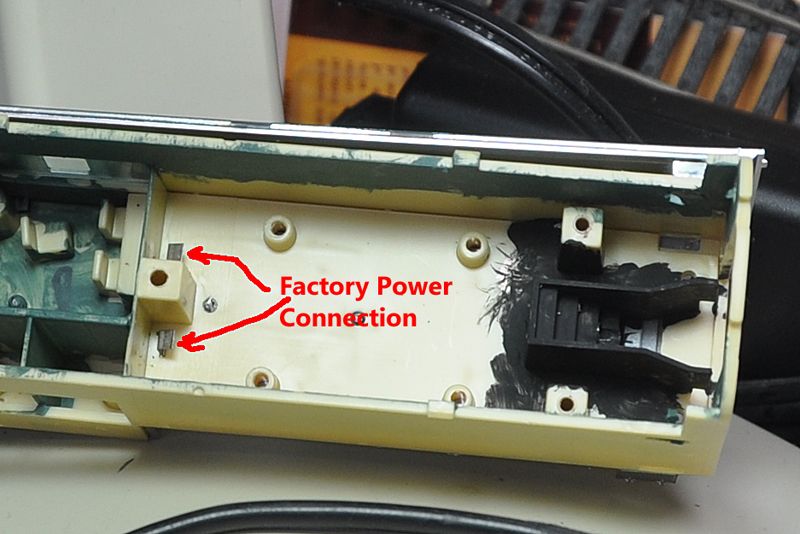 Re assembled 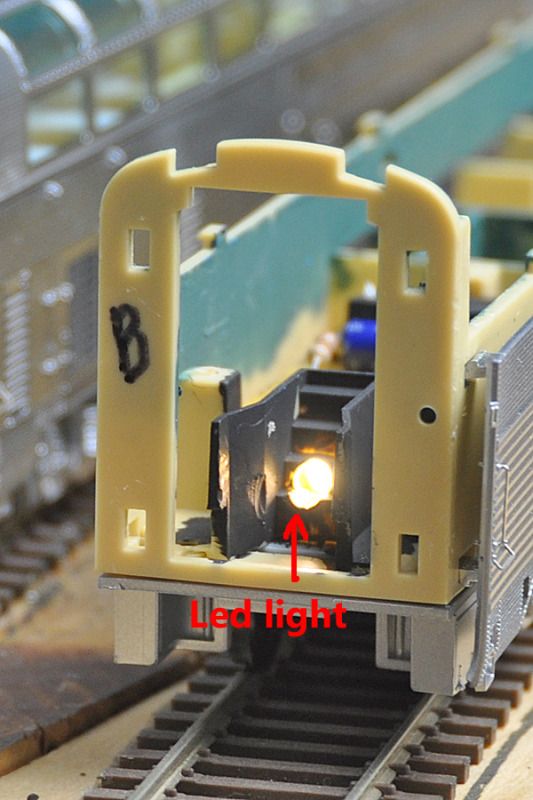 On the road again 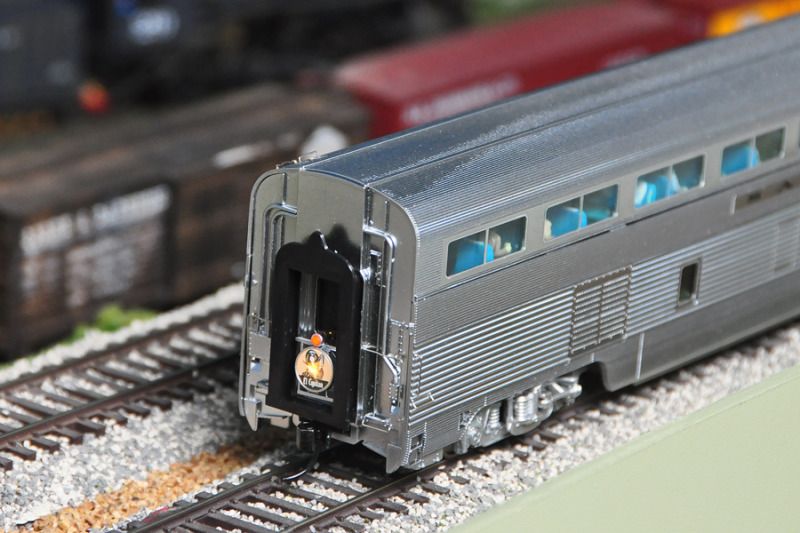 |
|
|
|
Post by calzephyr on Oct 23, 2012 13:13:05 GMT -8
Karl
Thanks for posting. I appreciate the pictures and purchased an extra rear coach car yesterday just for the purpose of doing some experiments. I was not sure the drumhead the could be lighted as the back is solid . Did you remove the back of the drumhead for the light to shine? The drumhead is solid on the backside and I wanted to know if you drilled a hole or removed the total backside of the drumhead. The fiber Optics looks like it worked well.
I installed the regular lighting overhead so my power source is already in and working.
Thanks
larry
|
|
|
|
Post by kentuckysouthernrwy on Oct 23, 2012 13:20:24 GMT -8
Does the little gate portion that has the drumhead and light on it come off of your car end? If I recall I had to drill holes for the fiber optic to go through the door but not the parts attached to the gate.
|
|
|
|
Post by calzephyr on Oct 23, 2012 13:40:58 GMT -8
Does the little gate portion that has the drumhead and light on it come off of your car end? If I recall I had to drill holes for the fiber optic to go through the door but not the parts attached to the gate. Karl I took it apart but it is back in place today. That makes sense since the delux version had the drumhead lighted. I will check that out. Larry |
|
|
|
Post by mlehman on Oct 23, 2012 17:23:54 GMT -8
Nice work. Containing the light to get it to come out where it should -- and not where it's not -- is the difficult part of these installs. This looks great, nice intensity for the illumination without overdoing it.
Might step up the resistance on the LED just a tad and that will help make the bright spot in the middle disappear, while leaving the rest just right as you have it now.
|
|
|
|
Post by antoniofp45 on Oct 24, 2012 1:58:21 GMT -8
Karl, Thanks for posting your the step by step process. One request: Please post a couple of "night time" scene shots with the lighted drumhead and interior.  |
|
|
|
Post by upwpfan on Oct 24, 2012 8:05:33 GMT -8
Karl;
An excellent application. Can you post or send me your circuit diagram and parts list for your constant lighting system. I would appreciate it.
Thanks
Jere Ingram
|
|
|
|
Post by kentuckysouthernrwy on Oct 24, 2012 14:31:06 GMT -8
Karl, Thanks for posting your the step by step process. One request: Please post a couple of "night time" scene shots with the lighted drumhead and interior.  I've not lit the interior yet. That is beyond my time budget these days. Surely would be doable. Here is a similar circuit I made for another project  parts wise it's a small rectifier from the Shack, and a 47 uf capacitor across the + and - leads from the rectifier, a 1k resistor in line with the LED. The components are placed on some perf board also from Radio Shack. The in car board is cut to fit the mounting studs you see in the one shot of the power tabs. I used a couple of spare screws from the interior of the car to hold it in place..... The rectifier has 4 leads all out of the same side of it, two ac inboard and + and- outboard and well marked. I bent the black part over to fit a lower profile. The wiring diagram is based on one in MR within the last few months. My wife cleaned up my work bench so who the hell knows where the magazine is. |
|
|
|
Post by calzephyr on Oct 24, 2012 16:15:38 GMT -8
Karl, Thanks for posting your the step by step process. One request: Please post a couple of "night time" scene shots with the lighted drumhead and interior.  I've not lit the interior yet. That is beyond my time budget these days. Surely would be doable. Here is a similar circuit I made for another project  parts wise it's a small rectifier from the Shack, and a 47 uf capacitor across the + and - leads from the rectifier, a 1k resistor in line with the LED. The components are placed on some perf board also from Radio Shack. The in car board is cut to fit the mounting studs you see in the one shot of the power tabs. I used a couple of spare screws from the interior of the car to hold it in place..... The rectifier has 4 leads all out of the same side of it, two ac inboard and + and- outboard and well marked. I bent the black part over to fit a lower profile. The wiring diagram is based on one in MR within the last few months. My wife cleaned up my work bench so who the hell knows where the magazine is. The interior light kit is $14.95 list price and I attached any extra led to light the lower light to the kit. It includes the light bar that runs the length of the car and has eight smt leds in it along with the electronics board and screws to connect to the car. I know it is probably more expensive than the single led nad parts, but if you need six or eight leds to light the car, the kit might be cost worthy. Larry The light bar below without the cover.  |
|
|
|
Post by kentuckysouthernrwy on Oct 24, 2012 18:18:29 GMT -8
IF you value your time as $ it definitely would be worth the $, if you want to tinker like I do it's a fun challenge.
|
|