Deleted
Deleted Member
Posts: 0
|
Post by Deleted on Jul 9, 2012 4:28:38 GMT -8
The best line, I ever saw in print regarding the AB6, was in the book "Rock Island Diesels 1930-1980" by Louis A. Marre. In the book, the author refers to the AB6 "as a B-unit with a view".
|
|
|
|
Post by onequiknova on Jul 9, 2012 9:33:56 GMT -8
Hey John, I know you documented the AB6 build on another forum, but why not res-erect the build on this forum? I'd like to see the build photos, for I learn from your efforts and I think others would benefit too.  Thanks guys. That shouldn't be a problem. I didn't take a whole lot of pictures during the build, but I have some pictures of it before it was painted that show the basics of what was done. I've got the parts I need to build a second, and have contemplated building one to Ebay, since I'm laid off and all. I'm just not sure it would be worth my time in the end. |
|
|
|
Post by rockfan on Jul 9, 2012 10:31:20 GMT -8
Very nice! Thanks
|
|
Deleted
Deleted Member
Posts: 0
|
Post by Deleted on Jul 9, 2012 13:51:50 GMT -8
John, PM sent.  |
|
|
|
Post by onequiknova on Jul 11, 2012 18:29:17 GMT -8
A small update here. Nothing too spectacular. I made some .040 truck spacers to get the ride height where I want it. 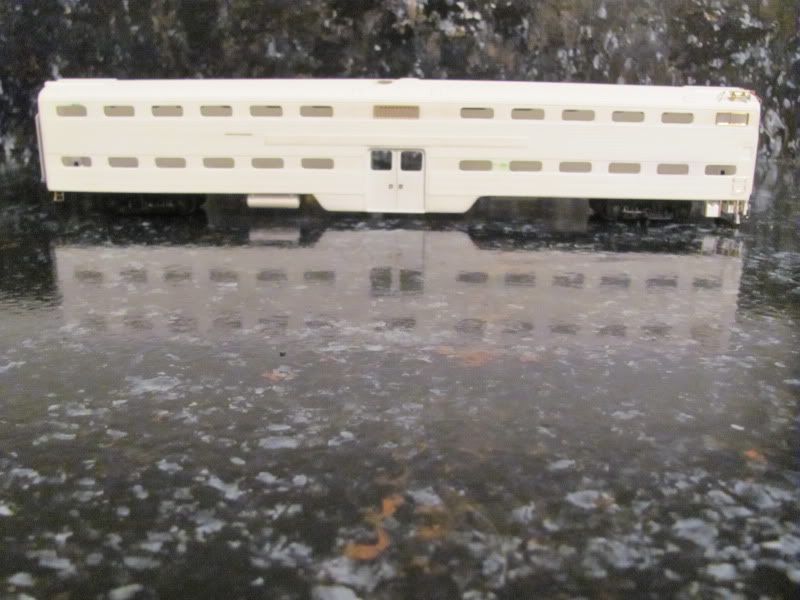 I also started working on the underbody. I'm using a combination of Walthers, brass and scratch built details. I'm still trying to figure out how to mount all that conduit the runs along the bottom of the body. 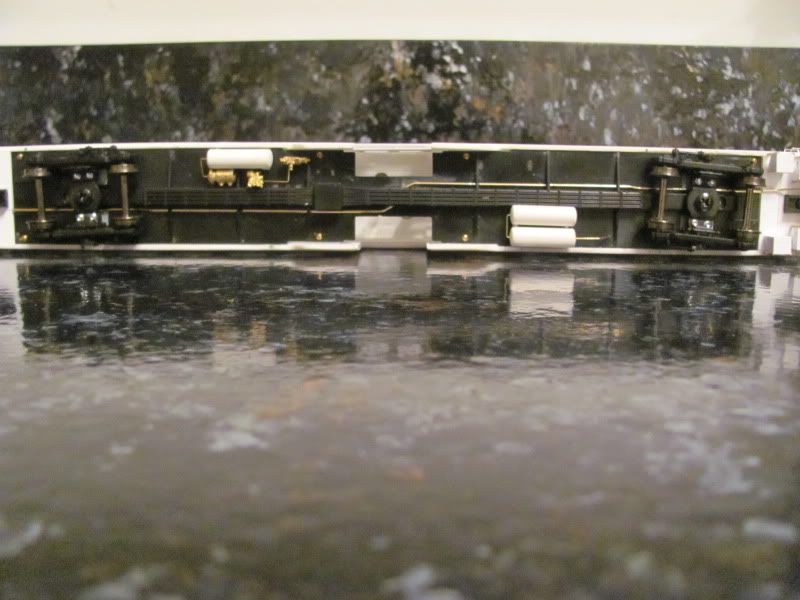 Scratchbuilt air tanks. 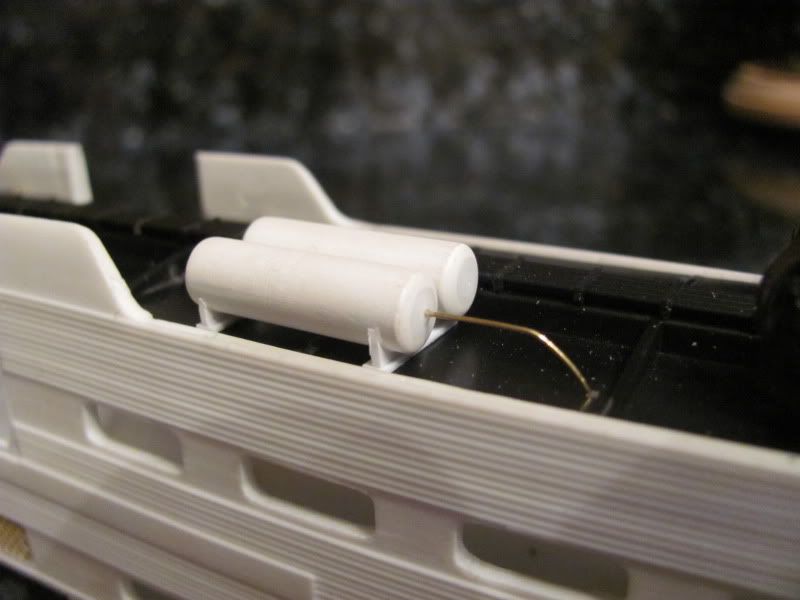 I ordered some Archer tread plate decals for the vestibule. I wish I had the idea to used these before I glued the railings in place. It would have made it much easier to decal. 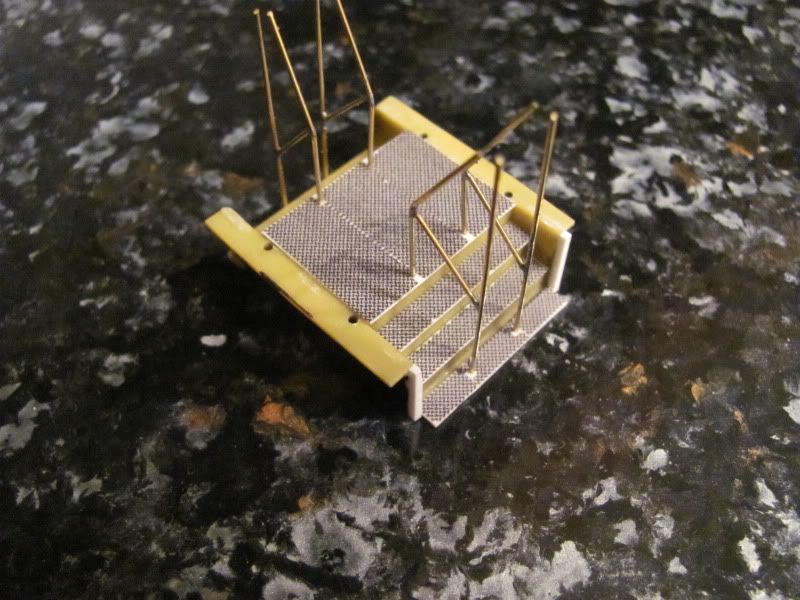 Last but not least, I started work on the other end of the car. I'm not going to replace the crash beams with brass on this end. I really don't feel it will be very noticeable coupled into a train. 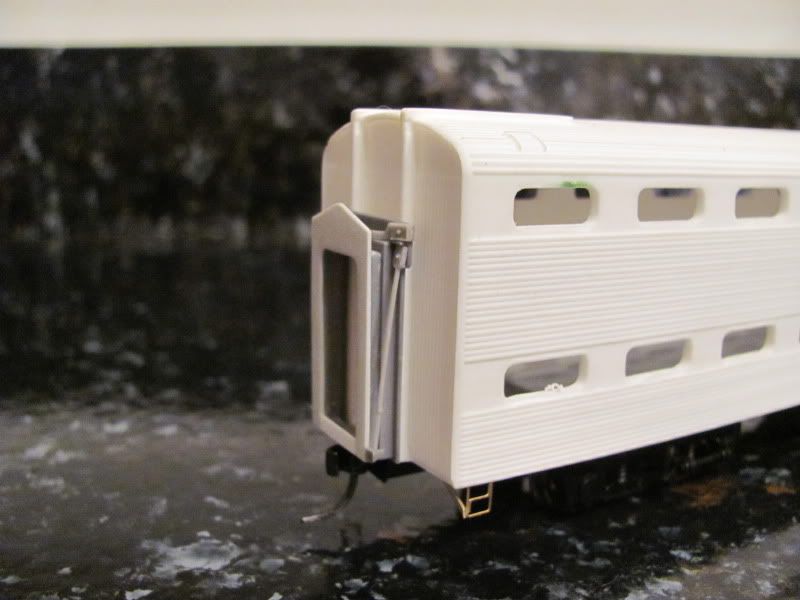 |
|
|
|
Post by drolsen on Jul 11, 2012 22:29:28 GMT -8
I also started working on the underbody. I'm using a combination of Walthers, brass and scratch built details. I'm still trying to figure out how to mount all that conduit the runs along the bottom of the body. John - Not sure if this would work for your application, since I'm not sure how the conduit is mounted, but you might look at Railflyer's part no. DP 6205, "EMD/GMDD Pillow Blocks." These are square and rectangular etched brass pieces with holes for running traction motor cables along diesel underframes. Might be easier / cheaper to scratchbuild something similar instead of buying them, since you're obviously not afraid to scratchbuild what you need, but the photo on their website might give you some ideas for mounting brackets. Looking great! Dave |
|
|
|
Post by onequiknova on Jul 12, 2012 17:26:10 GMT -8
John - Not sure if this would work for your application, since I'm not sure how the conduit is mounted, but you might look at Railflyer's part no. DP 6205, "EMD/GMDD Pillow Blocks." These are square and rectangular etched brass pieces with holes for running traction motor cables along diesel underframes. Might be easier / cheaper to scratchbuild something similar instead of buying them, since you're obviously not afraid to scratchbuild what you need, but the photo on their website might give you some ideas for mounting brackets. Looking great! Dave Thanks Dave. My plan was to scratchbuild the pillow blocks, They're just some .040 styrene cubes with a hole drilled through them. I just needed a way to route all the conduit without getting in the way of truck travel. What I ended up doing was hanging the piping off the bottom edge of the shell. Had I mounted everything to the underframe, I would need a 60" radius curve to run it. I got one corner done today. Note, I also relocated the sand boxes further forward and replaced the small chime on the horn with the correct larger chime. 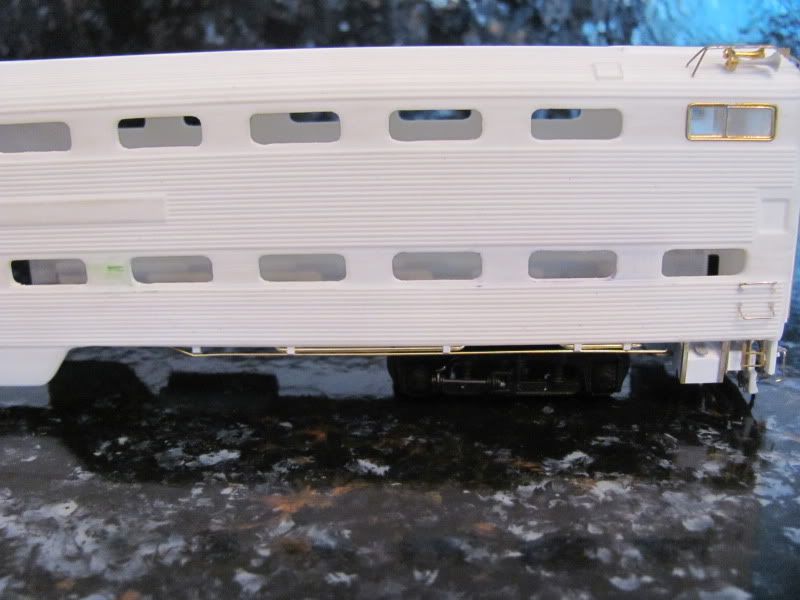 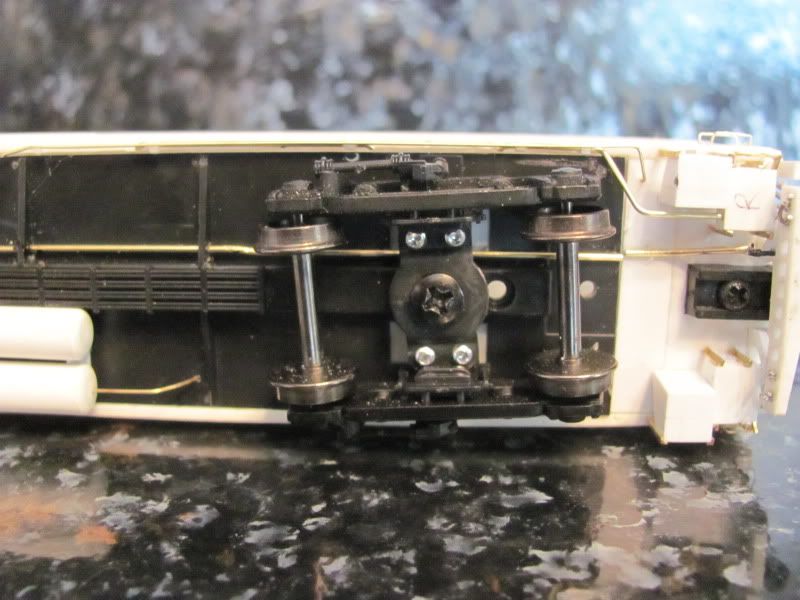 I will bend up and glue more brass rod to the bottom of the chassis, so it will appear to be one continuous piece of conduit. |
|
|
|
Post by onequiknova on Jul 13, 2012 18:47:11 GMT -8
Hopefully I'm not boring you guys with these small updates. I worked on it for a couple hours again today. I got the MU boxes built for the other end of the car, added a couple grabs, added the coupler cut bar bracket and scratchbuilt the thing that surrounds the draft gear, whatever that's called. All that's left on this end is to build a cut bar and figure out what to do with all the MU cables. 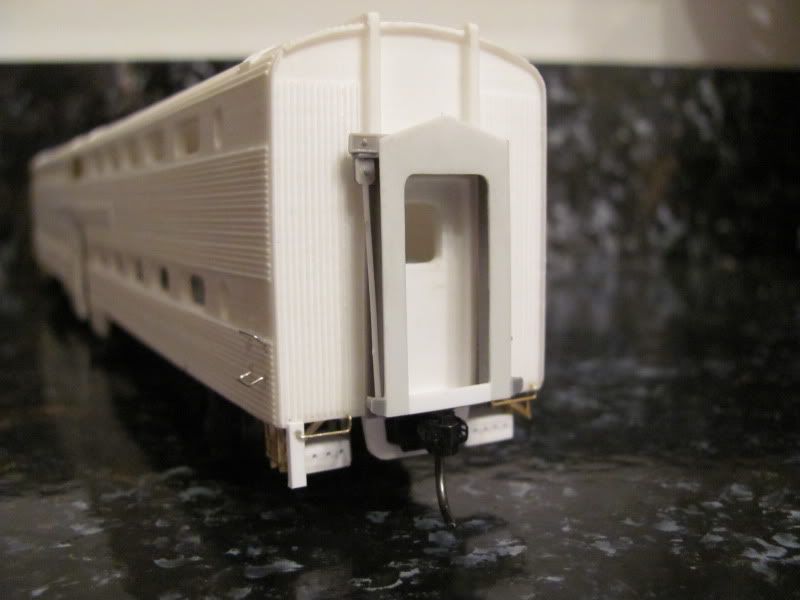 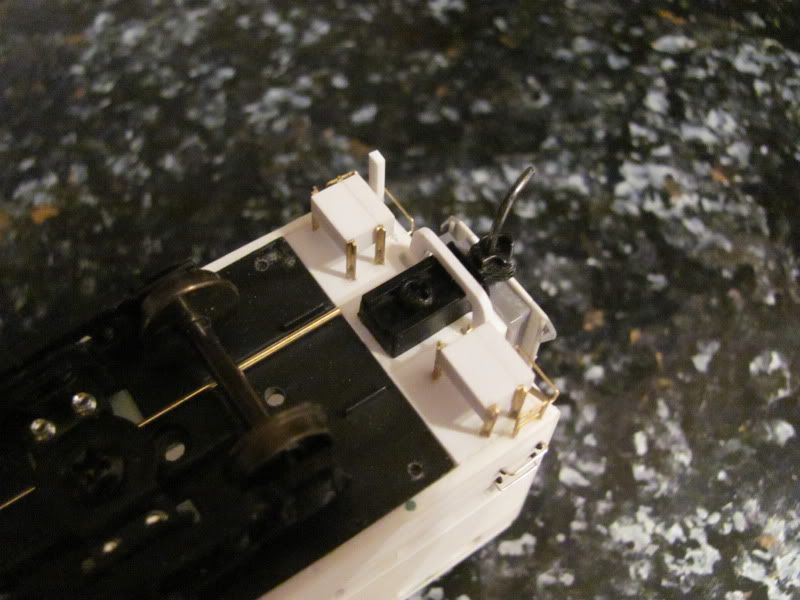 I also added the vestibule door grabs to both sides. 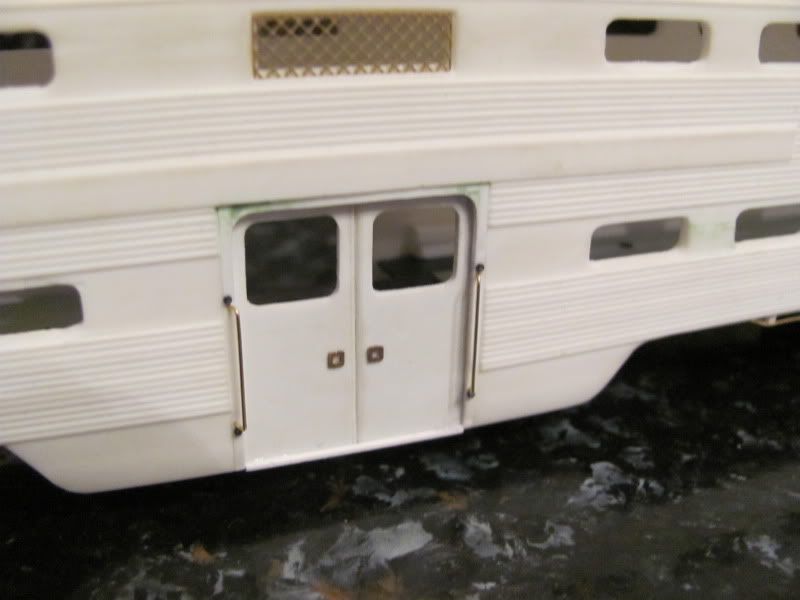 The light at the end of the tunnel is near. Hopefully I'll be painting soon. |
|
|
|
Post by fr8kar on Jul 13, 2012 21:05:12 GMT -8
Everything is looking good so far. I'm curious to see how the pin lifter turns out. A couple weeks ago when I handled that dome car I nearly popped my wrist trying to get the pin on it. I didn't realize the lever had a crude but clever locking mechanism. Once I started looking at it, I thought the design was a very clever fail-safe solution. If this car has a similar setup, I'm anxious to see it modeled.
|
|
|
|
Post by onequiknova on Jul 14, 2012 7:53:21 GMT -8
The rear cut bar will look the same as the front one.  |
|
|
|
Post by dhs12001 on Jul 14, 2012 11:29:46 GMT -8
The conduit runs look great. With the close clearances, do the trucks still clear the piping? What is the newer horn you added?
Dave
|
|
|
|
Post by onequiknova on Jul 14, 2012 13:08:52 GMT -8
The conduit runs look great. With the close clearances, do the trucks still clear the piping? What is the newer horn you added? Dave I added the opposite side conduit to see what kind of clearance I've got. The truck hits the conduit just before it hits the center sill. I ran it through a 24" snap track S curve with no problem. 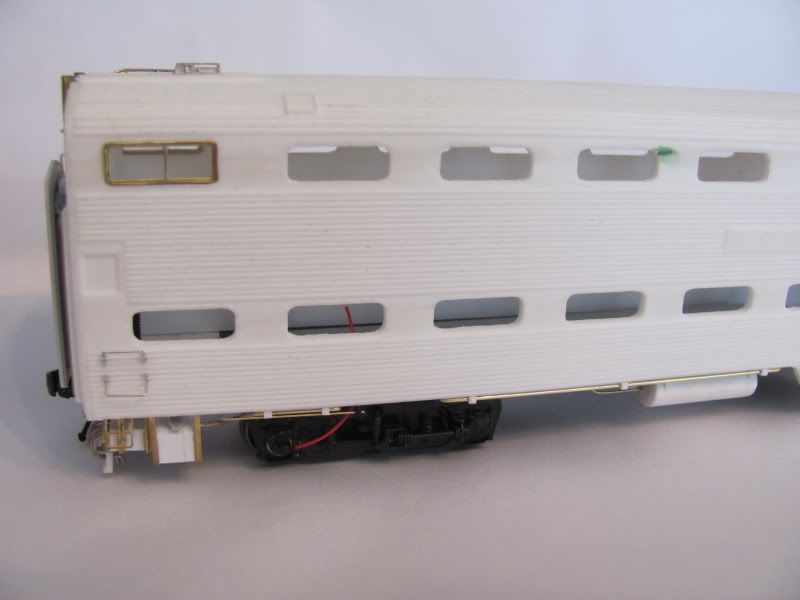 The horn started out as a three chime Nathan with the upper rear facing chime cut off. The new larger chime was left over from an Intermountain f unit kit. I probably could have found the correct horn, but didn't want to wait. |
|
|
|
Post by onequiknova on Jul 16, 2012 12:12:54 GMT -8
I think I'm finally ready to paint the shell now. All the conduit is finished. Today I scratchbuilt the cut bar and routed the air and MU cables. There were various receptacles added to the side and under the body as well. 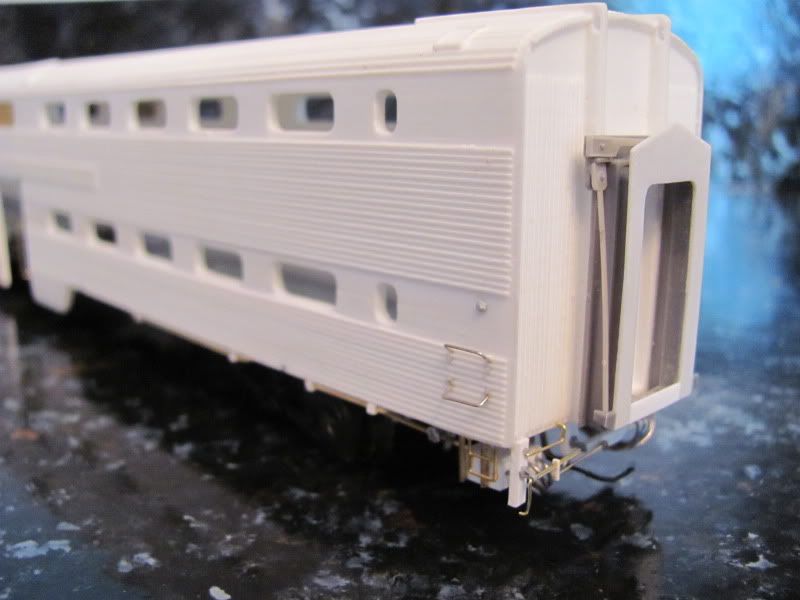 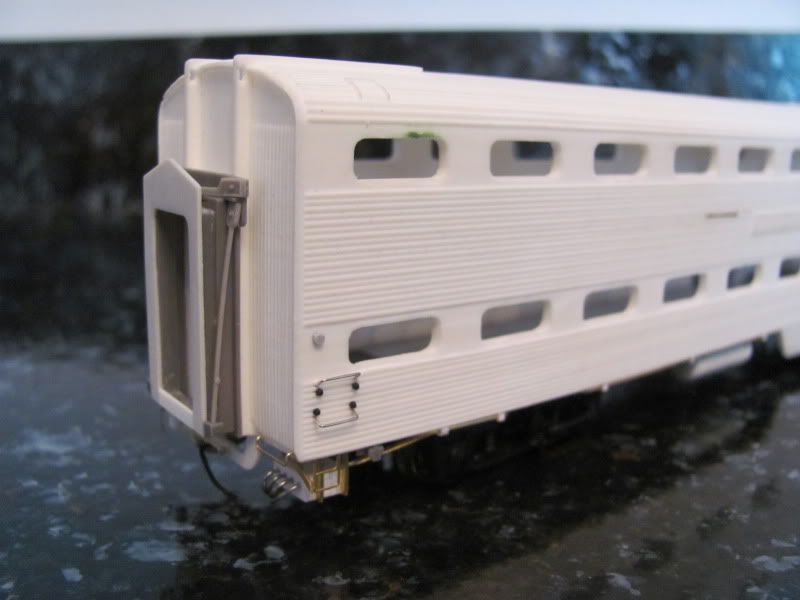 Here's a close up of the cut bar. My camera doesn't do well this close up. The cut bar is just a few pieces of .012 brass wire, a scrap of .010x.030 styrene, some D/A brackets and an eye bolt to hold the end under the coupler. 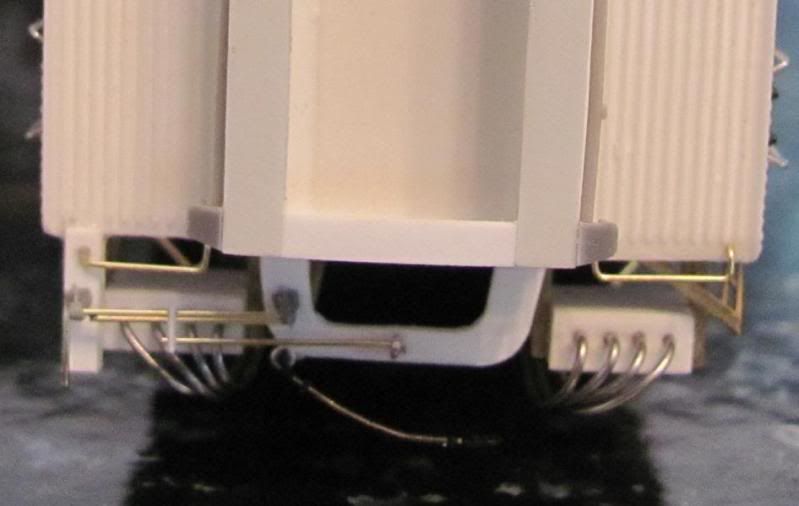 And finally the mirrors that were supplied with the kit have been installed. The markers will be added after paint since I plan to use Crystal Clear for the lenses. 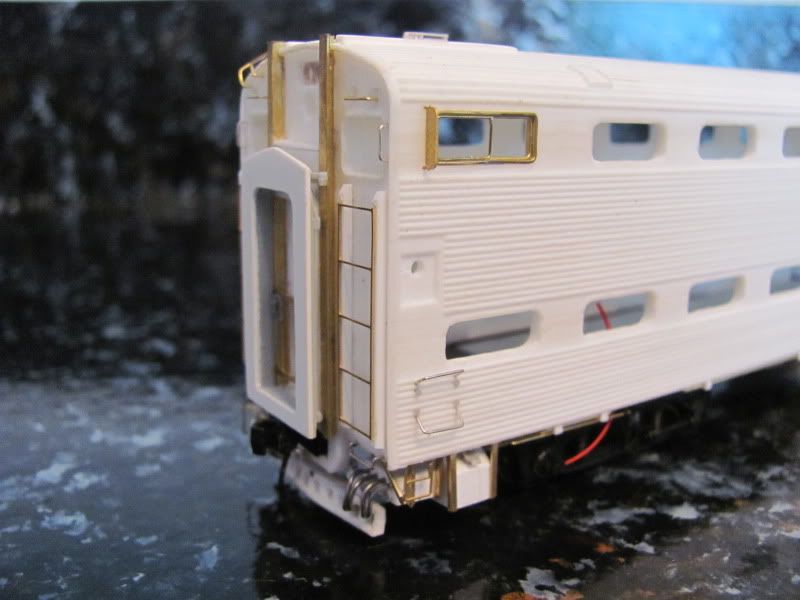 |
|
|
|
Post by onequiknova on Jul 23, 2012 20:23:14 GMT -8
It's been a while since I updated this thread. I've had the shell in Alclad about a week now, but my initial attempts at Sharpie window gaskets didn't work like it did on my brass cars. I'm thinking decals might be my best shot now, but not sure where to get them. Even after sanding the crap out of every nook and cranny of this shell, there are still imperfections in the resin that I'll just have to live with. I honestly think I'd have been better off scratchbuilding the entire car. 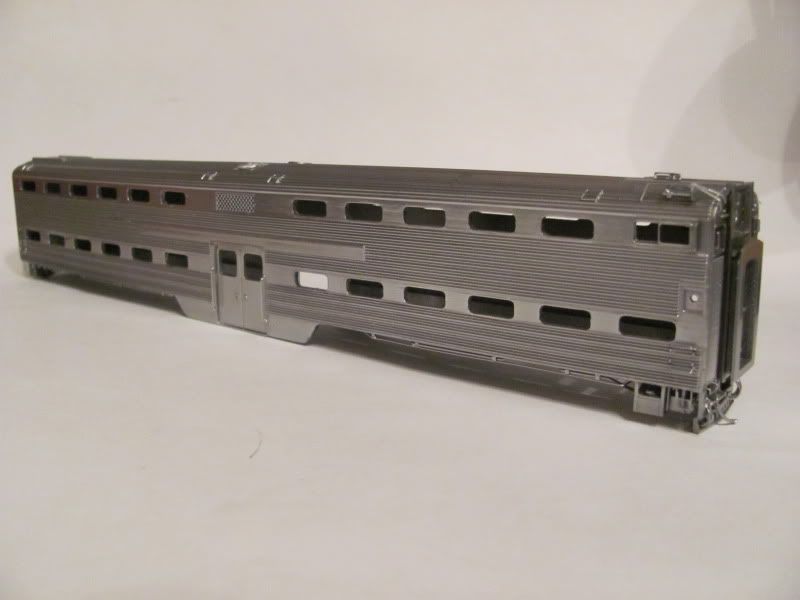 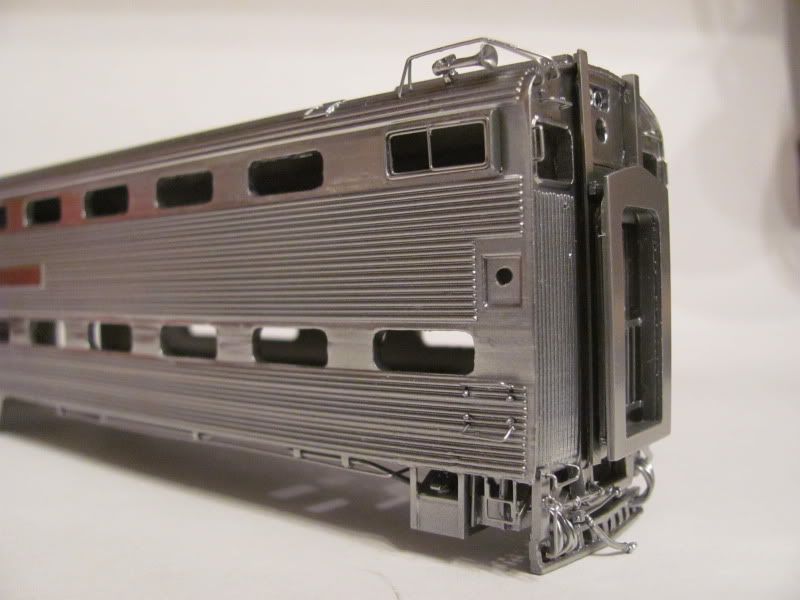 |
|
|
|
Post by rockisland652 on Jul 25, 2012 7:08:02 GMT -8
That is an amazing transformation. The Alclad reveals much of the imperfections, yes. However, the prototypes did have some flex here and there in the flat stainless sheathing.
For you kids out there that have never seen one of these resin kits in person, let me tell you that the shell looks unsalvageable in person.
John, this is simply a stunning piece of the modelers' art. She'll look great with your commuter power.
Let's see 'er in service!
Tom Klimczak
Lemont, IL
|
|
cnw
New Member

Posts: 45
|
Post by cnw on Jul 26, 2012 11:40:18 GMT -8
Yeah, I'm with Tom on this John. It looks great if you ask me. I think you are being too hard on yourself. One other thing, I have never even seen another modeler with one of these cars so you are on the rare species list anyway.
|
|
|
|
Post by onequiknova on Jul 26, 2012 13:43:40 GMT -8
Thanks guys.
I'm still trying to figure out how I'm going to do the window gaskets. Right now I'm thinking of cutting up a black letter "O" for the corners and black striping for the straight sections. With 48 windows to frame, talk about tedious. There has got to be a better way.
|
|
|
|
Post by dhs12001 on Jul 26, 2012 17:24:05 GMT -8
H John
I just saw the painted body and have to agree with the other comments. It looks pretty darn good to me. While I have no clue on the window gaskets, I did check on the Welcome Aboard decals. It appears the overall size is the same as the 2500 series decals available from Steve Hile. I would speculate that only the car numbers are oversize. If I find the actual size I'll pass it along
Dave Street
|
|
|
|
Post by bdhicks on Jul 26, 2012 21:43:32 GMT -8
Can't you just print up your own decals on clear decal paper?
|
|
|
|
Post by drolsen on Jul 27, 2012 0:17:25 GMT -8
I'm still trying to figure out how I'm going to do the window gaskets. Right now I'm thinking of cutting up a black letter "O" for the corners and black striping for the straight sections. With 48 windows to frame, talk about tedious. There has got to be a better way. John - I think a couple companies make diesel numberboard gasket decals. Those should be much easier to start with than zeroes. Looking fantastic! Dave |
|
|
|
Post by tracktime on Aug 6, 2012 23:18:16 GMT -8
Simply stunning work. What did you use for a base coat before the Alclad2?
Best Regards,
Harry
|
|
|
|
Post by onequiknova on Aug 8, 2012 4:00:27 GMT -8
Thanks.
I used Model Masters Navy gray, which is a darker gloss gray.
|
|
|
|
Post by stevef45 on Aug 9, 2012 6:33:50 GMT -8
I agree, incredible work and attention to detail. Far more patient then me to add the "little details".
|
|
|
|
Post by jamesbrodie67281 on Aug 11, 2012 9:32:07 GMT -8
Dear Sirs, Are these bi-level coaches 0 scale or HO please?
K-Line do an aluminium bodies car 21-1/3 inches long to suit the Super Chief and later train versions, all that is needed is to change the bogie wheels to 2 rail.
Re sand boxes used when the train is being propelled although the traction to the wheels is on the loco when braking when being propelled the driver can administer sand to the leading wheel sets to assist with braking and deter wheel sliding, when administered from the loco end would help prevent wheel slip..................just a thought.
Jim Brodie.
|
|
Deleted
Deleted Member
Posts: 0
|
Post by Deleted on Aug 11, 2012 11:09:48 GMT -8
Dear Sirs, Are these bi-level coaches 0 scale or HO please? Jim Brodie. HO scale |
|
|
|
Post by rockislandengineer on Sept 3, 2012 10:35:41 GMT -8
Hi oequicknova,
Maybe Walthers is having a difficult time obtaining the Budd prints, in as much as they are in the posession of Bombadier
|
|
|
|
Post by rockislandengineer on Sept 3, 2012 11:08:28 GMT -8
Hi onequicknova,
The underframe print shows a sandbox on the Fireman's side, only further back.
To answer the other member's question, sand is used for both breaking and traction. That is why a cab car needs sandboxes (particularly these with their crappy composition brake shoes.)
|
|
|
|
Post by TREBOR on Sept 18, 2012 9:11:20 GMT -8
I don't think the big shots want the axle with the speed recorder sliding either.
|
|
|
|
Post by Josh Clark on Nov 7, 2012 17:03:55 GMT -8
Amazing work so far. Ive never used Alclad before, but just to clarify... you just let it soak in it for a week? It looks great! Thanks
|
|
|
|
Post by onequiknova on Nov 7, 2012 17:09:26 GMT -8
Thanks.
Alclad is airbrushed on like paint. I didn't go back and read the thread, but i was probably refering to letting it dry for a week.
|
|