|
|
Post by tillamook on Aug 19, 2020 4:40:34 GMT -8
Since it was requested in the Sunday's Pic thread and I intended to do it anyway, here is my thread about modeling PNWR's 3002. This particular GP40 is a very interesting prototype, as it is ex NS Slug mother 1382, which means it is a chop nose GP40. I don't really know if there are too many chopped 40s, at least its sister 3001 shares the same history. Modeling the PNWR and being into building rolling stock, there is no way around at least one of the slugs with its mother unit. I opted for 3002 simply because of the huge Operation Lifesaver logo on the sides, adding interest in the uniform but interesting livery. Perhaps at this point I'll introduce myself. I'm in my thirties and live in Bavaria near Regensburg. My wife and i are avid fans of the Pacific Northwest and have visited virtually every mile of the west coast from Mendocino to Sequim and good parts of Oregon's outback. Being a model railroader sinc my childhood, seeing north american railroads and getting acquainted with "the american way" of model railroading got me started in the hobby again. I first concentrated on the Port of Tillamook Bay Railroad and finished GP9s 101 and 3771, both RDCs and still have SD9s 4414 and 6139 on the bench near completion. But reading through John Armstrong and Lance Mindheim raised one big issue with the POTB: operating potential. Plus, now there are only additional SD9s to model, no real challenges and no 2nd generation Diesels. Luckily, at the beginning of the year I found a shop that still had all three numbers of the Athearn Genesis PNWR GP39-2s, and the decision was made to switch to the PNWR, the only railroad the POTB interchanged with. Unluckily, COVID has them stuck at my brother-in-law's house in Texas, I don't know when I can get hold of them. Im pretty sure some day I'll get a Santa Fe GP39-2 to patch up, too. So in the mean time I got a cheap Athearn Blue Box GP40 and a lot of Cannon parts. I also found a P2k GP7 going for really cheap because the previous owner opened the shell the wrong way.
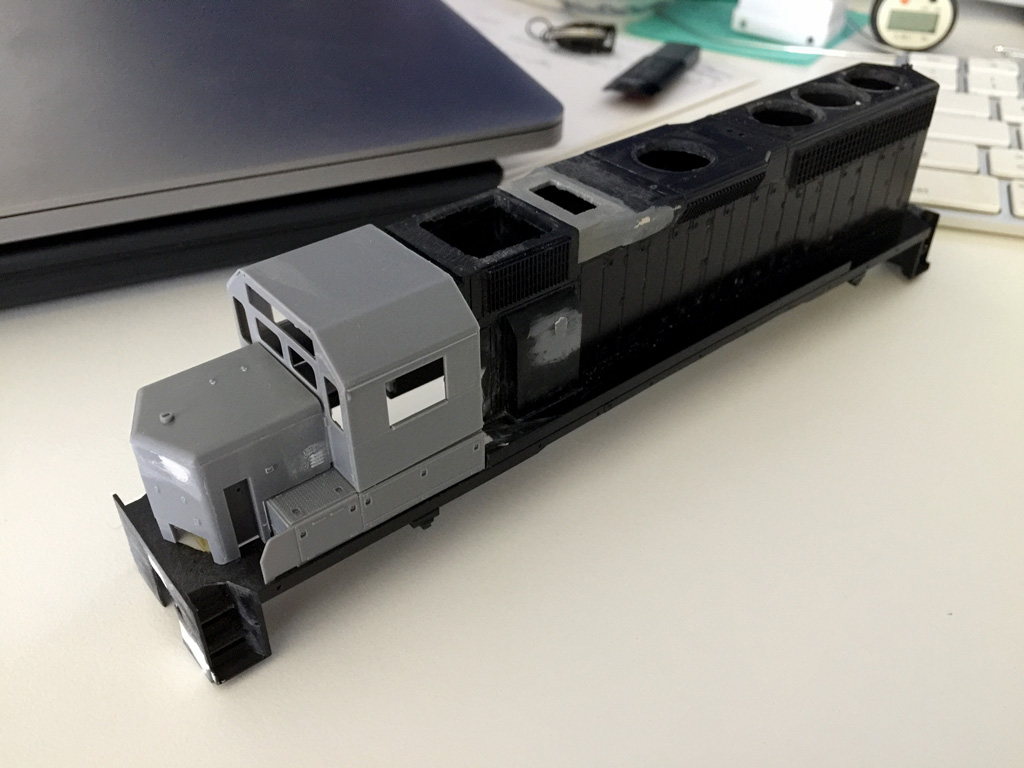
So this is where it begins:
I'll try to keep you updated, but due to several circumstances like a toddler or the construction of our new home, this build may take a while.
My POTB stock can be seen here: model-railroad-hobbyist.com/blog/58741 |
|
|
|
Post by tillamook on Aug 19, 2020 5:15:37 GMT -8
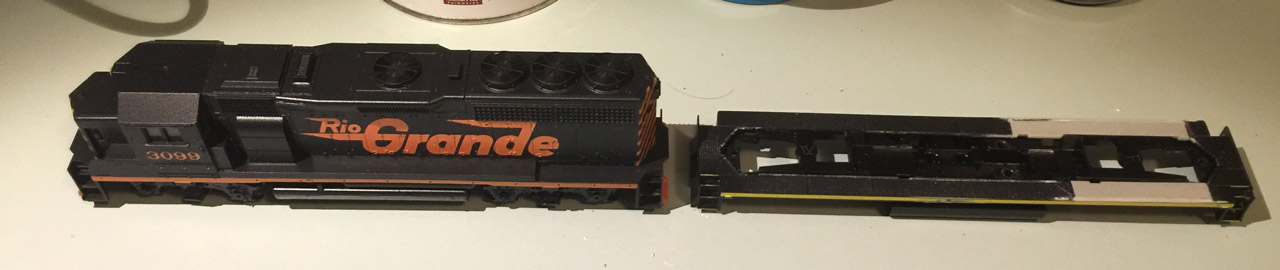
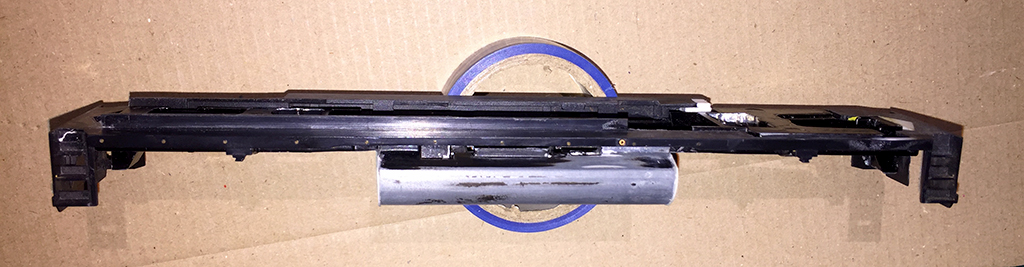
I began with the frame of 3002.
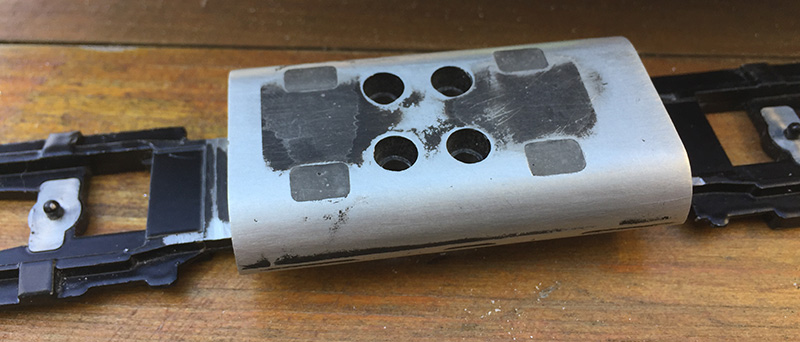
Like I said in the Sunday pic thread, I closed the shell mounting holes with epoxy and sanded the whole tank smooth.
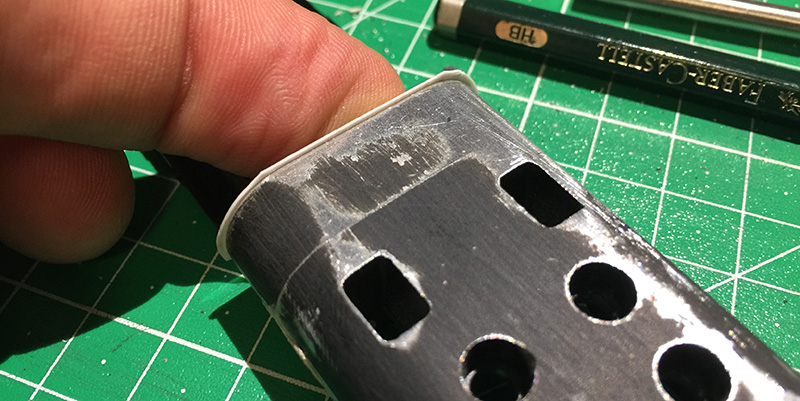
I also filed and sanded the tank ends to a square angle and glued 0.3 mm styrene end caps on them. Those were then filed down using a scapr 0.3 mm piece as a guide.
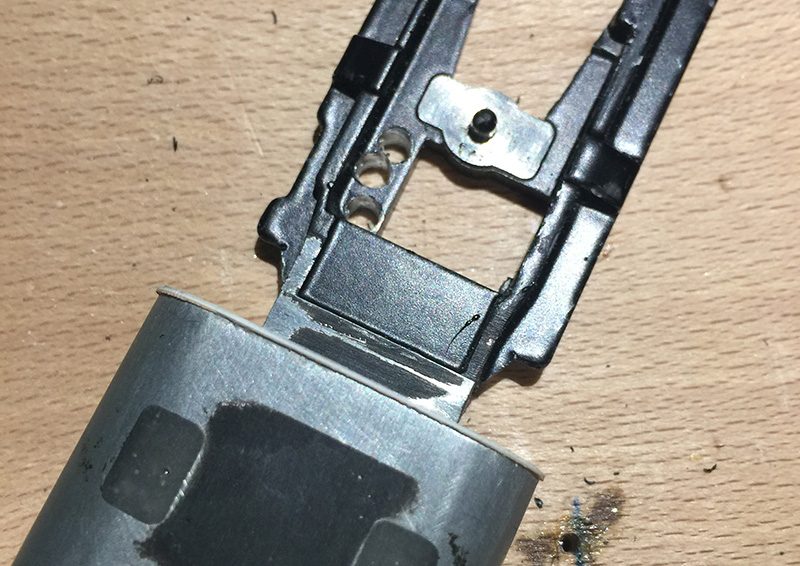
Furter along the road, I opened the frame to make room for electrical pickup wires.
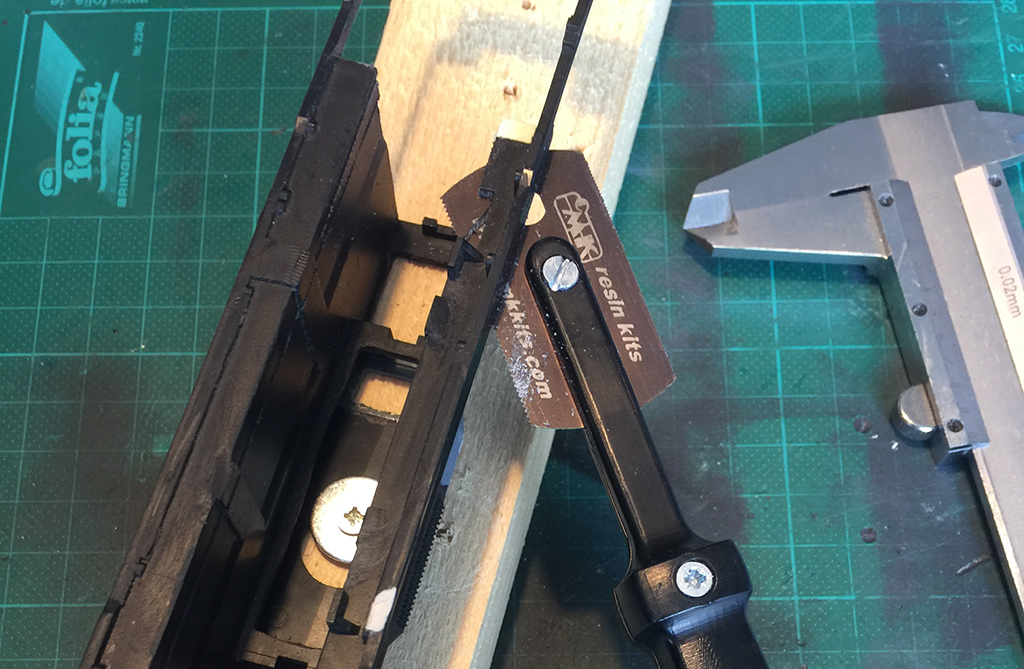
Meanwhile, I sanded down the pilot detail on the shell and cut off the cab, nose and battery boxes with a razor saw. Here is a picture already test-fitting a few Cannon parts.
The dynamic brake is the Athearn part combined with the front taper of a Kato GP35 hatch. Fortunately I can still use the donor Kato part in the future build of PNWR 2005. But that's another story.
On 3002 now I'm planning to cut the long hood down to the sill and redo the whole end with styrene to get the hood doors right and matching.
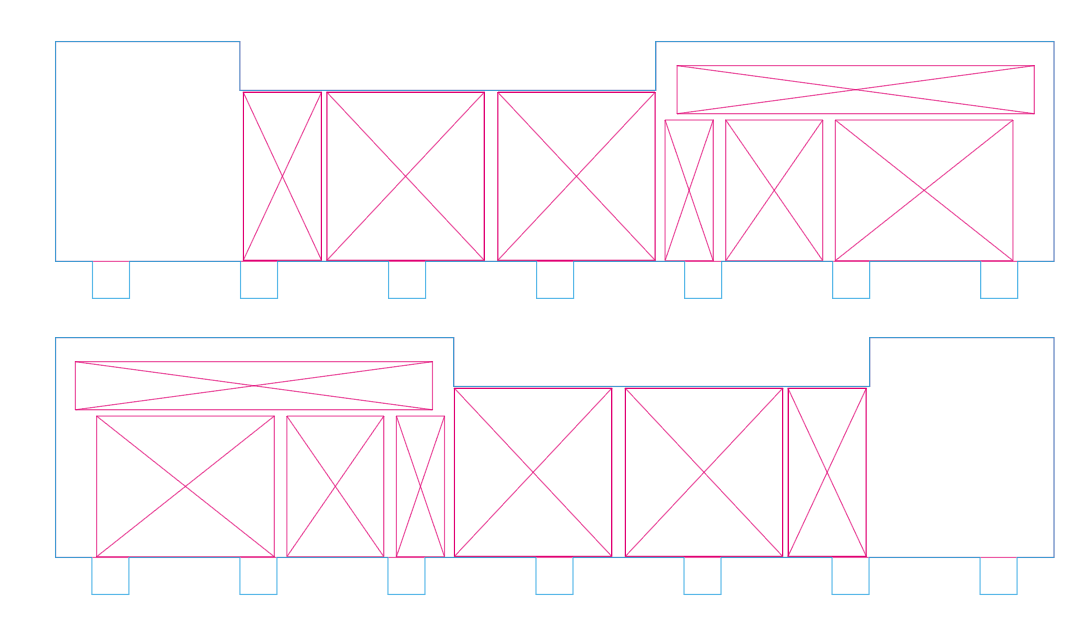
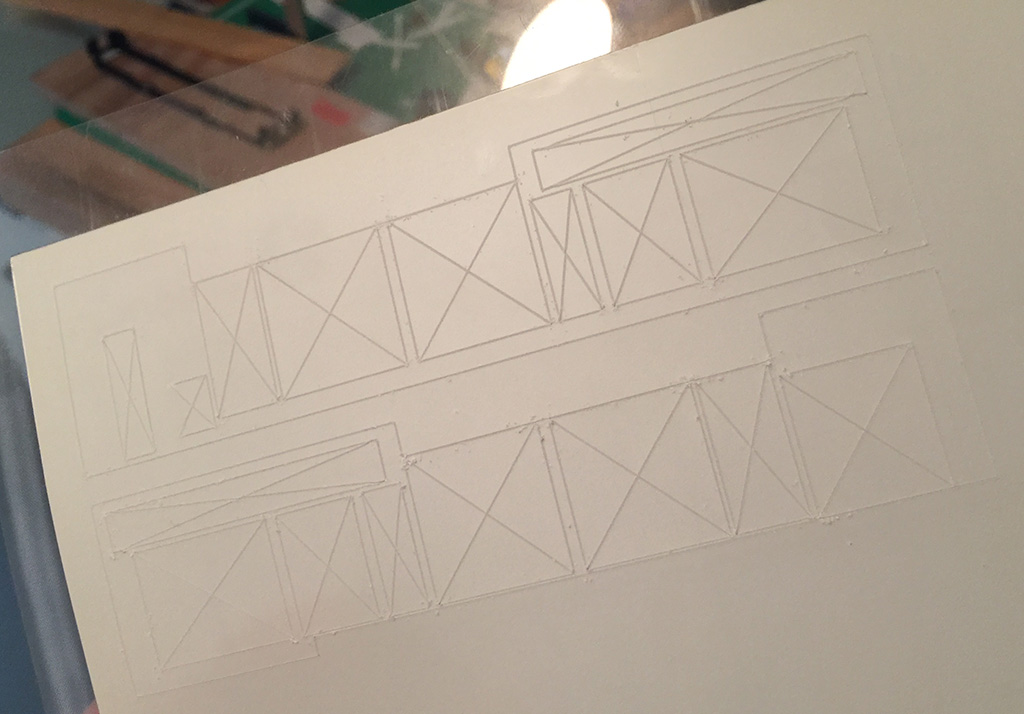
The sides are going to be a laminate of two 0.5 mm styrene layers. The blue line marks the lower slice of the sandwich with mounting tabs for the walkways. The top layer will have the same outline minus the tabs and the purple cutout markers where the doors and radiator screens will go.
So much for now, stay tuned.
Small disclaimer: yes, the whole thread is going to be metric.
|
|
|
|
Post by rockfan on Aug 19, 2020 5:54:39 GMT -8
Very nice, don't forget to tell us about the slug, what did it start as?
Is just a loco with windows painted over or is the body chopped like some rr's have done?
|
|
|
|
Post by nsc39d8 on Aug 19, 2020 6:22:12 GMT -8
3002 began life as Norfolk & Western 1382 with a high short hood. NS began a program to cut down the high hoods in the 2000's and the GP40's were some of the first. This GP40 did not get the
complete rebuild to Dash 2 specs and admiral cab like some others.
The slug would be a RP4ED built by Norfolk Southern shortly after the Southern/N&W merger. They were built from retired GP18's. The GP40 "mothers" could power two of these slugs.
RP4-ED is Remote Power 4 axle - EMD base with dynamic brakes.
One thing on the slug is NS cut the fuel tanks from these frames so there is almost nothing between the trucks but the air brake equipment.
|
|
|
|
Post by fishbelly on Aug 19, 2020 7:57:58 GMT -8
Not necessarily related to this build, but I am very curious as to the locomotive in your avatar. Urban camouflage or Milk Cow scheme? I would like to see the whole thing. Looks pretty cool.
Back on topic. I like your approach here. However long it takes. I am looking forward to the progress reports. Budget builds are always fun to watch come together. The decisions/ compromises you have to make and the reasons for them. Very cool!
|
|
|
|
Post by TBird1958 on Aug 19, 2020 8:19:41 GMT -8
Willkommen Jan, Great start on the project it should be a nice build thread, looking forward to your progress pictures. As a side note I have to mention that I found it interesting that you'd visited Sequim, WA (of all places). I'm a Washington State native and have been there and to the whole Olympic Peninsula many times for vacation and to play music with my band, it's a beautiful part of the state and you can still easily see remnants of the Milwaukee Road out there. I've visited Bavaria as well, though not Regensburg. To keep it railroad related, here's a preserved Milwaukee Road Howe Truss bridge in Sequim, WA.  |
|
|
|
Post by tillamook on Aug 19, 2020 10:20:32 GMT -8
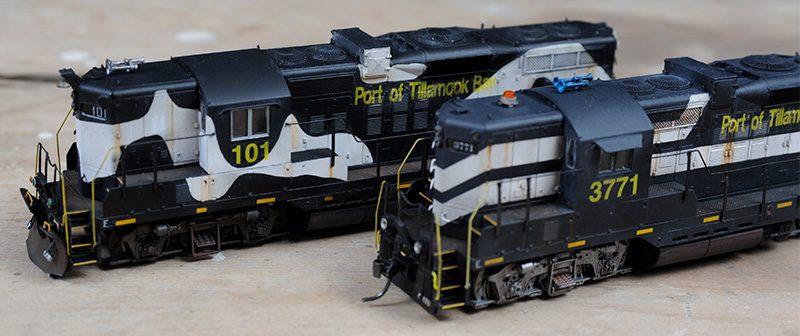
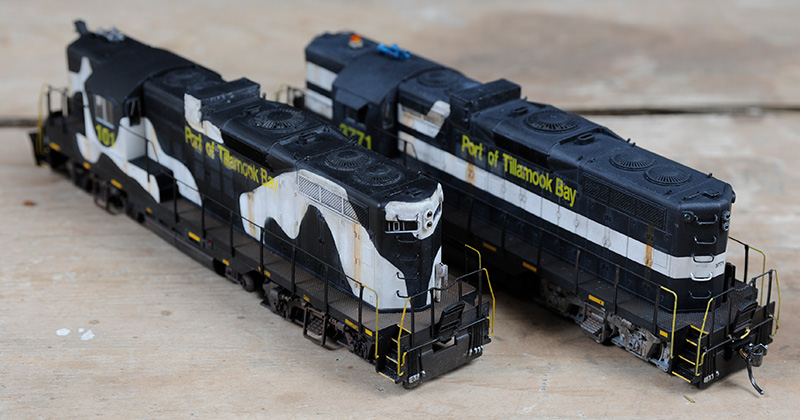
Not necessarily related to this build, but I am very curious as to the locomotive in your avatar. Urban camouflage or Milk Cow scheme? I would like to see the whole thing. Looks pretty cool. The engine in my avatar is Port of Tillamook Bay Railroad 101, a GP9 in a Holstein Friesian cattle themed livery. Here's the big picture:
She's got a nice booty, too:
It's a Proto2000 GP9 Phase II with a few detail pieces installed. The protoype, unlike 3771, is still operating with the Oregon Coast Scenic Railroad based in Garibaldi, OR.
To keep it railroad related, here's a preserved Milwaukee Road Howe Truss bridge in Sequim, WA. Unfortunately I missed that bridge. But we visited the original Twin Peaks bridge in Snoqualmie, WA. And of course had breakfast at the Roadhouse in Fall City. That was a really great trip I'll always remember. |
|
|
|
Post by sd80mac on Aug 19, 2020 13:35:56 GMT -8
The Moo!
|
|
|
|
Post by lvrr325 on Aug 19, 2020 21:10:25 GMT -8
If ever there needed to be a model that is DCC sound with a custom sound file for the horn, that engine is it. "moooooooo"
|
|
|
|
Post by tillamook on Aug 30, 2020 4:23:43 GMT -8
Yesterday I too the plunge and sawed off the walkway of the Athearn shell.
This turned out pretty easy with a razor saw, just follow the molded in separation line below the doors or the raised walkway on the other side. The only problem is that the shell gets pretty wobbly down the road. So I screwed it to a piece of wood.
And here it is, after some sanding with 600 and 1000 grit, test fitted on the frame. I had to shim the brakeman's side to keep the sill from warping.
After that I had to cut out the dynamic brake section which I damaged slightly during that process as I bent the small plastic grilles. Fortunately, I've got another db hatch in my spare box.
Lesson learned: Don't ever glue anything before you are 100 % sure about how you are going to get things done.
|
|
|
|
Post by tillamook on Aug 30, 2020 5:13:51 GMT -8
Btw, sorry for the poor photo quality but I'm kinda between houses at the moment.
|
|
|
|
Post by loco8107 on Aug 30, 2020 6:03:00 GMT -8
Yesterday I too the plunge and sawed off the walkway of the Athearn shell.
This turned out pretty easy with a razor saw, just follow the molded in separation line below the doors or the raised walkway on the other side. The only problem is that the shell gets pretty wobbly down the road. So I screwed it to a piece of wood.
And here it is, after some sanding with 600 and 1000 grit, test fitted on the frame. I had to shim the brakeman's side to keep the sill from warping.
After that I had to cut out the dynamic brake section which I damaged slightly during that process as I bent the small plastic grilles. Fortunately, I've got another db hatch in my spare box.
Lesson learned: Don't ever glue anything before you are 100 % sure about how you are going to get things done.
Nice job! Where did you get the saw to cut the shell from? Never saw one like that but it looks easy to use. |
|
|
|
Post by tillamook on Aug 30, 2020 6:18:57 GMT -8
It's from CMK, a czech resin kit manufacturer. It takes blades approximately the same size as razor blades. They're available with fine, medium and large teeth or – like mine – one fine and one large toothed side.
|
|
|
|
Post by tillamook on Sept 17, 2020 9:00:25 GMT -8
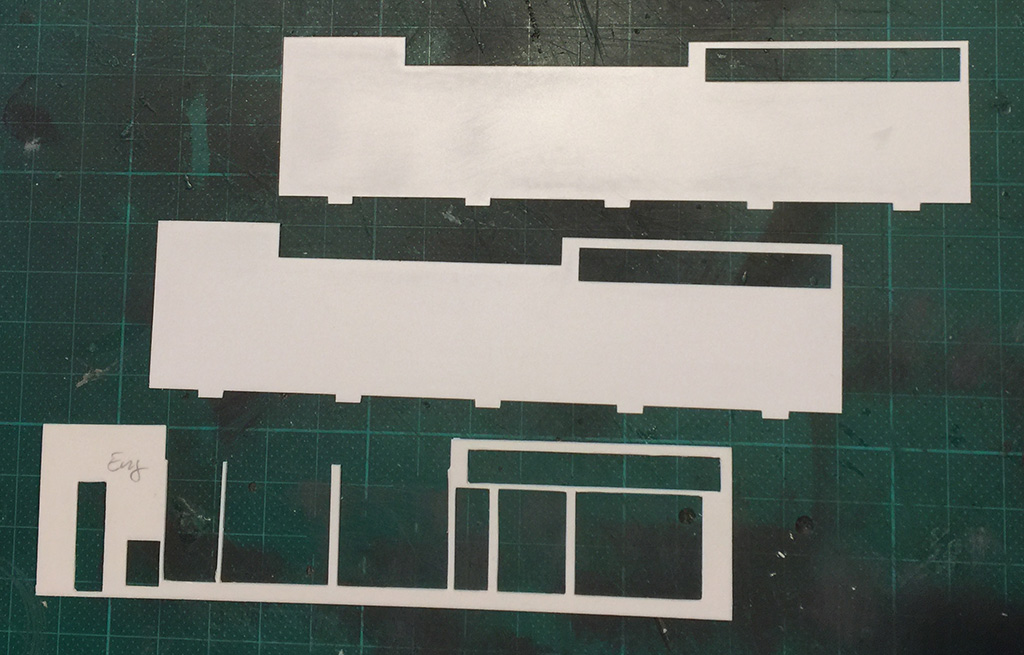
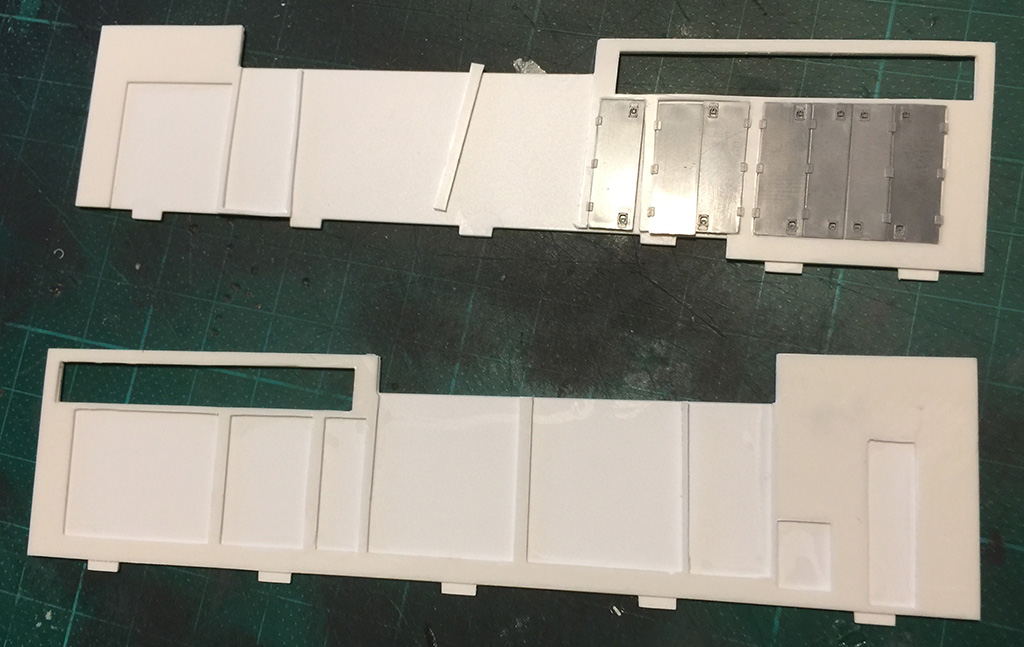
Allright, so this weekend I finally had the time to let the plotter cut out the long hood sides. Here are the outer layers fresh out of the machine.
Here are all three layers, from top to bottom: inner layer, 0.25 mm, about a mm less high than the others to allow the cannon hood roof to be fitted; middle layer, 0.25mm; outer layer compleete with cut-outs for the doors, 0.5 mm thick.
The layers are then laminated together:
The doors are only test-fitted as of now and will not be glued in until the shell is complete and everything went well.
Cutting the 0.25 mm sheets was easy and they came out great. However, 0.5 mm is already beyond the limits of my cameo 2 plotter. Knowing that from other projects I mirrored the data so that the outer layer was cut from the "inside", allowing for a better cutting line.
I'm still thinking of redoing the sides using four layers of 0.25 mm styrene for straighter cuts. I'd have to check how the resulting sandwich fits the cannon hood end and roof.
So much for now, stay tuned.
|
|
|
|
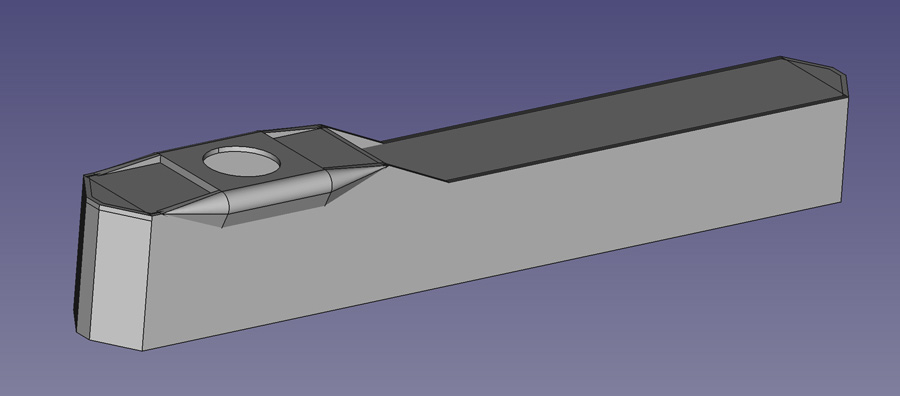
Post by tillamook on Jan 22, 2021 6:31:19 GMT -8
Just a quick update – the project is not dead yet. I my spare time I'm currently working on the slug’s shell to have it printed.
|
|
|
|
Post by Funnelfan on Jan 22, 2021 23:18:06 GMT -8
Those slugs sets were bought specifically for the run from Albany, OR to Toledo, OR. The line has some rather steep grades against trains heading back toward Albany (2.58%) over a short part line, and that is the reason for the slugs along with the sharp curves limiting power to 4 axle units. The line survives because of one large customer, a Georgia Pacific kraft paper mill that makes paper bags and corrugated stock for cardboard boxes. My March 8th, 2008 photo shows PNWR 3002 and slug already looking beat up by that point.
|
|
|
|
Post by Funnelfan on Jan 23, 2021 4:19:47 GMT -8
Before Southern Pacific RR leased the branch to Willamette & Pacific Rwy (later Portland & Western) in 1993, they used slugs made from U25B locomotives and mated to a series of SP GP40-'s and SSW GP40R's. I model those trains that also often included SD9E's and the occasional GP9E. Here is my early 1990's Toledo Hauler.  |
|
|
|
Post by Funnelfan on Jan 23, 2021 4:54:35 GMT -8
I also model the Willamette & Pacific and early Portland & Western, but the slug sets are past my modeling time frame.  |
|