|
|
Post by sd40dash2 on Sept 25, 2020 12:06:09 GMT -8
This shell is destined to become white 105. Krylon white and glosscote have been applied. 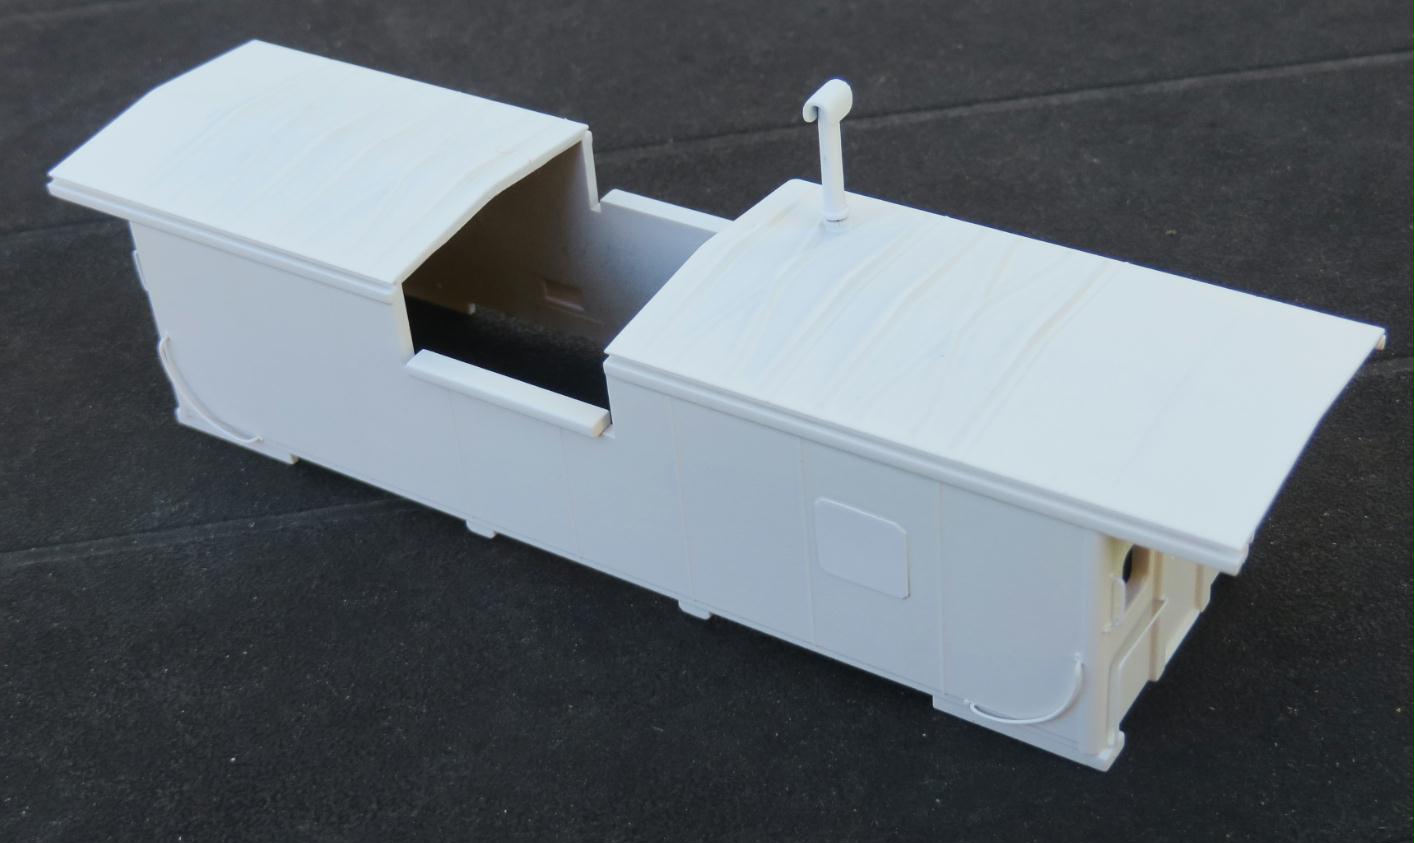 |
|
|
|
Post by Christian on Sept 25, 2020 14:46:09 GMT -8
Rattle can, eh? Those look darn good. None of that nasty overspray stuff that usually signals a rattle can paint job. Why gloss coat over glossy paint? |
|
|
|
Post by sd40dash2 on Sept 25, 2020 14:50:24 GMT -8
^ The white paint is "flat enamel", not ideal for decalling out of the can.
|
|
|
|
Post by sd40dash2 on Sept 25, 2020 16:24:14 GMT -8
I have shortlisted SOO 105 or 121 for this project. The latter is easy as the entire cupola is red, while the former requires white paint to match its white main body roof. 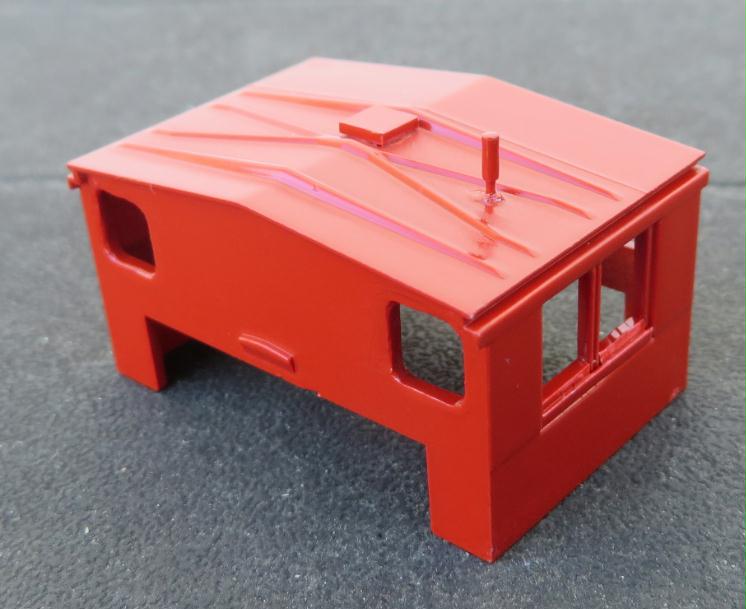 |
|
Deleted
Deleted Member
Posts: 0
|
Post by Deleted on Sept 26, 2020 4:18:05 GMT -8
Excellent work.
|
|
|
|
Post by sd40dash2 on Sept 26, 2020 4:20:31 GMT -8
End and side grabs installed, painted and dry, ready for decals.  |
|
sd50f
Full Member

Posts: 101
|
Post by sd50f on Sept 26, 2020 7:50:22 GMT -8
Looking good so far. I love how well the spray paint worked. I sometimes use it when I don't feel like getting the airbrush and compressor out. It doesn't always work out as well as it did for you.
Timothy Dineen
|
|
|
|
Post by sd40dash2 on Sept 26, 2020 7:56:10 GMT -8
I have decided not to fog over the cupola windows with dullcote this time. I have also decided to leave one half side window open. All of this means I'll need to install cupola seats -- here they are at the ready.  |
|
|
|
Post by sd40dash2 on Sept 26, 2020 7:58:33 GMT -8
Looking good so far. I love how well the spray paint worked. I sometimes use it when I don't feel like getting the airbrush and compressor out. It doesn't always work out as well as it did for you. Timothy Dineen Thanks. The airbrush is a hassle which is admittedly very necessary in limited cases. For many other applications the spray paint works very well and I would recommend you keep trying with Krylon. Seems to be the best for plastic models. |
|
|
|
Post by sd40dash2 on Sept 26, 2020 14:03:38 GMT -8
We'll now focus on brown caboose 119 for the next series of photos. Decals and end windows have been applied and are dry and the stack has been painted. Ready to take this outside for a quick application of dullcote.  |
|
|
|
Post by sd40dash2 on Sept 27, 2020 3:11:51 GMT -8
Hand-painted the sills and inside of the shell flat black so the shell will match the underframe when attached. I'll also be addressing that interior paint overspray.  |
|
|
|
Post by sd40dash2 on Sept 27, 2020 7:37:42 GMT -8
SOO 119 shell has been dullcoted. 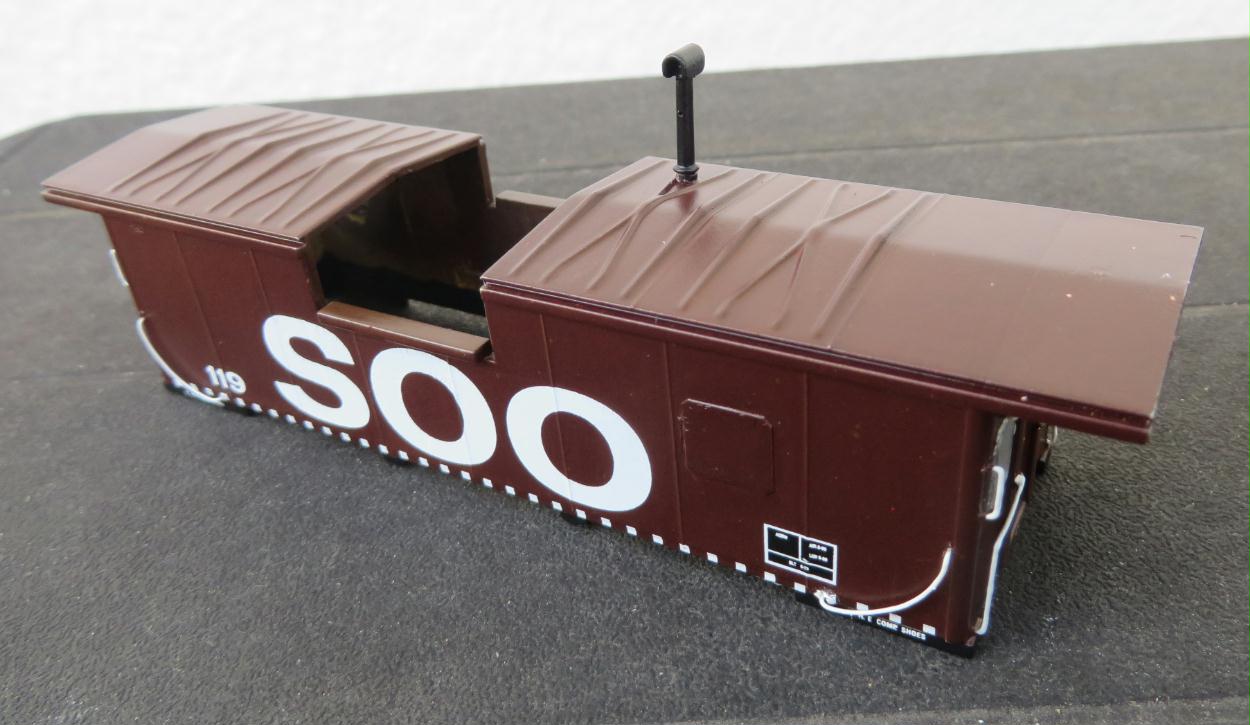 |
|
|
|
Post by Christian on Sept 27, 2020 7:45:11 GMT -8
I'll also be addressing that interior paint overspray. Who's going to see it? |
|
|
|
Post by sd40dash2 on Sept 27, 2020 7:48:00 GMT -8
^ I know it's like that plus all of you have now seen the interior. Anyone who takes it apart in the future to add details or electronics will see it as well. Cabooses are strange that way. While we generally cannot see the interior under normal viewing conditions, we know when we have nice (or crappy) caboose interiors. There is comfort in knowing it looks good in there. JMO.
|
|
|
|
Post by sd40dash2 on Sept 27, 2020 9:44:58 GMT -8
Interior walls and ceiling of SOO 119 have been hand-painted primer grey. Now the crew can ride in uniform, drab comfort.  |
|
|
|
Post by sd40dash2 on Sept 27, 2020 14:26:00 GMT -8
The interior of the cupola looks terrible. I am going to be painting the walls and roof light grey to match the prototype. The crew at least deserves a uniform interior paint job, no matter how drab. 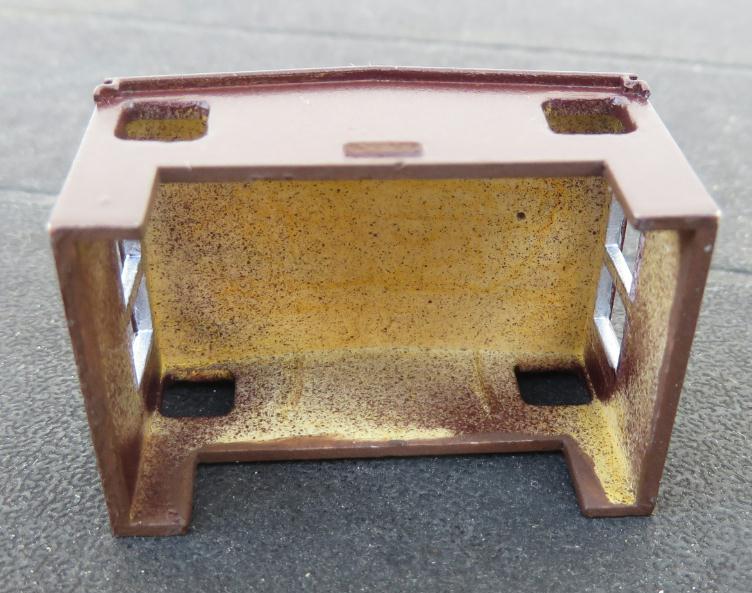 |
|
|
|
Post by sd40dash2 on Sept 27, 2020 16:39:21 GMT -8
SOO 119 still had its beacon in the early years of this brown paint job. Besides that, there is very little detailing necessary to the roof of these cabooses. It wouldn't be very difficult if Walthers wanted to produce a deluxe version of this model for their Proto line.  |
|
|
|
Post by sd40dash2 on Sept 28, 2020 2:52:50 GMT -8
Ahhh much better. Interior walls and ceiling of 119's cupola have been painted light grey to match the prototype. If anyone ever adds interior lighting to this model or even looks through the windows, this paint work will offer a much nicer finished appearance.  |
|
|
|
Post by sd40dash2 on Sept 28, 2020 5:16:33 GMT -8
Seats have been carefully positioned and glued inside the cupola. Take care to allow sufficient lower clearance for cupola mount to shell. 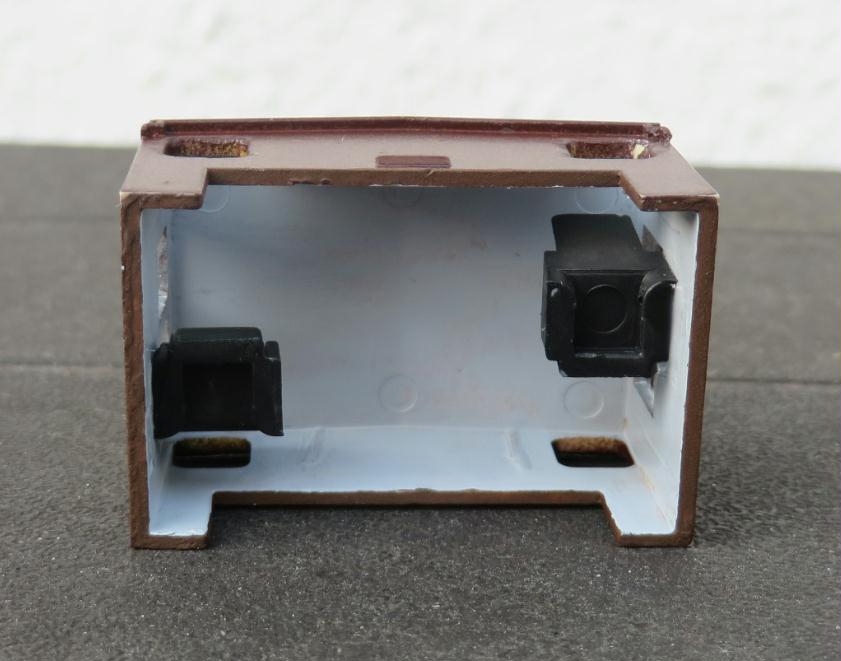 |
|
|
|
Post by sd40dash2 on Sept 28, 2020 11:18:10 GMT -8
Cupola completed and ready to re-attach to shell. The face windows will be installed once the cupola has been reattached to shell.  |
|
|
|
Post by sd40dash2 on Sept 28, 2020 13:46:16 GMT -8
Close-up of the #105 end railings installed and painted along with sills painted at the same time.  |
|
|
|
Post by thunderhawk on Sept 28, 2020 14:03:50 GMT -8
The be prototypical the windows should be essentially opaque with a slug or two in them.
So comforting sailing down the main at 50, ears ringing from flatspots, while looking at the slug embedded in the window in front of you.
|
|
|
|
Post by trainguy99 on Sept 28, 2020 16:05:23 GMT -8
Really nice work, especially using a spray bomb.
|
|
|
|
Post by sd40dash2 on Sept 29, 2020 2:52:59 GMT -8
Decals and dullcote have been applied.  |
|
|
|
Post by sd40dash2 on Sept 29, 2020 8:08:00 GMT -8
One thing I discovered with the last two of these I built is the unprototypical difference in colour underneath from the shell to the underframe. Both the underside of the side walls and the underframe itself should be black when you turn the model upside down. This is how you can accomplish that, note the black hand-painting. 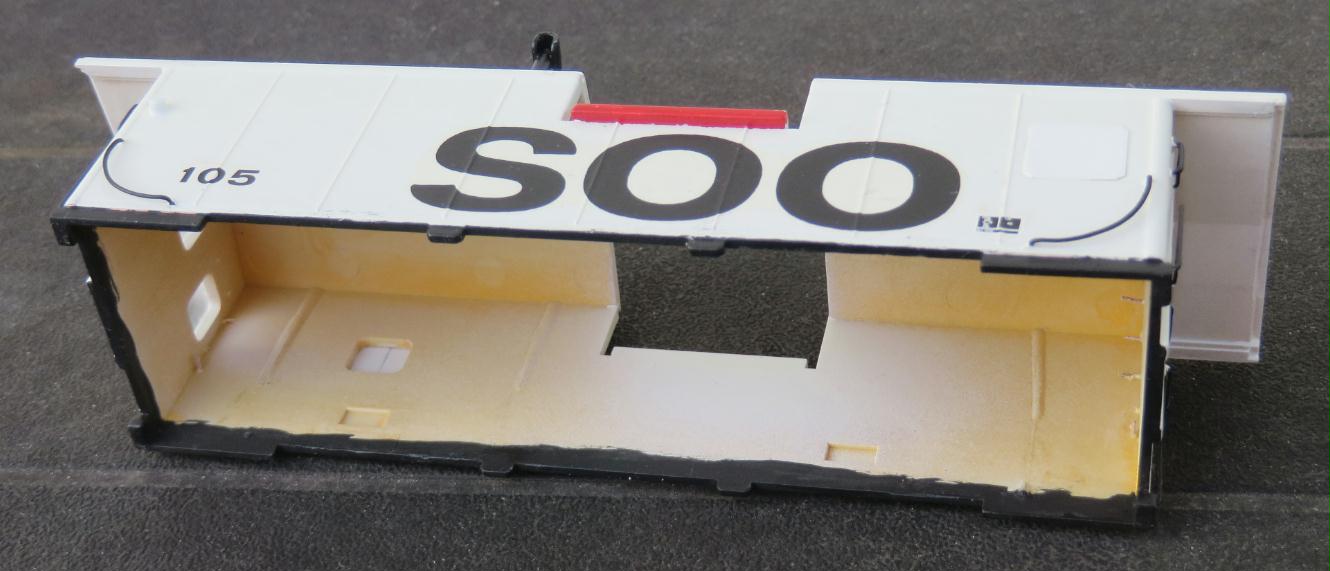 |
|
|
|
Post by sd40dash2 on Sept 29, 2020 14:01:18 GMT -8
SOO 105's inside has been painted light grey, being careful to leave the hand painted black sill treatment intact. It is very sloppy-looking right now, but once I attach the underframe it will all blend together beautifully.  |
|
|
|
Post by sd40dash2 on Sept 30, 2020 2:57:22 GMT -8
SOO 105 weathering complete, re-mounted to underframe, see how the underside of the side walls matches the black underframe?  |
|
|
|
Post by sd40dash2 on Sept 30, 2020 6:57:32 GMT -8
The Walthers window part is a large and extremely toy-like piece that produces an unattractive recessed window. I have decided to cut my own windows and these are the ones for both cupolas.  |
|
|
|
Post by sd40dash2 on Sept 30, 2020 13:37:06 GMT -8
Cupola has been attached to shell and flush windows and etchings have been installed.  |
|
|
|
Post by sd40dash2 on Oct 1, 2020 2:48:52 GMT -8
Assembled view of completed interior treatment with corrected end markers. 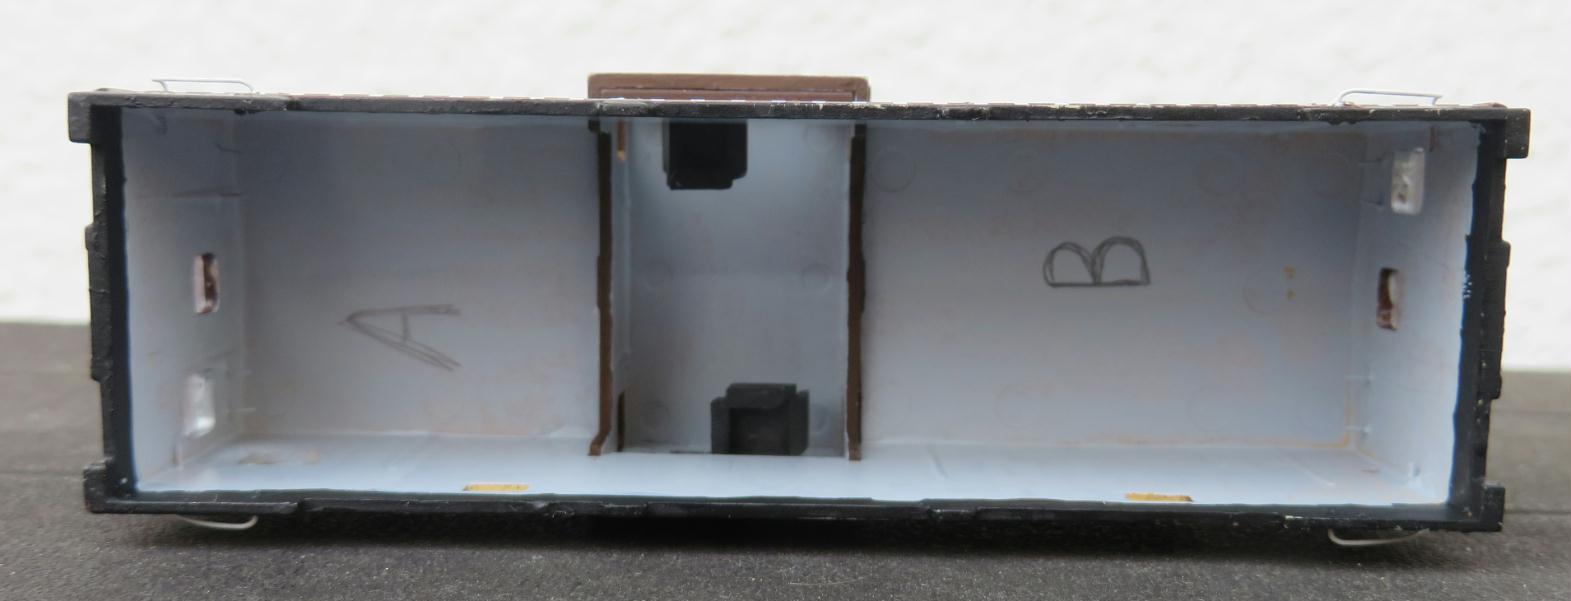 |
|


