|
|
Post by sd40dash2 on Nov 10, 2020 7:16:59 GMT -8
^ Thanks Evan. Those were branches from a spruce tree.
|
|
|
|
Post by sd40dash2 on Nov 11, 2020 3:43:24 GMT -8
Don't put the spray cans away just yet! I tested the flat black paint on a scrap piece of wood first to ensure it wouldn't warp. No trouble here so I proceeded to spray the underside of the flat car along with the truck and coupler box sprues.  |
|
|
|
Post by sd40dash2 on Nov 12, 2020 3:25:47 GMT -8
Flat black paint is now drying outside in a November heatwave. It looks here like the paint is thicker than it actually is -- it dried nice and flat and thin.  |
|
|
|
Post by sd40dash2 on Nov 13, 2020 3:47:30 GMT -8
I much prefer spray painting trucks over brush painting them. 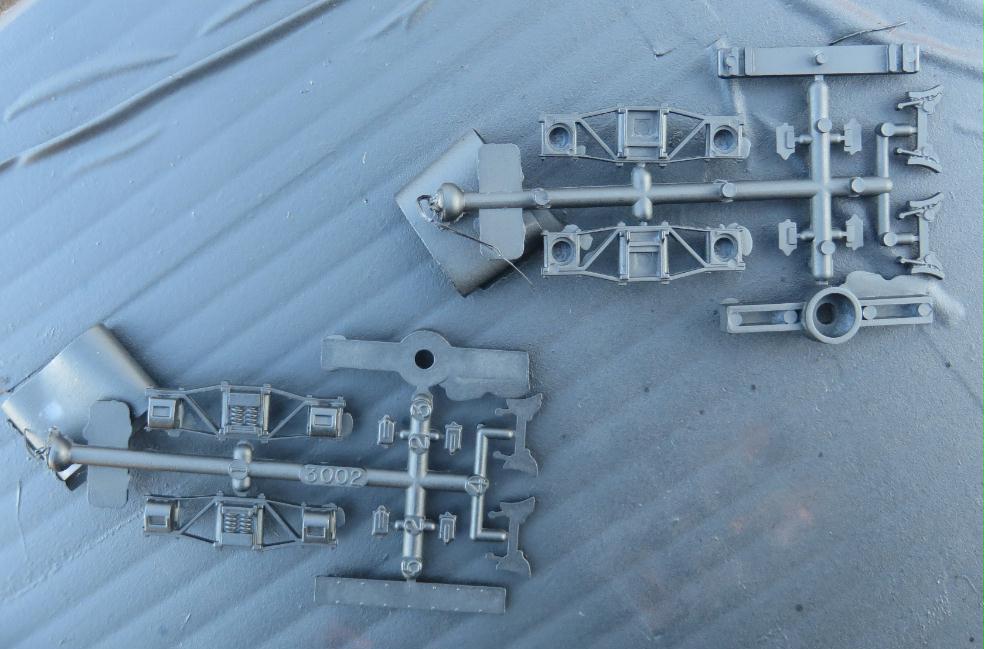 |
|
|
|
Post by sd40dash2 on Nov 14, 2020 4:19:43 GMT -8
Arch bar trucks are complete and ready for installation and weathering. Working with such parts really takes me back as I enjoy imagining what life and railroading must have been like back then. Seems like it would have been a tough life in the era of these trucks.  |
|
|
|
Post by edwardsutorik on Nov 14, 2020 12:52:15 GMT -8
I just happened upon this website by a modeler with an interest in 1900 railroading: www.wnbranch.comEd |
|
|
|
Post by sd40dash2 on Nov 14, 2020 13:40:18 GMT -8
^ Thank you for that. That website is very well designed and up to date with interesting videos and information. It's also nice to see standalone hobby sites like this still extant in an age when many are moving over to the various awful social media interfaces.
|
|
|
|
Post by Christian on Nov 14, 2020 16:56:35 GMT -8
^ Thank you for that. That website is very well designed and up to date with interesting videos and information. It's also nice to see standalone hobby sites like this still extant in an age when many are moving over to the various awful social media interfaces. A real website is harder to do. I have a feeling that lots of the stuff on social media would never be seen if the creator had to make and maintain a web site. So we take the good with the bad. And, yes, I'm also with you about razzle dazzle social media. I much prefer the more reflective nature of a web site. With a web site you have to work your mind. With lots of social media you sit back and get assaulted. |
|
|
|
Post by sd40dash2 on Nov 15, 2020 3:39:58 GMT -8
Time to start staining the deck after sealing it with dullcote and allowing that to dry. I started with a base coat of solid yellow.  |
|
|
|
Post by Christian on Nov 15, 2020 4:55:16 GMT -8
I started with a base coat of solid yellow. Yellow huh? That's a new one for me. Can't wait. |
|
|
|
Post by sd40dash2 on Nov 16, 2020 3:46:58 GMT -8
Next was a diluted 80-20 water-paint coat of burnt umber. This coat should be semi-transparent, not solid. The only solid colour when painting the deck should be the yellow from the previous step. 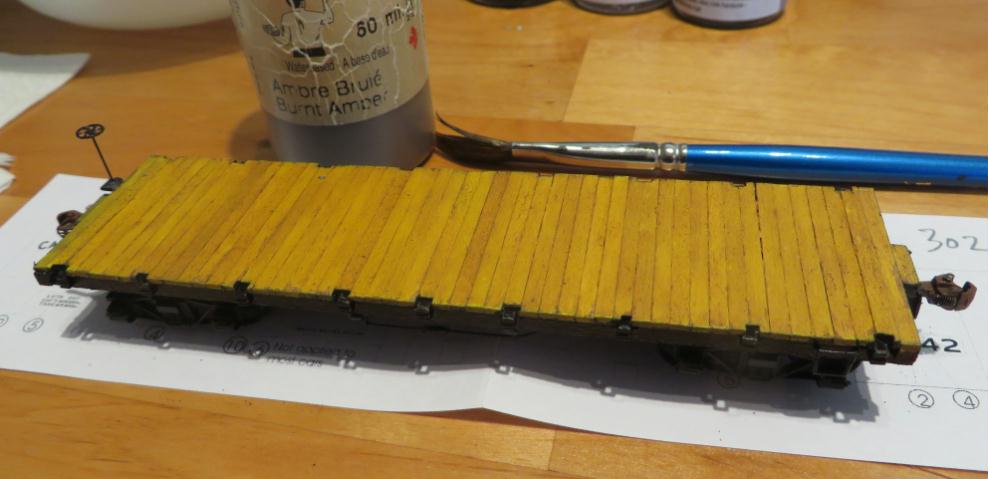 |
|
|
|
Post by sd40dash2 on Nov 17, 2020 6:15:29 GMT -8
Next was a thinned coat of grey to age the wood.  |
|
|
|
Post by slowfreight on Nov 17, 2020 6:43:03 GMT -8
Somehow when we weren't looking it went from a pile of parts to a mostly-complete car.
|
|
|
|
Post by riogrande on Nov 17, 2020 6:56:09 GMT -8
Now all you need to to put a major swayback into it like Malcom Furlow used to do back in the day! Nice job.
|
|
|
|
Post by sd40dash2 on Nov 17, 2020 10:55:17 GMT -8
Followed by a heavily diluted coat of black.  |
|
|
|
Post by edgecrusher on Nov 17, 2020 10:57:21 GMT -8
Looking good! You threw me off starting with the yellow like that.
|
|
|
|
Post by sd40dash2 on Nov 18, 2020 3:52:01 GMT -8
More black to flow in between the cracks. 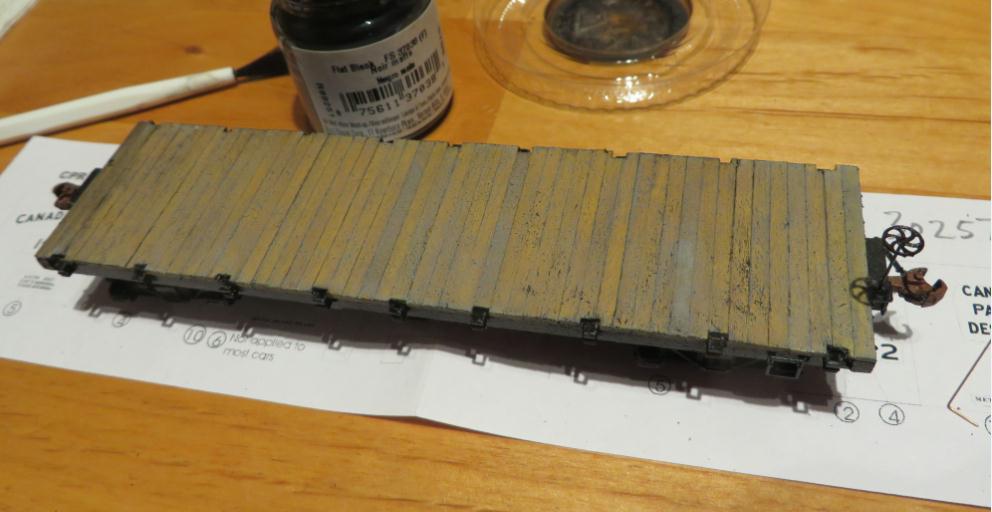 |
|
|
|
Post by sd40dash2 on Nov 19, 2020 5:17:40 GMT -8
Yet more black thin wash. I know everyone has a different way of doing this and different ages of prototypes. I am merely sharing here what seemed to work for me.  |
|
|
|
Post by sd40dash2 on Nov 20, 2020 4:44:52 GMT -8
One final thin wash of grey along with some drybrush black to highlight finer surface detail. I guess some would keep going but I'm going to stop here. Funny thing, this always looks different depending on the lighting conditions it's viewed in. Hope this helped you, feel free to modify my methods to suit. If any of this inspired any of you, please post a photo!  |
|
|
|
Post by riogrande on Nov 20, 2020 5:47:24 GMT -8
Even more gray wouldn't hurt. Most aged wood is gray, gray, gray, and little if any brown at all.
|
|
|
|
Post by sd40dash2 on Nov 20, 2020 8:58:03 GMT -8
View of the underframe after some light dry brush rust weathering to highlight the details. 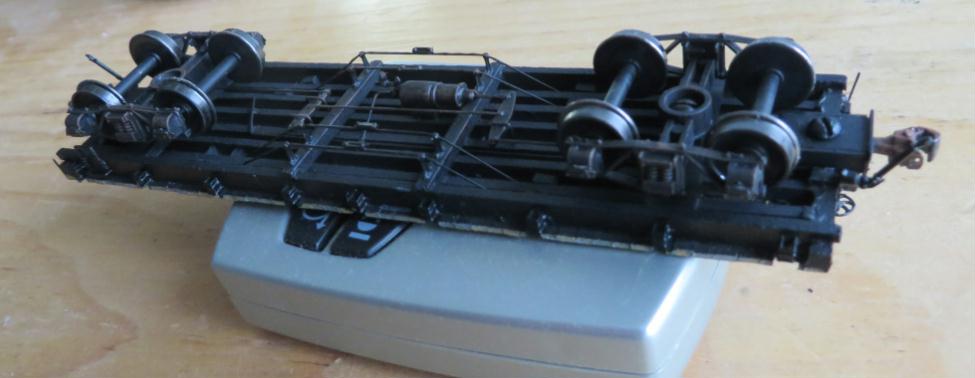 |
|
|
|
Post by sd40dash2 on Nov 20, 2020 16:26:55 GMT -8
Decals have been installed but it's now too cold to spray outside. So I connected the bsmt spray booth vent hose to the window, fired up the fan and sprayed in here. Worked well.  |
|
|
|
Post by sd40dash2 on Nov 21, 2020 3:58:20 GMT -8
Decalling complete including sealing and drying. The base car is now totally finished as Juneco intended. I plan to pick up the pace to several postings per day until this build is finished in the next few days. 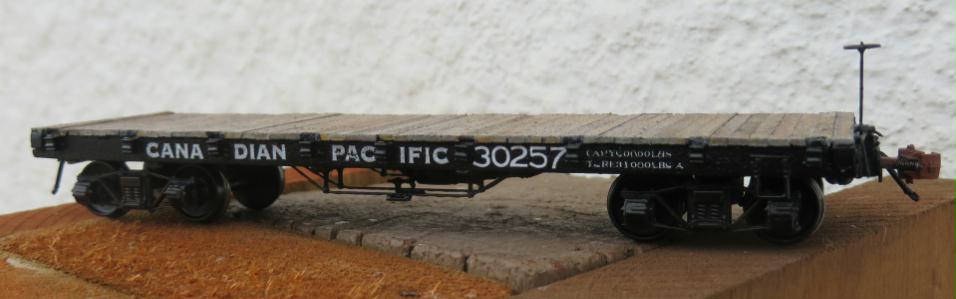 |
|
|
|
Post by sd40dash2 on Nov 21, 2020 6:57:36 GMT -8
Final view of the underframe of the completed car. The camera revealed some modelling flaws in my axle paint treatment, so I'll be fixing that later. These flaws were invisible under my [obviously poor] modelling light and visor magnification FYI.  |
|
|
|
Post by sd40dash2 on Nov 21, 2020 9:39:01 GMT -8
Onto the load, here we begin by installing the brackets for log load and allowing to dry. A napkin keeps the car from rolling away.  |
|
|
|
Post by sd40dash2 on Nov 21, 2020 13:50:41 GMT -8
Apply a bit of scale bark and other wood debris onto the top of the deck. I did this by rubbing some of it off the load.  |
|
|
|
Post by Christian on Nov 21, 2020 16:13:17 GMT -8
OK, I'll try the yellow undercoat. I was really skeptical until I saw the finished deck with the black sides and white lettering. It seems to homogenize very well. Of course, you are going to cover it all up with logs and debris!
|
|
|
|
Post by sd40dash2 on Nov 21, 2020 16:19:43 GMT -8
^ Taking inspiration from others, I love it!  Brush most of the debris onto the outer edges where it will be seen; remember the logs will occupy most of the surface of this car, so why bother wasting this valuable debris in an area where it won't be seen on a loaded car?  |
|
|
|
Post by fr8kar on Nov 21, 2020 18:09:23 GMT -8
OK, I'll try the yellow undercoat. I was really skeptical until I saw the finished deck with the black sides and white lettering. It seems to homogenize very well. Of course, you are going to cover it all up with logs and debris! Who knew? Except Manny, of course! Always something to learn here. |
|
|
|
Post by sd40dash2 on Nov 21, 2020 18:40:29 GMT -8
Use the diluted wet glue trick to affix the debris to the surface. 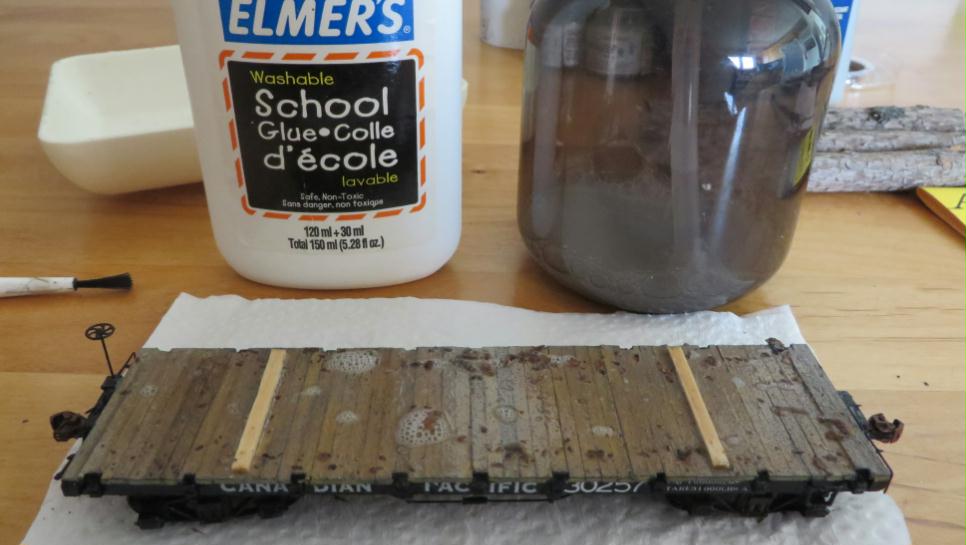 |
|


