|
|
Post by sd40dash2 on Nov 22, 2020 5:24:28 GMT -8
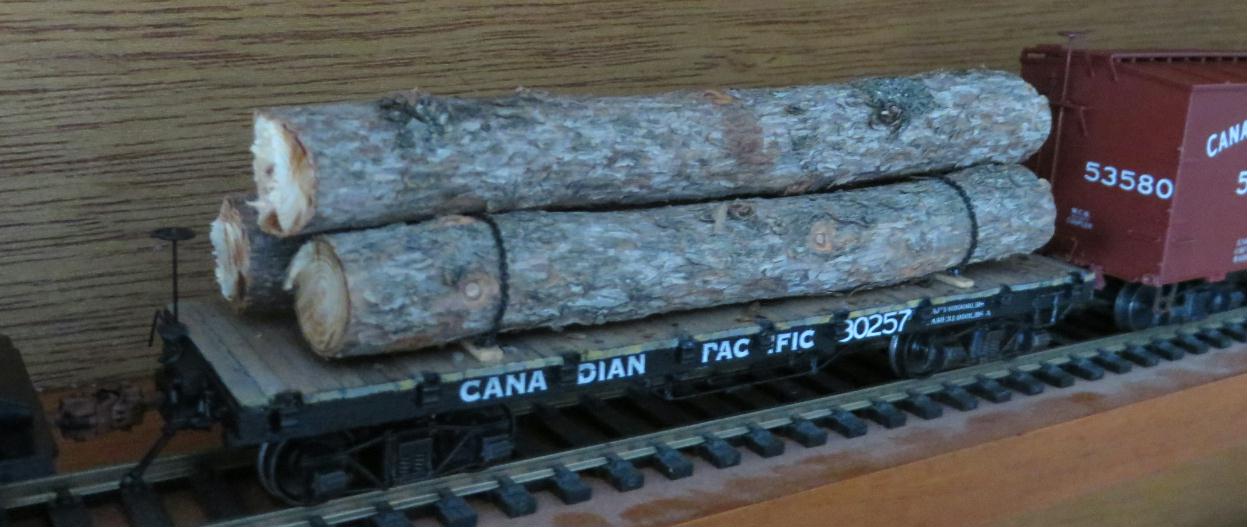
Load braces and debris are installed and dry, ready for next step. 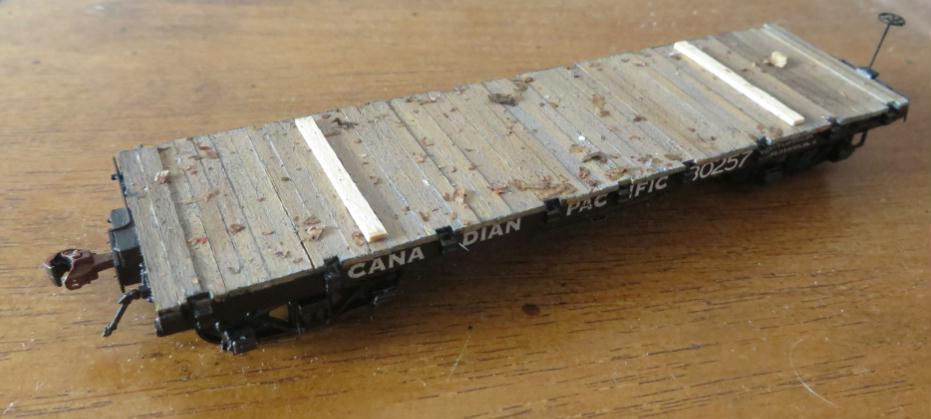 |
|
|
|
Post by sd40dash2 on Nov 22, 2020 8:42:48 GMT -8
Get the logs ready and tie-down chains cut to length.  |
|
|
|
Post by sd40dash2 on Nov 22, 2020 11:52:46 GMT -8
Attach the tie-down chains to the braces with ACC and allow to dry. 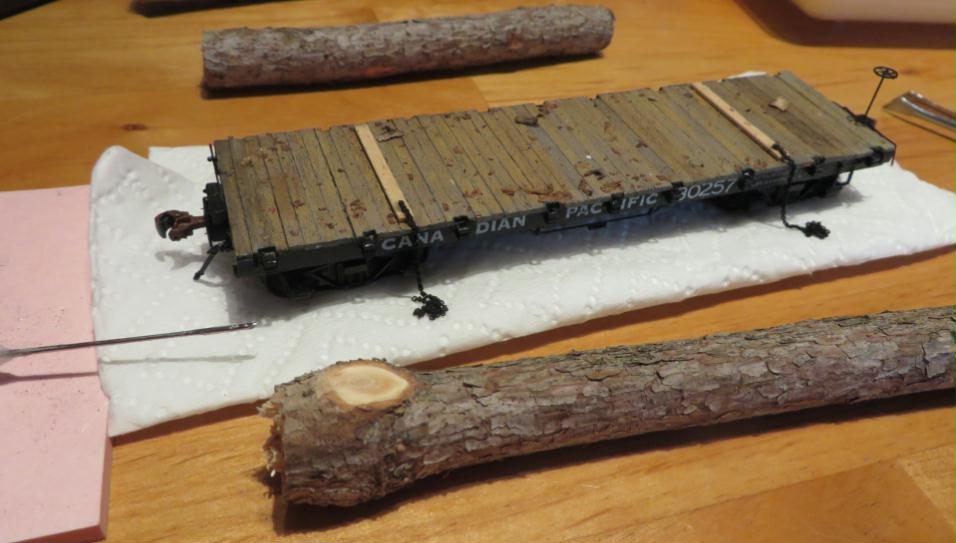 |
|
|
|
Post by sd40dash2 on Nov 22, 2020 14:51:12 GMT -8
Closer view. I had earlier test-mounted the logs and marked the chain mounting spots with pencil. 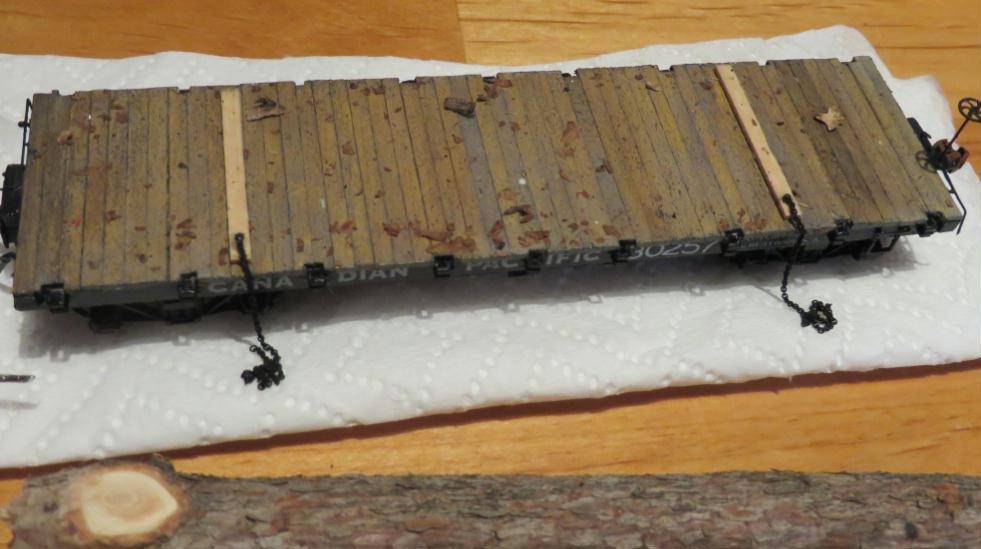 |
|
|
|
Post by sd40dash2 on Nov 22, 2020 19:35:49 GMT -8
Install the bottom two logs to the deck using lots of Weldbond. Always allow lots of drying time, at least 12-24 hours between each of these steps.  |
|
|
|
Post by sd40dash2 on Nov 23, 2020 3:45:10 GMT -8
Once logs are confirmed to be firmly in place, drape the chains over top and onto the braces underneath the logs as much as possible. According to the prototype photos I viewed, the chains were only used on the bottom two logs like this and the top log would help keep the tension out as the chains tended to loosen en route. 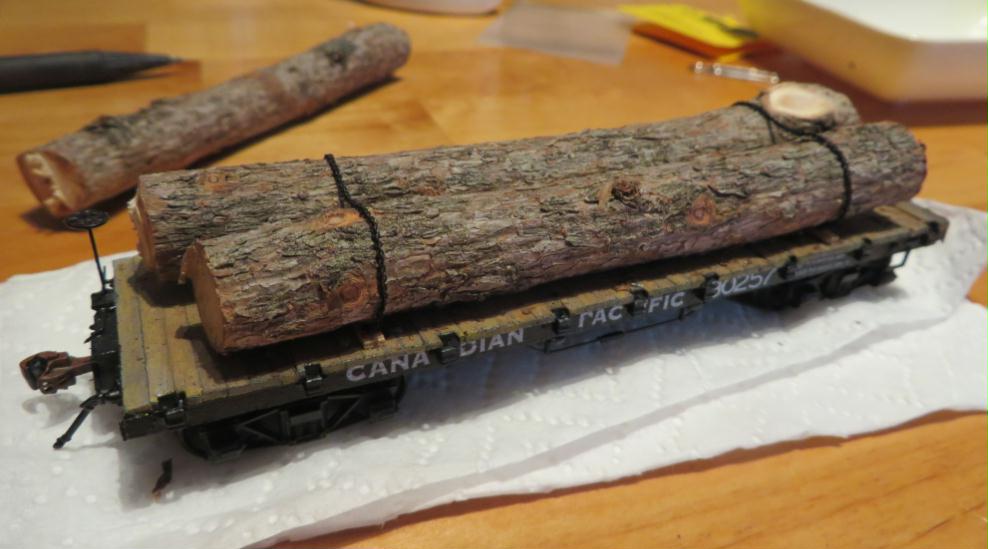 |
|
|
|
Post by sd40dash2 on Nov 23, 2020 5:46:40 GMT -8
MODEL FINISHED: Top log was installed with more Weldbond. 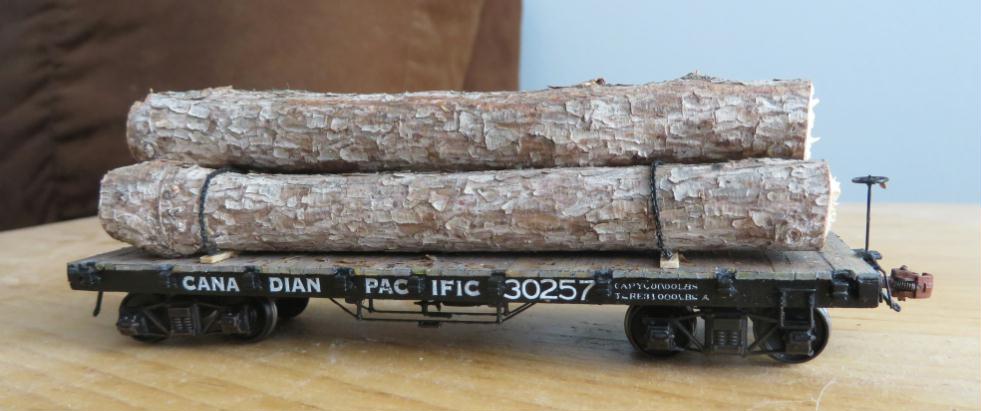 |
|
|
|
Post by Christian on Nov 23, 2020 5:51:03 GMT -8
This is turning out to be very colorful for a black and white car.
|
|
|
|
Post by sd40dash2 on Nov 23, 2020 10:15:53 GMT -8
MODEL FINISHED: View of the log cuts at the opposite end of the car. 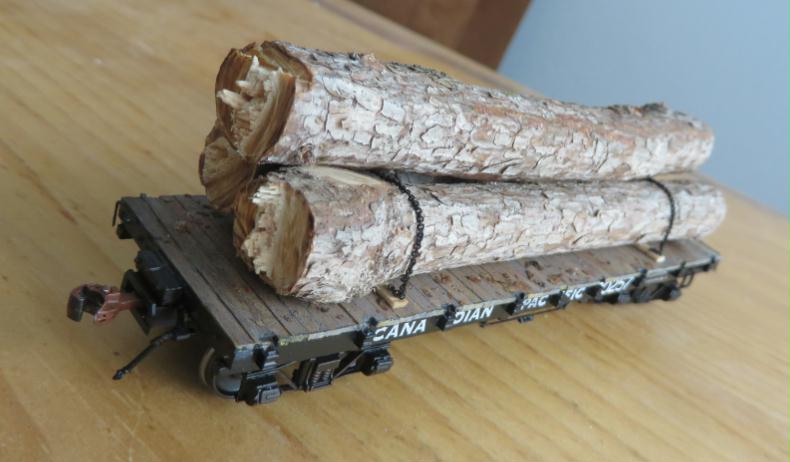 |
|
|
|
Post by GP40P-2 on Nov 23, 2020 11:15:25 GMT -8
Now you probably need a dozen more or so, to fill out a log train. Build, paint, repeat.....
BTW, Nice build!
|
|
|
|
Post by sd40dash2 on Nov 23, 2020 12:22:55 GMT -8
^ Thanks for the suggestion and comment. Nah, this was just an irrelevant diversion to my usual era and I don't plan to expanding on it very much unless I become truly bored again. MODEL FINISHED: This is the box the finished model will be stored in. The box is very important as all of these trains will one day be sold and the buyer will want a box. 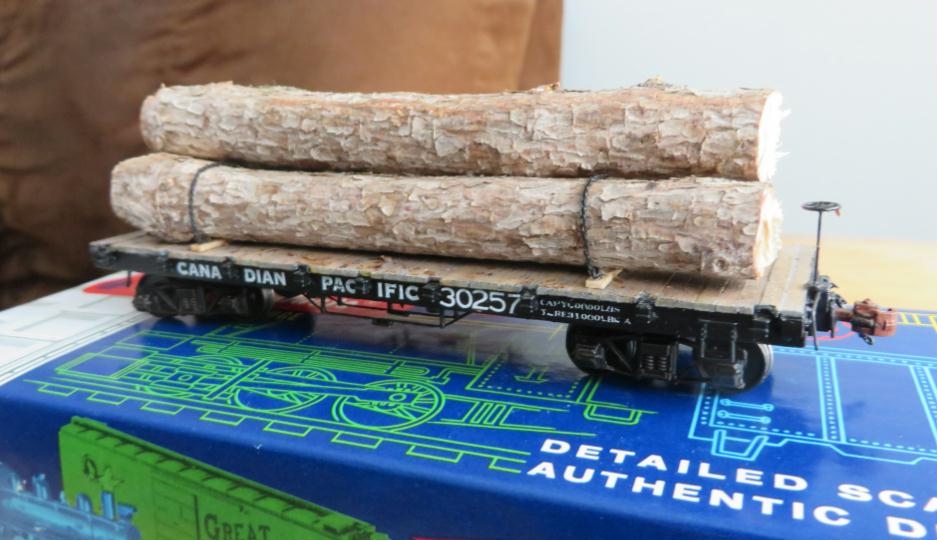 |
|
|
|
Post by sd40dash2 on Nov 23, 2020 14:34:12 GMT -8
MODEL FINISHED: As Juneco no longer supplies a box with their kits, I had to use a spare and affix the end label from the kit packaging. I request forgiveness for not using the superlative Arrowhead box. It was just a bit too long for this car and didn't fit quite right. 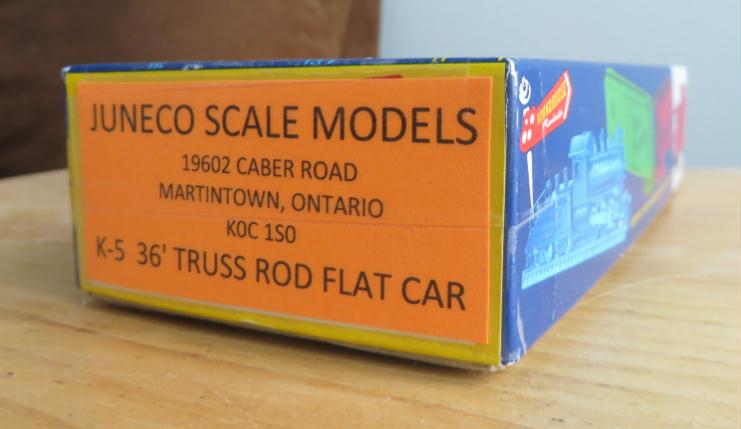 |
|
|
|
Post by valenciajim on Nov 23, 2020 22:29:58 GMT -8
This is a truly impressive model.
|
|
|
|
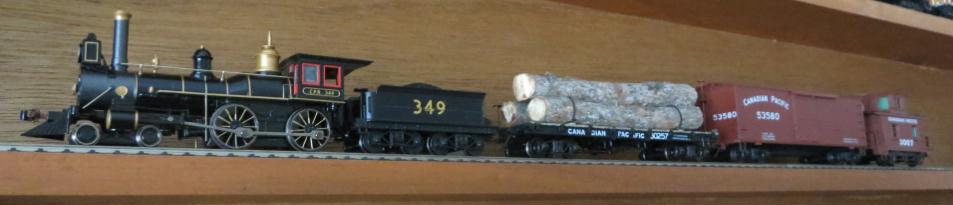
Post by sd40dash2 on Nov 24, 2020 2:59:59 GMT -8
|
|
|
|
Post by riogrande on Nov 24, 2020 3:49:22 GMT -8
One fine flatcar and load. Thanks for sharing.
|
|
|
|
Post by edgecrusher on Nov 24, 2020 6:38:04 GMT -8
Looks great, the flat fits very well with the rest of the train.
|
|
|
|
Post by Christian on Nov 24, 2020 7:31:22 GMT -8
I was hoping you would fit it into a train for a photo. Surprised to note that CP was using five digit car numbers way back then.
|
|
|
|
Post by GP40P-2 on Nov 24, 2020 13:45:47 GMT -8
I dunno, but I think that train would look real good with a couple more of those!
|
|
|
|
Post by sd40dash2 on Nov 24, 2020 14:03:19 GMT -8
I dunno, but I think that train would look real good with a couple more of those!  Is it that you really like ancient flatcars or that you want me to continue posting build threads? If the latter I could start something on the bobber caboose but I don't see myself building any more of those flats. |
|
|
|
Post by Colin 't Hart on Nov 26, 2020 14:07:42 GMT -8
I must admit when you started this thread I read "Circa 1900-1910" and I thought "Meh". But I love log cars, and this one is a beauty! Really nice work, Manny!
|
|
|
|
Post by sd40dash2 on Nov 26, 2020 14:28:50 GMT -8
^ Thanks Colin. You had said you missed my threads so I kinda did this for you. Glad you enjoyed. I had fun building this. |
|


 Is it that you really like ancient flatcars or that you want me to continue posting build threads? If the latter I could start something on the bobber caboose but I don't see myself building any more of those flats.