|
|
Post by princessofthecape on Oct 18, 2013 20:10:19 GMT -8
As I have discussed in another thread, I'm currently planning a 'one off' module with dimensions approximately 6' x 18" that'll constitute a small switching layout. I have worked with foam insulation board many times in the past, even going so far as to buy a hot wire cutter to aid with sculpting (and good lord, what a wonderful tool it is), so I'm not unfamiliar with the material itself. However, I've always employed some kind of a base for the foam -- either a flimsy board frame, hollow-core wood doors, or a piece of plywood. On this attempt, mobility is going to be key. Additionally, the railroad will need to be supported by simple shelf brackets attached to an apartment wall. This means the final product needs to be as lightweight as possible, and this has led me to consider eschewing all traditional forms of benchwork. So, here's the questions: Has anyone here used only foam insulation board to build their layout? If so, what's the minimum thickness for a base required? Has the material proven durable enough to be moved (potentially a lot)? Have you had any luck attaching a veneer to the foam in order to improve appearances? If an all-foam base isn't workable, what's the lightest-weight solution you guys would suggest to use as a base for terrain construction? *Edit* Also, here is the basic -- BASIC -- plan for the layout, with the Cannery/quay in the upper right hand corner, and some kind of swing or lift bridge on the tidal marsh on the left. This only exists on paper atm and I've purchased none of the supplies, so feel free to throw out suggestions to enhance or improve operations. I know this is a very simple track plan, but I didn't want to create another of the ubiquitous John Allen Timesaver knockoffs where every inch of space is eaten up by track or industry. Still, as I said, I would welcome suggestions. 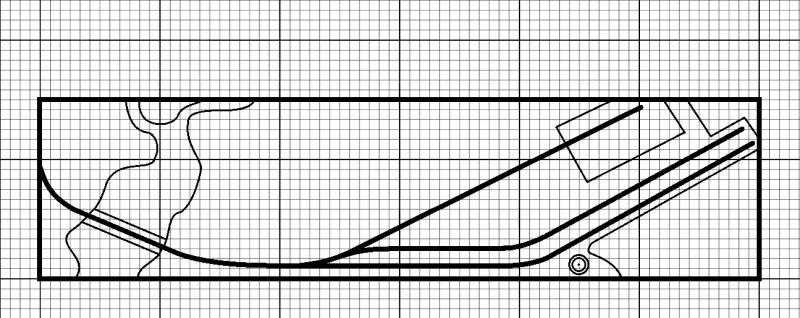 |
|
|
|
Post by mlehman on Oct 18, 2013 21:02:17 GMT -8
2" foam would work well for a layout that size. 1" foam would be too flexible. I'd recommend framing around the perimeter to protect against gouges more than for strength. You could use 1/8" masonite or 1/4" luaun. Use PL300 or another foam-safe adhesive to bond it to the foam.
|
|
|
|
Post by WP 257 on Oct 18, 2013 22:04:10 GMT -8
Yes, I have an only-foam base, 2" pink.
Read the foam in the store. Where I shopped, the rated strength in either pounds per square inch or per square foot was stamped on the foam. Don't let the rug-rats stand on the foam, and it'll do fine.
My father constructed a bolt-together (in sections, so it can be moved someday) lightweight wood framework to support the pink insulation foam sheets. I then glued the foam sheets to the frame using Liquid Nails. It has worked very well, and the layout has survived very well despite children playing in the room. Only edges of the foam where it gets rubbed a lot by children have flaked or worn.
The only issues are that the foam sheets are not totally flat, and can be a bit of a challenge to get to lay flat on the lightweight wood framework, so where I was originally intending to apply a second layer of 2" thick foam, I opted not to do so, and instead used lightweight plaster and/or spackling compound to build up scenery relief where desired.
The foam was easy to work with. I only needed the foam cutting tool, and of course putty knives to cover seams, etc.
|
|
|
|
Post by princessofthecape on Oct 19, 2013 1:49:38 GMT -8
I added a rough plan of the layout to the original post, so as to not spam up the forum with threads. Any comments/critiques are encouraged.
|
|
Deleted
Deleted Member
Posts: 0
|
Post by Deleted on Oct 19, 2013 6:06:14 GMT -8
You'll need a frame for six feet in length. When you start putting the scenery, track and expensive toy trains on that foam, you'll be surprised how flexible it can get. I used pink foam as scenery base 1 1/2" thickness and I surely wouldn't want to have $300 choo choo's supported by just that foam, too flexible. Once the foam was affixed to the wood framing of the bench work, it was solid.
Also, the stuff can't take much abuse. It chips, dents and breaks with little effort. I set one foam board down a little hard on the bench work and it hit a corner of the lumber. That point put divot in the foam board. So, if you plan on moving this, you'll need a frame of some sort. Also you can attach the lumber frame to the shelf brackets much more securely than you could ever do with just the foam board.
|
|
Deleted
Deleted Member
Posts: 0
|
Post by Deleted on Oct 19, 2013 6:16:41 GMT -8
Also, here is the basic -- BASIC -- plan for the layout, with the Cannery/quay in the upper right hand corner, and some kind of swing or lift bridge on the tidal marsh on the left. This only exists on paper atm and I've purchased none of the supplies, so feel free to throw out suggestions to enhance or improve operations. I know this is a very simple track plan, but I didn't want to create another of the ubiquitous John Allen Timesaver knockoffs where every inch of space is eaten up by track or industry. Still, as I said, I would welcome suggestions. Don't take it personally, but there is a reason that John Allen stuffed as much track, etc. into a plan. Minimal track for a large layout works, minimal track for a small layout equals boring. If this this module of yours is to be something more than a future cornerstone to a larger layout or something to serve as a back drop for photos of models, then you've got something. If you want this to be a layout that is operated, I can see five minutes of fun, if that, and then onto washing the dishes, scrubbing the shower or whatever floats your boat at the moment. Scenery is nice, but you can't run trains on the scenery, especially if this is all you've got. You need more to keep it interesting. |
|
|
|
Post by mlehman on Oct 19, 2013 6:24:24 GMT -8
A couple of suggestions in line with Jim's comments...
Where the double spurs are parallel with the edge would make a good place for a run-around. It's not absolutely needed, if you switch from one end only as things are arranged here. However, it's worth considering you might connect it to something else eventually.
I'd also consider making where the main that leads to the edge on the left a straight piece of track. It'll be hard to connect with that curve in it that starts just before you get to the edge. This would also facilitate adding a temporary staging track/fiddle yard with a couple or three tracks that could be added on when you operate. This could serve as the originating yard for locals serving this complex. The runaround would make it possible for the loco to lead coming from staging, then lead back out again after running around its train.
|
|
|
|
Post by princessofthecape on Oct 19, 2013 14:07:38 GMT -8
Actually, my plan is a reversal of the classic British shunting puzzle the Inglenook Sidings: www.wymann.info/ShuntingPuzzles/sw-inglenook.html which isn't seen a lot in U.S. tiny layouts, but is quite common across the pond. Having said that, I am looking at all options, as I do agree that there is a lot of concern that it could grow stale or boring with time. I may crank out a couple of alternate designs just to see what I can come up with. |
|
|
|
Post by catt on Oct 19, 2013 16:11:17 GMT -8
If it were my layout I would factor in a couple more sidings and at least a run around track on the right end so the loco could escape to lead the train back to the yard (staging).
|
|
|
|
Post by princessofthecape on Oct 20, 2013 0:33:48 GMT -8
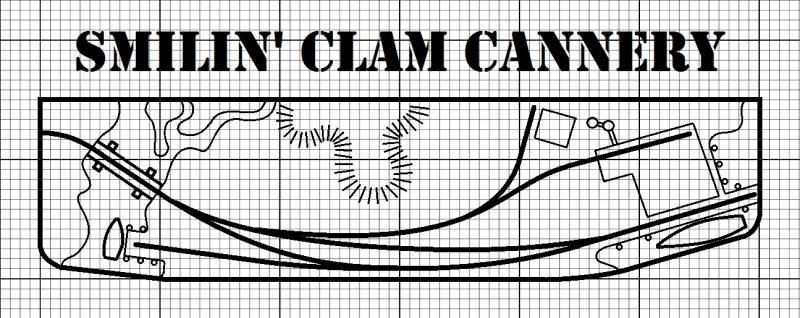 Okay, here's a revised version of the plan. Again, I'm still wide-open on design, but this one does incorporate a roughly 30" runaround track, plus three sidings (two serving the cannery; the third a state-owned fishing pier). It still feels like it's missing something, but maybe I'm just tired. Is this an improvement on the last one? |
|
|
|
Post by nscaler711 on Oct 20, 2013 1:32:07 GMT -8
In my opinion I like the new version a little better, and its not quite spaghetti laid out either.
Have you thought about doing this in N scale like the gentlemen's you posted about on another thread? With the space you want you could do twice as much in N.. this way you get all the scenery and trains you want without either too over powering.
Also with N scale everything is lighter, and is perfect for foam only set ups like yours. If you use 2" thick foam you can carve out 1/2" down and have the perfect depth for water ways and it gives you an excuse for a lift bridge or any other type of bridge.
And I'll be honest N scale is easier on a budget too with locomotives going from $50 to $120, and DCC in the $20 to $100 for sound.
(Sorry not trying to be an advocate for N scale, I have both scales, love the details in HO but love the scenery and long trains in small spaces in N )
|
|
|
|
Post by princessofthecape on Oct 20, 2013 1:46:16 GMT -8
In my opinion I like the new version a little better, and its not quite spaghetti laid out either. Have you thought about doing this in N scale like the gentlemen's you posted about on another thread? With the space you want you could do twice as much in N.. this way you get all the scenery and trains you want without either too over powering. Also with N scale everything is lighter, and is perfect for foam only set ups like yours. If you use 2" thick foam you can carve out 1/2" down and have the perfect depth for water ways and it gives you an excuse for a lift bridge or any other type of bridge. And I'll be honest N scale is easier on a budget too with locomotives going from $50 to $120, and DCC in the $20 to $100 for sound. (Sorry not trying to be an advocate for N scale, I have both scales, love the details in HO but love the scenery and long trains in small spaces in N ) I was an N-scale modeler for about five years, and I had my start in N. However, about 6 years ago, I decided to sell off all my N-scale engines and rolling stock. The reason was pretty simple: I love, love, LOVE to scratch build structures -- almost all of them without plans, templates, or even rough designs. Unfortunately, I simply wasn't in any way satisfied with the stuff I was producing in N... and the moment I switched to HO, it made a huge difference. Here are a few examples of stuff I've built:  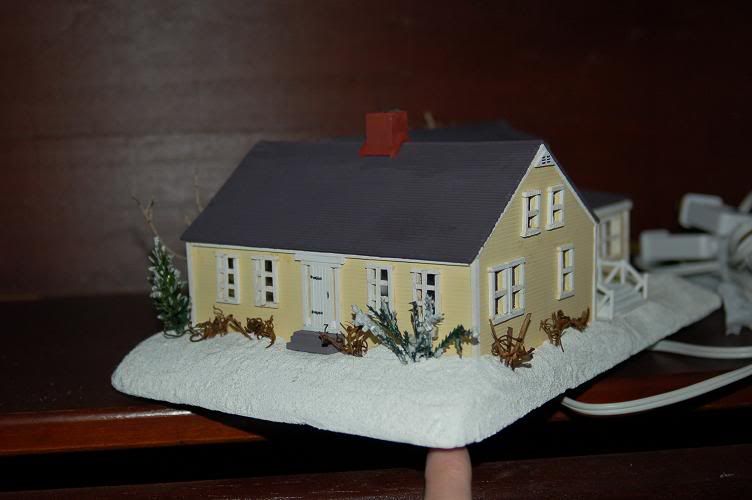 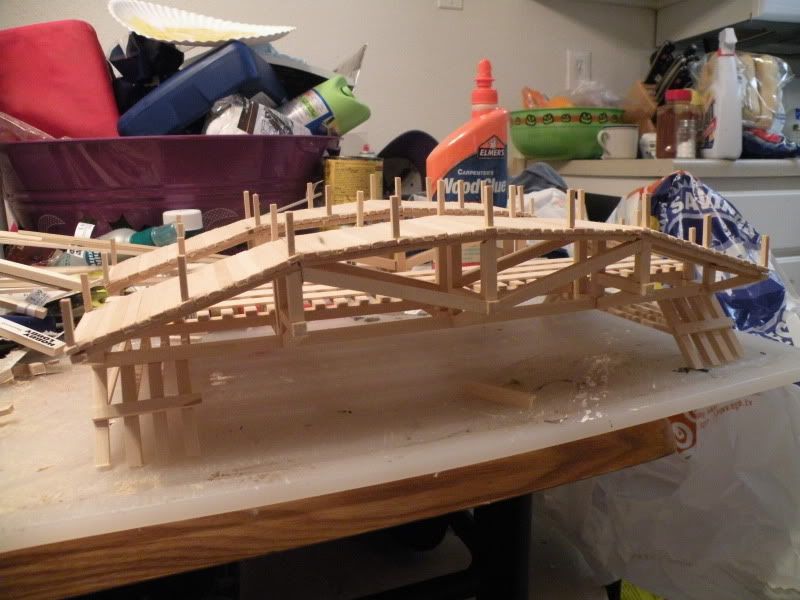 I plan to scratch build every structure on this new layout except the bridge. And, although I gave serious considering to going back to N just for this module (I am, after all, in a 1-bedroom apartment -- space is at a massive premium), I just couldn't imagine building a railroad without buildings I had built myself. |
|
|
|
Post by nscaler711 on Oct 20, 2013 2:13:43 GMT -8
In my opinion I like the new version a little better, and its not quite spaghetti laid out either. Have you thought about doing this in N scale like the gentlemen's you posted about on another thread? With the space you want you could do twice as much in N.. this way you get all the scenery and trains you want without either too over powering. Also with N scale everything is lighter, and is perfect for foam only set ups like yours. If you use 2" thick foam you can carve out 1/2" down and have the perfect depth for water ways and it gives you an excuse for a lift bridge or any other type of bridge. And I'll be honest N scale is easier on a budget too with locomotives going from $50 to $120, and DCC in the $20 to $100 for sound. (Sorry not trying to be an advocate for N scale, I have both scales, love the details in HO but love the scenery and long trains in small spaces in N ) I was an N-scale modeler for about five years, and I had my start in N. However, about 6 years ago, I decided to sell off all my N-scale engines and rolling stock. The reason was pretty simple: I love, love, LOVE to scratch build structures -- almost all of them without plans, templates, or even rough designs. Unfortunately, I simply wasn't in any way satisfied with the stuff I was producing in N... and the moment I switched to HO, it made a huge difference. Here are a few examples of stuff I've built: I plan to scratch build every structure on this new layout except the bridge. And, although I gave serious considering to going back to N just for this module (I am, after all, in a 1-bedroom apartment -- space is at a massive premium), I just couldn't imagine building a railroad without buildings I had built myself. 1 bedroom apartment huh? Me too.. but I do have a 5x9 feet table in my apartment partially in the kitchen, but I realized how long my trains were in HO... I was using 6 axle diesels to pull 15 cars... well that's just stupid ya know? Then it hit me I can run 30 cars with 2 6 axle diesels in N scale in that space, so I am going back Lol. Anyways those are pretty cool, I do not have that talent, I think my talent in this hobby is weathering stuff. But anyways good luck and I want to see progress! also where was i when you sold all that n stuff lol |
|
|
|
Post by princessofthecape on Oct 20, 2013 2:59:19 GMT -8
It's funny, because I am just terrified of weathering things. I'm going to be getting an Athearn SP GP9 for Xmas plus about 10 cars, and I'm going to have to teach myself to weather by watching Youtube. I have some old, junky rolling stock I can practice on, but the entire thing scares the living daylights out of me. I guess we're all good as something, but not necessarily everything! |
|
|
|
Post by nscaler711 on Oct 20, 2013 3:19:34 GMT -8
|
|
|
|
Post by princessofthecape on Oct 20, 2013 3:21:12 GMT -8
Yup, you do very nice work. I particularly like how you nailed the dark leakage spots on the fuel tank. Spot-on.
|
|
|
|
Post by nscaler711 on Oct 20, 2013 3:27:42 GMT -8
most people wont believe me when i tell them i disassemble the whole locomotive and weather it piece by piece, but i do and it makes for spraying dullcote easier... that is an MTH loco and it was difficult to pull apart. and thank you.
also i was just thinking for your future snow projects...
Baking soda is the best to use for snow. it sparkles where it needs to sometimes..
i will look around for my photo of a F7 i made snowy
and use hairspray to hold it... it doesnt dampen the baking soda bad enough to make it mushy
|
|
|
|
Post by jalajoie on Oct 20, 2013 8:47:58 GMT -8
Foam use alone act as sound amplifier. To lessen this effect I use a thin plywood underneath the foam. I also use camper tape directly on top of the foam then cork for roadbed and finally the tracks. Everything is glued with latex caulk and I use high density foam which is very rigid. This is the green foam use to insulate beer fridge in grocery store or bar. Your last plan is very good, I took the permission to modify it a bit as a tough. I draw a straight line past the bridge, although curve look good, they do not permit reliable coupling and this is a switching layout. Also a single slip switch could be installed before the bridge this would1 allow for future expansion.  |
|
|
|
Post by Brakie on Oct 21, 2013 17:00:15 GMT -8
If I may..There's no reason I can think of to jam pack a small layout with track-the "time saver" design is dead and hopefully buried since it was designed by John Allen as a switching contest at a NMRA meet and nothing more. Your original design was superior by a long shot since it gives you operation and a means to add scenery. Here is my planed 1' x 10' switching layout..The buildings is Walthers background building the trucking company and the shipping company used as other types of industry.  I followed Lance Mindheim's modern ISL design principals with this design.  I haven't built either one but,hope to start this winter. |
|