|
|
Post by tankcarsrule on Feb 7, 2016 5:17:42 GMT -8
|
|
|
|
Post by kentuckysouthernrwy on Feb 7, 2016 6:12:49 GMT -8
Those 6 wheel trucks, Buckeye?, are works of art in themselves, let alone the other fine detail work.
|
|
|
|
Post by tankcarsrule on Feb 7, 2016 6:21:17 GMT -8
Thank you Karl. Yes they're 11' wheelbase Buckeyes. At the time they weren't available anywhere, so I was forced to build my own.
Regards, Bobby
|
|
|
|
Post by mlehman on Feb 7, 2016 7:17:05 GMT -8
Bobby, Those trucks are awesome! A bit of railfanning this week, although I'm transitioning back into model building and away from track, etc on the layout right now after the last big track laying blitz. 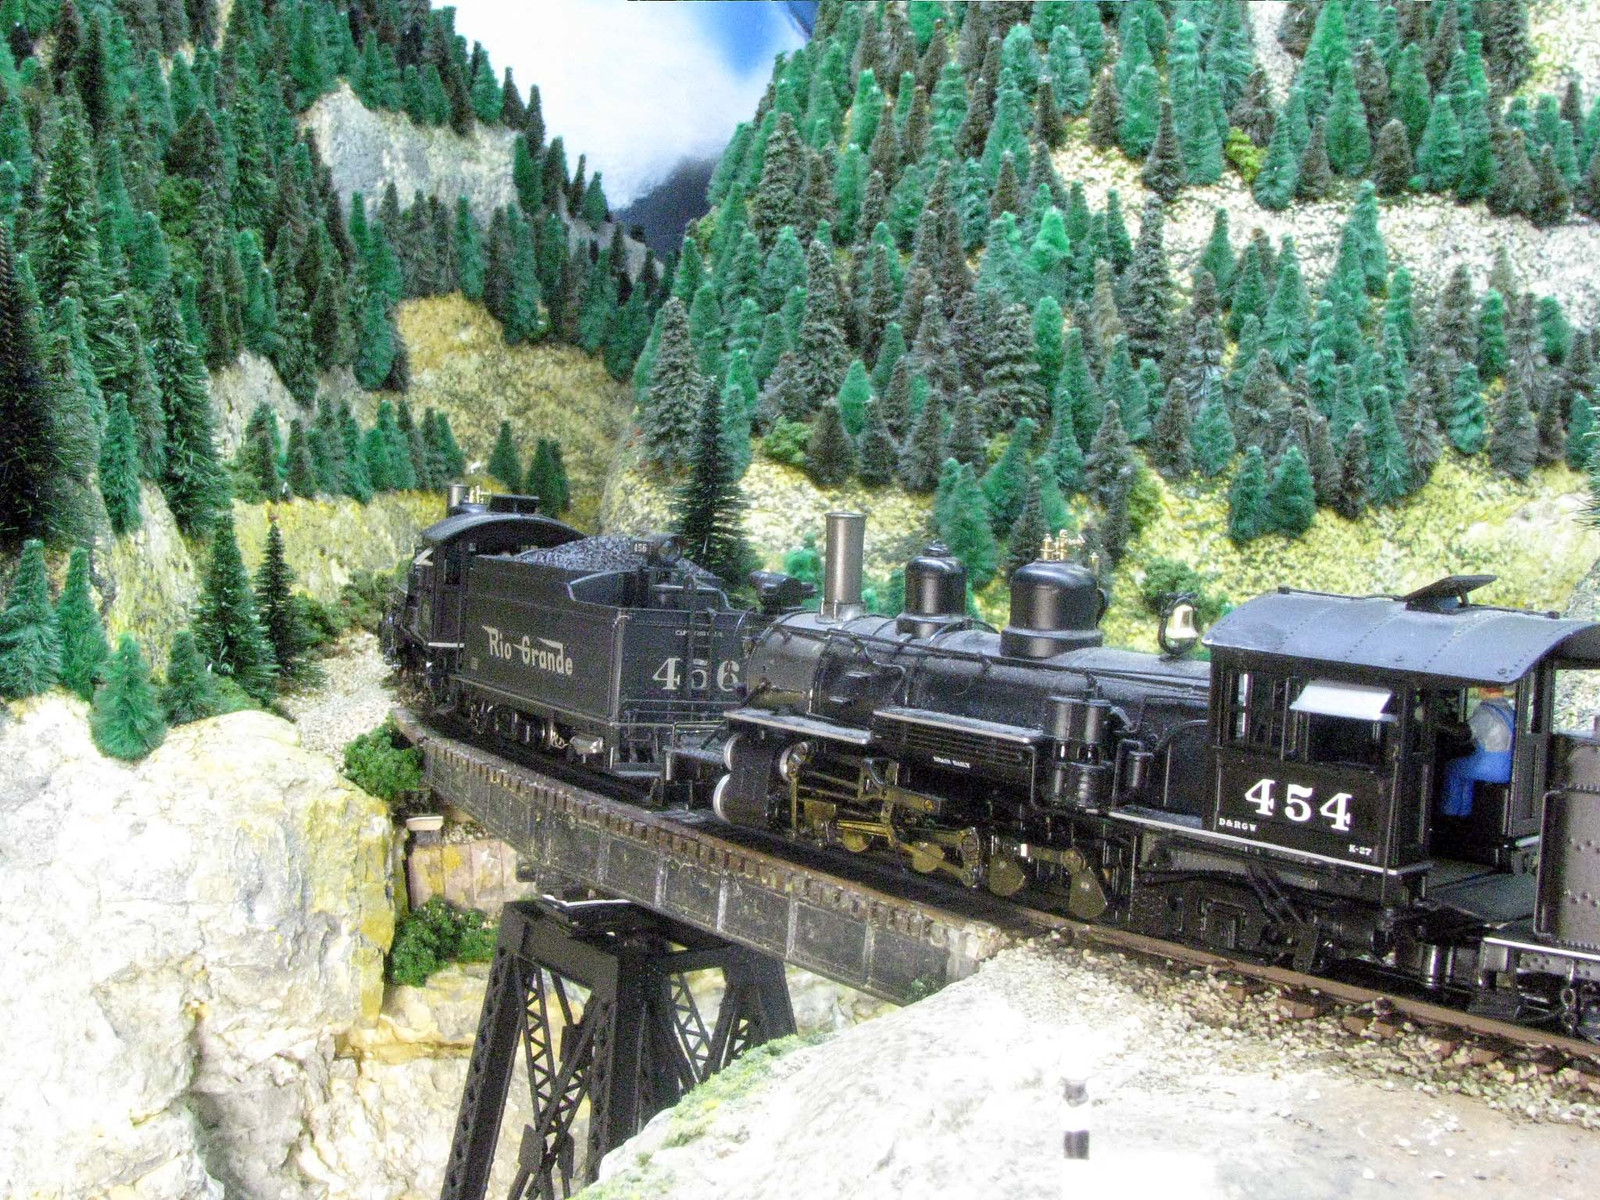 At Snowden, the Cascade Extension ends in a loading rack that serves the Gramps oilfield and a team track where pipe is unloaded, among other uses. Here's the arrival of the pipe train.  Among the structures there now is a warehouse that serves the Gramps oil field at the opposite end of the pipeline that ends there, plus the Mears Logging outfit. Not much room, so I just loped off the end and modeled it.   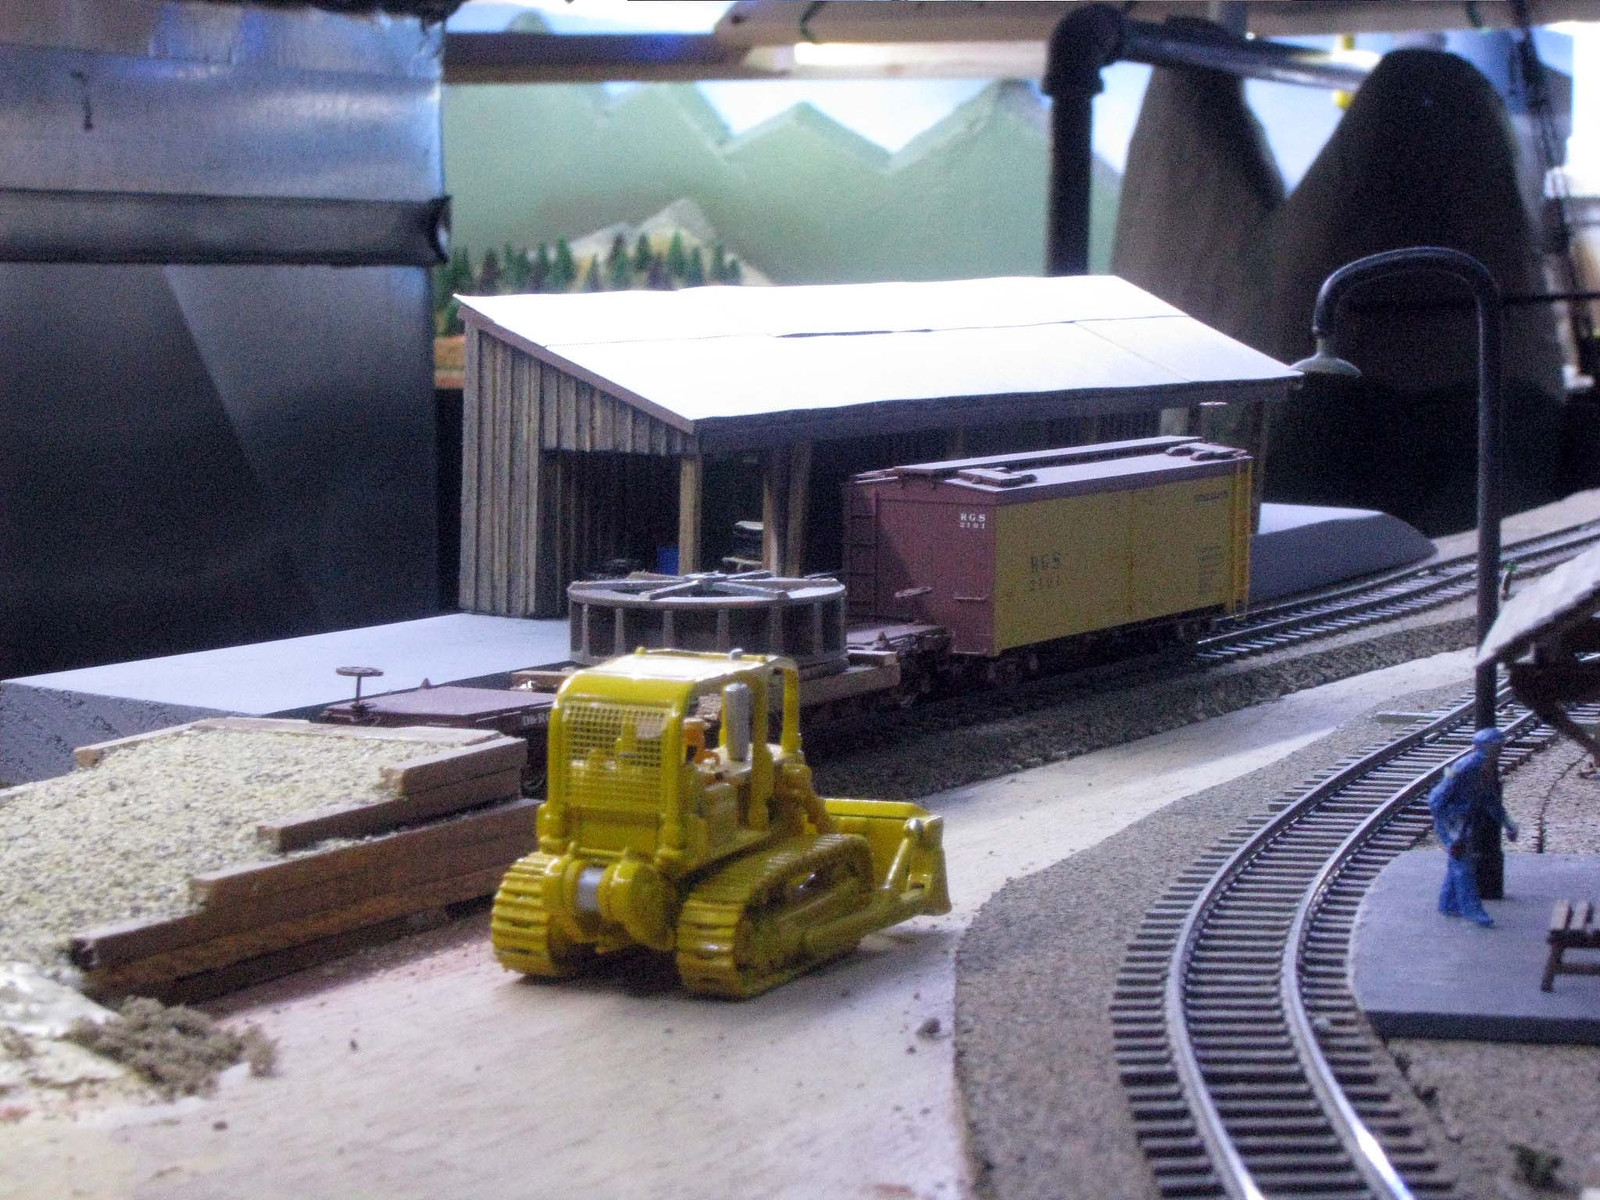 |
|
|
|
Post by TBird1958 on Feb 7, 2016 10:37:08 GMT -8
Beautiful work on that tank car Bobby - as usual! I decided to get to my fave outdoor photo location early this morning...... Here's GP30 3006 leading to newer EMD's..  Second out is SD45 5339, this is Kato unit with a rebuilt undeframe - At some point in the future I'll likely rebuild the handrails, for now they'll do.  Trailing is 1969 built GP40 #3082 from the first batch of new image painted units, this is an Atlas unit that's had it's fuel tank and chassis modified as well as a few parts added  Here's an Atlas/Branchline 50'RBL (General American I think) standing in for a similar 1964 built PC&F car. In this scheme it represents a 1977 repaint from the D&RGW's Burnham shops, the stock model is incorrect in that has the earlier high ladder and brakewheel and is missing the Hydracushion underframe.  Here's a shot of the rebuilt end.  Here's it's cousin in the as delivered orange/silver scheme, many of these cars were not modified until late in their years, so an unmodified car is acceptable for my '70 era layout. I've added cushion pockets, and some Plano walkways and cutbars.  Last, a first attempt at making an underframe from Evergreen and some random bits from my parts box,  |
|
|
|
Post by danpik on Feb 7, 2016 15:37:51 GMT -8
After seeing the work Bobby did on that tank car I was a bit hesitant to post my work from this week. But, here goes anyway Railyard Models PC X79 done in the paintout scheme after Kelloggs got them back.   After preliminary lettering and rusting 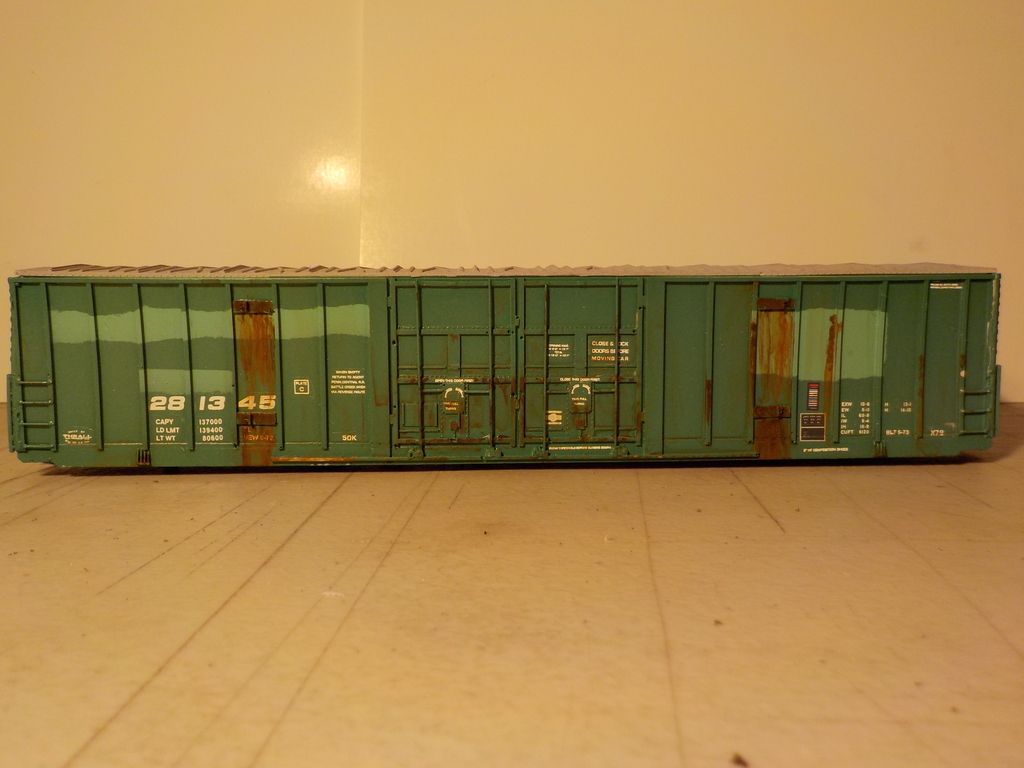 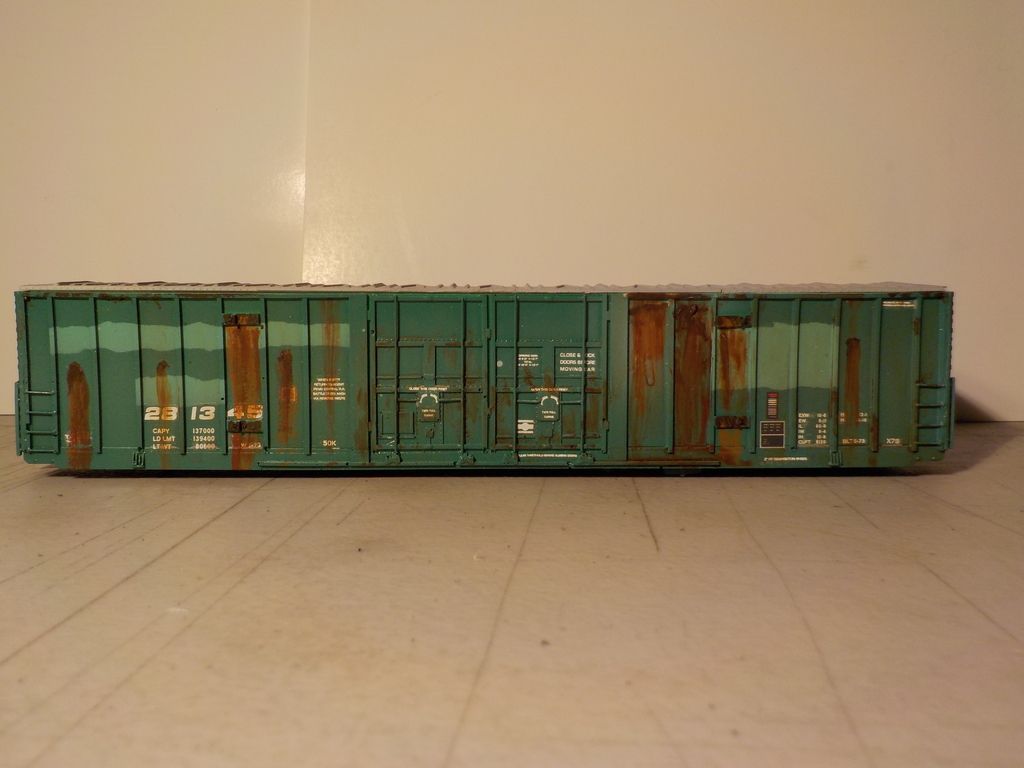 |
|
|
|
Post by 12bridge on Feb 7, 2016 15:48:14 GMT -8
Dan, the Kelloggs car looks great. What are the colors you used to paint and patch it? I spent the evening working on new carfloats. I am 500 miles from my layout, but I have a wood shop at my use, so I worked on some things. These are wood blanks for a pair of NY Harbor carfloats. The Walthers kit is good for about 1950, not 1990, and it has way too many older spotting features and details, not to mention some of the dimensions are wrong. Frenchman River makes a beautiful carfloat kit, but it is built to Philadelphia standard sizes, so that wont work either. I used Bethlehem steel drawings (Like the surviving floats in use), and made wood cores. The big one is a New Haven style 41'x360' barge, about the biggest in NY Harbor, and the small one is a 41'x290' NY Dock float. Both will be skinned with .015 styrene, and then super detailed in the coming months.  |
|
|
|
Post by danpik on Feb 7, 2016 16:07:24 GMT -8
Dan, the Kelloggs car looks great. What are the colors you used to paint and patch it? I used PC green from Badger for the base color. I mixed up a 50/50 batch of PC green and white for the paint-out patches. After that I lettered the car and used a diluted wash of glosscoat and white to fade the green. The rust streaks went on next and I still have to put the KELX lettering on and seal it all |
|
|
|
Post by markfj on Feb 7, 2016 16:12:32 GMT -8
Here is a Branchline kit decorated in PC’s wrong side logo scheme. Other than lowering the ladders and brake hardware, and adding Kadee couplers and boxes, the kit is stock.
I’m almost embarrassed posting this when I see what you all are accomplishing. Bobby, you modeling skills rock man!


Thanks, Mark
|
|
|
|
Post by ssw on Feb 7, 2016 16:29:19 GMT -8
I have an astounding inability to pick an era...or railroad. My primary focus is on the Milwaukee and the Cotton Belt due to family connections. However, I also like the Katy...a lot. I model from steam up through some limited modern stuff. So here's the gamut this week. I had a busy week, completing 2 projects, and getting another to the point of decals. First up is a Hallmark Models wood-sheathed MKT caboose, painted with PollyScale Reefer Yellow, with PollyScale Engine Black for the platforms and ladders, per color prototype photo. Decal logos came from an ancient Walthers set, and the reporting marks and numbers from an equally ancient Champ set. As you can see, despite liberal applications of Liquid Decal Film, I still had some issues. This car was for my grandfather.  I also like Green katy things, so here's a Pecos River Brass MKT 1000 series steel caboose with Braces. (ACF 1949) These lasted into the Green era, and then in the '80s were rebuilt to the MKT 200 series cars with extended vision cupolas. This will be MKT 29, which was rebuilt to MKT 213 which is on display in West, TX. (the town, not the geographic area) - The car was primed with Model Master white primer, and the green is Floquil MKT green gloss. Black is PollyScale Engine black, brushed on carefully. Yellow is Testors Chrome Yellow. Waiting on the proper Herald King set to get it lettered. The stripes in the Microscale set are not correct - too steep.  Finally, I've taken a liking to the HLCX solid maroon units that are common across the UP on locals. There was a deturboed GP40 running around my hometown here a while back, and I found out it was a former Milwaukee unit, so I decided it'd be the one I modeled. HLCX 1047 is an Atlas GP40 that received the DB hatch with air filter from an Atlas GP38 (ordered the part from Atlas) that also received DW ditchlights (That still need to be wired), a DA air conditioner, and I scratchbuilt a PTC array from a piece of styrene, and topped it all off with 2 DW Sinclair antennas - one on the cab roof, one on the PTC array, angled per prototype photos It also got a DW airhorn stand, topped with an Athearn M3 air horn. I painted the shell with Tru-Color MKT Maroon, and the bottom of the sill with Tru-Color Black. The decals are Highball Graphics set L-215 for Helm diesels. The small HLCX above the numberboards are from Microscale 90101 railroad gothic alphabet set. After I got done, I counted and there are 67 different decals on this locomotive. I've got an Athearn GMTX GP38-2 that this will run around with. It was a fun project.   As usual, everyone's projects this week look top-notch! This is my favorite thread of the week, to see what everyone else is doing, to get inspiration for my projects, and learn a thing or two along the way. Have a good week, Bradley Linda Waco, TX |
|
|
|
Post by Chet on Feb 8, 2016 7:01:24 GMT -8
There are some really great photos posted here. Excellent work and detail. Well done to all. Here's a scratch build freight station that I built about 25 years ago. I couldn't find a kit that I could use either as is or to use for kit bashing, so this one was build to fit the space available. Part of the interior was detailed and it has interior lighting.    |
|
|
|
Post by dtinut on Feb 8, 2016 17:39:01 GMT -8
Nice freight station Chet. Looks great.
Maybe needs afew more weeds between the platform and the tracks, and a bit more dirt, but is really neat!
Brian
PS - I am a believer of Railroad stuff is usually dirty...
|
|
|
|
Post by atsfan on Feb 8, 2016 17:45:09 GMT -8
Dude, that Tank Car is pure UFB.
Amazing.
I spent lots of time painting walls semi gloss white.
Not sure a picture of a white wall can compare to that.
But slow progress continues.
|
|
|
|
Post by markfj on Feb 9, 2016 17:13:10 GMT -8
|
|
|
|
Post by csxt8400 on Feb 10, 2016 8:46:36 GMT -8
Echoing the sentiments of that tank car. Amazing, just amazing.
Also love those DRGW diesels!
|
|
|
|
Post by tankcarsrule on Feb 10, 2016 10:33:41 GMT -8
Thanks to all that have such nice things to say about my six axle.
Regards, Bobby
|
|
|
|
Post by roadkill on Feb 10, 2016 10:58:17 GMT -8
Very nicely done, Mark!
|
|
|
|
Post by tom on Feb 12, 2016 4:26:39 GMT -8
Well, this week’s thread motivated me to get more work done. Here is the Funaro & Camerlengo X29B Pennsy boxcar that I’ve been working on for a while. The plan was to finish it when I had a week off at the end of the year, but that didn’t happen. So, I decaled and dull coated it last night. I used Microscale Micro Sol and Micro Flat for this project and I have to say their “flat” turned out a little glossy to me. That and the Micro Sol didn’t do such a great job setting the decals. Overall, I'm just happy to get this kit finished so I can move on to another project. One thing that pleasantly surprised me is that the coupler height was nearly perfect at both ends. I guess all that careful measuring, filing and sanding paid off! Thanks, Mark The X29B looks very nice. How hard was this kit as I have only attempted one F&J kit and that was one of the earlier ones (the H30) and that one did not survive the stomp factor (the one where you will get more satisfaction by stomping on it vs finishing it)? |
|
|
|
Post by roadkill on Feb 12, 2016 17:39:49 GMT -8
Nice to know I'm not the only one to stomp an old F&C H30 to bits...
|
|
|
|
Post by markfj on Feb 12, 2016 18:39:21 GMT -8
Tom, the biggest challenge with building the kit was getting the floor/frame casting to fit properly into the body shell. Attached are some photos I snapped of F&C’s X29D kit, which is nearly identical to the X29B (obviously!). The one piece body is fairly nice and a big help for a beginner resin kit builder like me. You’ll notice in the one photo that I’m using a toothpick to point to the cast “nubs” that are on the inside of the sill on the body. Those all have to be removed and the back of the sill needs to be smooth for the floor/frame casting to fit. Expect to spend time on this step, you want that inside “ledge” the floor rests on to be smooth and flat. I used a small straight edge to make sure the ledge was flat and then my digital calipers to make sure it was at the same depth all around.    Close up photos of the supplied detail parts (I forgot to include the walkway castings). Most of these parts I didn’t use on the X29B kit and I’ll probably use even fewer on this kit. I have a small stockpile of Branchline, Kadee, and other detail parts, so working with these parts just isn’t worth the effort. However, you’ll need to use those small washers; they’re the mounting points for the truck. You could make them out of styrene, but I think the cast ones are good enough.   In this photo, I’m pointing to the bolster pad on the frame/floor casting. It needs to be flat and, of course, both bolster pads need to be at the same height. Those washers need to be measured too as they mostly likely will not be the same thickness.  The F&C decals are also ok…  but I’ll most likely be using this set since it has the shadow keystone, which was applied to the X29D. (Recognize your decals Tom?)  Just for the sake of comparison, I snapped a couple shots of an X58 Rail Yard Models body. Frankly, the fact that this body is made from resin is astonishing! I’ve built many plastic boxcar kits that didn’t even come close to the high quality of this resin kit. No excess flash or “nubs” to remove, and look at the detail around the door. How did they do that…in resin?   Sorry for the longwinded post, but I hope this gives you some idea of what working with these F&C one piece body kits is like. I met the owner of F&C at a recent trainshow, he’s a nice guy and very passionate about his work. The kits were selling at 2 for 1, so one kit case me about $24 bucks (less trucks and couplers). Thanks, Mark |
|
|
|
Post by tom on Feb 16, 2016 13:56:15 GMT -8
Tom, the biggest challenge with building the kit was getting the floor/frame casting to fit properly into the body shell. Attached are some photos I snapped of F&C’s X29D kit, which is nearly identical to the X29B (obviously!). The one piece body is fairly nice and a big help for a beginner resin kit builder like me. You’ll notice in the one photo that I’m using a toothpick to point to the cast “nubs” that are on the inside of the sill on the body. Those all have to be removed and the back of the sill needs to be smooth for the floor/frame casting to fit. Expect to spend time on this step, you want that inside “ledge” the floor rests on to be smooth and flat. I used a small straight edge to make sure the ledge was flat and then my digital calipers to make sure it was at the same depth all around. Close up photos of the supplied detail parts (I forgot to include the walkway castings). Most of these parts I didn’t use on the X29B kit and I’ll probably use even fewer on this kit. I have a small stockpile of Branchline, Kadee, and other detail parts, so working with these parts just isn’t worth the effort. However, you’ll need to use those small washers; they’re the mounting points for the truck. You could make them out of styrene, but I think the cast ones are good enough. Thanks for the photographs and the hints for using the F&C X29B boxcar kit. That will probably be some future project for me and will wait until I go to an RPM met when F&C will be there. Good luck with the decals! Just remember that my PRR shadow keystone decals were for the X29F or G. The PENNSYLVANIA and keystone will be fine but the data is not in the correct style for the earlier X29B. I would use the data from the Microscale PRR decal sheet but use my roadname and keystone since those are done better than Microscale's version. |
|


