|
|
Post by onequiknova on Jun 19, 2012 21:34:39 GMT -8
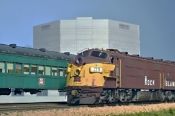
You commuter guys can rejoice. I'm sure when I'm done with this build Walthers will surly announce a Budd Bi-level.  I know there were a couple guys interested in these kits on the old forum, so I'll document my build of one as I try to turn it from a Sows ear into something resembling a silk purse. This is my first all resin kit, so I don't have a lot to compare it to quality wise, but I'd rate the basic kit somewhere around a 5 or 6 out of 10. It's rather crude in some area. The car comes with raised window gaskets, only they're badly shaped and inconstant. I ended up chiseling them off, all 48 of them. The round roof vents were poorly cast, and look more like man hole covers than screened vents. The car had a small chunk of the fluting missing on one side, probably from an air pocket during casting. This is a cab car and I'm a little disappointed in the "flatness" of the pilot detail. This area will need to be totally rebuilt. The fluting looks a little heavy to my eye, but should look okay when finished. The car comes with a small etched brass detail card with grills for above the doors, wind deflectors, end gates and ladders for the cab end. I won't be using the ladders since they're too wide and missing a rung. The Rock Island decals I ordered with the kit look excellent. Anyway here are the pics so far. I have already shaved the solid cast crash bar's so they can be replaced with brass channel. The cast in headlight was cut out and a DA piece glue in it's place. 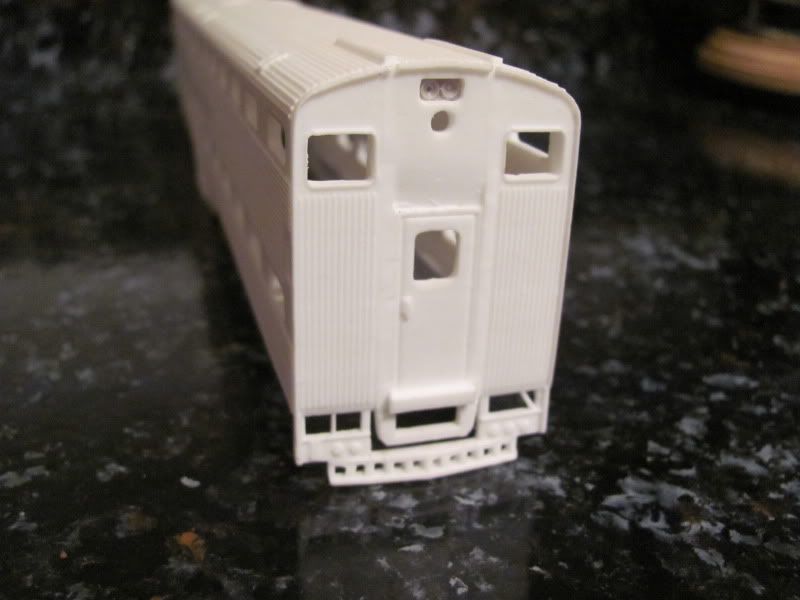 The other untouched end. 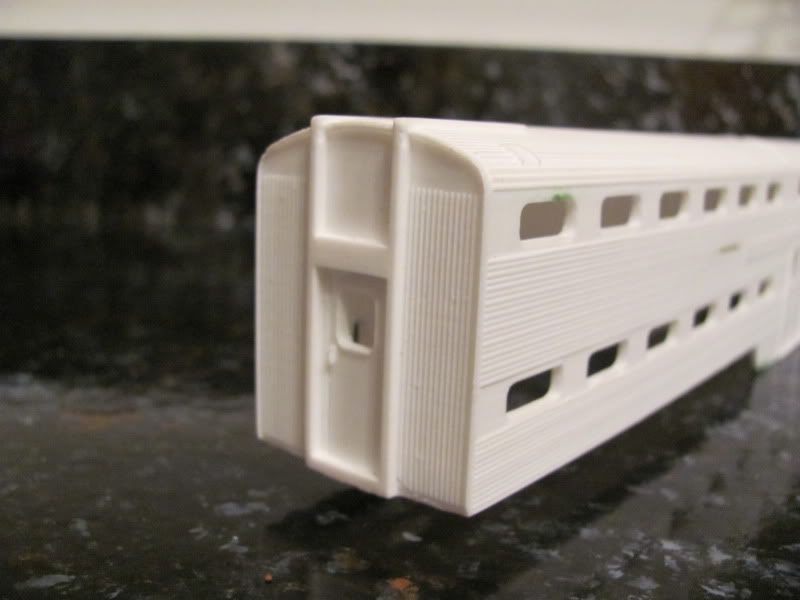 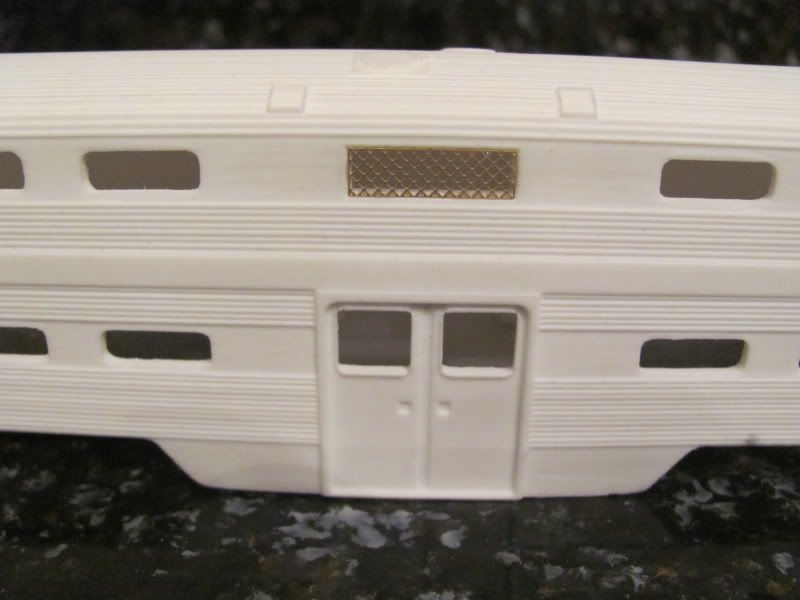 Here's where a chunk of the fluting was missing. There's really no good way to fix this, so I tried some brass wire to hide it. 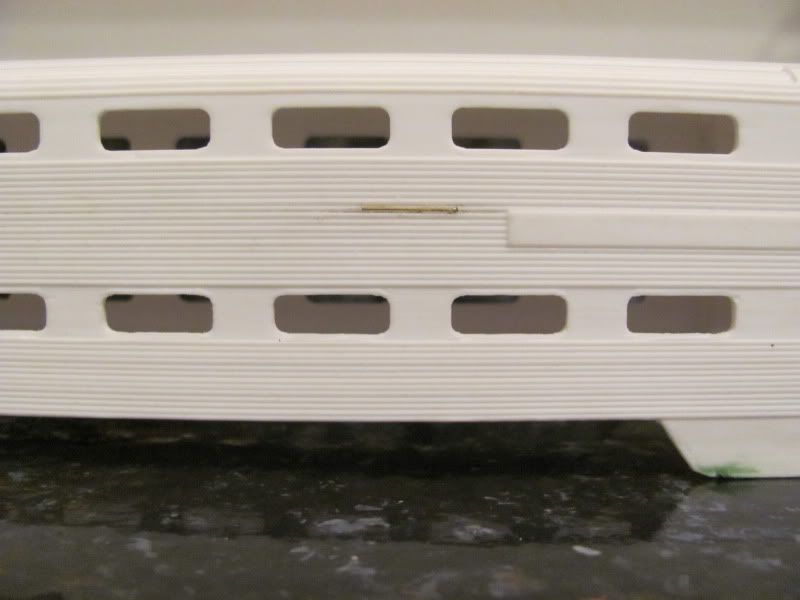 The operators cab window will need to be reshaped to look right. Note this kit doesn't come with markers, and these cars had odd marker lights , so I'm not sure what I'm going to do here yet. Grabs not included. 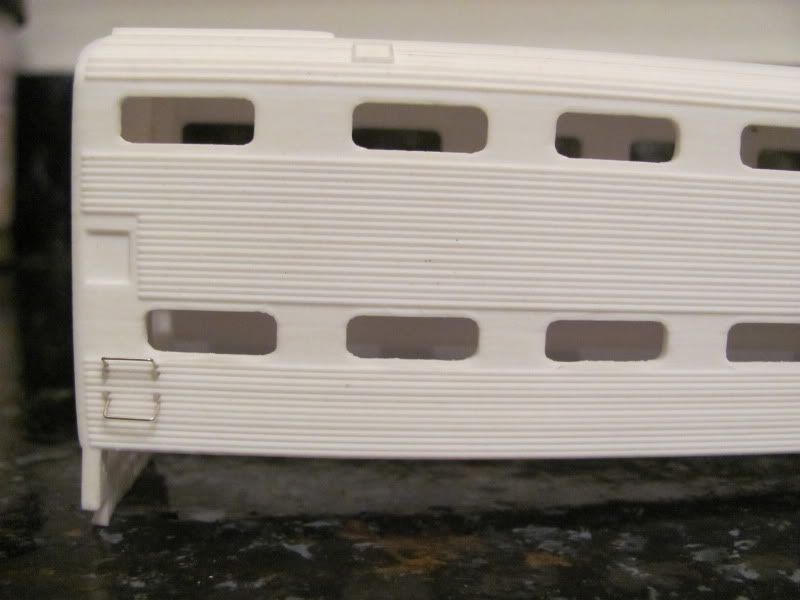 The man hole covers. These have since been drilled out. If I can't find a suitable etched part, I build something. 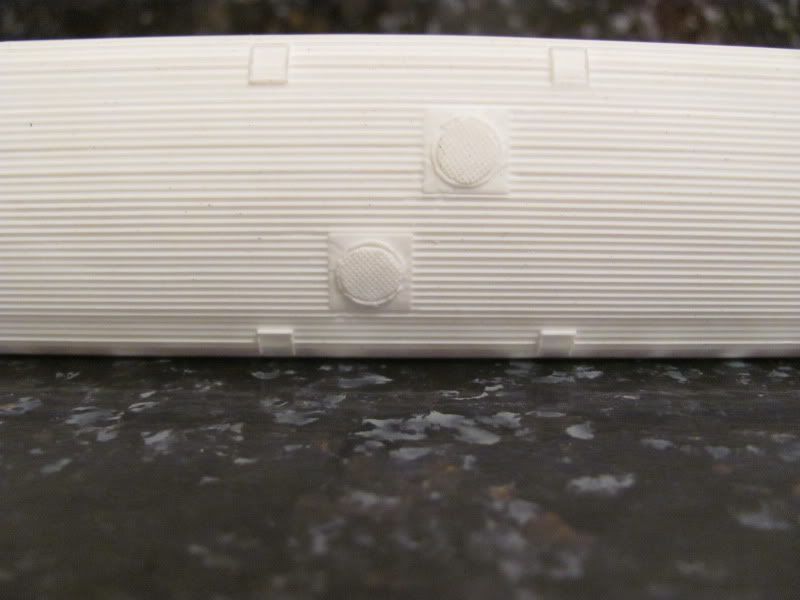 And finally, the start of the rebuild. 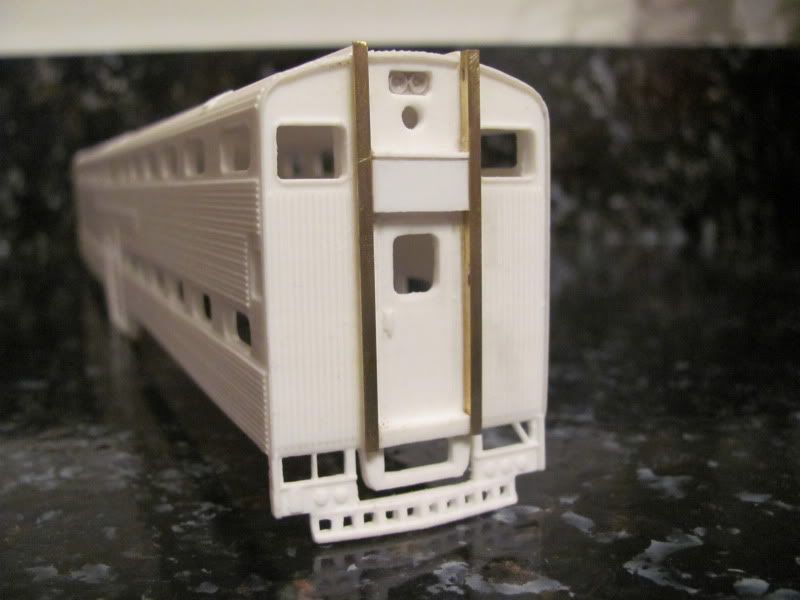 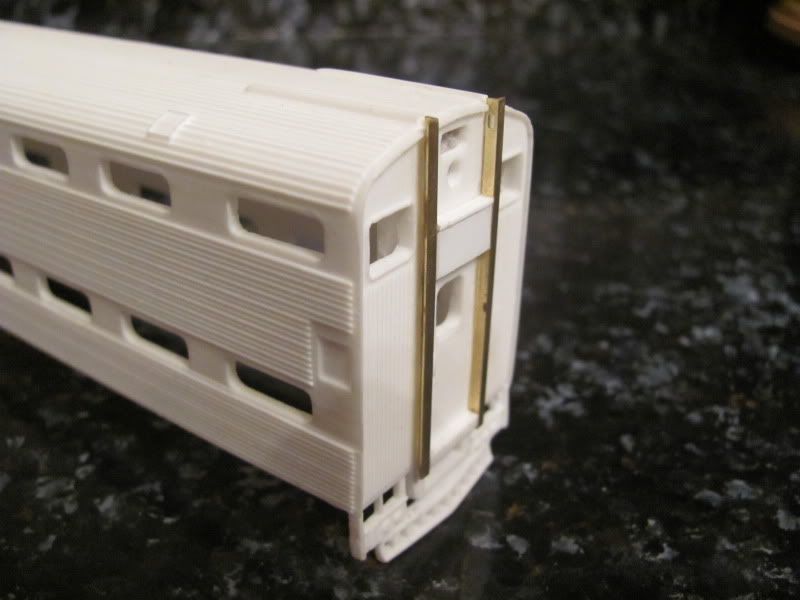 |
|
|
|
Post by drolsen on Jun 20, 2012 2:08:18 GMT -8
John - Thanks a lot for sharing the photos. This is a tough subject for me. I really want to model the Maryland Area Regional Commuter (MARC) Sumitomo-built single level cars that were in operation during my 1998 modeling era (and still are): MARC 7756: drolsen.rrpicturearchives.net/showPicture.aspx?id=2768893Island Model Works offers the coach cars, but the level of detail on them, and the amount of work I will probably end up doing to them, just doesn't appeal to me. In particular, it looks like it would be difficult to hide the thickness of the car sides at the windows. I appreciate what he's doing to make models available to commuter train enthusiasts that would otherwise have to do completely without them, but the details on the MARC models at least are too heavy and "soft" for me to accept. I keep hoping someone will eventually offer them in plastic, but that's unlikely, as I'm not sure that any other commuter railroads have identical cars. That's always a drawback of commuter equipment - it seems to vary too much from one order to the next (one operator to the next) to justify a mass-production model. I'm also going to attempt to turn one of the Walthers Horizon cars into a Sumitomo car by adding the fluted siding, but that may prove to be a ton of work while still not looking quite right. Dave |
|
Deleted
Deleted Member
Posts: 0
|
Post by Deleted on Jun 20, 2012 4:10:26 GMT -8
Hey John,
Does this kit come with trucks? If so are they any good?
I've had first hand experience with the old Holgate & Reynolds, later Three Brothers hunk o' aluminum bi-levels and the trucks in those kits were total junk.
Keep up the good work, maybe I'll do a coach and cab car for the Milwaukee Road yet......
|
|
|
|
Post by dhs12001 on Jun 20, 2012 4:54:38 GMT -8
Hi John
I am also building 2 of these cars. Painting and decals are done, but I bet you will finish before I do. It didn’t occur to me to sand down the window gaskets, good idea. The kit I received did have the marker lite chunks included , that I ended up using
Dave Street
|
|
|
|
Post by onequiknova on Jun 20, 2012 7:32:48 GMT -8
Thanks guys.
The kit does include resin trucks that look okay at first, but the bolster are really thick. I doubt I'll use them. The "glass" included is made from a clear, green tinted resin, that when inserted from behind, fits flush with the outside of the car. My only complaint with the glass is between the thickness of it and the green tint, they are barley see through.
Thanks for letting me know your kit came with markers. I'll have to E mail them.
|
|
|
|
Post by dhs12001 on Jun 20, 2012 11:09:03 GMT -8
Hi John
If you don't use the kit trucks, any thoughts on replacements? Doesn't seem that Kato or Walthers are available separately.
Dave
|
|
|
|
Post by onequiknova on Jun 20, 2012 12:59:29 GMT -8
I honestly haven't looked for replacements yet Dave. If I can't find a suitable aftermarket truck, I may sacrifice one of my Walthers RI cars for the trucks and interior. Anyone know of a source for this style truck? On a side note, IMW is sending me replacement markers tomorrow.  |
|
|
|
Post by onequiknova on Jun 20, 2012 17:39:25 GMT -8
Got a little done today. I made some new roof vents out of some mesh and styrene. Those garage sale leather punches I bought came in real handy for this. It's not my first choice in mesh pattern, but I had it on hand. 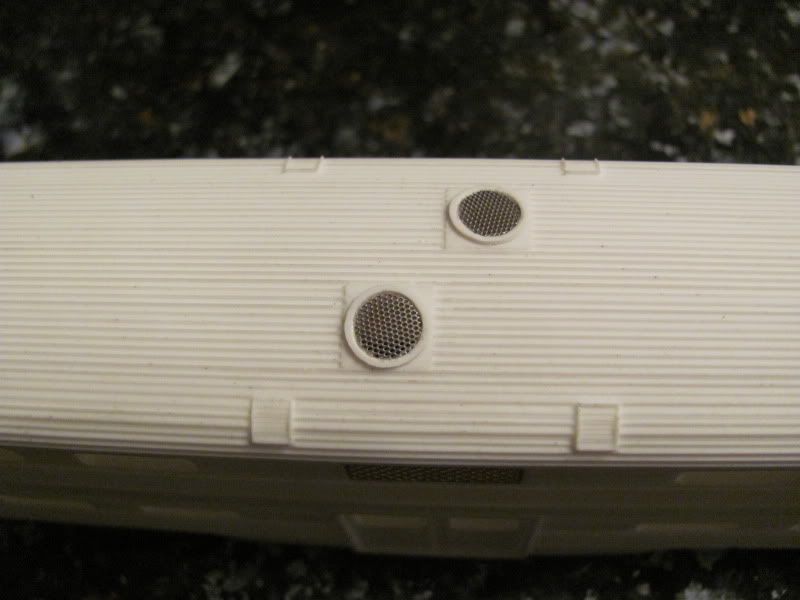 I also got some work done on the business end. Here's a proto pic. anybody know what the tank behind the stirrup holds?  I installed a non working diaphragm with a scratchbuilt buffer. I figure this car will never run mid train so no point in complicating things with a working diaphragm. The end gate comes with the kit. 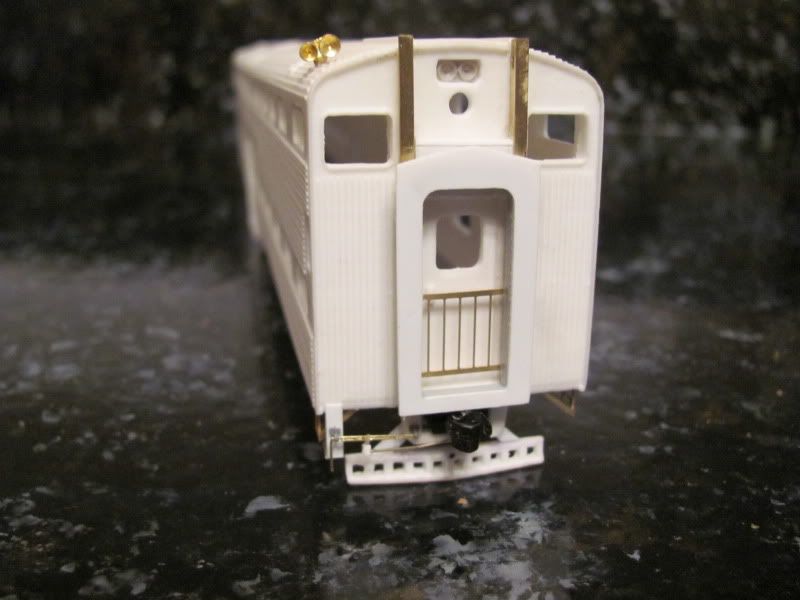 The one dimensional pilot was cut off and the rebuild has begun. The stirrups are from the kit, though the diagonal braces are not. The cut bar is scratchbuilt. 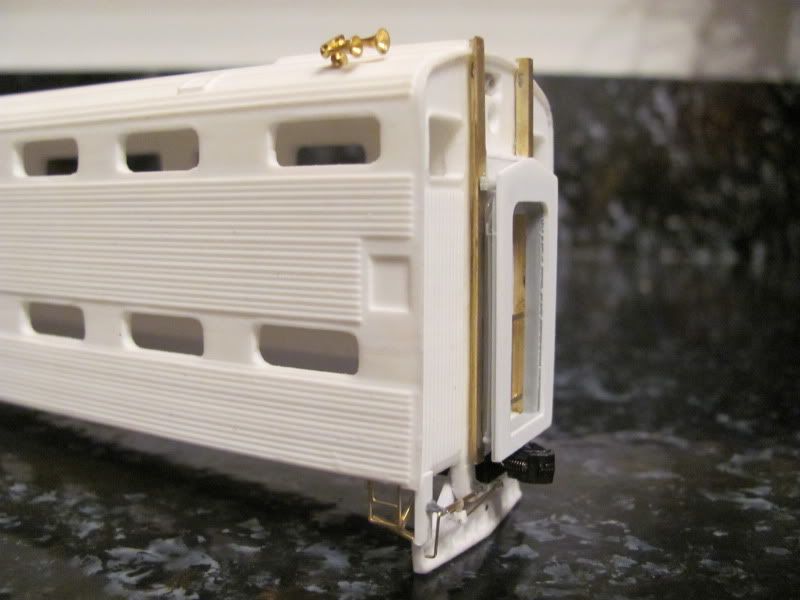 The original floor is designed to go all the way to the end of the body, but I want the coupler to stay with the shell, so I glued in this little shelf. This will also allow me to mount the MU boxes (?) with all their dangling cables. 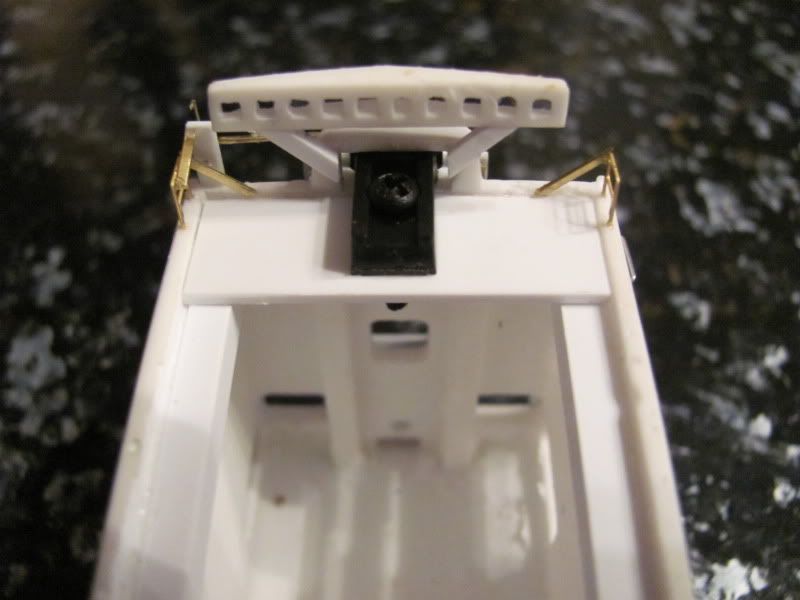 |
|
|
|
Post by gbc636 on Jun 20, 2012 20:22:29 GMT -8
If it's the square box that you are referring to. That holds sand. Why on the cab car? Who knows. Strange place for it.
|
|
|
|
Post by onequiknova on Jun 20, 2012 20:52:41 GMT -8
A few more additions tonight. They sure hung a lot of crap from the front of these things. I decided against trying to scratchbuild the ladders and just work with what came with the kit. The ladders are a little too wide and only have 5 rungs instead of six. I glued the ladders to a couple strips of styrene so it stands proud of the body like the prototype. The ladder is just hanging there off a couple brass pins. They can't be permanently mounted until after it's decaled. Besides the ladder, I added a handful of grabs, including that funky one over the horn. What a pain that one was. It seems to be shaped different on every car. 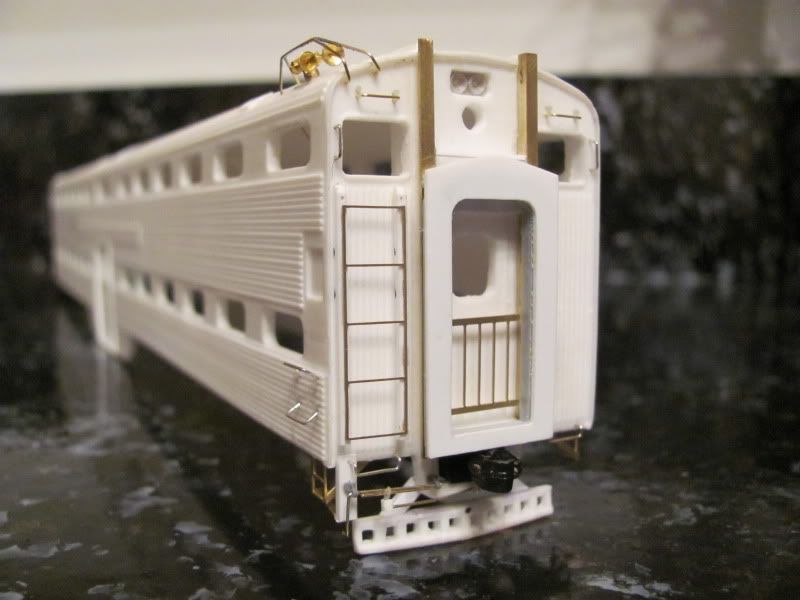 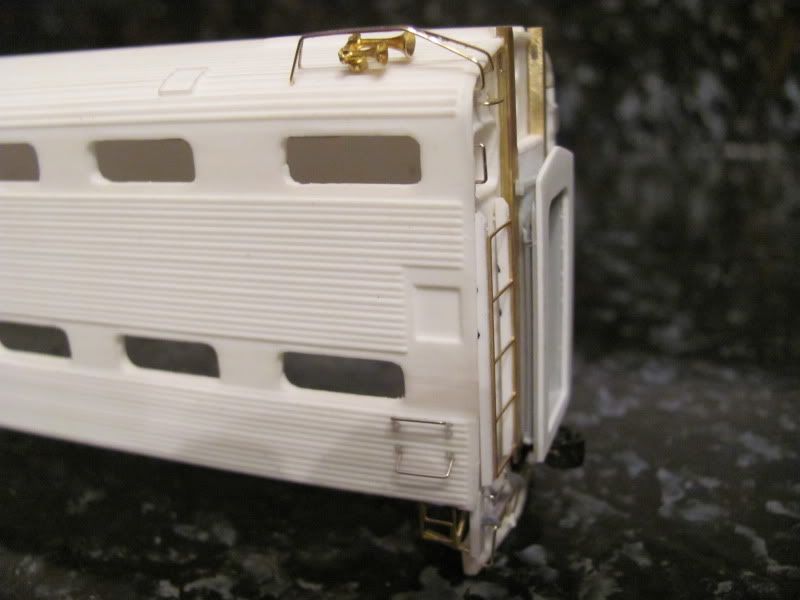 |
|
|
|
Post by onequiknova on Jun 20, 2012 20:56:23 GMT -8
If it's the square box that you are referring to. That holds sand. Why on the cab car? Who knows. Strange place for it. Hey Greg. Long time no see. It being a sand box crossed my mind, but it didn't make much sense to me either. |
|
Deleted
Deleted Member
Posts: 0
|
Post by Deleted on Jun 21, 2012 5:00:58 GMT -8
Got a little done today. This will also allow me to mount the MU boxes (?) with all their dangling cables. Those boxes and cables are the 480 volt three phase Head End Power or HEP connections. |
|
|
|
Post by onequiknova on Jun 21, 2012 8:03:07 GMT -8
Got a little done today. This will also allow me to mount the MU boxes (?) with all their dangling cables. Those boxes and cables are the 480 volt three phase Head End Power or HEP connections. I am referring to the square box directly in front of the truck with the filler cap on top.  Being a sand box makes sense since it's absent from the cab cars that Metra converted to coaches. Like in this picture, where the head end power boxes are visible. www.flickr.com/photos/chicagorail/4219316722/sizes/l/in/photostream/ |
|
Deleted
Deleted Member
Posts: 0
|
Post by Deleted on Jun 21, 2012 9:51:18 GMT -8
The capped box is for sand. Cab cars are classified as "locomotives" and are FRA blue carded, just like a real locomotive. My only guess is that there is a either an FRA or AAR rule that states that "locomotives" must have sanding capabilities. I would guess the blue carding and not just age is why Metra has been removing the cabs from the older cab cars. At least that is my guess.  |
|
|
|
Post by onequiknova on Jun 21, 2012 12:56:48 GMT -8
Does anyone know if there was a sand box on each side? I can't seem to find a clear shot of the firemans side.
|
|
|
|
Post by onequiknova on Jun 21, 2012 14:24:18 GMT -8
A small update. I built the HEP boxes and the engineer's side sand box. (Still don't know if the other side needs one. They're just simple styrene cubes with brass angle for the brackets. The cables are made from solder. 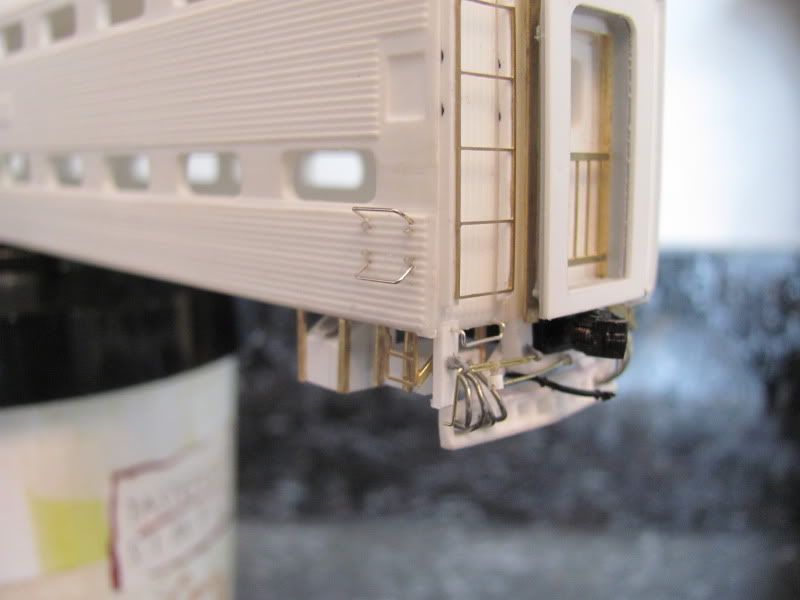 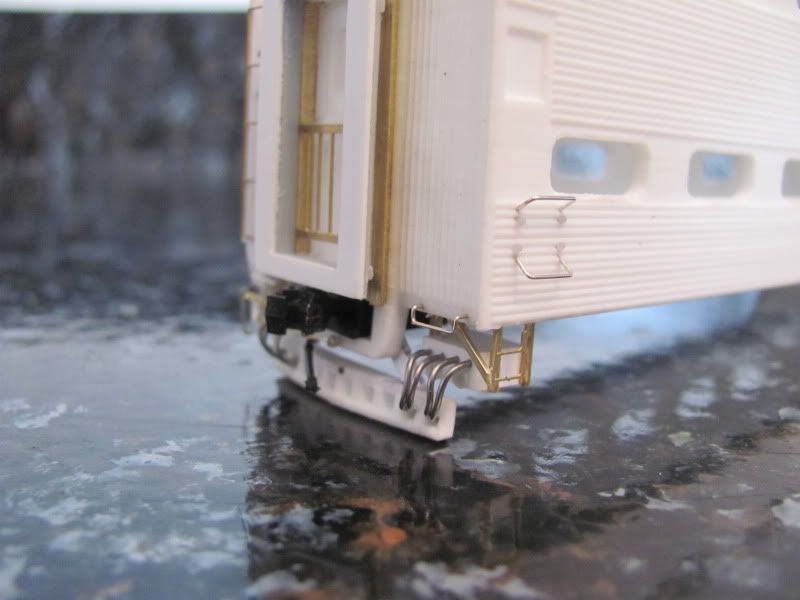 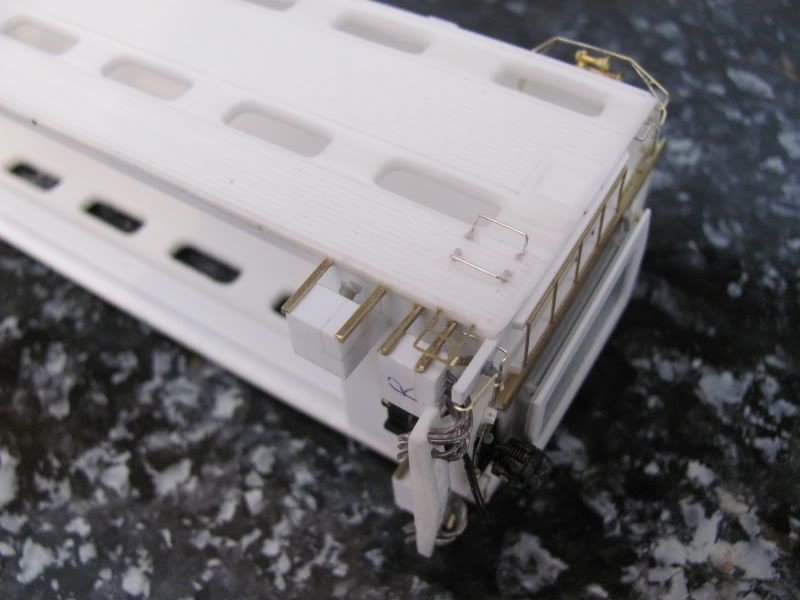 I extended the shelf slightly to fit the sand box. For those building these kits, be careful, the truck centers marked on the floor are way off. 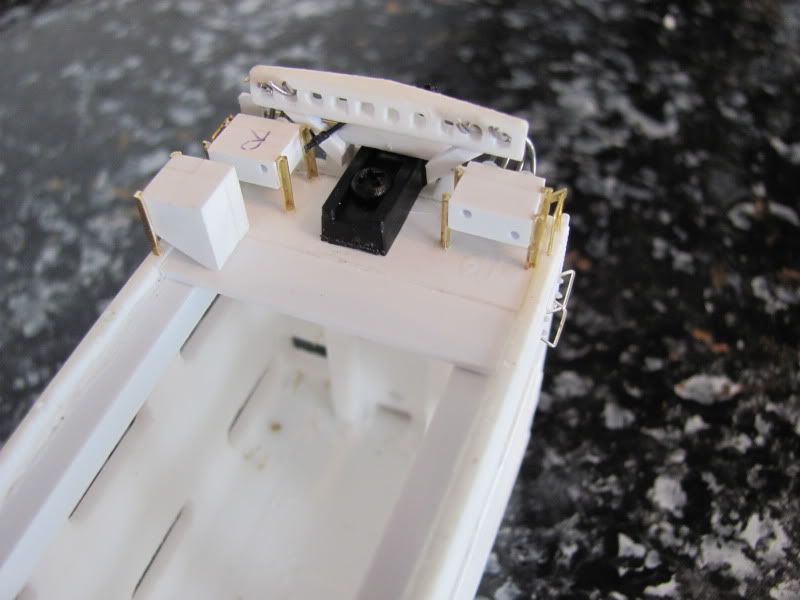 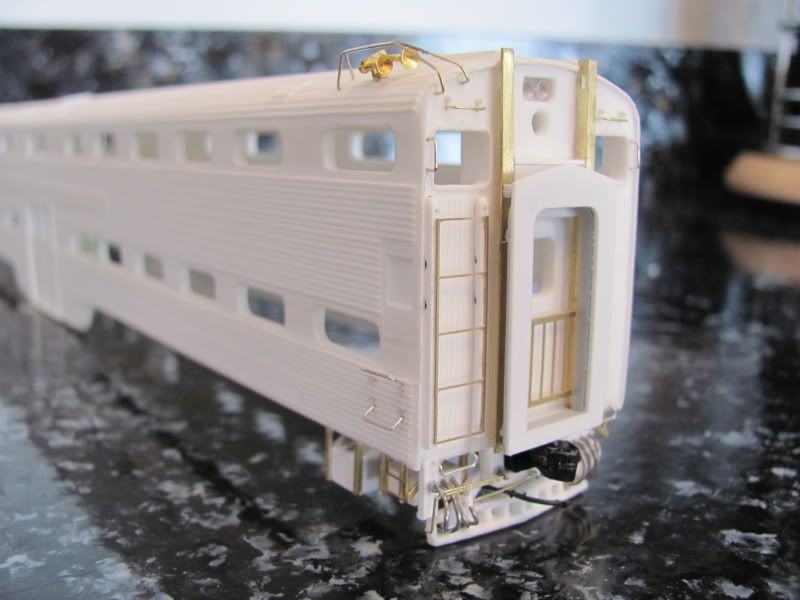 |
|
|
|
Post by onequiknova on Jun 21, 2012 20:34:42 GMT -8
I rebuilt the engineers cab window. First thing I did was open the window opening up to a more appropriate looking size. The window frame is a piece of brass strip bent into a rectangle and soldered together. It's hard to tell, but the glass is temporarily pressed into the opening. The glass is layered so it looks like the prototype sliding window. My attempt to "frame" the glass with thin strips of bare metal foil failed, though the vertical piece seperating the panes worked. I'm not sure what to do now. I may just leave it as is. 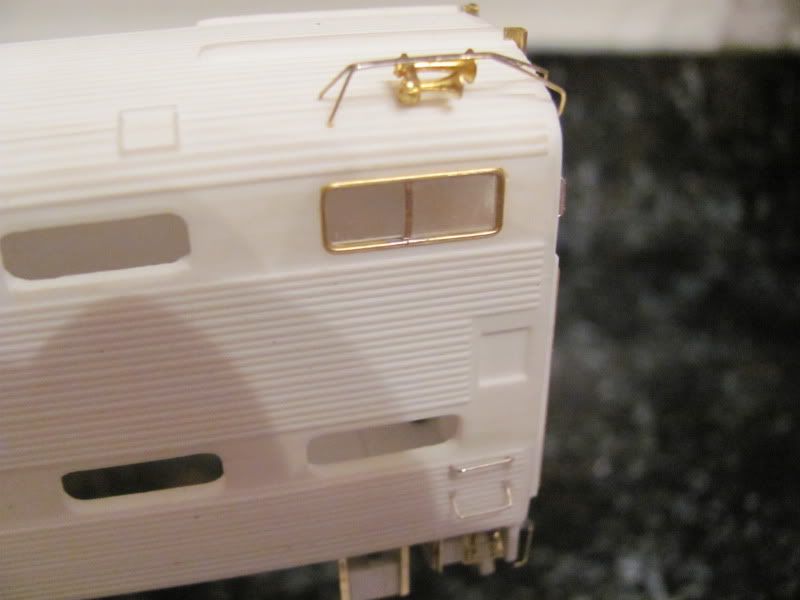 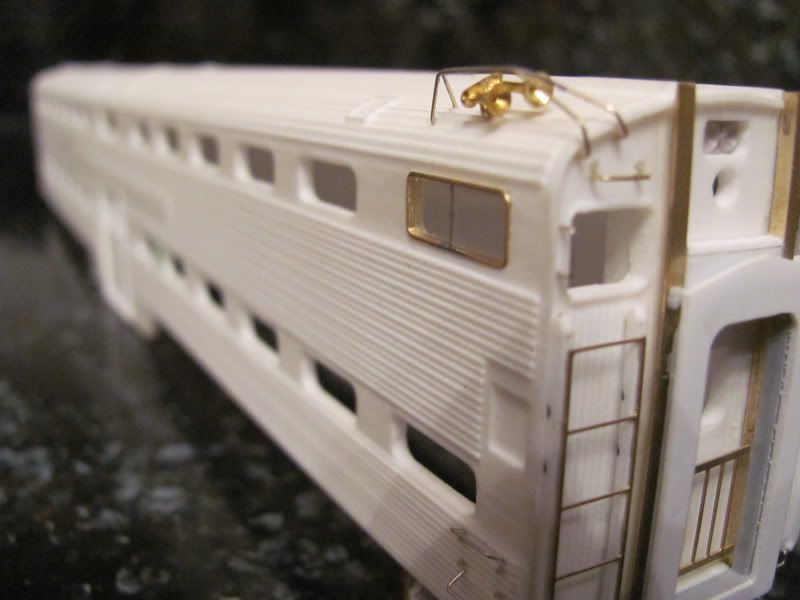 |
|
|
|
Post by antoniofp45 on Jun 21, 2012 20:55:33 GMT -8
Onequiknova,
Your attention to detail is impressive and this will be a beautiful model once it's finished, not doubt.
For refinishing, which look are you targeting? (new, good condition, aged, worn, etc.,.).
|
|
|
|
Post by onequiknova on Jun 21, 2012 21:23:06 GMT -8
Onequiknova, Your attention to detail is impressive and this will be a beautiful model once it's finished, not doubt. For refinishing, which look are you targeting? (new, good condition, aged, worn, etc.,.). Thanks Antonio. In the time frame I'm aiming for, the cars were about a decade old. The Rock Island never seemed to wash anything so that may have sped up the ageing process some. I think I'll aim somewhere between good condition and aged. Any suggestions on a base coat? |
|
|
|
Post by dhs12001 on Jun 22, 2012 7:16:38 GMT -8
Does anyone know if there was a sand box on each side? I can't seem to find a clear shot of the firemans side. Hi John Answering the question about sand boxes, I looked at the Randall book volume 3. On page 189 is an under body sketch depicting major components. A photo at the top of the page shows Milw. #380. The sketch dimensions the overall car to coupler centers (not shown, but leader lines are beyond edge of car body) as 87-1/2’. Engineers side sand box center is 4’-1/2” back while firemans side center is 6’- 4” back from end leader line. the dimensions I stated are approximate by scaling the sketch. I hope this helps Dave |
|
|
|
Post by antoniofp45 on Jun 22, 2012 7:56:34 GMT -8
Yes. Alclad is still working on the new formulas as they want to get them right so they're not available yet.
However, for the look your targeting, I would respectfully suggest a "warm" gray tone with materials currently available.
Scale Coat-2, New York Central Lt. Gray, imho, would work well. The SS tone will exhibit just a slight "reddish-brown" hue, which is similar to but slightly lighter than the tone on Rapido's Canadian and still gives the appearance of some aging. Try it on a scrap plastic piece first, then coat it with Alclad and a single coat of clear. Check it in natural light.
|
|
|
|
Post by Donnell Wells on Jun 22, 2012 14:21:28 GMT -8
Once I read the topic, and saw who the originator of this thread was, I knew I was going to love it! And I have not been disappointed! That cab window mods is...I can't even describe it. It is such a simple modification, however, the "improvent factor" is almost immeasurable.
Superb job John! Looking forward to this one!
Donnell
|
|
|
|
Post by onequiknova on Jun 22, 2012 14:58:32 GMT -8
Wow, thanks Donnell. I'm humbled. I just try to push my own envelope on each build. Sometimes things work out, sometimes they don't. I have a small update on my cab window. I wasn't happy with the look, so I bent up some window frames out of .012 brass wire. The glass is a press fit, but I'll have to make a new one, this one is pretty scratched up. 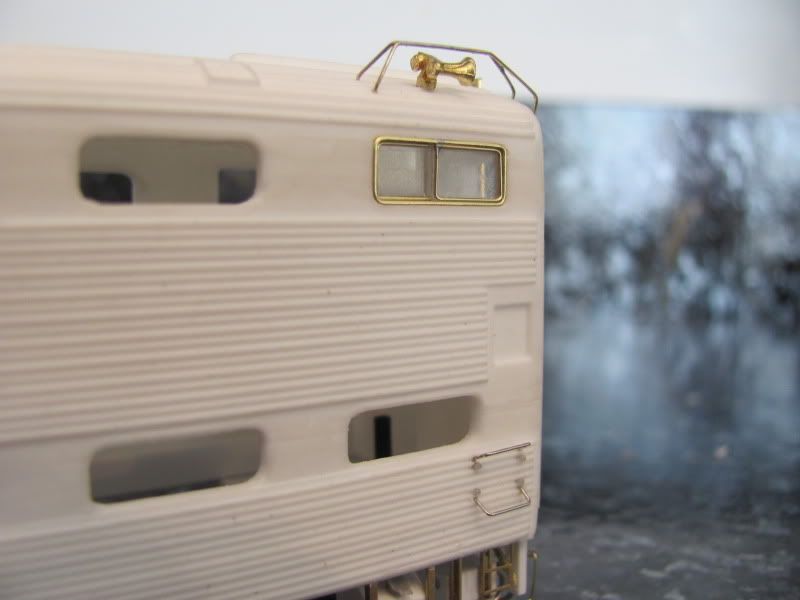 I spent more time than I'm willing to admit making a jig and bending up window gaskets out of more .012 brass wire. Once on the body, I wasn't feeling it though, so I chiseled them back off . The tiniest flaw was too noticeable. I wasn't looking forward to making 33 more anyway.  I'll just use my Sharpie trick for gaskets. 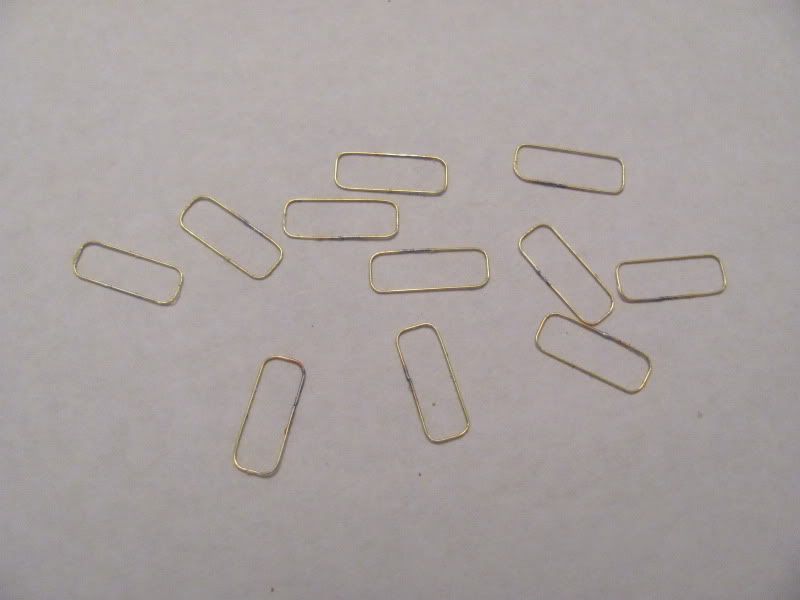 Does anyone know what color window tint these Budd cars received? The kit comes with green tint, but from what I can tell from the pics online, they look more smoked than green. |
|
Deleted
Deleted Member
Posts: 0
|
Post by Deleted on Jun 22, 2012 15:22:03 GMT -8
Well from riding on these cars under Metra ownership, the color is a blue green. Smoke is used on the Sushi liners.
|
|
|
|
Post by onequiknova on Jun 23, 2012 13:21:29 GMT -8
|
|
Deleted
Deleted Member
Posts: 0
|
Post by Deleted on Jun 24, 2012 4:27:02 GMT -8
When I was riding Metra on the Rock Island District up until 2002 the windows on the Budd cars look dark on the outside during daylight hours, but when inside looking out they have a greenish blue tint. The Sushi liners were definitely gray when looking through them from inside. The Budd's really look greenish during the night when standing outside.
In the late 1960's, I rode a Rock Island bi-level to and from downtown with my uncle. I was eight years old and can't remember much about the window color. All I remember is the absolute fun I had riding in the upper deck looking out the window and a little bit of La Salle Street station.
Unless you are lighting the interior for night operation a dark tint of any kind wouldn't be wrong.
It also depends on your era. The windows of the Rock Island are not the same as windows of the Metra era.
|
|
Deleted
Deleted Member
Posts: 0
|
Post by Deleted on Jun 24, 2012 4:40:06 GMT -8
|
|
Deleted
Deleted Member
Posts: 0
|
Post by Deleted on Jun 24, 2012 4:44:33 GMT -8
|
|
|
|
Post by onequiknova on Jun 24, 2012 8:23:57 GMT -8
Your right. the tint has to have some form of back lighting to see the color. This picture shows it pretty well on an Ex RI cab car. www.flickr.com/photos/jamesbondsv/3383231279/sizes/o/in/photostream/ It also shows a Sinclair antenna in the center of the roof. I can't seem to find a picture showing the antenna location during the RI days. |
|
|
|
Post by onequiknova on Jun 24, 2012 14:57:22 GMT -8
A few more updates. First I built the conductors side window frame and sand box. 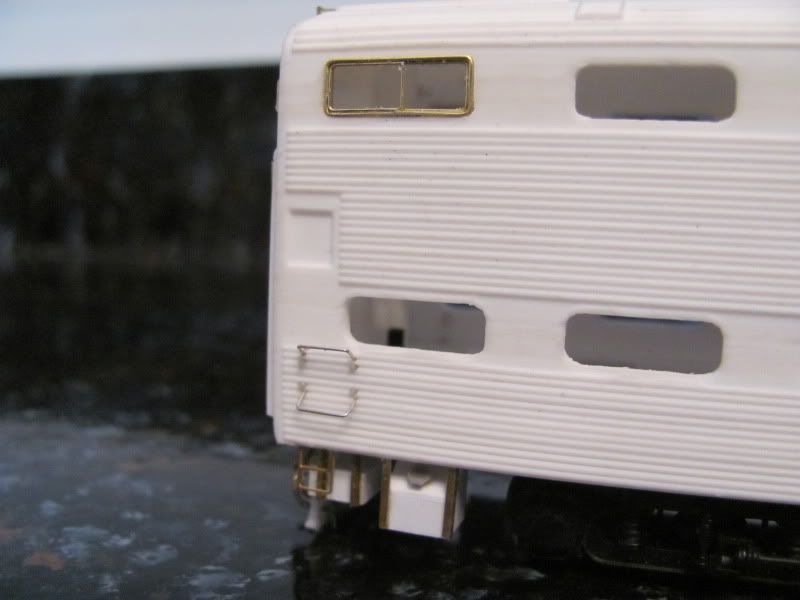 The main doors were bugging me, so I decided to rebuild them. Here is the original. 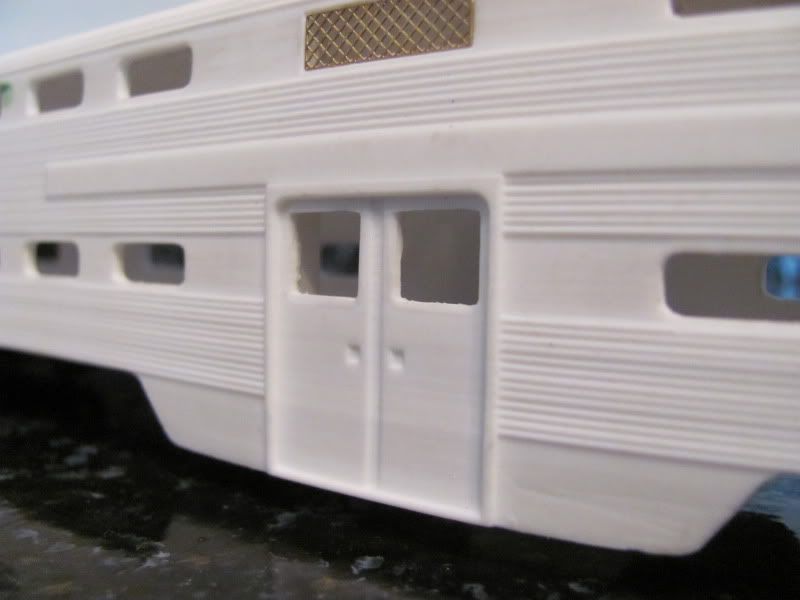 The frame work on the model stands proud of the fluting about .010". On the prototype, the frame was flush with the smooth part of the sides and the fluting stood out from the frame. I know I sound crazy complaining about a .010", but the difference really shows. This is where I'm at so far. 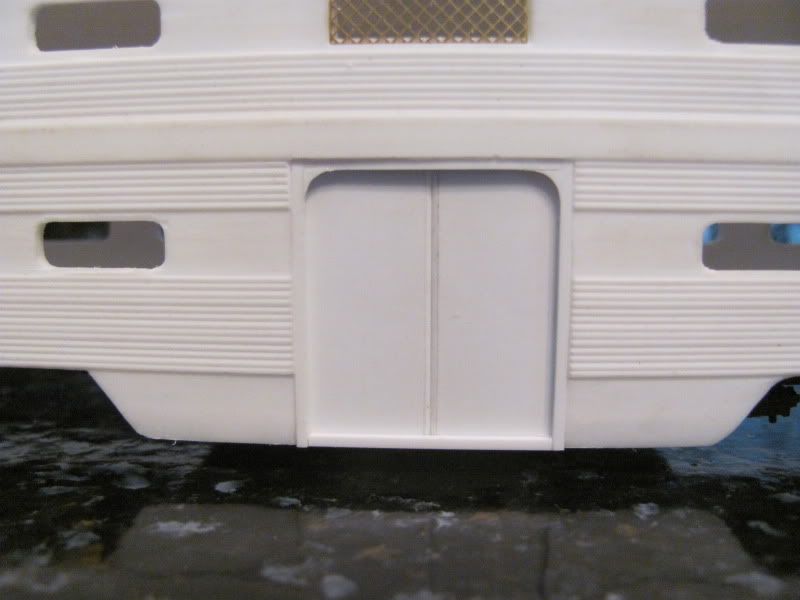 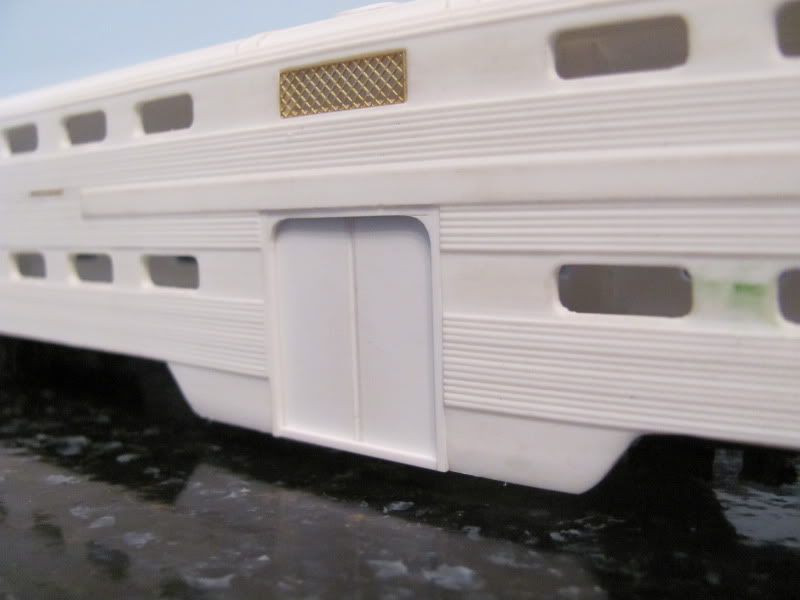 The doors themselves are made from two pieces of .040 styrene with half round glued to the edge to represent the door gaskets. The frame itself is made from .040 square styrene. I also recontoured the skirting so it curves under. The model was completely flat here. Here's a cropped image of what the doors should look like. 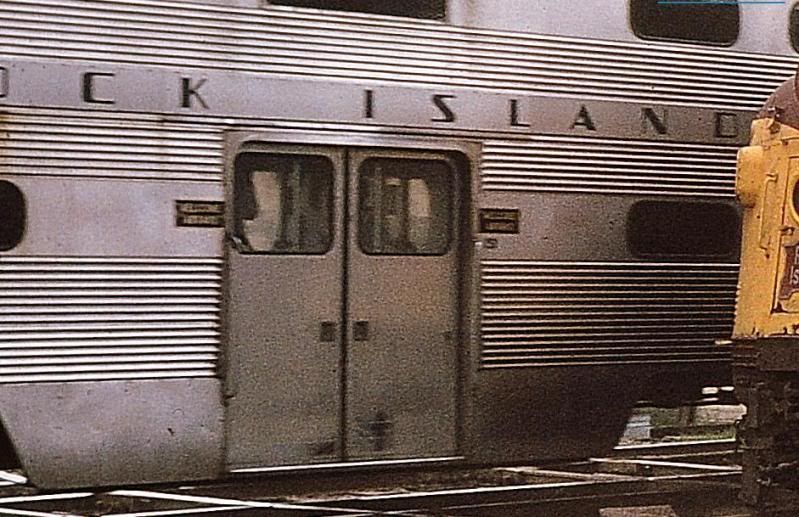 Here's the original. www.flickr.com/photos/7547061@N02/6348378151/sizes/z/in/photostream/ |
|


