|
|
Post by TBird1958 on Jul 30, 2023 11:09:15 GMT -8
Tank car fun.......Continued. Here's the "B" end finished and ready for paint.  the equipment area is about half done as well.  I have several Kato SD45's that I bought when they first came out a couple of decades ago, they are still in great running order and I did go to the trouble of painting and detailing them, including milling the frame and lowering. Obviously the notable thing I didn't do at the time was the handrails, so I'm mocking up some jigs to be able to build a set or two and see if it's worth the time/effort.  Some of the first pieces, these will get screwed to the wood and I'll add additional parts to keep the stanchions (KV Models) straight as I solder them into place. Cheers, Mark Hills  |
|
|
|
Post by fr8kar on Jul 30, 2023 12:07:39 GMT -8
A few months ago I had this idea to take some 45' containers and cut 5' out of them to turn them into quick and dirty Sea-Land containers with IBCs on 35' and 40' centers. I finally got around to putting the decals on these yesterday. I also decided to take some Herpa reefer containers I picked up for a song and letter them using leftover bits from my Chiquita decals and the bulk of a Hapag-Lloyd set I'd just designed for non-reefer containers. These models are far from perfect but they were fun little experiments that prove the concept of what I was trying to do. And they were fairly inexpensive, too.    That hideous Sea-Land container on the bottom is a factory painted Con-Cor container that will be a stand-in for now. Apart from being crude in detail it's too wide. I see another big undecorated container purchase in my future when I want to fill out the Sea-Land train but first things first. Next I'll be painting a bunch of regular marine containers and lettering them with other decal sets I've drawn. This is what I love about containers and trailers as loads on intermodal trains: you can dial in specific trains and railroads -- even specific eras -- just by swapping out the loads on the same cars. |
|
|
|
Post by valenciajim on Jul 30, 2023 13:07:04 GMT -8
Here is an Acurail model that I finished this morning. I painted it with Tamiya Race Car White and used Microscale decals to complete the model. The model was finished with on overcoat Tamiya flat. All paint was sprayed from Tamiya rattle cans, which actually are pretty good. 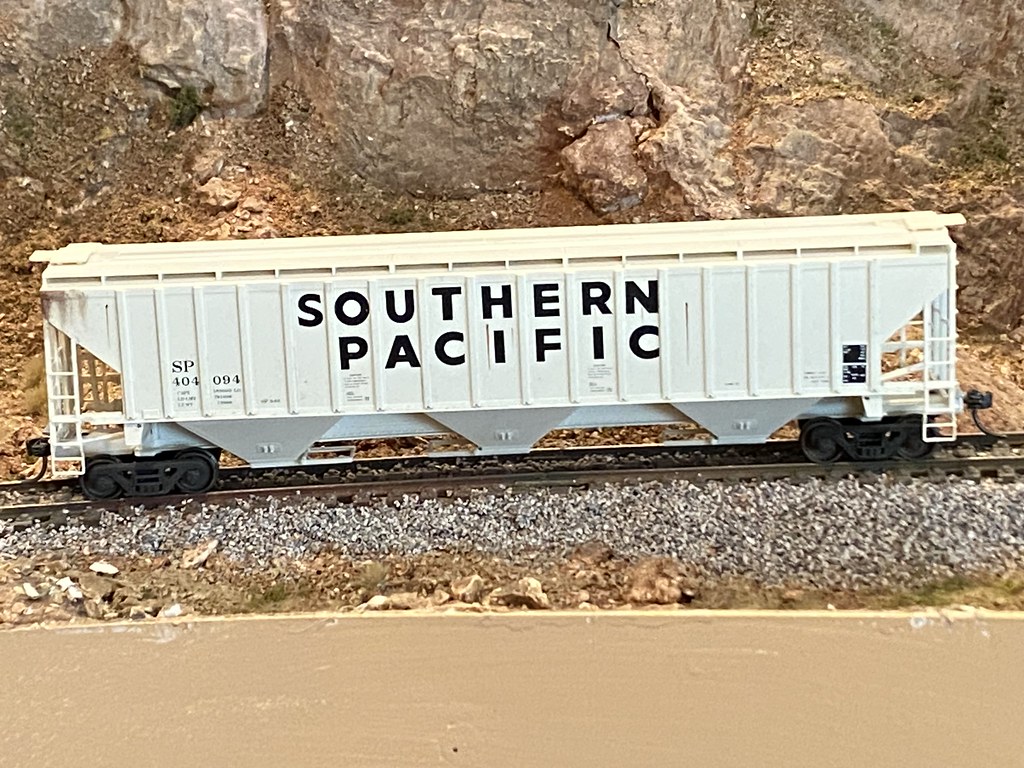 I am also experimenting with weathering roofs of 40 foot boxcars that were of a 1950s vintage. Here are two Accurail cars, one with weathering applied using Tamiya light gray panel accent paint and pan pastels. It is easy to overdo it. Here is the weathered roof next to an almost identical car with no weathering.  |
|
|
|
Post by simulatortrain on Jul 30, 2023 14:03:33 GMT -8
I built a Tangent Greenville 86' kit that I had bought to do something else with and changed my mind. I was between painting it NW and RI from a pool that Tangent doesn't so far offer the body style for (small differences in grabs.) Decided on RI because it seemed less likely we'll see that one RTR. Decals are not quite done but I'm finished for the day. I challenged myself to paint this car with only rattle cans and I'm satisfied with the finish. I have to praise Tangent support, my kit included the wrong train line, and they quickly sent the correct one and even the Morton platforms I needed to finish this car.  |
|
|
|
Post by drolsen on Jul 30, 2023 17:27:07 GMT -8
Some of the first pieces, these will get screwed to the wood and I'll add additional parts to keep the stanchions (KV Models) straight as I solder them into place. Neat to see you updating the Kato models, Mark. The thick handrails were always their biggest shortcoming, so I'm looking forward to seeing how yours turn out with the KV stanchions. I have some but haven't had the nerve to try them yet. We just moved into what will hopefully be our forever home, and I was anxious to spend some time at the workbench, so I pulled out a small project I've been wanting to do: swapping around the roof hatches and discharge gates on Rapido's Procor 5820 cuft covered hopper. Someone on another group mentioned that the discharge gate arrangement on the prototype cars didn't match the way the factory installed them on the models. It turns out that there were variations in the gate orientation throughout the production of these cars. As the model comes out of the box, all the gates are pointed towards the A end of the car, so two have to be turned around so that all gates point to the center of the car to match this UNPX series. The gates on the model were designed to be swapped around to match the particular series the model is decorated for, so they were relatively easy to remove with an Xacto chisel blade. Like many parts on factory assembled models, they're held in place by a blob of CA that was applied to each of the mounting pegs. The CA joint cracks apart with a little pressure with no damaged to the pegs or any visible part of the gates. I used a finger nail to gently pull one corner of the gate away from the hopper bay, just enough to insert the tip of the chisel blade. Coming in from the side of the car, I gently pushed the blade in between the gate and hopper back until the peg on that end of the gate cracked loose. I repeated the process on the other side to pop the other mounting peg loose, and then wiggled the pegs free of their holes in the bottom of the hopper bay.  You can see that there's dry CA around the mounting holes. I scraped that off with a chisel blade and sanded a little just to smooth the surface down. I also scraped the CA away from the discharge gates, being careful not to damage the mounting pegs. I applied a little blob of Tamiya thick liquid cement around each peg and pushed them back into place, oriented towards the center of the car. One last thing I did was to shave off the leftover sprue gates on either end of the bolt-on mounting plate for discharge gates. They all seemed to have a rough nub left over from assembly.  Next, I removed the four square vented roof hatches. This series of cars had only standard round hatches in my 1996 era, from the photos I've seen. Those were a little harder to get loose. I inserted my chisel blade under the square hatch, pointed along the centerline of the car and gently pried. I sent a couple hatches flying when they popped loose, and at least one mounting peg broke on each one. That wasn't a problem since I didn't need to reuse those hatches. I drilled out the broken pegs with a #56 drill bit, but later discovered I needed to open up one hole with a #55 because one mounting peg is larger to correctly orient the hatches.  With the roof hatch and discharge gates swapped around, the car matches the prototype series it's decorated for. I managed to do all this without too much damaged to the paint. I slipped with the chisel while removing a roof hatch and dinged one of the ribs, but nothing a little touchup and weathering won't hide. Even freshly repainted, these cars were ten years old and certainly had some dings at that point. I like this car a lot and may get another after finishing this easy project. The end ladder rungs are a little heavy, but I may thin them down a bit on the back sides with a blade to improve their appearance, as Ryan Harris has demonstrated on his covered hopper models. I need more of these cars for a customer on the future layout.   Dave |
|
|
|
Post by 12bridge on Jul 30, 2023 18:35:10 GMT -8
My mindless project this week was to draw up and print EMD Power Assemblies...to scale.   Those are 567A/B on the left, and 567C/645 on the right.  Rest of the week was busy getting ready for St. Louis. Great event, and good to meet several of you guys. |
|
|
|
Post by csxt8400 on Jul 31, 2023 10:32:47 GMT -8
Very nice work fellers. I have a car that I had hoped to get done for St.L but hope wasn't enough. A quick phone grab of where this potash hauler is at. Rapido paint with removed lettering, Chicago Link art in its place.  |
|
|
|
Post by csxt8400 on Jul 31, 2023 13:29:08 GMT -8
I built a Tangent Greenville 86' kit that I had bought to do something else with and changed my mind. I was between painting it NW and RI from a pool that Tangent doesn't so far offer the body style for (small differences in grabs.) Decided on RI because it seemed less likely we'll see that one RTR. Decals are not quite done but I'm finished for the day. I challenged myself to paint this car with only rattle cans and I'm satisfied with the finish. I have to praise Tangent support, my kit included the wrong train line, and they quickly sent the correct one and even the Morton platforms I needed to finish this car. Adam, that finish looks fantastic for rattle can. What paint did you go with? |
|
|
|
Post by ncrc5315 on Jul 31, 2023 14:17:17 GMT -8
12Bridge, I hope you are going to offer those power assemblies, that would be a great detail accessory for my diesel shop.
|
|
|
|
Post by simulatortrain on Jul 31, 2023 14:28:22 GMT -8
I built a Tangent Greenville 86' kit that I had bought to do something else with and changed my mind. I was between painting it NW and RI from a pool that Tangent doesn't so far offer the body style for (small differences in grabs.) Decided on RI because it seemed less likely we'll see that one RTR. Decals are not quite done but I'm finished for the day. I challenged myself to paint this car with only rattle cans and I'm satisfied with the finish. I have to praise Tangent support, my kit included the wrong train line, and they quickly sent the correct one and even the Morton platforms I needed to finish this car. Adam, that finish looks fantastic for rattle can. What paint did you go with? Thank you! The white ends are a can of Tamiya with a little life left in it, the doors are a Rustoleum silver (I'll have to check what kind exactly, I think it was American Accents or something), and the main body is Krylon satin brick. The key is floating them in hot water for about 5 minutes before you spray, it works wonders! |
|
|
|
Post by packer on Jul 31, 2023 16:46:02 GMT -8
Adam, that finish looks fantastic for rattle can. What paint did you go with? Thank you! The white ends are a can of Tamiya with a little life left in it, the doors are a Rustoleum silver (I'll have to check what kind exactly, I think it was American Accents or something), and the main body is Krylon satin brick. The key is floating them in hot water for about 5 minutes before you spray, it works wonders! I'm painting some junk cars for a "club runner" rack, so I'm gonna have to try the hot water trick. I like krylon's flat, maybe the gloss will be smoother after that. |
|
|
|
Post by 12bridge on Jul 31, 2023 18:32:41 GMT -8
12Bridge, I hope you are going to offer those power assemblies, that would be a great detail accessory for my diesel shop. Yup, they will be. Right now I am focusing on getting my web store built up, hopefully by the end of the month. |
|
|
|
Post by ncrc5315 on Aug 1, 2023 12:14:13 GMT -8
12Bridge, I hope you are going to offer those power assemblies, that would be a great detail accessory for my diesel shop. Yup, they will be. Right now I am focusing on getting my web store built up, hopefully by the end of the month. I will keep a watch out for them, thank you! |
|
|
|
Post by myoungwisc on Aug 1, 2023 20:34:01 GMT -8
My mindless project this week was to draw up and print EMD Power Assemblies...to scale... Looks like you had a great setup in St. Louis, hope that sales were brisk! Have you considered producing the Star 845 marker lamp that appeared on numerous cabooses in the mid-1980s? www.starsafetytechnologies.com/search-result?SearchKeyword=845-Martin |
|
|
|
Post by Mr. Trainiac on Aug 2, 2023 14:59:18 GMT -8
My mindless project this week was to draw up and print EMD Power Assemblies...to scale. Those are 567A/B on the left, and 567C/645 on the right. Pretty interesting to see water deck 567 liners. I always thought that was a pretty slick design compared to the current jumper setup. The flange on the bottom edge should be flattened at the 12 o'clock position so the packs don't hit each other in the engine, and the area from 4 to 6 should be thickened to match the radius of the flange for the p-tube bracket mounting holes on the 645 packs at least. I don't know how oil distribution worked in the 567A/B before the trunnion rod was introduced, if it used the p-tube or not. What did you use to design this model? Did you measure a physical power assembly, or did you have prints? |
|
|
|
Post by ChessieFan1978 on Aug 3, 2023 3:51:20 GMT -8
TBird1958,
What exactly is wrong with the Kato SD45 that you had to lower it? Also are those Proto 2000 Side frames on your UP model?
|
|
|
|
Post by csxt8400 on Aug 3, 2023 8:30:58 GMT -8
They look like Atlas trucks to me.
|
|
|
|
Post by cemr5396 on Aug 3, 2023 8:45:49 GMT -8
Pretty interesting to see water deck 567 liners. I always thought that was a pretty slick design compared to the current jumper setup. Maybe in theory, not in practice. The 567A and B had horrible water leak problems, and was one of the main things EMD wanted to address with the new 567C, in addition to the slight power bump. |
|
|
|
Post by ChessieFan1978 on Aug 3, 2023 10:05:50 GMT -8
They look like Atlas trucks to me. Unless TBird did some heavy modifications the are probably P2K SD7/9 Sideframes and Kato Low mount trucks combined. That's what I use for my conversions.  Trains Trains by Matt Fisher, on Flickr |
|
|
|
Post by csxt8400 on Aug 3, 2023 10:51:29 GMT -8
I stand corrected. Those are definitely the trucks as you've mentioned, Matt. I tried posting my Atlas SD24 truck for comparison but postimages isn't playing nicely right now. Looking at them, both trucks have their pros and cons. Edit:  |
|


