Deleted
Deleted Member
Posts: 0
|
Post by Deleted on Aug 17, 2013 20:08:45 GMT -8
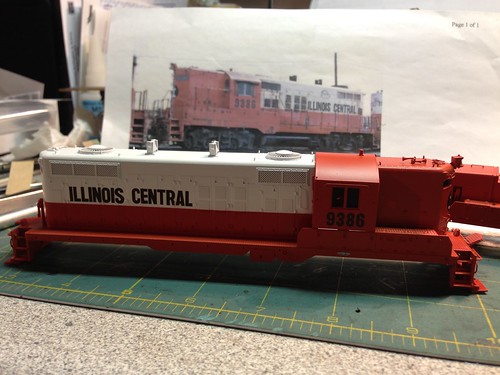
The children go back to school soon and parents are scrambling to get school supplies and clothing. In a couple weeks the parochial school across the street and the public elementary school next to it will be back in session. Thank goodness! Of course I'm an old curmudgeon...  Cheap and Nothing Wasted Bicentennial GP18 1776 is finally ready for paint. My order for GP18 grilles and radiator shutters arrived from Plano on Friday.  The front is pretty basic. I had to scratch build the cut bars.  Showing the nice Plano etched GP18 grilles and the shutters behind.  |
|
071
New Member

Posts: 47
|
Post by 071 on Aug 18, 2013 2:23:56 GMT -8
Looks great Jim, do Plano do the shutters too? I could do some for the two SD9s I'm about to start working on. Currently building an SD70I from parts I've accumulated over the past couple of years. American model parts are not so readily available in this part of the world but when you come across locos that have been ruined by someone else for cheap prices you just have to have a go! I picked up two Genesis SD70s which had been inflicted with this hideous paint job...  This will stay as a spartan cab SD70 and go NS when I get around to stripping it. I stripped its brother and this is the subject of the SD70I to run with the SD70M-2 I showed last week...  Still plenty to do. They wont be perfect, but since I can't go down to the tracks and see one pass every day I'll try to get them as close as possible going from pictures. I just wish i could finish my projects instead of having about 15 on the go at once! |
|
|
|
Post by SOMECALLMETIM on Aug 18, 2013 5:34:00 GMT -8
Jim,
The GP18 looks good. Could you tell me more about the Plano grilles and shutters? How hard are they to install and do how do they compare to the Proto GP20 grills? I yanked grills and shutters out of a donor Proto GP20 model with the idea to use them in the GP18. Do you happen to have any close up photos of the Plano parts installed? Thanks,
|
|
|
|
Post by nebrzephyr on Aug 18, 2013 8:02:30 GMT -8
Jim...engine is coming along. Anxious to see it painted. Here's an Athearn RTR SD40-2 that I detailed-up, including adding working ditch lights. Bob  |
|
Deleted
Deleted Member
Posts: 0
|
Post by Deleted on Aug 18, 2013 9:47:31 GMT -8
Jim, The GP18 looks good. Could you tell me more about the Plano grilles and shutters? How hard are they to install and do how do they compare to the Proto GP20 grills? I yanked grills and shutters out of a donor Proto GP20 model with the idea to use them in the GP18. Do you happen to have any close up photos of the Plano parts installed? Thanks, The Proto grilles for the GP18 and 20 are cast in delrin. One, delrin doesn't hold paint well even after grit blasting and the use of automotive adhesion promoter. Second, they are thick when compared to the Plano grille which is etched out of stainless steel. The hardest part of install is having to mill out material on Proto weight to clear the shutters.    Photos of the parts in their packages   Instructions for the shutters  |
|
|
|
Post by surlyknuckle on Aug 18, 2013 14:42:31 GMT -8
Nice work, folks.
Bob, I love that BN SD40-2. Those cascade-green engines are some of my favorites. Last year I was lucky enough to have a former BN SD40-2 still in BN paint (HLCX marks) assigned to the local I worked. She was still a sweet machine, and I enjoyed having it on the job for about an entire month. Ran better than the CSX one it was paired with.
|
|
|
|
Post by tankcarsrule on Aug 18, 2013 16:15:46 GMT -8
I built this car in brass in 1989.  |
|
|
|
Post by Donnell Wells on Aug 18, 2013 17:58:41 GMT -8
Jim...engine is coming along. Anxious to see it painted. Here's an Athearn RTR SD40-2 that I detailed-up, including adding working ditch lights. Bob
Now that's hot Bob! I really like those custom ditchlight housings.
Donnell |
|
|
|
Post by Donnell Wells on Aug 18, 2013 18:00:43 GMT -8
Bobby, you are the tank car king! He even builds them in brass no less! How many tanks have you built altogether?
Donnell |
|
|
|
Post by icrr3067 on Aug 18, 2013 19:36:20 GMT -8
|
|
|
|
Post by mlehman on Aug 18, 2013 20:31:13 GMT -8
Some snapshots from today. The pink is gone, covered in Sculptamold painted to resemble one of the soils of the Silverton area. More layers to follow.  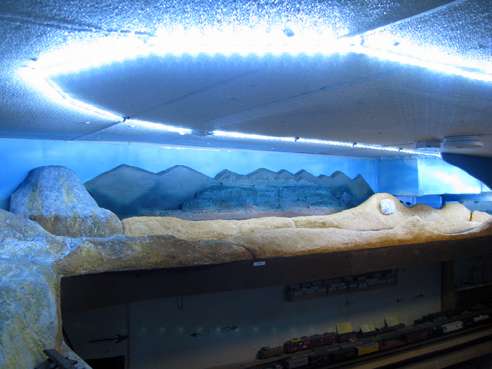 First train into Black Cat Junction. Shortages of track materials will slow progress at this point. 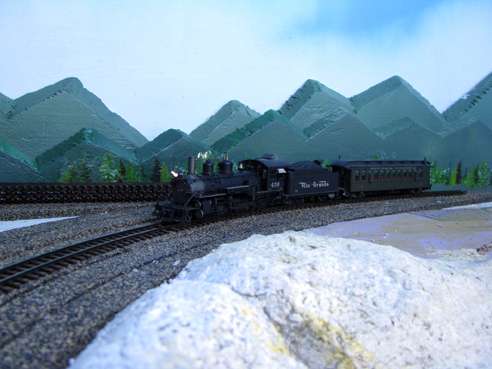 The long view of the Cascade Branch, taken from the popup in the corner at Black Cat Junction. 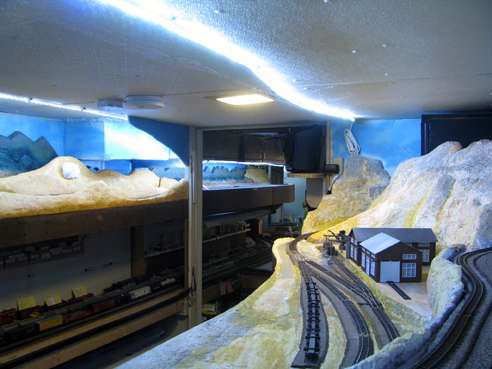 |
|
|
|
Post by tankcarsrule on Aug 19, 2013 2:14:06 GMT -8
Bobby, you are the tank car king! He even builds them in brass no less! How many tanks have you built altogether?
DonnellThanks Donnell. I've built a total of 15. My first two were brass. Regards, Bobby |
|
|
|
Post by jlwii2000 on Aug 19, 2013 16:46:11 GMT -8
You guys are very good at building these models from the ground up. Something I'm afraid to even begin to try. My hats off to you! Mlehman the layout is coming along nicely..good job!
|
|
mecu18b
Full Member
My doctor gave me six months to live, but when I couldn't pay the bill he gave me six months more.
Posts: 145
|
Post by mecu18b on Aug 19, 2013 16:55:26 GMT -8
Some snapshots from today. The pink is gone, covered in Sculptamold painted to resemble one of the soils of the Silverton area. More layers to follow. First train into Black Cat Junction. Shortages of track materials will slow progress at this point. The long view of the Cascade Branch, taken from the popup in the corner at Black Cat Junction. Mike...Are those led rope lights? If so what do you think of them? I was thinking about using them but I havent see them used for a layout. Hows the light, cost etc? COO Norfolk Terminal Modern Narrow Gauge |
|
|
|
Post by mlehman on Aug 19, 2013 18:36:30 GMT -8
James and mecu18b, Thanks for the comments. mecu, What I'm using are Meridian line voltage LED strip lights. I get mine from Menards, but should be available elsewhere. These are the Daylight color, but they also have Warm White, available in 12' and 6' lengths which can extend some crazy long length without problems. I'm using two 12' lengths for the Cascade branch right now. I'll eventually add a second length over the Purgatory to Black Cat Junction segment, since it's about 3' deep. For now, they work well. The two lengths together draw 36 watts. I use various clips in order to direct the flat LED "cable" off to the side, rather than fastening it where it would shine straight down. This makes the string act like a long length of tiny spotlights. There's more on the way I use these on page 2 of this thread: cs.trains.com/mrr/f/88/t/213765.aspx?sort=ASC&pi314=1The Night SceneAt $40/12 feet, it sounds pricey at first. But these are the first LEDs that I think really met the standard to be used for layout illumination. And the savings in power will eventually pay for themselves. I've taken about 75% of my old 50W halogen track lights out of service now that I'm using them. The strip lights are so much easier to install. They're also COOL and practically zero clearance, so they stay out of your sight lines, especially in low clearance and double deck situations. |
|
mecu18b
Full Member
My doctor gave me six months to live, but when I couldn't pay the bill he gave me six months more.
Posts: 145
|
Post by mecu18b on Aug 19, 2013 19:23:10 GMT -8
Mike,
I have to say they seem to be nice and bright. I have a HOn30 modern day narrow gauge layout. 2 foot wide shelves and since its 60" high lights like this might do the trick. I hate seeing the lights when you stand at the end of the peninsular.
COO Norfolk Terminal
Modern Narrow Gauge
|
|
|
|
Post by mlehman on Aug 19, 2013 21:29:12 GMT -8
mecu18b, The camera's adjustments for exposure probably emphasize the light a bit more than it is to the eye, but they work well for me. Here's another pic I took tonight after doing some tuning on how the clips hold things in place to project the light. It was noticeably improved after that. 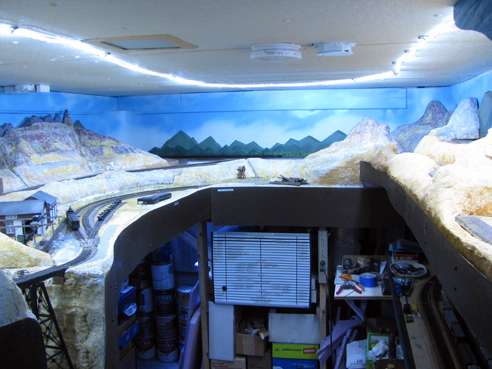 They put light where it's needed, adding to the theatrical black box effect by focusing attention on the layout. |
|
|
|
Post by nscaler711 on Aug 19, 2013 23:44:34 GMT -8
Here are a couple of photos of my BNSF SD70ACe that I weathered somewhat recently 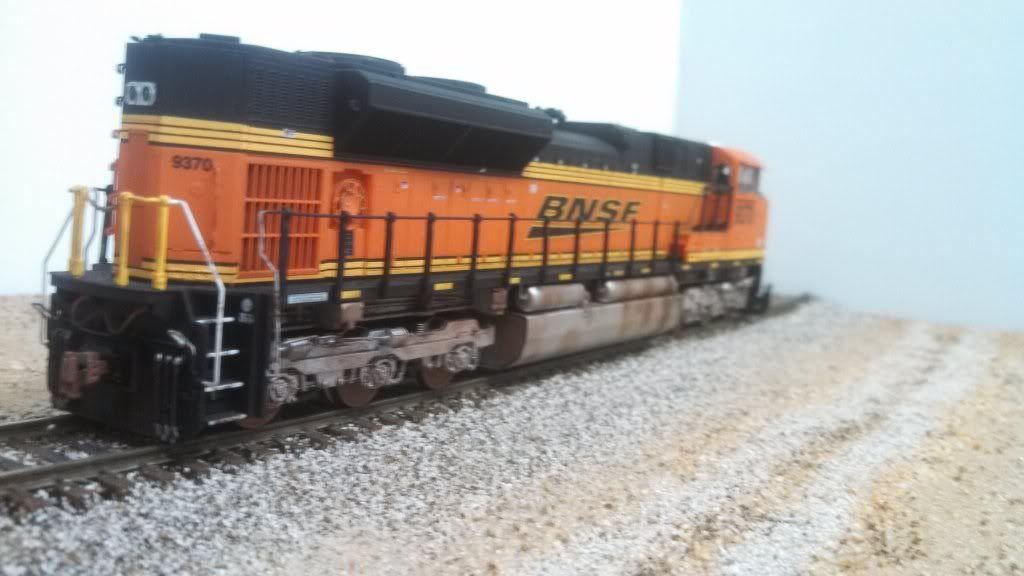 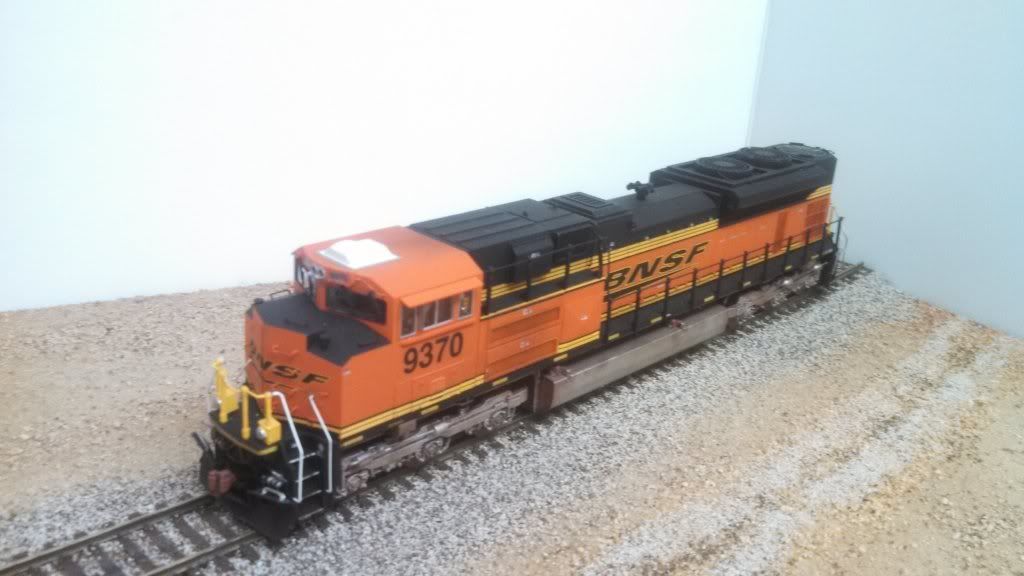  and yes those are Sergent Engineering Couplers they work beautifully, minus the hand of god with a magnetic stick. |
|
mecu18b
Full Member
My doctor gave me six months to live, but when I couldn't pay the bill he gave me six months more.
Posts: 145
|
Post by mecu18b on Aug 20, 2013 3:19:35 GMT -8
 mecu18b, The camera's adjustments for exposure probably emphasize the light a bit more than it is to the eye, but they work well for me. Here's another pic I took tonight after doing some tuning on how the clips hold things in place to project the light. It was noticeably improved after that. They put light where it's needed, adding to the theatrical black box effect by focusing attention on the layout. This is how mine looks....I think your lighting system would be much better. COO Norfolk Terminal Modern Narrow Gauge |
|
|
|
Post by mlehman on Aug 20, 2013 6:58:44 GMT -8
That looks pretty good to me. I can see where the intensity seems to vary a bit. What are you using to light it now?
One of the things about the strip lighting is how evenly it spreads the light. All the LEDs effectively operate in parallel because of how they're constructed in a long string. The beam of light from each LED thus stays aligned and works like sunlight does with its very close to parallel rays because it's so distant and so big. So the spread of light over a scene is very effective in making it behave like daylight.
|
|
mecu18b
Full Member
My doctor gave me six months to live, but when I couldn't pay the bill he gave me six months more.
Posts: 145
|
Post by mecu18b on Aug 20, 2013 8:37:39 GMT -8
Mike,
Im using reg florescent lights. 4 footers, however due to the odd size room ( 11x19 ) I cant fit even lighting. i also have a peninsular that im trying to light but in a way that the lights are as hidden as possible to maintain the shadowbox effect.
COO Norfolk Terminal
Modern Narrow Gauge
|
|
|
|
Post by mlehman on Aug 21, 2013 8:56:33 GMT -8
mecu18b,
The LED strip lighting is much easier to handle than the fluorescents if you need to get it behind a valance. I couldn't tell if your existing lights are surface mount or in a suspended ceiling. My main lighting is fluorescents in the suspended ceiling, but I also had many issues with getting even lighting because it was restricted to space between floor joists.
While the LED strip lighting is surface mounted, it projects no more than 1/2" below the ceiling. I've thought about adding some minimal valances made out of black foamcore board to shadowbox it, but just haven't seen that it's really needed if you have a low ceiling now that I've been using it for awhile. Along one side of the room is an area where there's a support beam that the light strips hide behind like a valance and that works well, I just didn't see trying to follow all the curves in the light strip in much of the rest of the room.
|
|