|
|
Post by riogrande on May 4, 2014 5:30:44 GMT -8
|
|
|
|
Post by mrsocal on May 4, 2014 5:41:11 GMT -8
Hi everyone, I had put it out there last week to this week share something that you have made or modified to make life at the hobby bench easier and fun. So what did you come up with?  Here are two of mine, 1st is an oil tray. I did not come up with the idea but I did build my own and it makes working with oils alot easier.  2nd is my painting susan, it gets the work up at eye level and allows me to turn the project being painted 360 degrees.  Most of those curves has easements as well. |
|
|
|
Post by mlehman on May 4, 2014 6:12:14 GMT -8
Jim,
The cabooses look great, even though the scenery is still a little sparse  Those are some nice flowing curves! Those are some nice flowing curves!
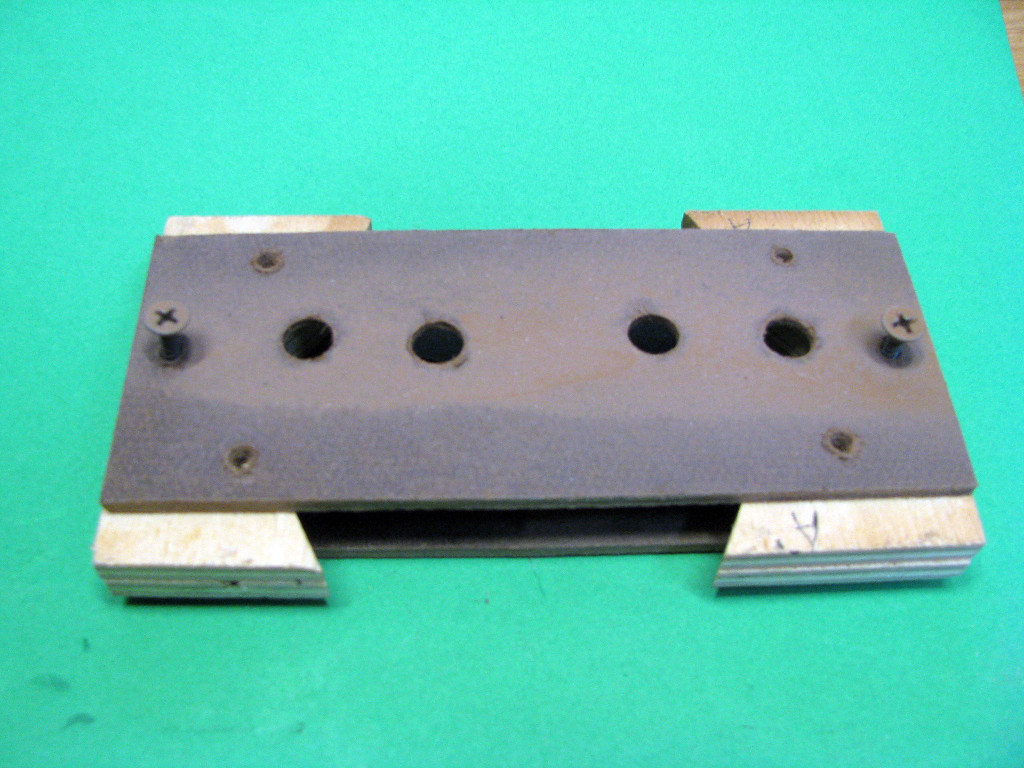
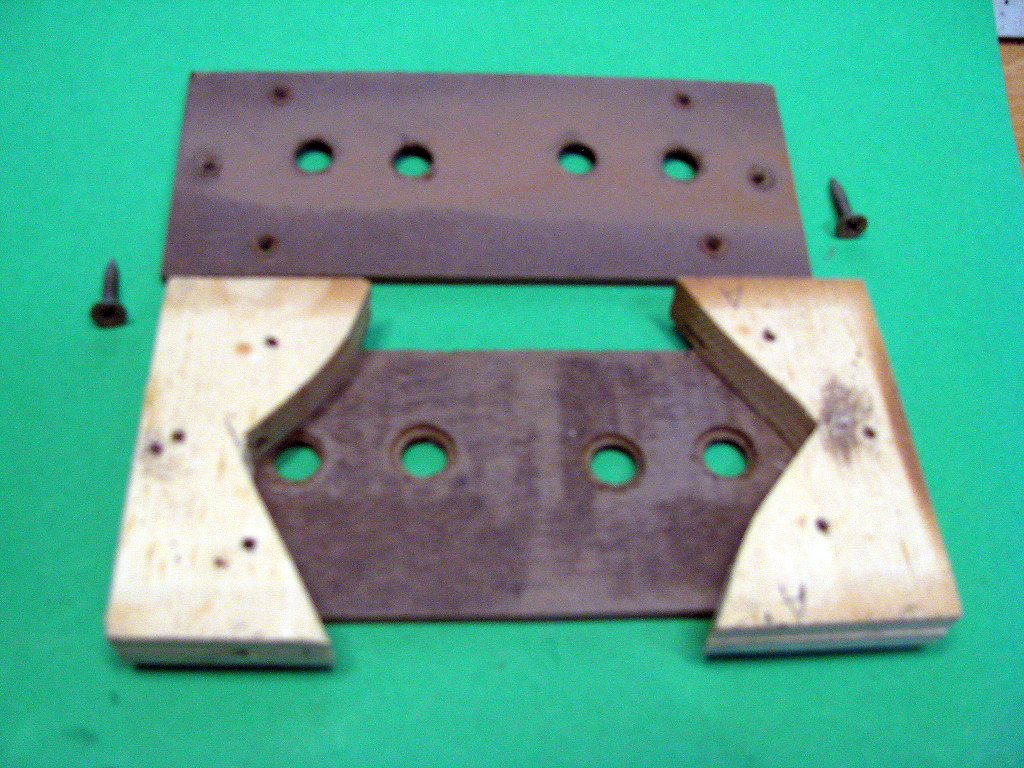
OK, there was a suggestion to show some tools made, so here the wheel painting jig I made after Wisconsin Jim was blinded by the shiny wheels on one of my weathered cars It's just some scraps with recessed holes to keep the wheel treads clean when painting.
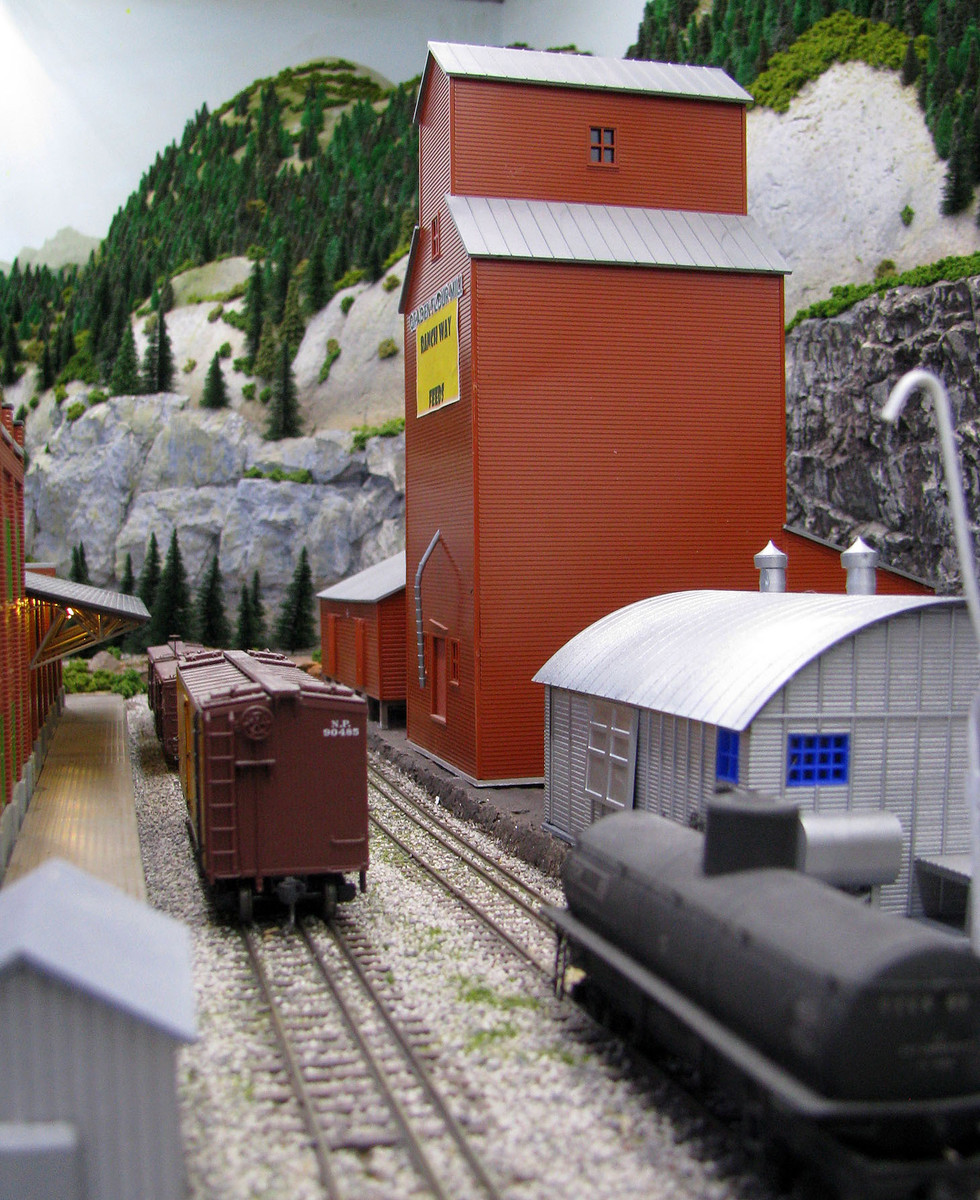
In Silverton a Twilight Zone-like event happened...the stations moved about 1.5 " to the southeast. This made enough room to extend the house track so it can hold the Re Mountain passenger with its loco in the clear to help alleviate operator complaints of congestion in Silverton around midday.

Work is continuing in Hesperus after industry was rearranged there recently.
A new aircraft joined the fleet, a HH-3E Jolly Green Giant. Famous for rescue use and spec ops (non-RR-related  )it's 1:72 scale. I found that when slightly larger than HO scale aircraft are over the lower sections of the layout, it forces the perspective to make the ground below look farther away. )it's 1:72 scale. I found that when slightly larger than HO scale aircraft are over the lower sections of the layout, it forces the perspective to make the ground below look farther away.

I finished a project to install back-up lights on a couple of my Blackstone HOn3 locos that came without them. I can also be applied to any loco with an extra decoder output to run the light. I wrote the install up here: Add a Back-Up Light to Your Blackstone HOn3 Loco
 |
|
|
|
Post by riogrande on May 4, 2014 7:14:16 GMT -8
Jim,
The cabooses look great, even though the scenery is still a little sparse Those are some nice flowing curves!
OK, there was a suggestion to show some tools made, so here the wheel painting jig I made after Wisconsin Jim was blinded by the shiny wheels on one of my weathered cars It's just some scraps with recessed holes to keep the wheel treads clean when painting.The cabooses are OMI except for the 4-stripe, which is a Division Pt. I bought new - the modified windows are a bit deep but otherwise it's nice. I still have two welded 01470-01490 class welded OMI cabooses that need paint. I plan on at least one being black, possibly with the yellow stripes. Thanks Mike! Staging scenery is a little sparse. Maybe I should put a few tumble weeds along the tracks until the upper level gets in down the road. I went to the trouble, not much trouble really, of adding easements to all of the curves where they sweep into the straight section of staging with the re-railers installed to catch errant wheels. The curves are 32" minimum with some 36 and a few in-between. I've soldered the joints on all the curves to keep them from kinking and improve conductivity. Next step is to solder in wire drops onto the body of the staging tracks in 2 or 3 places and attach them to a 14 AWG bus for the Digitrax Radio Chief I have had in storage - it still has the DT100R throttle, so I need to pick up a DT402 and get more of the loco's outfitted. A few have decoders already - but most don't. BTW, I've seen while masks on the commercial market - might pick one of those up once I get a compressor for the airbrushes. |
|
|
|
Post by kentuckysouthernrwy on May 4, 2014 7:15:19 GMT -8
I recently sat down and built a curved switch for one end of my new yard. I used a template from the Fast Tracks website and put it on a piece of ceiling tile and got to work cuttin' and soldering to make the switch. First I cut and gapped the PC board ties and laid them out on the template 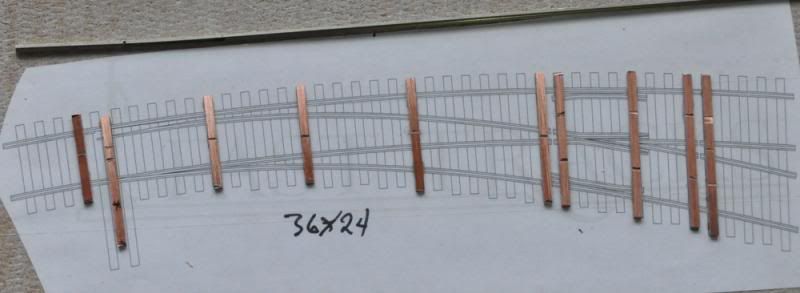 Next I laid out the stock rails and soldered them in place 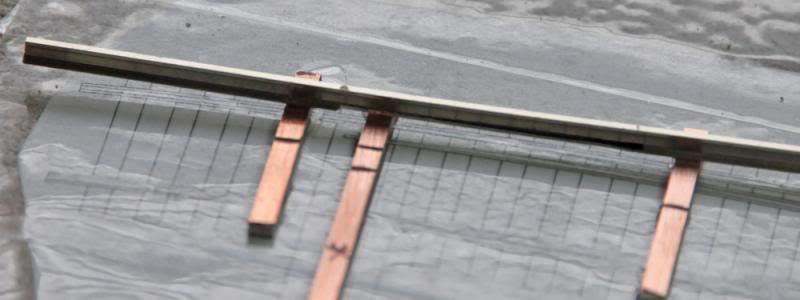 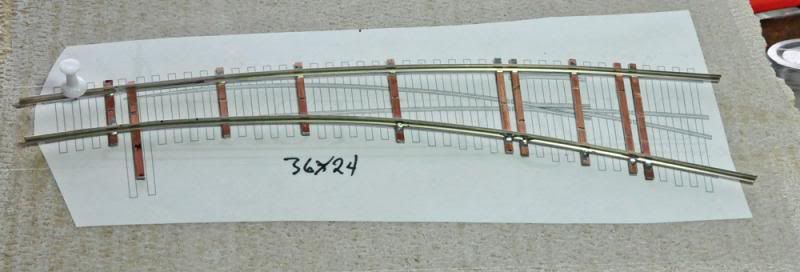 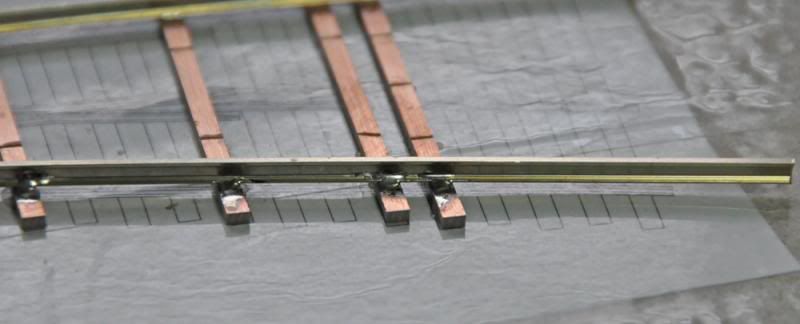 Then I formed the points and placed them using 3 point gages and the NMRA track gage.  I cut, curved and formed the guard rails and points then added the throwbar. 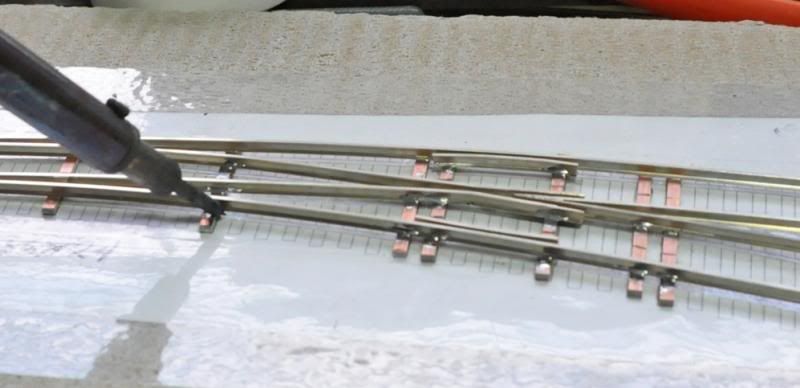 After adding the ties the switch was put on the layout. 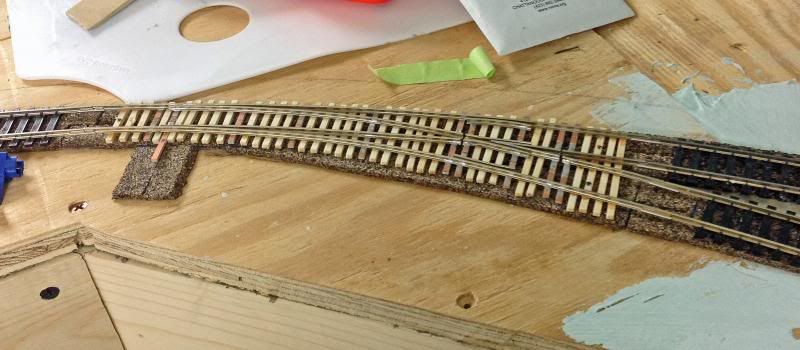 This little video shows the other end of my yard with the switches all #5s made with Fast Tracks jigs: Southern 2011 is one of Walthers' new SW-1s |
|
|
|
Post by dti406 on May 4, 2014 7:16:32 GMT -8
Well, two weeks ago it was the Pennsylvania Railroad and last week it was the New York Central so this week it is the Penn Central, hated it back then, but it sort of grows on you!   PC SD40 and SD45 going thru the siding at Thurd on the Stringsville Model Railroad Club Layout.  Atlas GP40, detailed and painted, one of ten GP40's that were painted with the Orange C, along with one RS-3 only units to receive this paint scheme, some said in recognition of the NH coming into Penn Central. Now, what's on the work bench!   Working on an Intermountain Pflauder Milk Car, as you can see I have completed the underbody work with the three air tanks, brake cylinder, brake valve and the associated piping. along with the rod guides and brake rods, now moving onto the exterior details before paint and decals. I have no special tools that I have come up with just use all the standard ones for building and painting kits. Thanks for looking! Rick J |
|
|
|
Post by TBird1958 on May 4, 2014 8:35:11 GMT -8
Cool stuff this week Gentlemen! The tool I have to share is a simple brush that I picked up while visiting the Art Supply store, it's called an Angle Comb, as you can see, it very thin in cross section yet broad and mildly stiff. I bought it to use applying chalks, especially around the ribs on exterior post cars - the idea being to not spread the chalk everywhere, just near the ribs, weld seams and rivet lines. Here I'm doing trial and error on some BB stuff, the first two shots are just to see what the brush looks like. I'll some completed Red Caboose ART cars that I used this on to share soon.   The FGE car is again a trial, here with orange then brown chalks to add some depth to the color.  I've been working on my Genesis F's and will share some pics of entire group soon, however I did use this brush in the silver areas on this unit. On the prototype the silver did not wear well, it oxidized, showed dirt quickly and had a bad tendency to peel off.  |
|
|
|
Post by tankcarsrule on May 4, 2014 9:34:12 GMT -8
Lots of great models and tools. If I displayed the tools I use, you'd get a good laugh! My soldering iron is a 35W that's thirty four years old. The rest of my junk is cheap old tools. I use a block of Teflon with grooves cut in it to make my ladders. I also use it to solder stanchions to the brackets. My Scottish blood is at fault.
Regards, Bobby McPitts
|
|
|
|
Post by riogrande on May 4, 2014 10:03:11 GMT -8
Lots of great models and tools. If I displayed the tools I use, you'd get a good laugh! My soldering iron is a 35W that's thirty four years old. The rest of my junk is cheap old tools. I use a block of Teflon with grooves cut in it to make my ladders. I also use it to solder stanchions to the brackets. My Scottish blood is at fault. Regards, Bobby McPitts Well, I just got done soldering drops to 10 staging tracks using an old Radio Shack soldering iron that's more than 20 years old, possibly 40 years old. No posh Weller soldering stations here! As long as I clean the tip and use flux, the old iron seems to still do the job decently! I need to get some solder soon, hope Home Depot has some cause I think Radio Shack, if I can find one open just sells cell phones these days! |
|
|
|
Post by mrsocal on May 4, 2014 10:12:25 GMT -8
I use an ol Weller that my dad bought back in 71' still going strong and dam I was 6 yrs old when he bought that thing. LOL
|
|
|
|
Post by mlehman on May 4, 2014 10:39:03 GMT -8
SNIP I need to get some solder soon, hope Home Depot has some cause I think Radio Shack, if I can find one open just sells cell phones these days! Jim, Actually, Radio Shack has done a pretty good job with soldering tools and supplies lately. I use the 64-035 silver-bearing solder for most things on the layout and for decoder installs, etc. It's what I used to build my PSC brass DL-535E. You may want something a little thicker for attaching drops to rail, but I just pump more of this thin stuff (.015" diameter) in to compensate. Plus, someone has to support all the silver mining on the layout... |
|
|
|
Post by TBird1958 on May 4, 2014 10:48:32 GMT -8
Lots of great models and tools. If I displayed the tools I use, you'd get a good laugh! My soldering iron is a 35W that's thirty four years old. The rest of my junk is cheap old tools. I use a block of Teflon with grooves cut in it to make my ladders. I also use it to solder stanchions to the brackets. My Scottish blood is at fault. Regards, Bobby McPitts Bobby, It would pretty cool to see a shot of a ladder under construction in that telfon jig if you ever get the chance. Your craftsmanship is very inspiring (along with quite a few others here) to me! |
|
|
|
Post by mrsocal on May 4, 2014 11:34:07 GMT -8
It is 12:32 pm on the west coast and here is where I am at to the moment on this 7 post build.  |
|
|
|
Post by tankcarsrule on May 4, 2014 12:43:25 GMT -8
Lots of great models and tools. If I displayed the tools I use, you'd get a good laugh! My soldering iron is a 35W that's thirty four years old. The rest of my junk is cheap old tools. I use a block of Teflon with grooves cut in it to make my ladders. I also use it to solder stanchions to the brackets. My Scottish blood is at fault. Regards, Bobby McPitts Bobby, It would pretty cool to see a shot of a ladder under construction in that telfon jig if you ever get the chance. Your craftsmanship is very inspiring (along with quite a few others here) to me! Thanks Mark. My latest project requires four ladders, so I'll post photos to my flicker and put them on Atlas. It'll be awhile, I'm doing the tank now. Regards, Bobby |
|
|
|
Post by riogrande on May 4, 2014 13:08:21 GMT -8
SNIP I need to get some solder soon, hope Home Depot has some cause I think Radio Shack, if I can find one open just sells cell phones these days! Jim, Actually, Radio Shack has done a pretty good job with soldering tools and supplies lately. I use the 64-035 silver-bearing solder for most things on the layout and for decoder installs, etc. It's what I used to build my PSC brass DL-535E. You may want something a little thicker for attaching drops to rail, but I just pump more of this thin stuff (.015" diameter) in to compensate. Plus, someone has to support all the silver mining on the layout... Thats good to know they still have some stuff like that. I used to always know I could get buttons, switches, wire, solder, soldering irons and the like from Radio Shack. I wouldn't mind a Weller if I had that much money available burning a hole in my pocket, it would get spent on trains directly. Of course if my dad bought me one, I wouldn't look a gift horse in the mouth! |
|
|
|
Post by stevef45 on May 4, 2014 19:07:59 GMT -8
|
|
|
|
Post by fr8kar on May 4, 2014 21:00:29 GMT -8
Hi everyone, I had put it out there last week to this week share something that you have made or modified to make life at the hobby bench easier and fun. So what did you come up with? Here's a little jig I made out of scrap styrene that I use to bend the funky brake cylinder piping on SCL GE U33B and U36B models:  And here's an example of one of the wires bent using the jig: 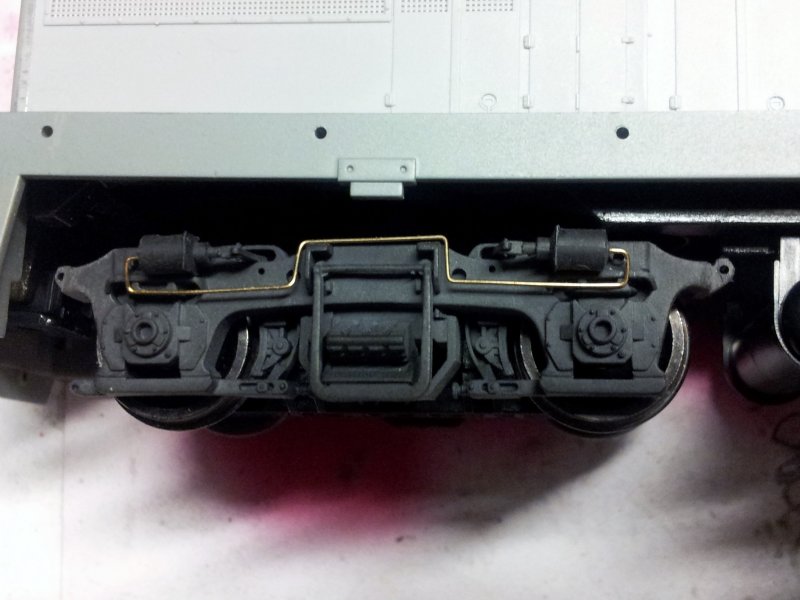 It looks like it can use some tweaking after looking at it through a macro lens. The old eyes just ain't what they used to be.... Lots of nice work on display this week from everyone! |
|
|
|
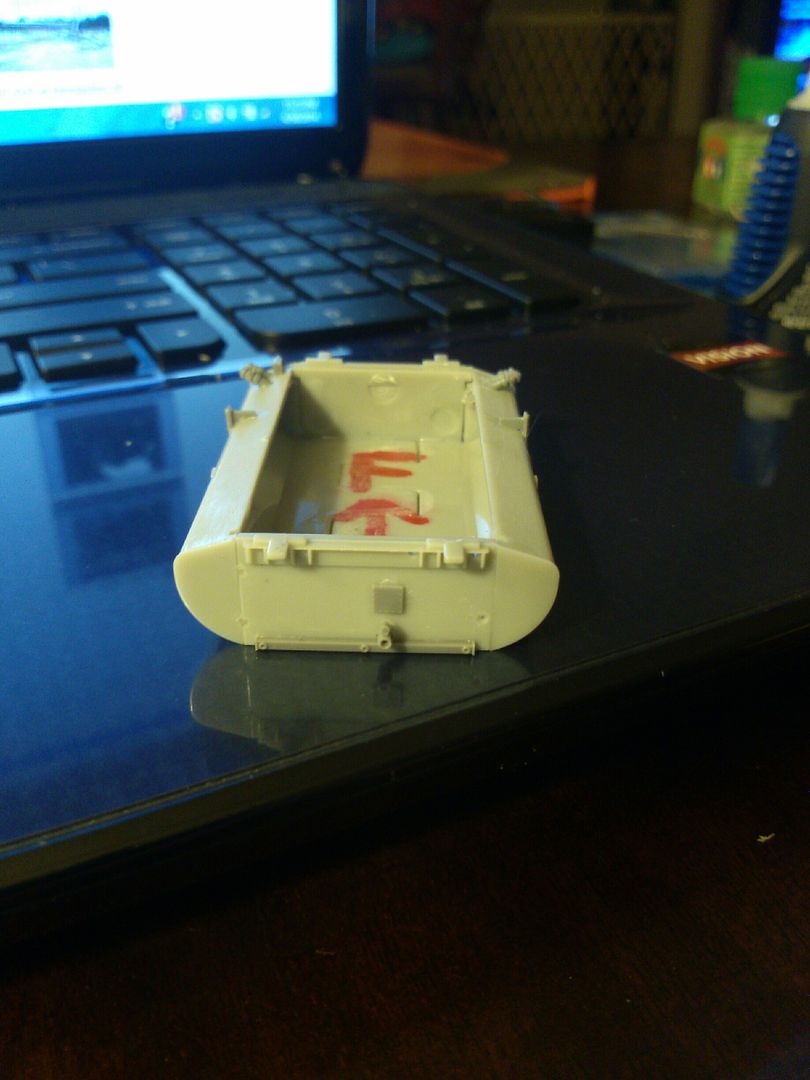
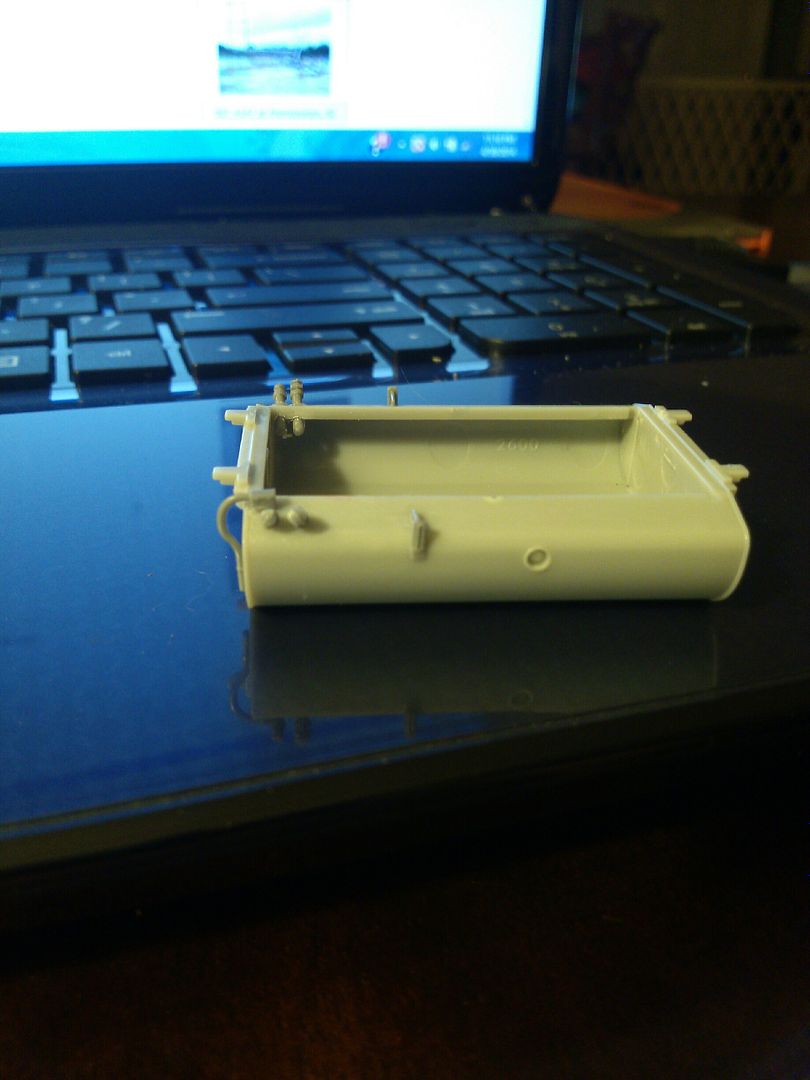
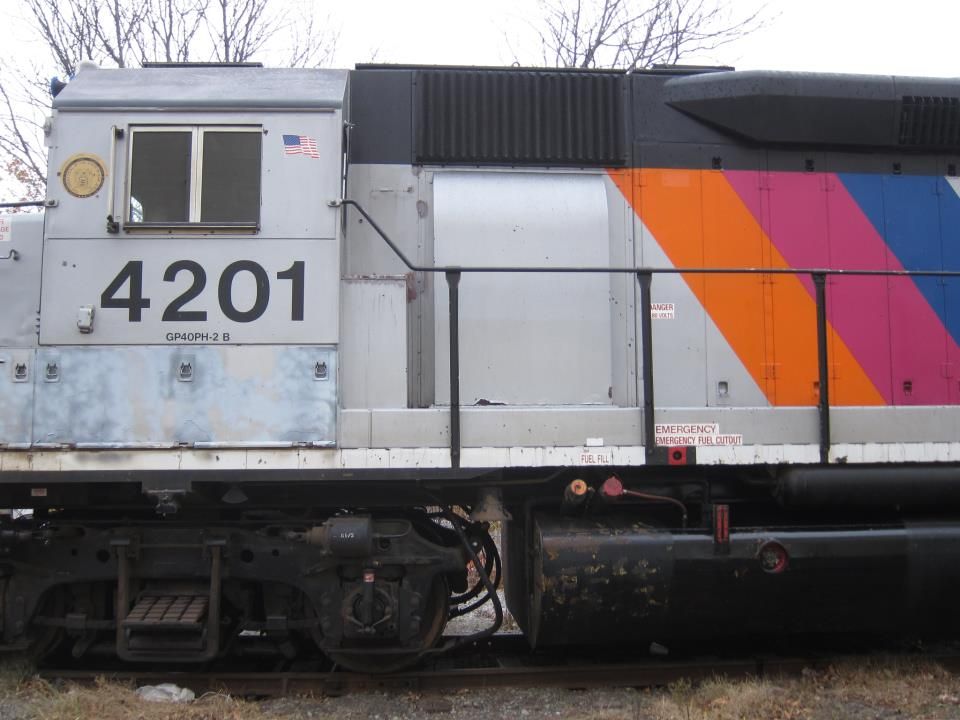
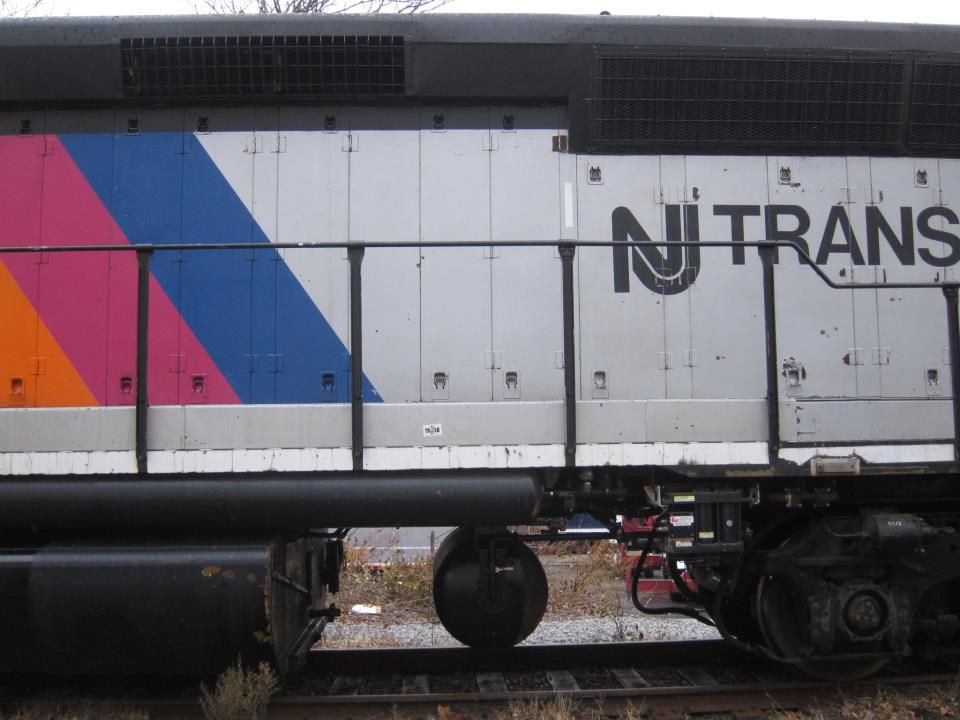
Post by drolsen on May 5, 2014 13:40:59 GMT -8
Slowly building up the fuel tank for my kitbashing project for NJ Transit GP40PH-2B. Athearn 2600 gallon tank and Cannon parts. Looks great! I wish Athearn would restock all those fuel tanks - they are a great product to have for modifying various diesel models. Nice work, everyone! Dave |
|
|
|
Post by carrman on May 5, 2014 14:30:19 GMT -8
Hi everyone, I had put it out there last week to this week share something that you have made or modified to make life at the hobby bench easier and fun. So what did you come up with? Here's a little jig I made out of scrap styrene that I use to bend the funky brake cylinder piping on SCL GE U33B and U36B models: And here's an example of one of the wires bent using the jig: It looks like it can use some tweaking after looking at it through a macro lens. The old eyes just ain't what they used to be.... Lots of nice work on display this week from everyone! This, this is genius! Dave |
|


 Those are some nice flowing curves!
 )it's 1:72 scale. I found that when slightly larger than HO scale aircraft are over the lower sections of the layout, it forces the perspective to make the ground below look farther away.