|
|
Post by mlehman on Jul 27, 2014 5:28:01 GMT -8
Hope it's been a great week in model railroading for you.  My build of a second PSC HOn3 DL-535E continues. The shell is basically complete and I'm working on the walkway, handrail, and pilot assembly now. 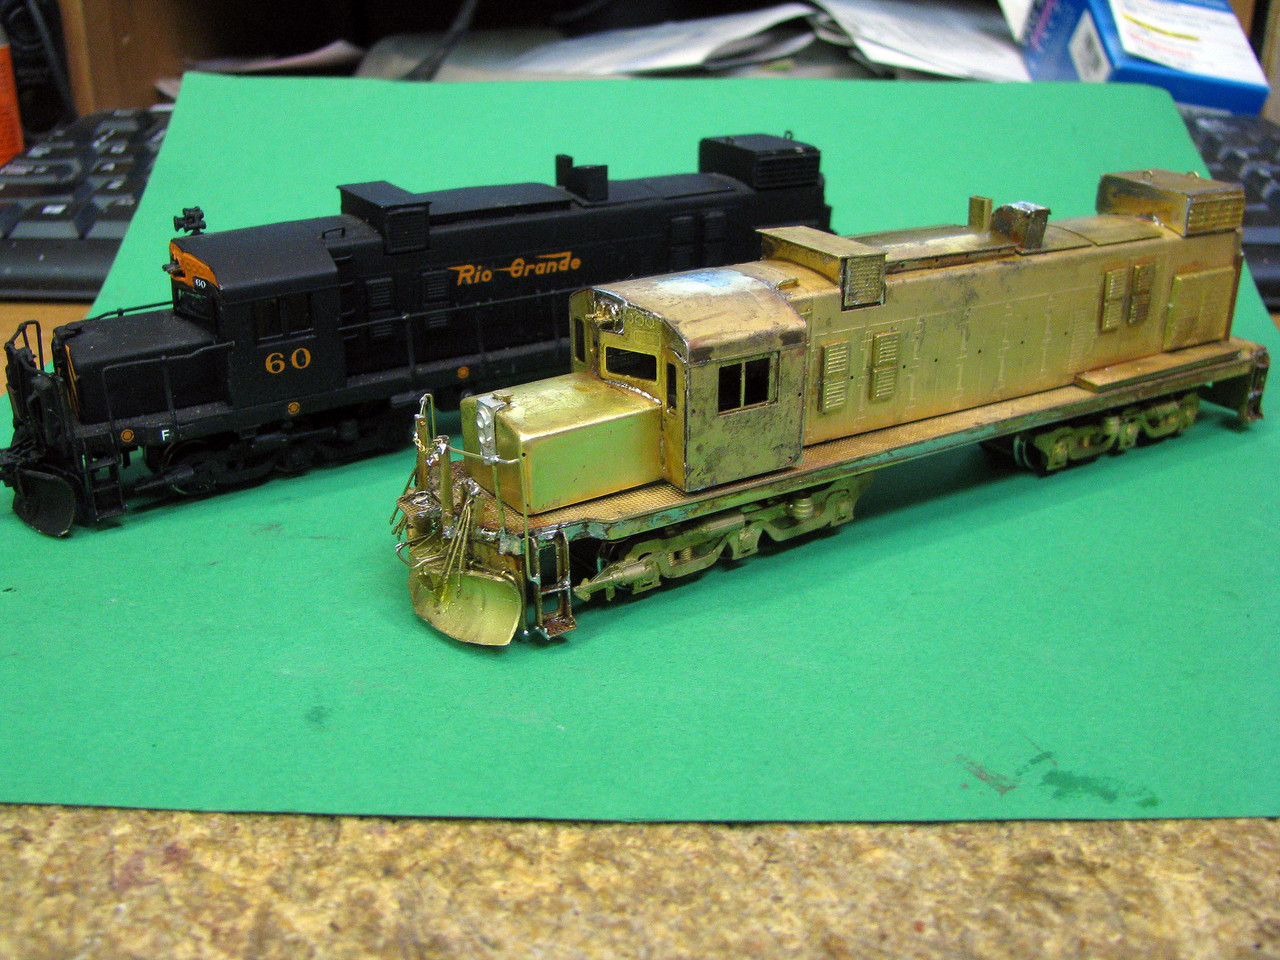 And a scenic view of Rockwood. 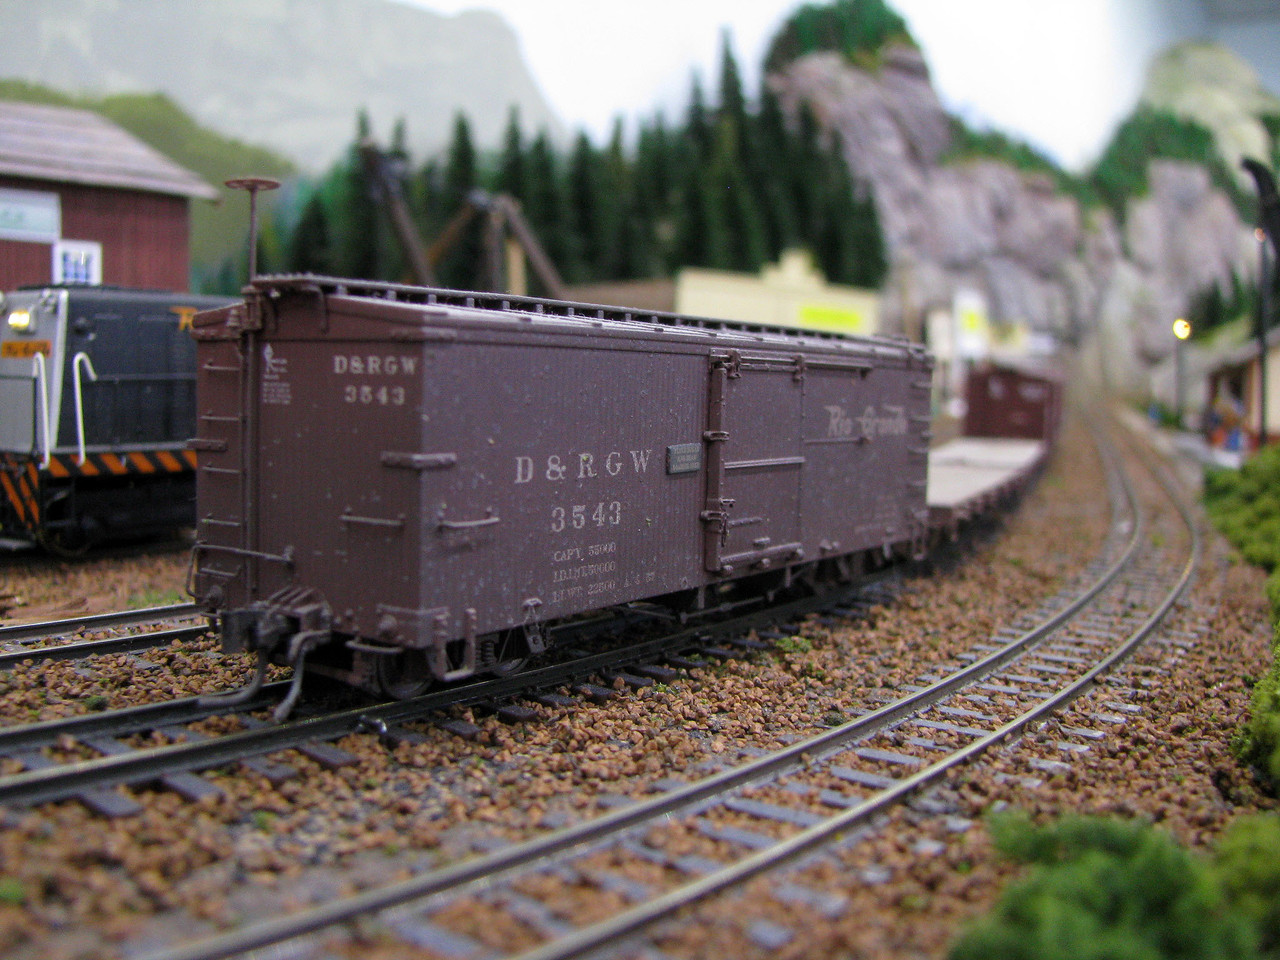 |
|
|
|
Post by SCL618 on Jul 27, 2014 8:06:43 GMT -8
Here is a project I recently finished. The upcoming S-CL Modeler #23 should have the completed article for readers and fans of the Georgia Railroad's NW2.  |
|
|
|
Post by dti406 on Jul 27, 2014 8:21:55 GMT -8
Well after the NMRA Convention last week a niece's wedding in New Jersey over the weekend, did not get a lot done last week. I do not think I ever posted pictures of this project I started some time ago, and has stagnated on the workbench for a while as I worked out the latching mechanism I was going to use. This is a marriage of an old AHM Clamshell Gon originally ordered by the P&LE and B&LE for the transportation of steel coils to cope with the removal of coil covers etc. Concept was brilliant but did not take into effect the vagaries of crane operators who damaged the coil covers so badly that they did not close. The interior of the AHM car is a joke, so I am wedding the frame and interior of a Walthers coil car to the exterior of the AHM Gon.    Also as bad as the interior of the gon is, the undeframe is a real joke and does not match the prototype drawings that were published in MR years ago. These are side by side comparisons of the AHM Gon and Walther's Coil Car.  Here are the cars after I have removed the frame and inside of the gon using my trusty Dremel Tool with a cutoff disc. The coil car has been completely disassembled into its component parts of the frame, coil frame, and coil trough.  Here I have removed the crossmember of the coil frame and filled in the the side of the coil frame with plastic strips. I have also installed a Details West Cushion Coupler pocket on the end of the car to replace the abortion that AHM had on the car.  This is the entire Coil Car Frame and Trough installed in the AHM Gon. Still to be done is installing the Breadbox Covers along with a working latching mechanism along with walkways and grabs on the gon itself. Thanks for looking! Rick J |
|
|
|
Post by TBird1958 on Jul 27, 2014 12:31:24 GMT -8
Cool stuff guys! My modeling efforts this week were primarily directed towards a 1:1 scale scenery project involving 5 cubic yards of Lave Stone, a wheelbarrow, shovel and me...... It was too much for one trip so they dropped off twice.   On a more serious note, I did manage to retro fit the first of 5 Kato GP-35's with Plano fans. Cheers!  |
|
|
|
Post by catt on Jul 27, 2014 15:29:16 GMT -8
Two more covered hoppers to be running the Grande Valley Railway rails.The Shore River railroad is based in New Jersey.  |
|
|
|
Post by bobelliott on Jul 27, 2014 17:54:31 GMT -8
Tbird, that's hysterical. 3 weeks ago, I loaded a dumpster with 7000 pounds of crushed limestone decorative rocks that the prior owner of my house put in all the flower beds and along the sides of the house. In some places it was 6-8 inches deep. I couldn't use a wheel barrow because the dumpster sat too high, so they went into it one 5 gallon drywall bucket at a time. I weighed several buckets that averaged 60 pounds, because I had a 9000 pound limit on the dumpster.
Bob Elliott
|
|
|
|
Post by icrr3067 on Jul 27, 2014 19:12:19 GMT -8
|
|
|
|
Post by TBird1958 on Jul 27, 2014 20:26:56 GMT -8
Beautiful work on the IC cars!
|
|
|
|
Post by mlehman on Jul 27, 2014 21:22:59 GMT -8
Looks like a slow SPF this week, but I like what I see. That's a heck of project Rick has got himself into, but is going to be good to see when it's done. Reminds me I skipped mowing the grass while finishing up the diesel, too.  Just got going and didn't want to stop, so got the basically model built. I still need to drill the headlights out. It needs some solder tidied in a spot or two, then cleaned up in mineral spirits to get the resin off. After that, a wash in TSP substitute, dry, then primed gray. After that, black, then Rio Grande decals with road number 64. 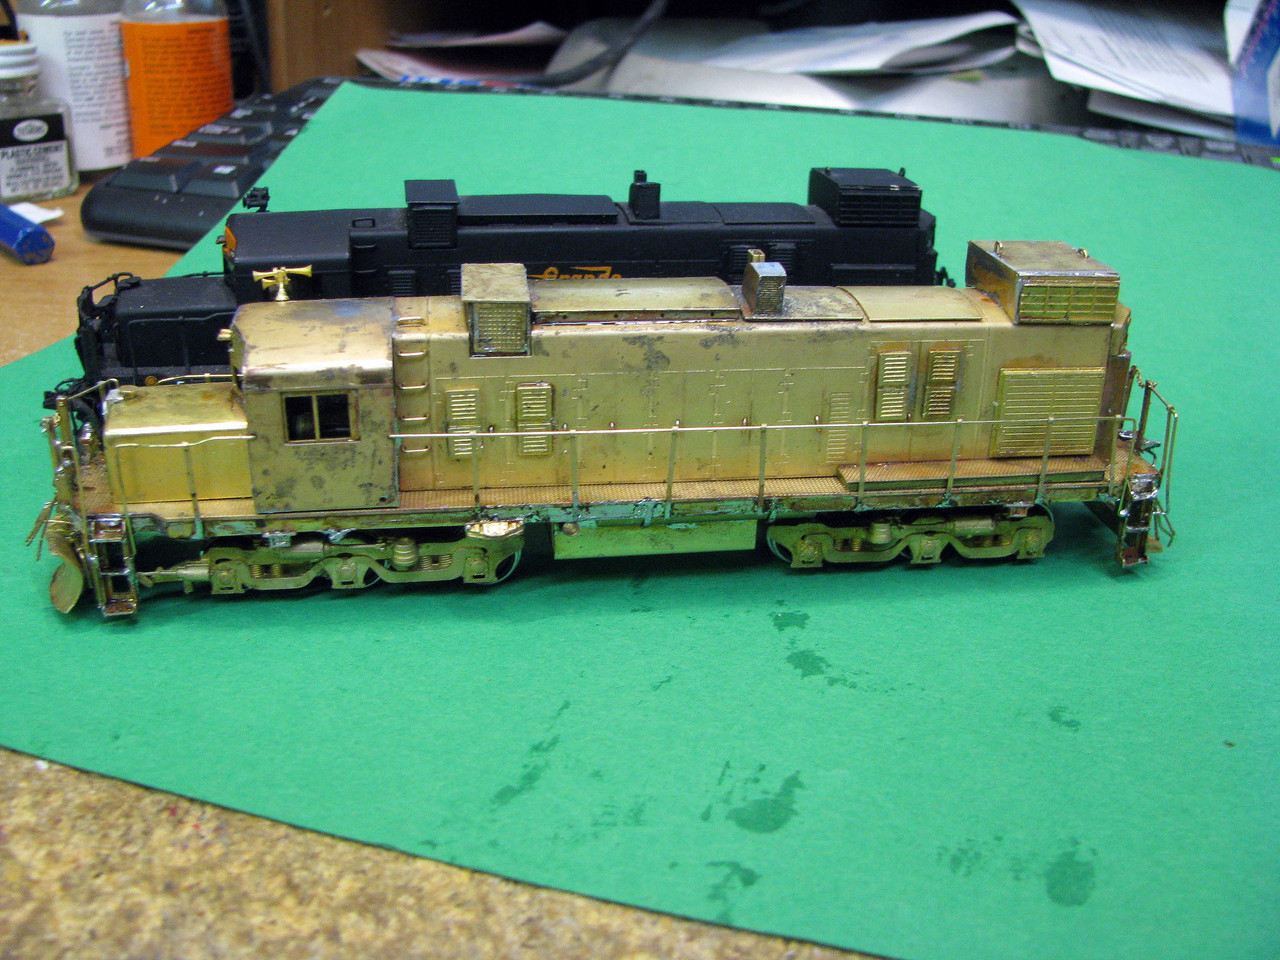 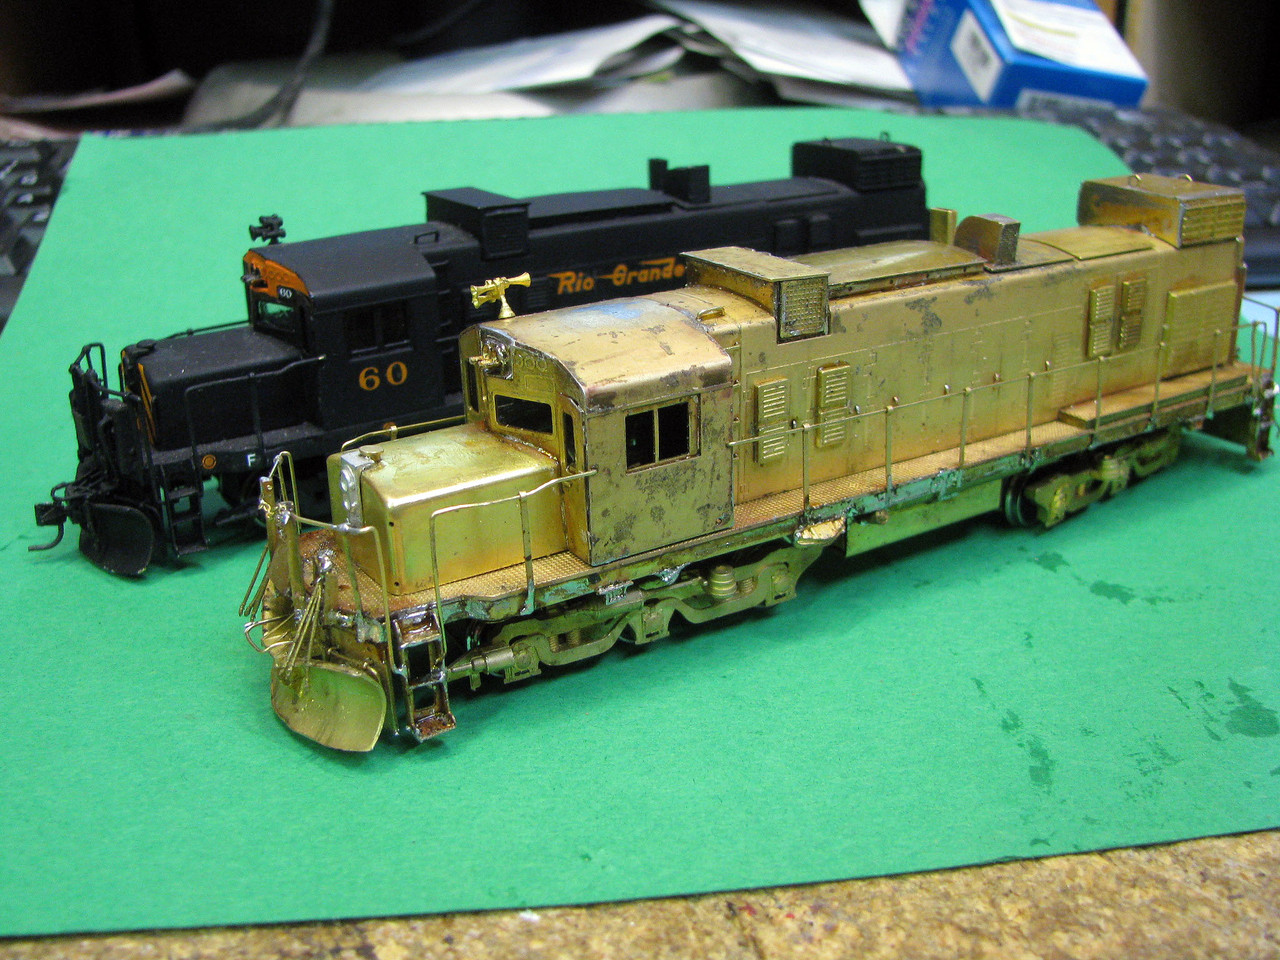 I used the WP&Y horn on a stalk this time, as I was fresh out of Rio Grande standard Nathans. 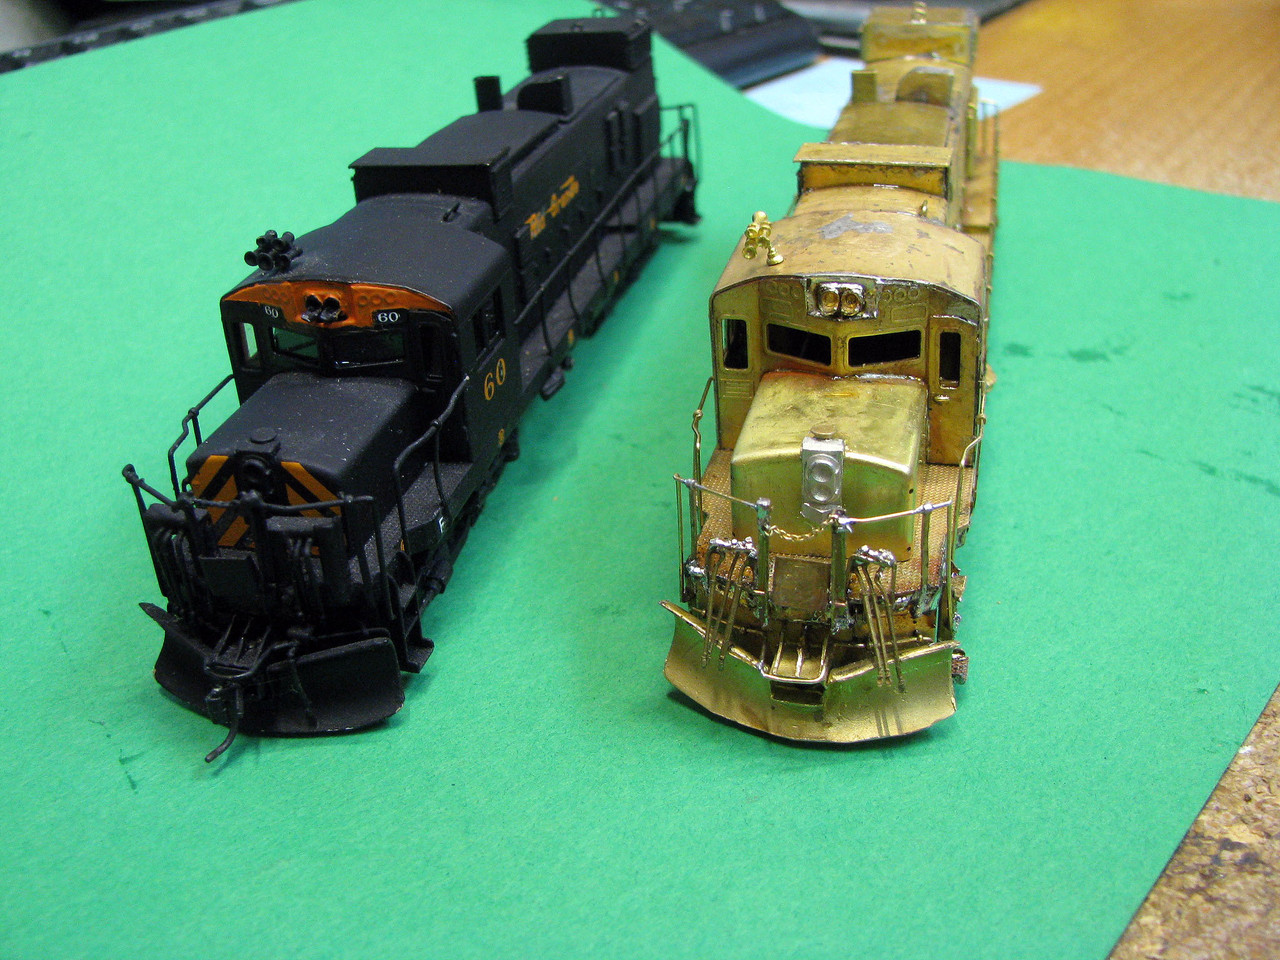 |
|
|
|
Post by coasterp on Jul 28, 2014 4:48:18 GMT -8
Looks like a slow SPF this week, but I like what I see. That's a heck of project Rick has got himself into, but is going to be good to see when it's done. Reminds me I skipped mowing the grass while finishing up the diesel, too.  Just got going and didn't want to stop, so got the basically model built. I still need to drill the headlights out. It needs some solder tidied in a spot or two, then cleaned up in mineral spirits to get the resin off. After that, a wash in TSP substitute, dry, then primed gray. After that, black, then Rio Grande decals with road number 64.   I used the WP&Y horn on a stalk this time, as I was fresh out of Rio Grande standard Nathans.  Is there somewhere I could see more of your layout? |
|
|
|
Post by mlehman on Jul 28, 2014 10:23:28 GMT -8
|
|
|
|
Post by markfj on Jul 28, 2014 15:26:52 GMT -8
All I did this past week was modify the sills on a IMRC PS-1 50’ double door box car to match the prototype. The car came with notched sills, but the photos I could find for cars in that number series did not have any notches.   Great work for everyone else as always! Mark |
|
|
|
Post by emd16645 on Jul 28, 2014 17:23:42 GMT -8
A few new additions to my fleet that arrived and were assembled last week. Just need weathering and couplers. 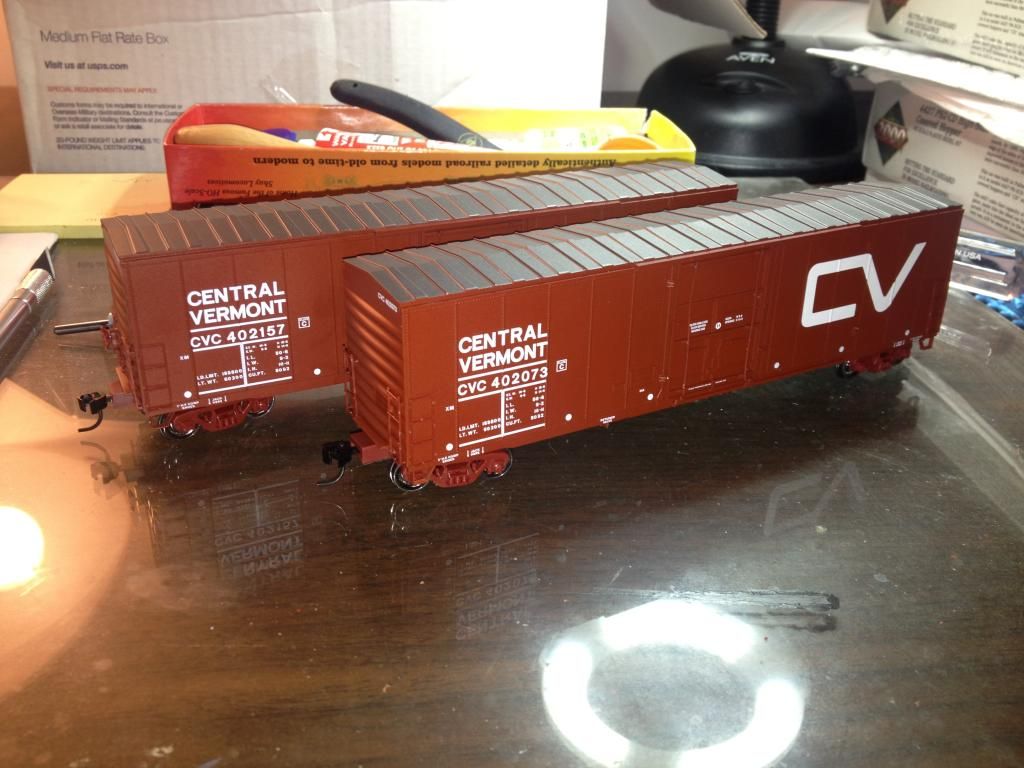 All these shots of the DL535s are making me jealous!! I'd love to add one or several to my roster. |
|
|
|
Post by mlehman on Jul 28, 2014 19:03:33 GMT -8
Nice work there, Mark and emd16645. emd16645 wrote: "All these shots of the DL535s are making me jealous!! I'd love to add one or several to my roster." They are sexy little things, aren't they?  They are out there, but don't come up often. These two were built from kits I bought from PSC at the 1996 Nat'l Narrow Gauge Convention in Durango. I thought they were a steal at $250/each. Didn't get around to building the first until last year. This one was a piece of cake. There are basically no instructions included, just a photographic parts list with labels for most parts. Like my dad says about farm girls, they usually clean up pretty well. Here's a couple of pics after the soak in denatured alcohol (NOT mineral spirits as I stated above, although that will work). Getting the rosin off really improve the appearance. 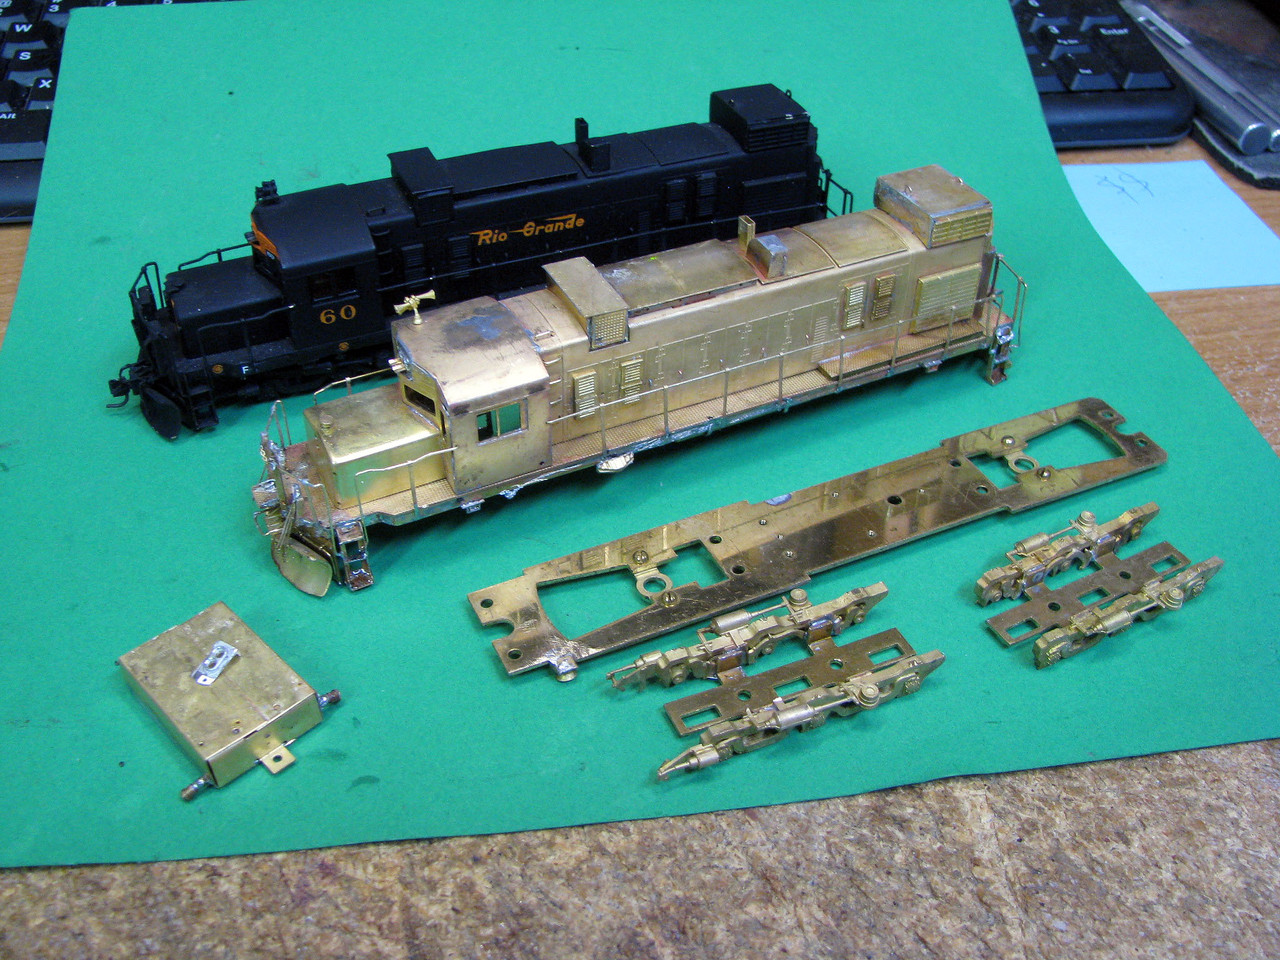 You'll note the the Pyle signal light (sitting in the fuel tank) came loose. It's white metal, so I epoxied it instead of trying to solder. 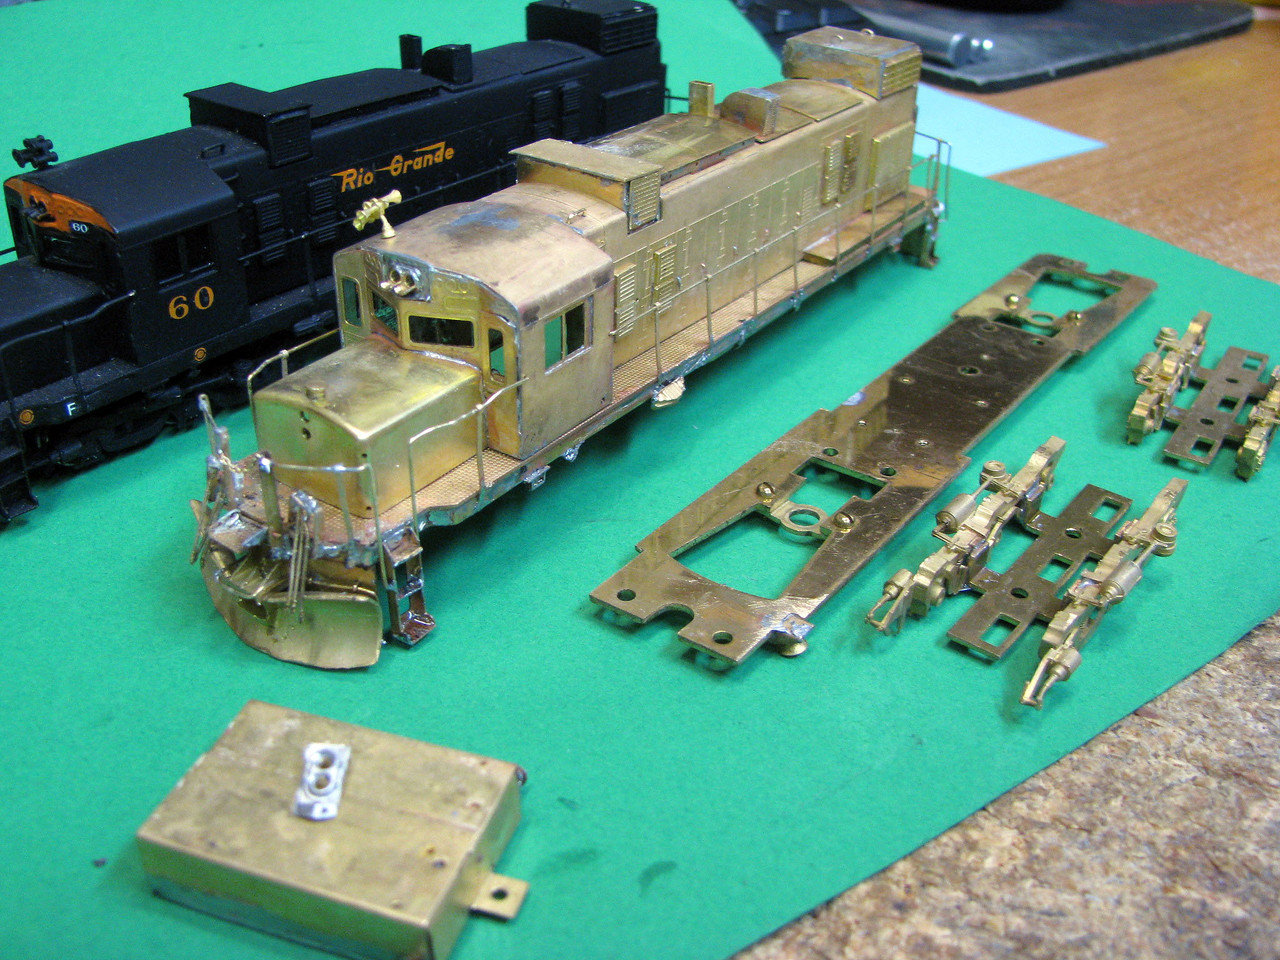 Next comes the vinegar bath. The gives the slick brass a little but of tooth to help the paint to stick well. 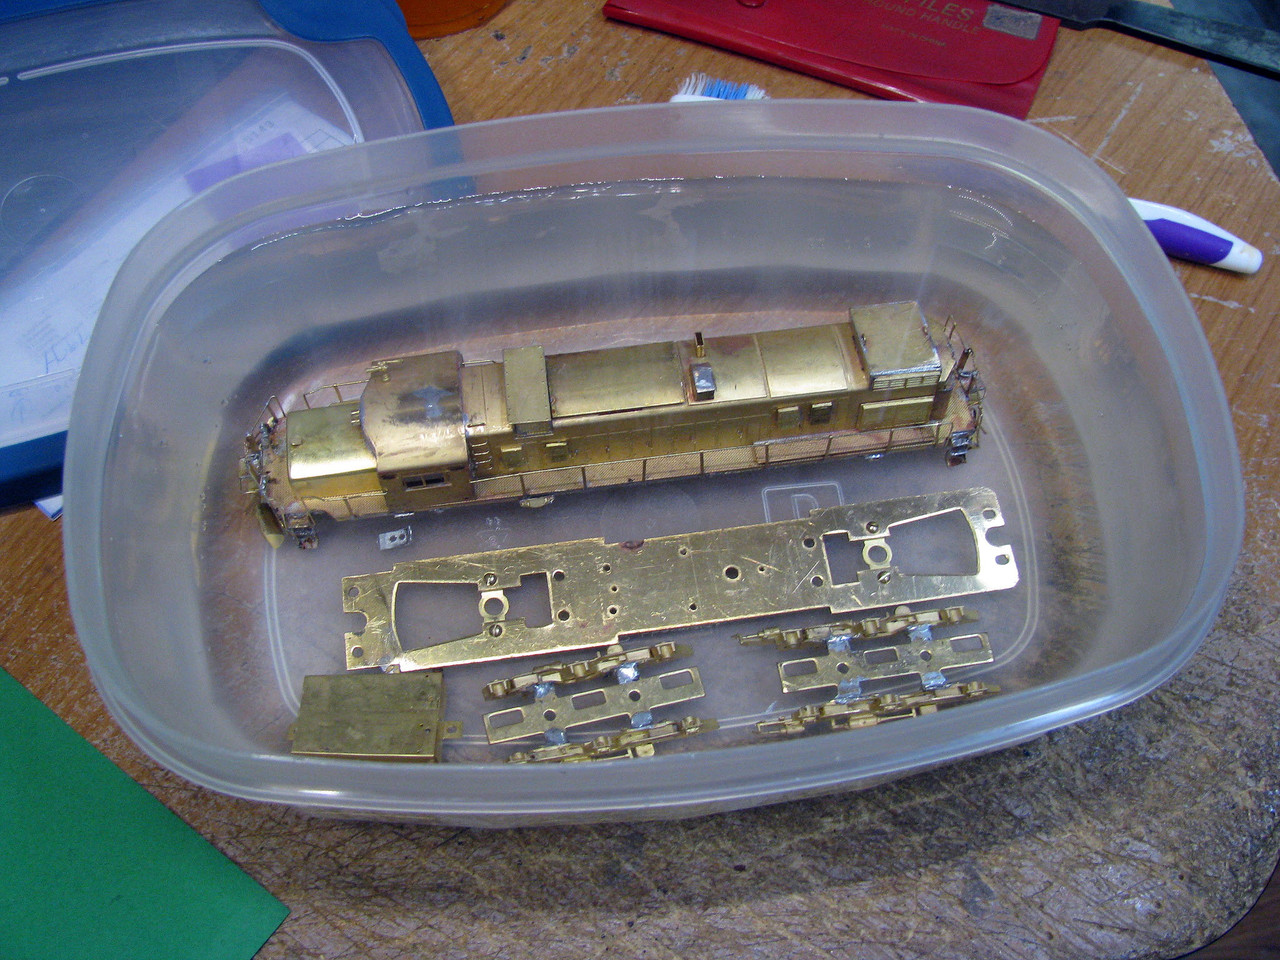 Vinegar was rinsed with hot water, then everything received a work-over in TSP-substitute to get things super clean. Here it all ready for paint, except I still needed to epoxy the Pyle light back on. 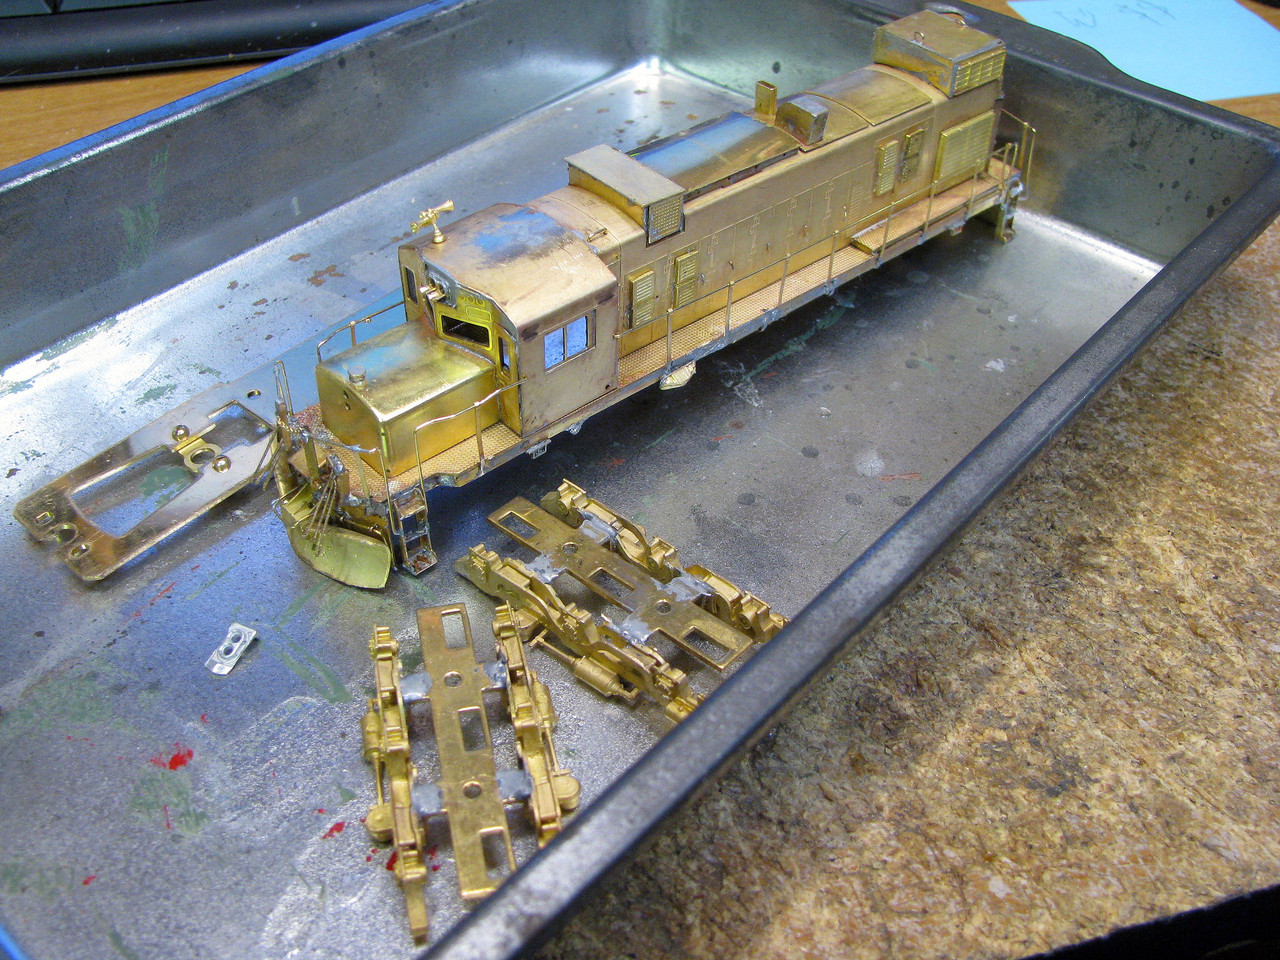 A couple of coats of Krylon dark gray primer.  Finally, the gloss black finish coat. 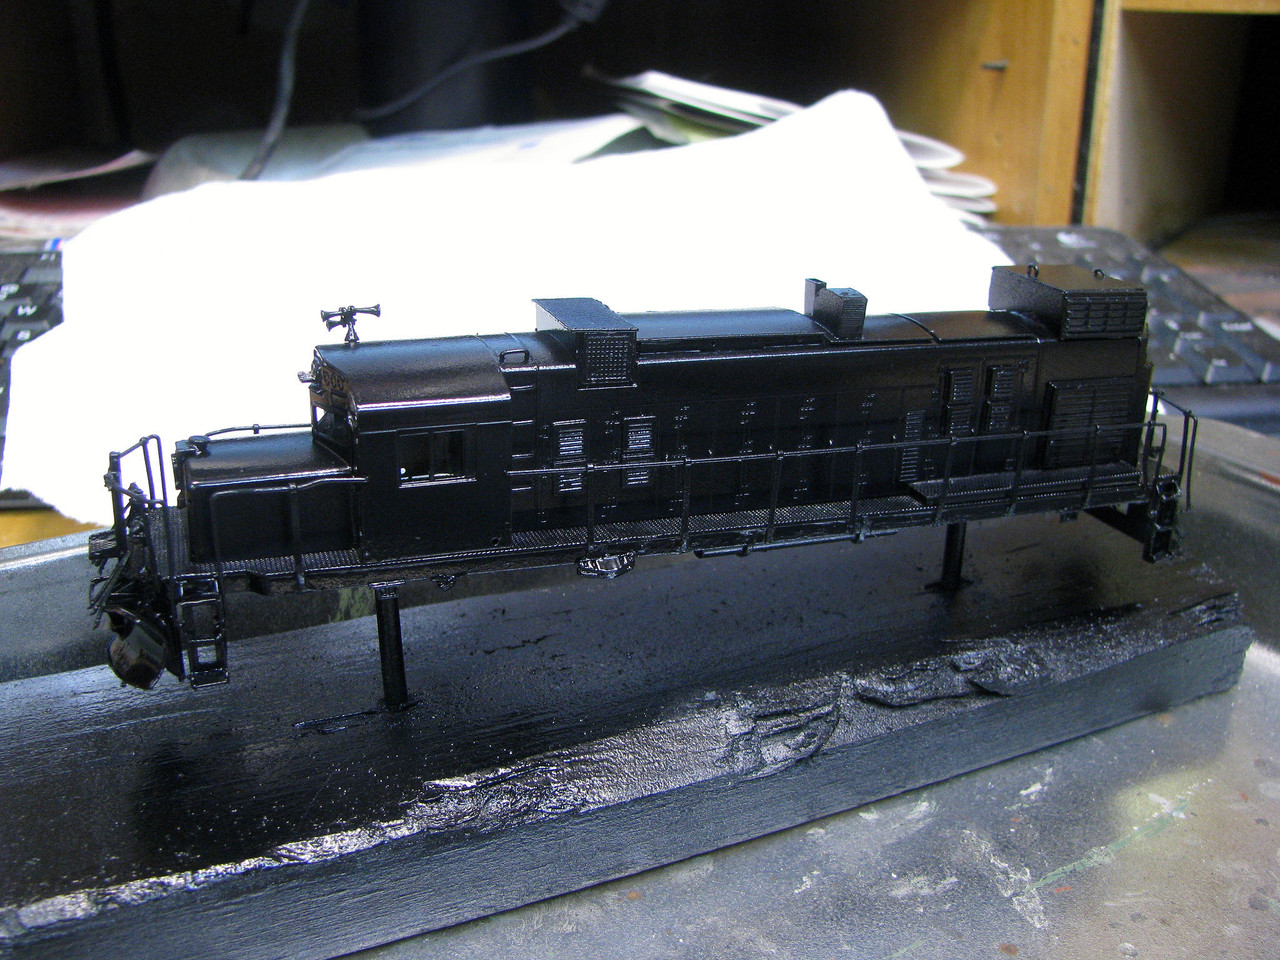 Everything's in the oven baking at 170 degrees for the next couple of hours. I dug out enough decals and a decoder to get it going. Being brass with six axles underneath, they pull well. It's also possible to add more weight by filling the fuel tank with it. I've not done that yet, as I'm hoping to use that space to house a speaker in an upgrade to sound. |
|
|
|
Post by coasterp on Jul 29, 2014 2:00:06 GMT -8
|
|
|
|
Post by emd16645 on Jul 29, 2014 6:07:24 GMT -8
Mike, Thanks for posting the additional photos of the Alcos. Although they look good in black and orange, I think they are a whole lot sexier in green and yellow  |
|
|
|
Post by mlehman on Jul 29, 2014 6:40:11 GMT -8
coasterp and Chris, Thanks to both of you for the appreciative comments. Chris, If the basement were only bigger, a ferry link to Skagway might very well be worked in, as implausible as that might be from the Four Corners region.  I can't remember which one right now, but one of the older track plan books (I think from Kalmbach, but could also have been a RMC imprint) has a great plan for the WP&Y that I always admired. Mom and dad have cruised and taken the train. And I've chatted with Carl Mulvihill at a NNGC and done a little biz with him along the way. Unfortunately, the only thing I could really fit in were a couple of DL-535s - glad you were at least not offended by them appearing in Grande colors - and a sweet little drop center flat. 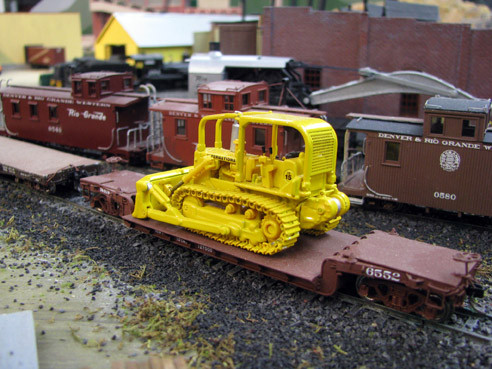 If the Rio Grande's NG lines had remained economically viable and required more investment after WWII instead of being closed ASAP, I'm fairly certain we would have seen the Rio Grande looking hard at what the WP&Y was using successfully. |
|
|
|
Post by catt on Jul 29, 2014 7:25:39 GMT -8
One of my favorite things is taking a decent trainset type car and making IMHO a decent model car out of it.For instance my 39 year old LifeLike identical twin Thrall All door cars.   |
|
|
|
Post by emd16645 on Jul 29, 2014 13:22:36 GMT -8
Mike, I definitely agree that the DL535 is plausible for the Rio Grande if the narrow gauge survived long enough. So are the shovelnose and Bombardier units  As a freelance modeler, I love when someone takes an unique piece of equipment and can adapt it to their needs. My someday layout, which I plan on having a WP&Y interchange modeled, reflects the economic boom that region would enjoy with the added benefit of a line from Alaska to the lower 48. With the increased tonnages in the region, I figure the WP&Y might need a few locomotives like these: www.railpictures.net/photo/101917/ |
|
|
|
Post by mlehman on Jul 29, 2014 16:46:58 GMT -8
Chris, I'd probably go for a Tunnel Motor version, being I'm inclined toward the Rio Grande. www.drgw.net/info/BB40T-2This guy did a bunch of neat conversions, but did them in standard gauge! Weird. If I build some, you can be sure they'll be narrowgauge. |
|
|
|
Post by catt on Jul 29, 2014 16:57:03 GMT -8
Mike, what's the gauge on those (the real ones)? I know it isn't 36"
|
|
|
|
Post by emd16645 on Jul 29, 2014 17:20:01 GMT -8
The narrow gauge lines in Brazil are meter gauge, or about 39". I think all the various conversions are neat, the BB40-T2, the DD45, or the modern GEs. My model era is around the year 2000, so the GEs would be the biggest available. That isn't to say that I don't happen to have a spare tunnel motor lying around that might get converted. In any case, I think these narrow gauge builds are a project that is years from jumping off for me at this point. And yes, I would build them as narrow gauge, not disguised as standard gauge. Who ever said their cant be dual gauge track in alaska?  |
|
|
|
Post by bdhicks on Jul 29, 2014 19:26:59 GMT -8
Edson was at BAPM again this year with 8-axle Brazilian locomotives, and he mentioned that if he had made them narrow gauge, he would never be able to find a layout to run them on, because it's so rare for a narrow gauge layout to have broad enough curves. I know the narrow gauge people at my local club say that a 50' diesel wouldn't have enough clearance for their layout.
|
|
|
|
Post by mlehman on Jul 29, 2014 21:35:05 GMT -8
Edson was at BAPM again this year with 8-axle Brazilian locomotives, and he mentioned that if he had made them narrow gauge, he would never be able to find a layout to run them on, because it's so rare for a narrow gauge layout to have broad enough curves. I know the narrow gauge people at my local club say that a 50' diesel wouldn't have enough clearance for their layout. Yeah, a Tunnel Motor on your average narrowgauge layout is probably a mismatch. Many folks do build to wider minimum radius, though. My main is 24" min R -- and a Tunnel Motor would look like it took a wrong turn at Durango. I still might build one, but can understand why someone would build one in SG, too. My clerances are pretty good though, so probably not the limiting factor here. BTW, the DL-535 is a roughly 55' overall length diesel. I tested my first one on the Cascade Branch and the results were not good. Part of the problem is the cab side door steps. It limits swing a little on that model, so was careful to provide clearance on this one. I suspect those C trucks don't like things up there much either. So I'll probably try testing up there again. |
|
|
|
Post by mlehman on Jul 30, 2014 16:12:39 GMT -8
I'm just loving the Aspen Gold and black paint scheme on this one much more than the orange and black of the first one. 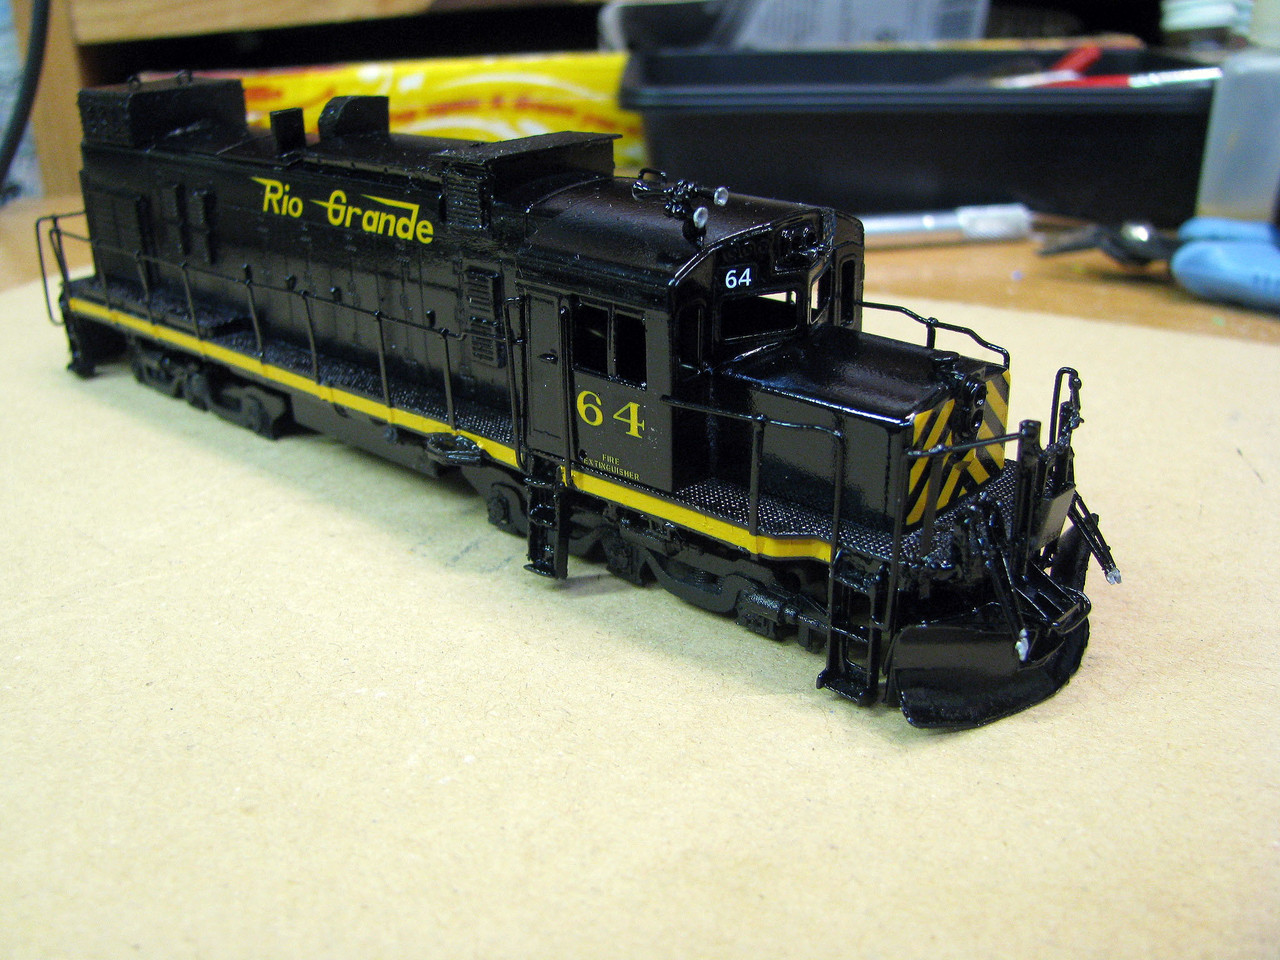 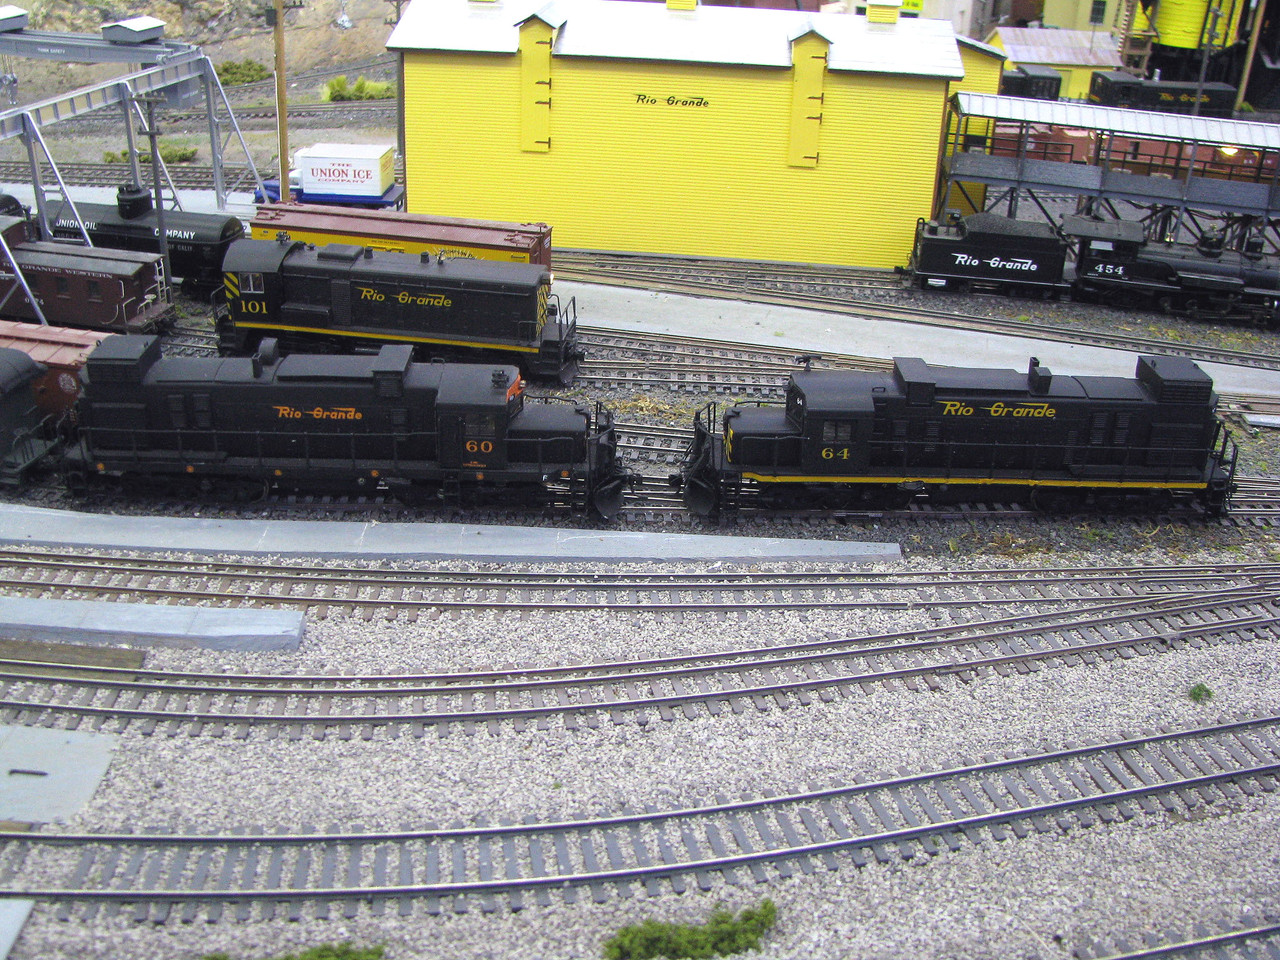 Still waiting on the decoder, since I discovered what I thought was going to work needed rethought. NCE D13SRs are on the way to restock my DCC box. In the meantime, some posing going on... Found at least one clearance issue with the platform at Chattanooga. 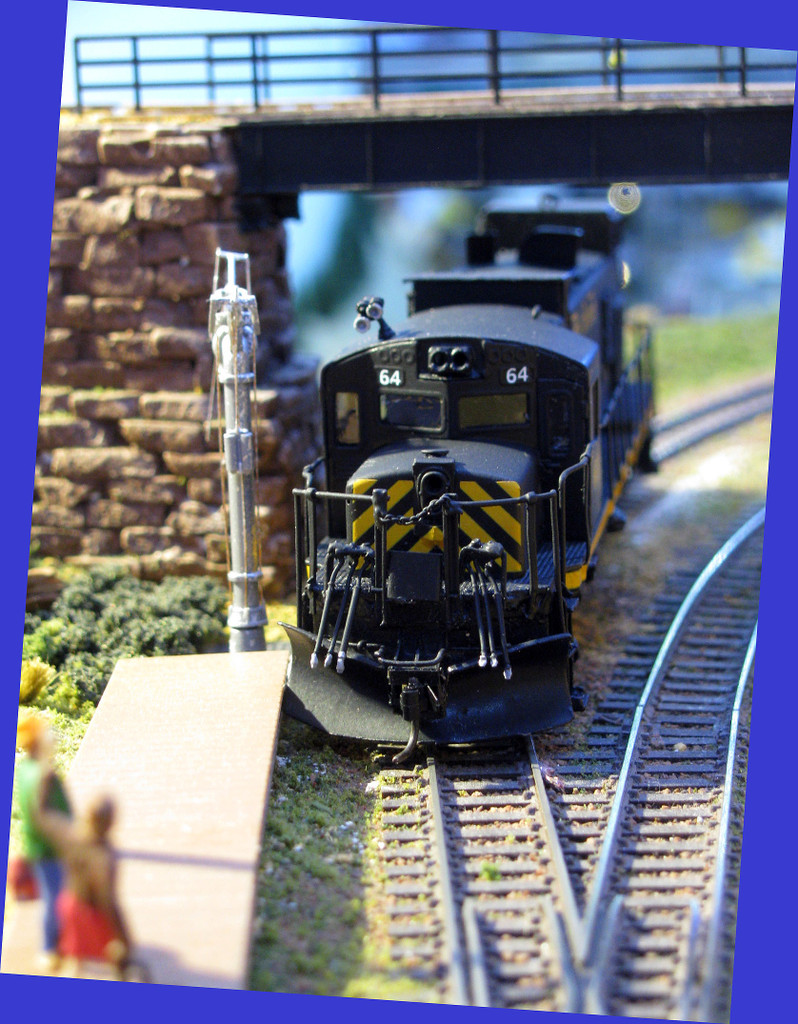 The DL-535E is how big compared to a Geep? 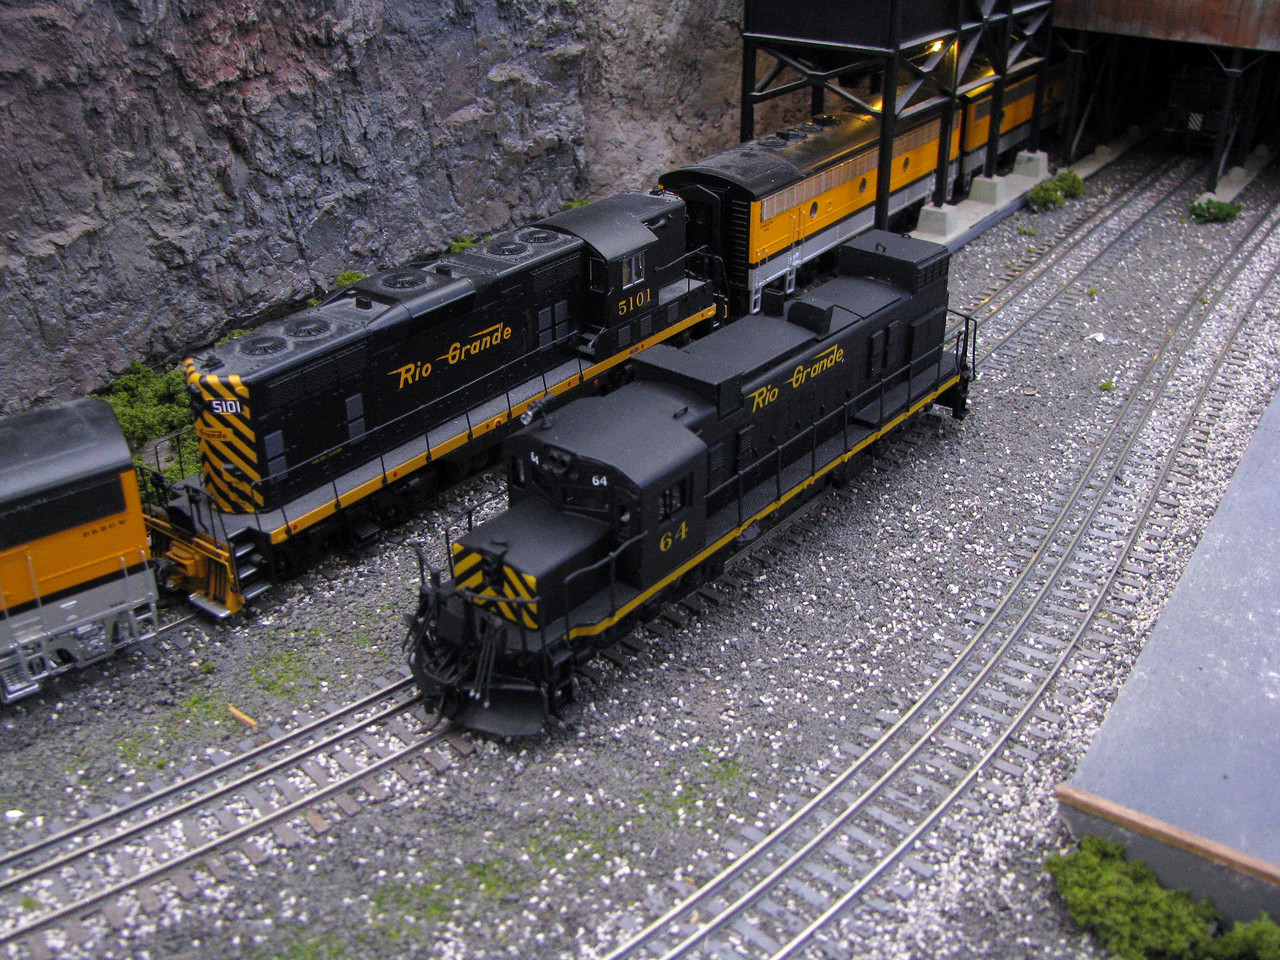 Posing in the Silverton sun...  Hope to have decoder and lights in by Saturday, so hoping for some more action shots then. |
|
|
|
Post by dtinut on Jul 31, 2014 20:02:27 GMT -8
Mike,
Looks great!
|
|