|
|
Post by Great-Northern-Willmar Div on Feb 8, 2015 7:03:49 GMT -8
|
|
djh4d
Full Member

Posts: 205
|
Post by djh4d on Feb 8, 2015 8:15:13 GMT -8
Started working on my pipe train. I still need to add the ratchets and yellow straps. But, it's about 97% complete. One down, fourteen more to go. 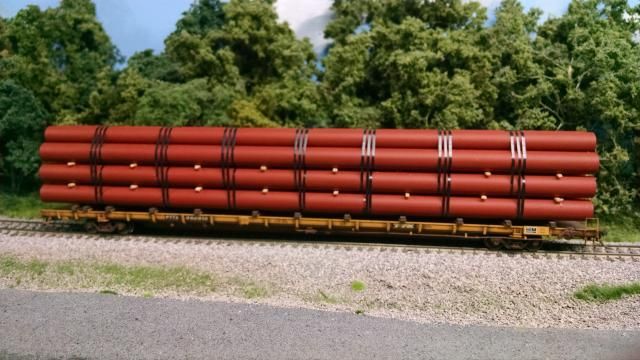 Enjoy, -Dave |
|
gnfan
Full Member
Posts: 109
|
Post by gnfan on Feb 8, 2015 8:19:52 GMT -8
I finished up adding sound decoders this week. The PGE C630M has a Tsunami and for the rest I used a LokSound 21 pin decoder plugged into the factory board. I must say the ease of adding in the 21 pin decoder makes it my favorite. Atlas includes easy to find marked sound tabs on their PC board which makes adding a speaker so easy. The Bowser board may have them but I never figured out where they were. The C636 has the new fuel tank and trucks from Bowser installed. Click on them to make them bigger.     David B. |
|
|
|
Post by dti406 on Feb 8, 2015 8:27:56 GMT -8
Jim is that the slug set that operated out of Tacoma, Trains had a neat article about those units way back in the 70's. I will show my progress on the Hot Coil Car, I have stagnated a little bit as I have to make the bends in the main airline in three dimensions, so I have to think out where every bend goes before I go and do it. Although I got a couple of steps done before that one.  Here I have installed some Kadee #158 Couplers in the boxes and spot glued them together for the installation on the car.  After checking the coupler height and installing a few shims I glued the coupler boxes to the frames and the cover piece on top of the coupler box. Like some other people while waiting for glue to dry etc. I started work on another project that has been sitting around. I have a old Stewart U25b Diesel that I wanted to do for the Pennsylvania complete with the Trainphone Antennas as delivered.    Some different views of the engine after installing Utah Pacific GE Lift Rings on the long hood and nose of the unit, a couple of grab irons, the Signal Box in front of the engineer on the walkway and the Cal-Scale Antenna Supports on the roof of the cab and along the sides of the long hood. Still to come, drop steps, coupler lift bar and other detail parts before painting. Thanks for looking Rick J |
|
|
|
Post by mlehman on Feb 8, 2015 9:28:27 GMT -8
It was a pretty unphotogenic work week around the layout, but nonetheless productive. I finally took the big leap to installing JMRI. The primary motivation was to enable use of Wi Throttles. I was needing to either add at least one new wireless throttle or create a hardware install using stuff that was mostly paid for. Thanks to my computer programmer wife's thirst for Mac's newest and greatest, I had access to two iPhones (4 & 5) and an iPad3. For $50 (a USB to serial adapter, 25' serial cable and the full version of WiThrottle) I now have 3 new wireless throttles! I like that. When my PowerCab adapter gets here this week, I'll be able to start using DecoderPro, which will make life at the programming track next to the JMRI station easy  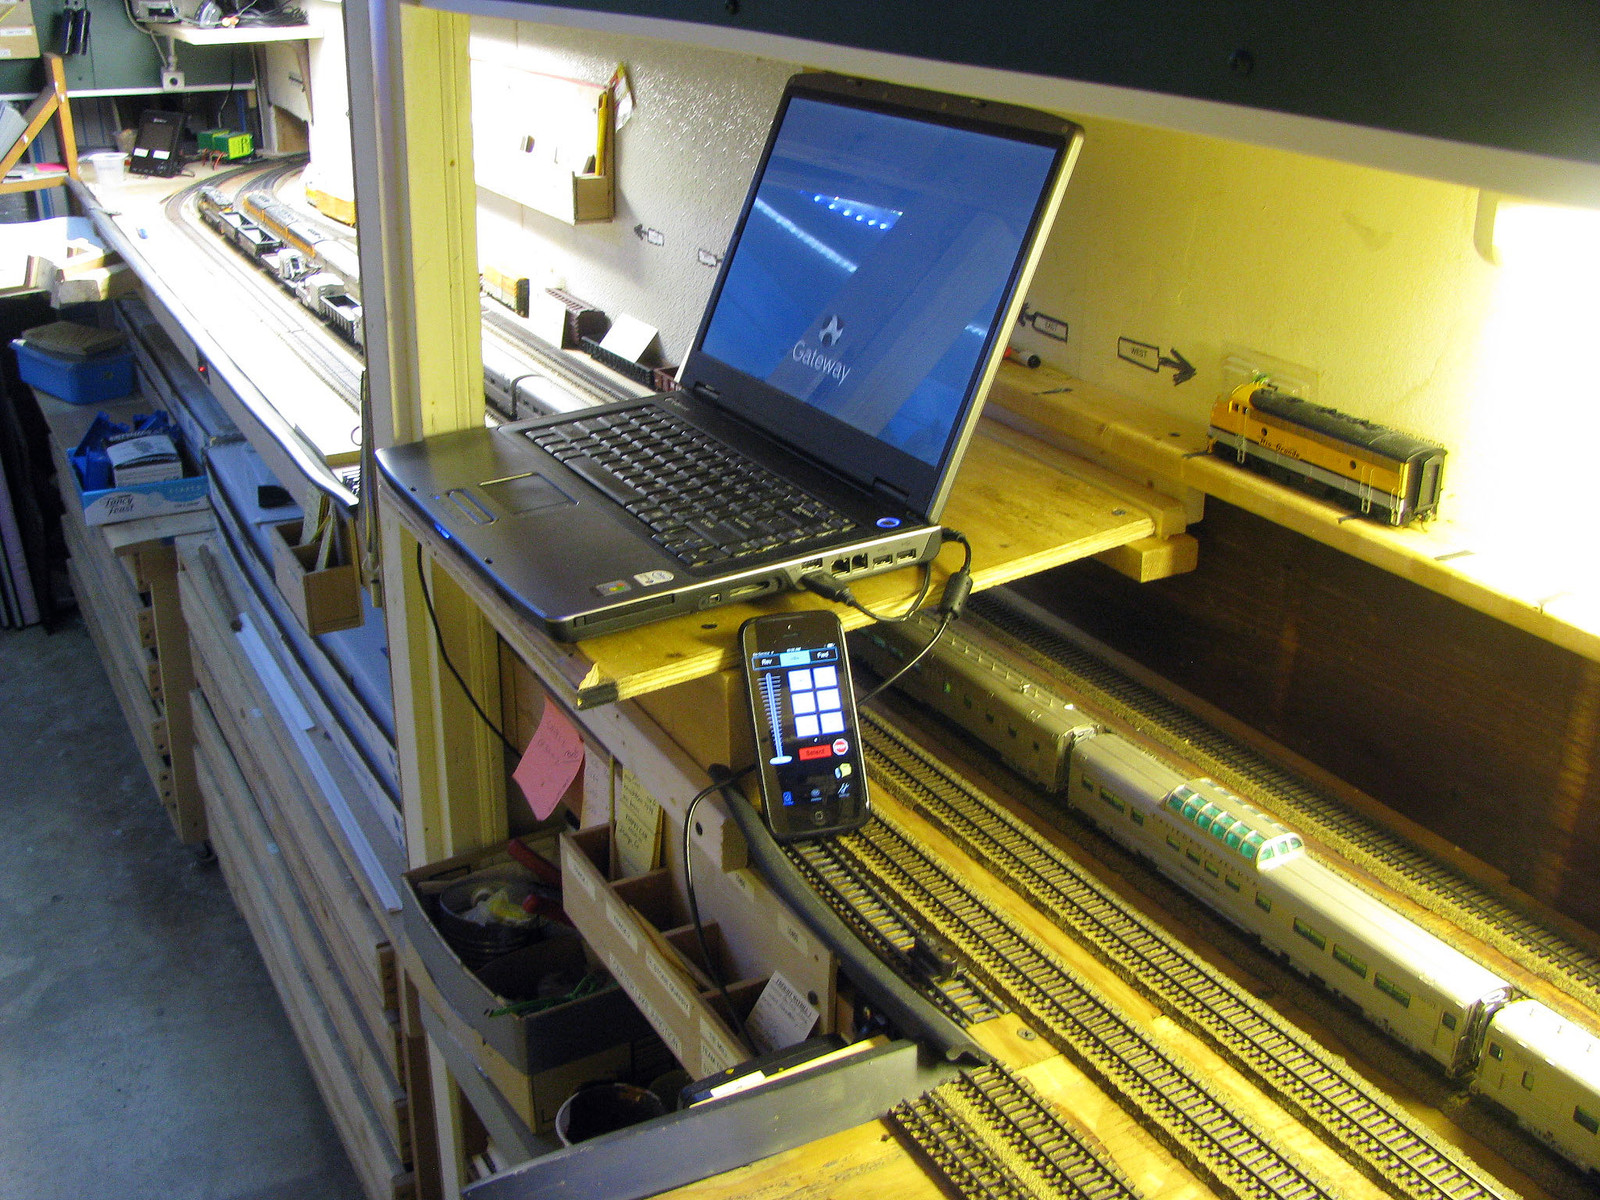 Then I tackled this mess. It had a slight rise in the track here that caused issues with trains right at maximum tonnage. Like several other spots, I went in and reshimmed and reset the track so to spread that rise out . This one turned out bigger than I planned, but have finally got it going after about 10 hours of work. Still got a couple of tweaks to do, but next up is ballasting. 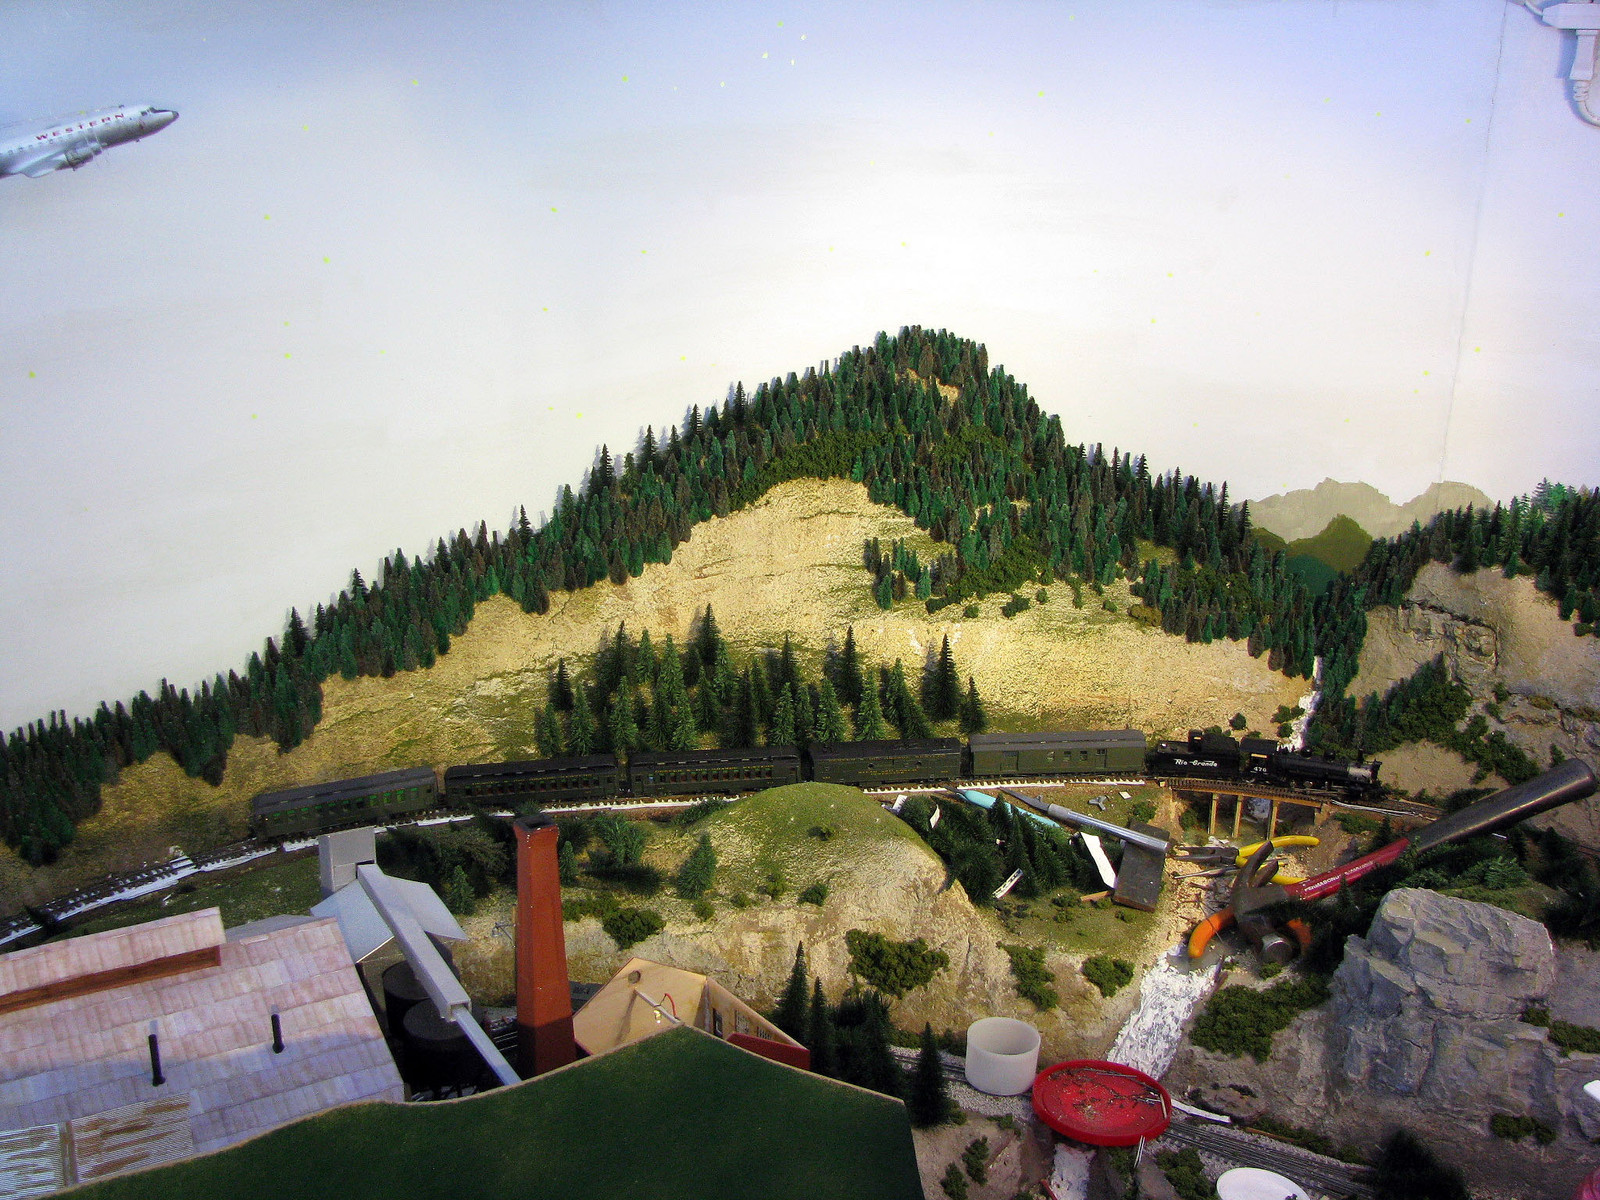 |
|
|
|
Post by wp8thsub on Feb 8, 2015 9:29:33 GMT -8
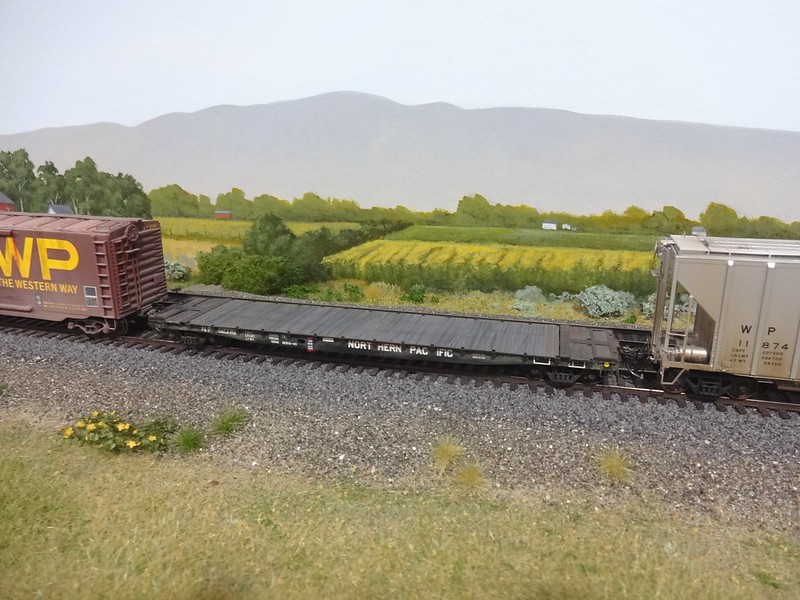 I got this ExactRail flatcar ready for service this week. It made its first revenue trip at last night's session. |
|
|
|
Post by TBird1958 on Feb 8, 2015 9:50:46 GMT -8
I remember occasionally seeing those F's in Tacoma, WA. when I was younger! Even tho I live in Seattle I commute to to Tacoma everyday, it's an active railroad town. Here's an older Intermountain 4750 finished with Herald King decals.  Eastbound lumber from the SP, on a Red Caboose flat  These two GN cars bring back a lot memories from my younger years in Eastern Washington. I'm about half done with the Tangent 4740, the Atlas ACF not started yet. Happily, the Rio Grande moved some grain westbound over the Moffat via it's CB&Q/BN connection in Denver so these cars fit in very nicely.  |
|
Deleted
Deleted Member
Posts: 0
|
Post by Deleted on Feb 8, 2015 10:27:12 GMT -8
Milwaukee Road Slug set. 83A - SE3 - 83C Very nice, always liked MILW. When did they start using that paint scheme, with the large lettering? |
|
|
|
Post by Great-Northern-Willmar Div on Feb 8, 2015 11:47:47 GMT -8
Milwaukee Road Slug set. 83A - SE3 - 83C Very nice, always liked MILW. When did they start using that paint scheme, with the large lettering? In the early to mid-1970's. 83A and 83C only got the billboard scheme because they were rebuilt as mother units for the slug. By the mid-1970's the Milwaukee's F-units were in pretty bad shape. When the Illinois Railway Museum got Milwaukee Road F7A 118C in 1983, you'd swear it was held together with banding wire and duct tape. |
|
|
|
Post by buffalobill on Feb 8, 2015 13:32:34 GMT -8
Jim nice job on the slug set. By the late 70's on the Milwaukee, it was not only the F's that were beaten, abused and worn out, even their GP-40's were in terrible shape.
T-Bird nice job on the covered hoppers, and the red caboose flat. Look good, a mix of new and old.
Rick the coil car is coming along, nice.
Bill
|
|
|
|
Post by TBird1958 on Feb 8, 2015 14:11:01 GMT -8
I got this ExactRail flatcar ready for service this week. It made its first revenue trip at last night's session.
I always enjoy seeing pictures of your layout, just fantastic, the colors used and the depth you've created with your background painting, thanks for sharing!
|
|
|
|
Post by oldmuley on Feb 8, 2015 16:00:04 GMT -8
It finally lives! After nearly 7 years, my Kaslo Shops SDL39 is almost ready to go. The rebuilt chassis with the Kato drive train works so much better than the original. Some weathering is just about all that is left to do.  |
|
|
|
Post by kentuckysouthernrwy on Feb 8, 2015 16:59:21 GMT -8
I got this ExactRail flatcar ready for service this week. It made its first revenue trip at last night's session. I like your background. Weathering on the cars is nice and subtle, too. |
|
|
|
Post by slowfreight on Feb 9, 2015 18:34:51 GMT -8
Eastbound lumber from the SP, on a Red Caboose flat What did you use for the lumber load? |
|
|
|
Post by stevef45 on Feb 9, 2015 22:35:51 GMT -8
Did some final paint removal from this SD70ACE that i got off ebay a few weeks back that was missing its cab and some detail parts. Was originally bnsf then crudely painted into NS. Several days in 91% alcohol did ok, but some spots were not coming off well. Then came castrol super clean and that did the trick for the rest of the paint that didn't come off. Stupid me forgot to remove the sideframes for cleaning since the original owner brushed on black of the silver and didn't even bother doing the whole truck. Didn't really accomplish much last night when i was working on it. I reassembled everything that I removed which included all the metal etched pieces so I can get the paint from behind that off. I modified the radiator section thats part of the main sheel by removing some of the core support for future speaker enclosure there. Here is the shell partially reassembled. No cab interior as i need ot order it. 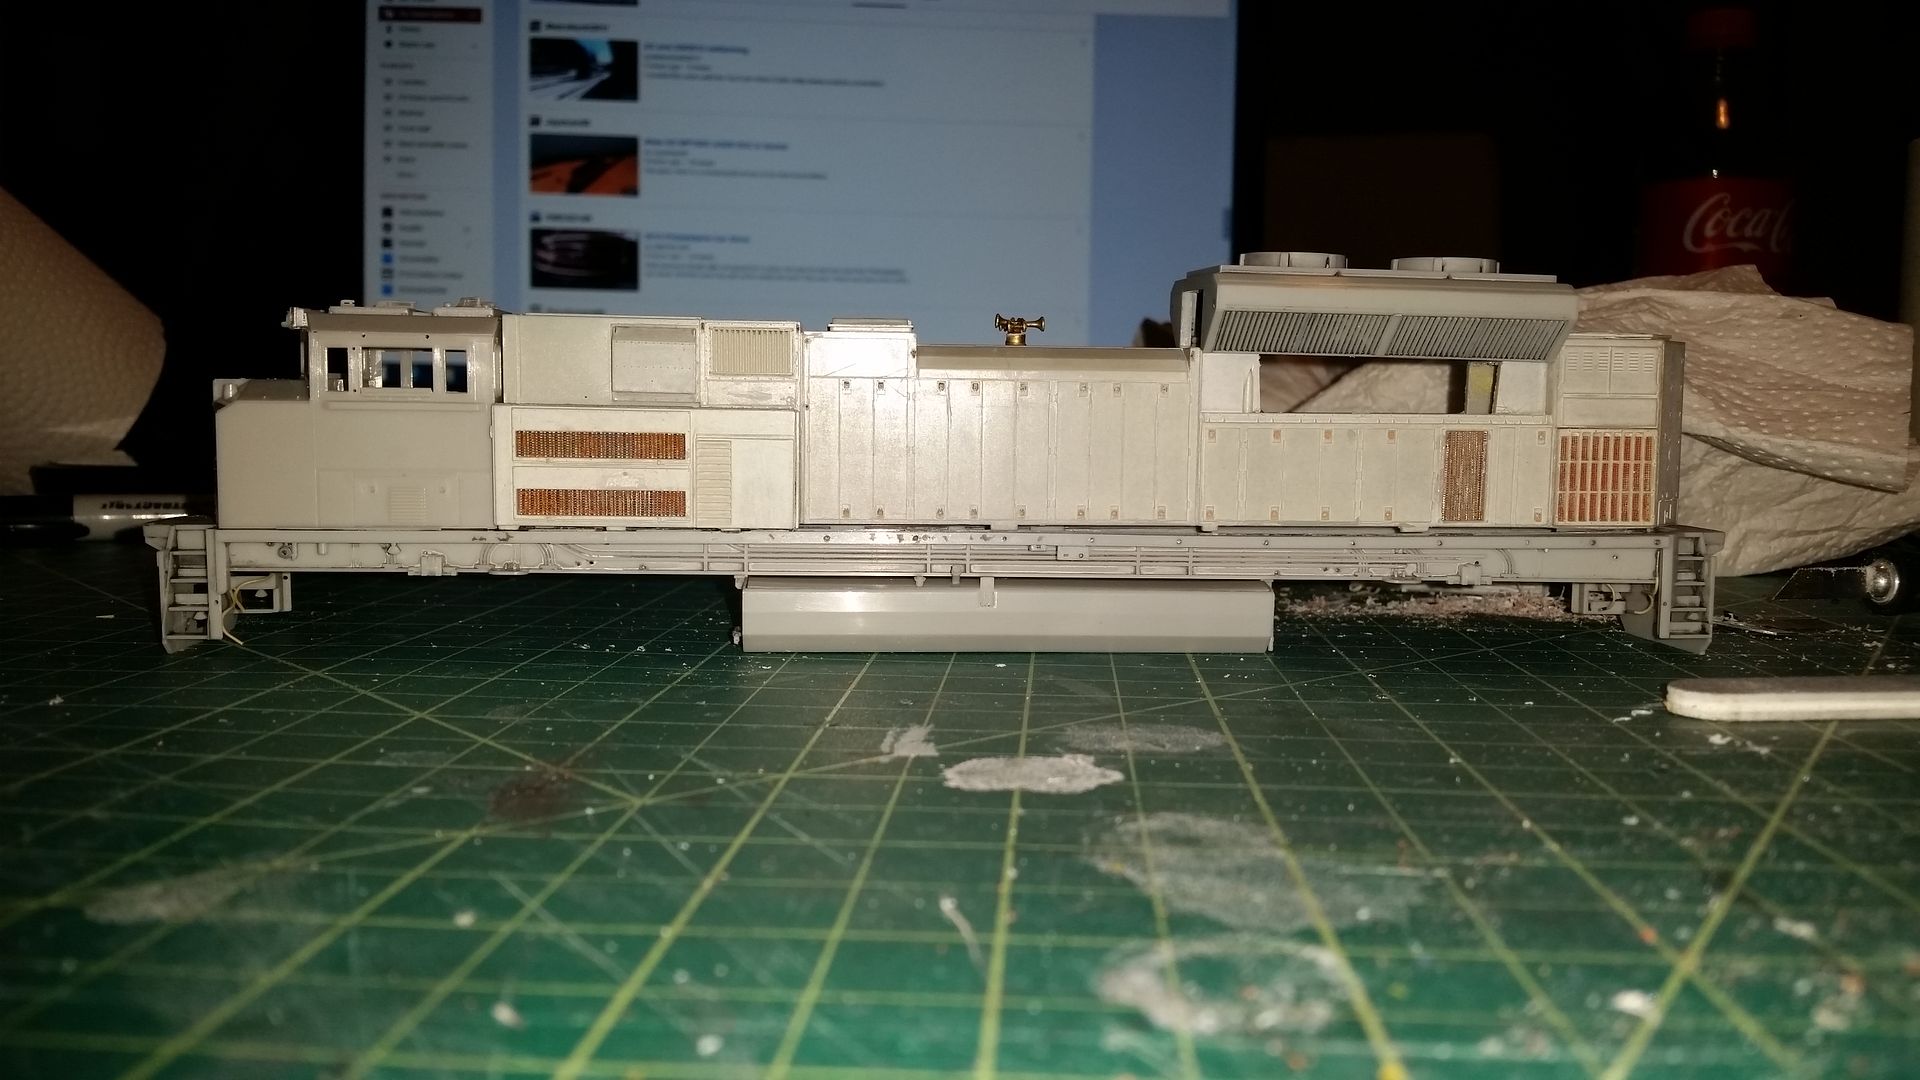 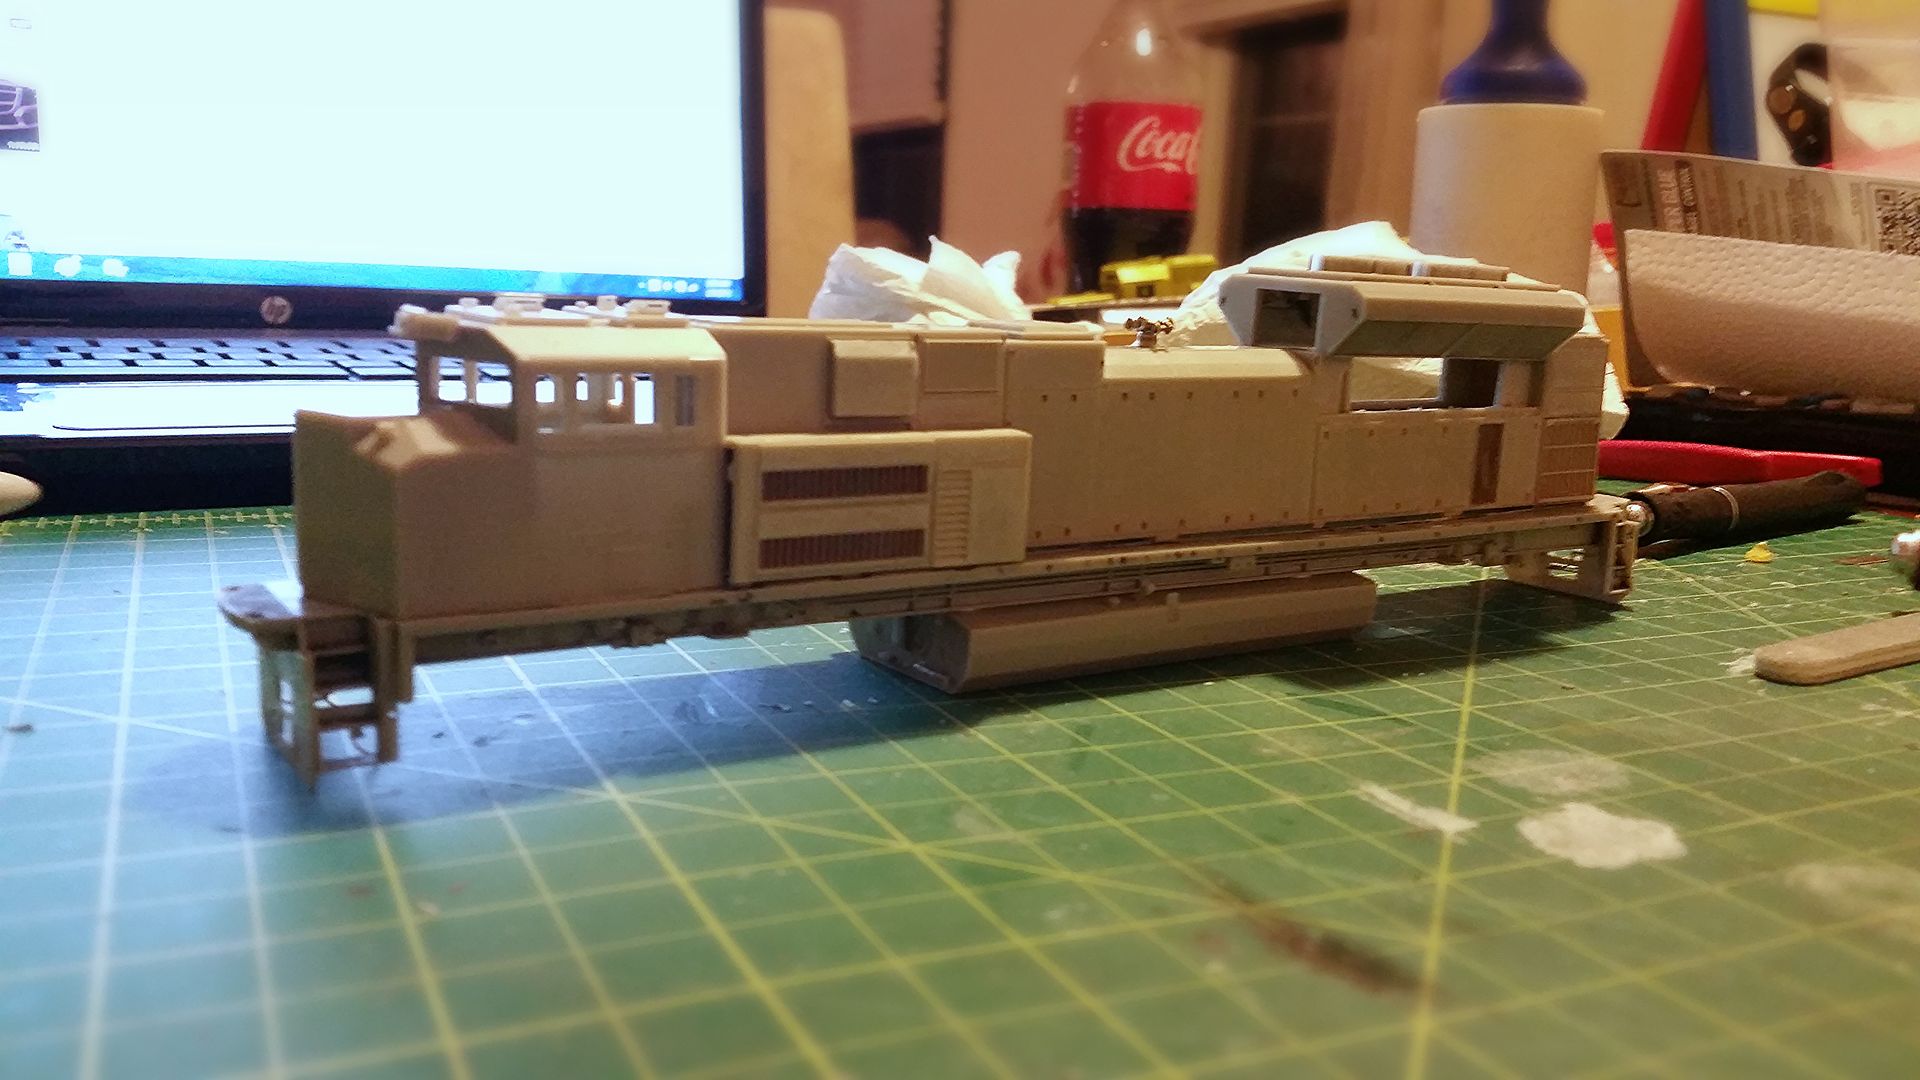 It is missing alot of parts from it. No idea what the original owner did to it. But here is a list of the parts I need to order to make it look right. G68912 SD70M-2 CAB INTERIOR is $9.98 G68929 SD70M-2 DITCHLIGHTS (2 PAIR) CN VERSION are $12.98 G68948 SD70M-2 CN HANDRAILS is $7.98 G68920 SD70M-2 CABLE SET is $7.98 G68921 SD70M-2 SANDER LINES is 8.98 This was based off my athearn instruction/parts manual for the SD70M-2 undecorated unit I was building. I dont even know if the truck sideframes have details on them or not. I can't wait to finally get painting. I have 9 locomotives to paint and lots of freight cars from projects i've done. Going to be busy busy busy. |
|
|
|
Post by TBird1958 on Feb 10, 2015 10:46:01 GMT -8
Eastbound lumber from the SP, on a Red Caboose flat What did you use for the lumber load?
It's from these folks, they're local and happened to be at swap meet last November, it's cool stuff. www.detailsnscale.com/ho_lumber_loads.htm
|
|
|
|
Post by riogrande on Feb 10, 2015 12:36:21 GMT -8
It's from these folks, they're local and happened to be at swap meet last November, it's cool stuff.http://www.detailsnscale.com/ho_lumber_loads.htm Interesting. I've got quite a few 50' flat cars now including 3 Red Caboose PS 53' flats that need lumber loads. Those look like some sort of laminated wood that was cut to size and stacked in layers. Those loads are pretty pricey, enough so that I'm going to look for some stock wood similar to that and see if I can roll my own. Anyone know what the stock wood is, you lumber guys? |
|
|
|
Post by nebrzephyr on Feb 11, 2015 8:06:19 GMT -8
It's from these folks, they're local and happened to be at swap meet last November, it's cool stuff.http://www.detailsnscale.com/ho_lumber_loads.htm Anyone know what the stock wood is, you lumber guys? It looks like 5 ply plywood. Just a guess. Bob |
|
|
|
Post by riogrande on Feb 11, 2015 8:41:26 GMT -8
It could be - next time I'm in a lumber store I'm going to look around. Something like what is used by that that vendor would be decent starting point vs. plain wood and looks more like stacked lumber. Once the pieces are cut into sections the hardest part is done. It looks like the ends were pressed into a red stamp pad, and then wrapped with thin black line, perhaps fishing line? If they were priced around $15 or under, I'd just buy a couple but funds are limited and it might be a fun if I can find the right laminated wood. Some thin strips of wood in-between and viola
|
|


