|
|
Post by TBird1958 on Jan 10, 2016 6:31:58 GMT -8
Up early for a long day at work, here's what's on the bench this week. Athearn PC&F lumber cars and a Cargill 4427, both are regulars on the Rio Grande in the 1970s
GO SEAHAWKS!

|
|
|
|
Post by riogrande on Jan 10, 2016 6:51:25 GMT -8
Great job Mark on that SP box car - love the light weather job - looks very realistic. Is the hopper an ER re-done in the earlier Cargill scheme? I've been hoping ER would produce the large center teardrop logo yellow Cargill cars. They were quite common in photo's and in Rio Grande Odyssey you can see them in a Grande Junction train along with the mint green Cargills.
|
|
|
|
Post by dti406 on Jan 10, 2016 7:59:35 GMT -8
1Managed to get modeling done this past week! It will be a green and yellow experience!  Before participating in the IPD mania of the late 70's the Atlanta & Saint Andrews Bay had some second hand 40' Boxcars, this was an IMRC 1937 AAR Mod. car kit that was painted with Floquil Dark Green Paint and lettered with Herald King Decals.  Atlas 17360 Gal Tank Car kit, painted with Floquil Dark Green Paint and lettered with Highball Graphics decals. Thanks for looking Rick Jesionowski |
|
|
|
Post by markfj on Jan 10, 2016 8:12:11 GMT -8
Hello Group, Great work so far guys! Here is my submission for the week: a slightly modified Branchline 50’ AAR boxcar kit decorated for the Lehigh Valley. The body modifications were minimal – just lengthened the center sill and shortened those sections of the sill that cover the bolster ends. The stirrup steps are Detail Associates #SS 6411, which are the closest I could find to the prototype. I also added Kadee #2102 end ladders, used a #2024 Champion brake wheel and installed a Plano #193 Morton “round” pattern running board (an excellent product!). The kit couplers and pockets were swapped out for Kadee #58 couplers and #242 boxes. Thanks, Mark      |
|
|
|
Post by mlehman on Jan 10, 2016 8:46:02 GMT -8
Nice work everyone, tasty stuff. I spent most of the Xmas cash on track and the crews have been getting at it. First was a much needed track at the shop. It's due for another one once I locate the proper turnouts, but this one is a big help.  Most of the work took place on the Cascade Extension as part of the upgrades to extend the narrowgauge main all the way to Crater Lake. Summit got a much=needed passing siding. 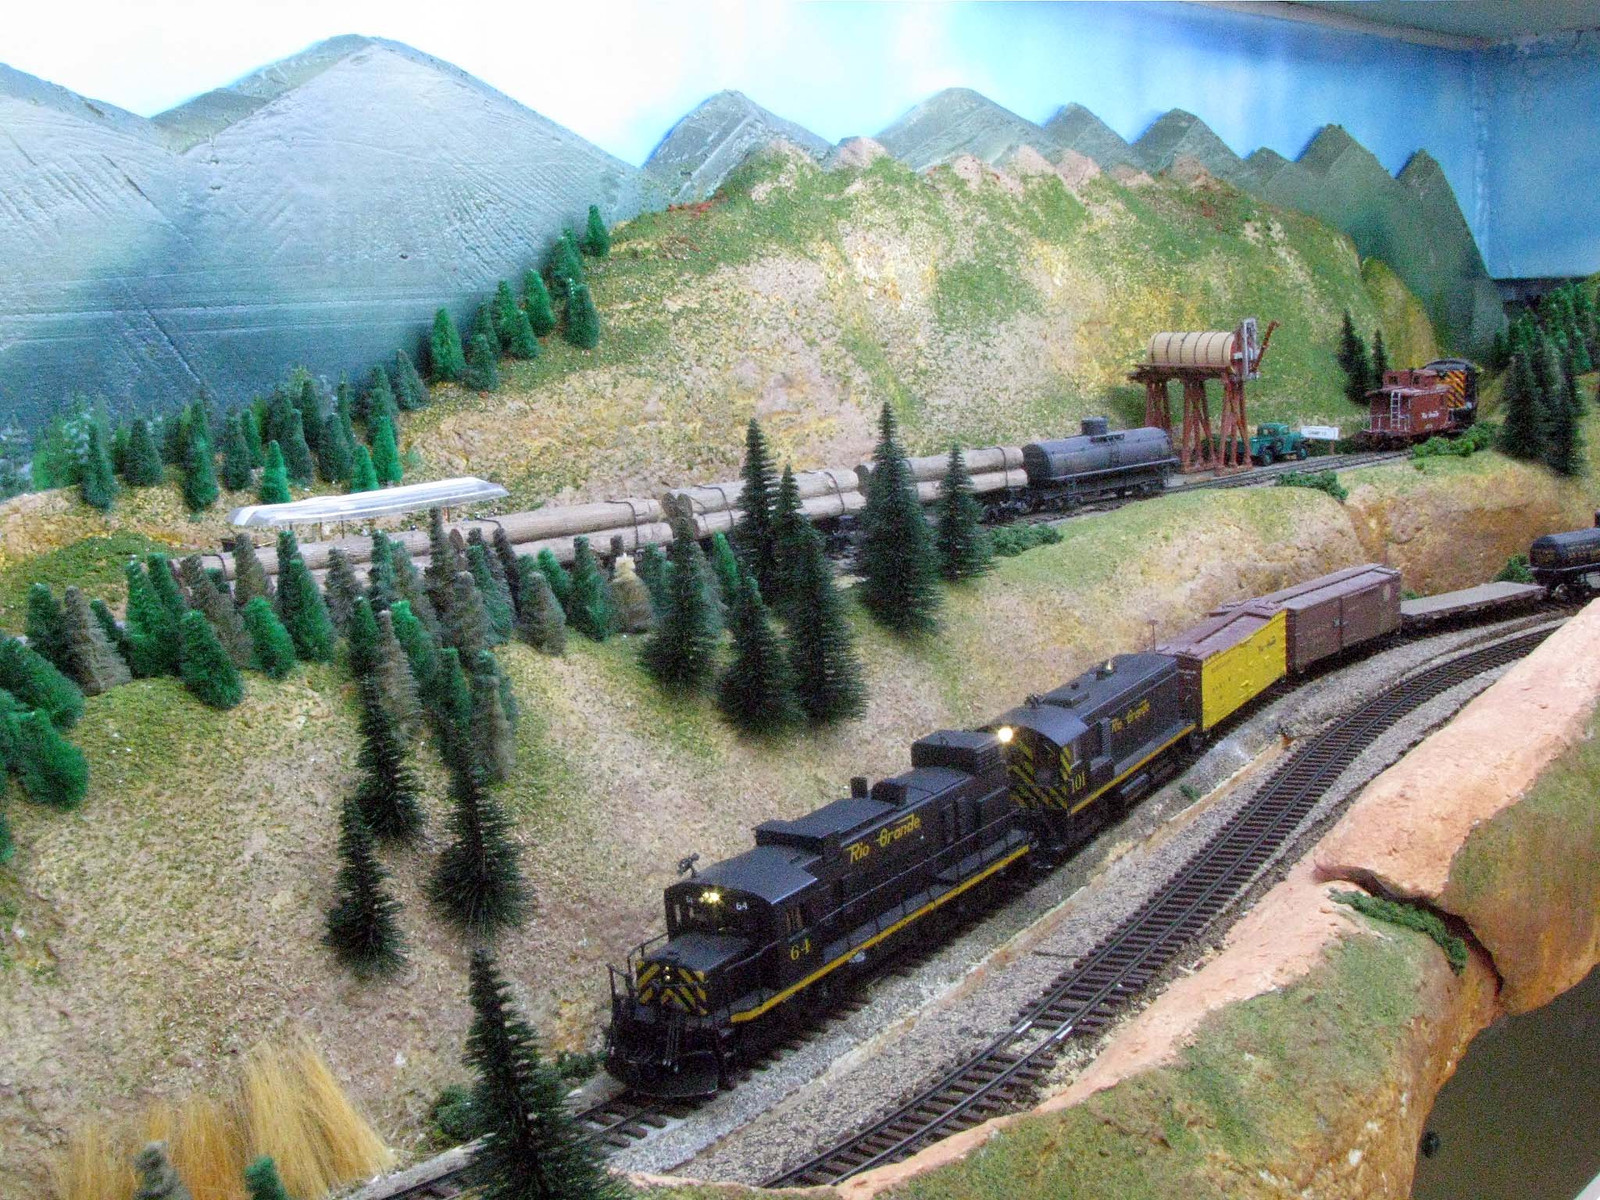 Black Cat Junction got a wye, another siding, and the start of some yard track.  A couple of more shots of Black Cat Junction with the "town site" liftout back in place.   Even the much changed Purgatory gets another makeover. It started with the turntable lead on the west end, then moved to the east end. Now there's access to the TT from both ends, as well as making it easy to switch the industrial spots next to it by reaching across the TT. A third siding will go between those tracks and to two mainline sidings.  |
|
|
|
Post by SantaFeSammy on Jan 10, 2016 10:37:26 GMT -8
Looking really good so far, gents.
I haven't added anything in a while so I figured I throw this one on here.

|
|
|
|
Post by roadkill on Jan 10, 2016 10:40:14 GMT -8
Uh, ya know yer not supposed to post prototype pics here, right???  |
|
|
|
Post by upmodeler1973 on Jan 10, 2016 13:10:33 GMT -8
Great photo santafesammy!
|
|
|
|
Post by riogrande on Jan 10, 2016 17:05:13 GMT -8
Uh, ya know yer not supposed to post prototype pics here, right??? Yes, its a model!  |
|
|
|
Post by wp8thsub on Jan 10, 2016 17:29:46 GMT -8
I started work on a farm scene.   I'm using a Walthers barn kit, modified with some extra windows, plus a foundation and addition built from styrene. The structure was weathered with craft acrylics. |
|
|
|
Post by calzephyr on Jan 10, 2016 17:42:46 GMT -8
Looking really good so far, gents.
I haven't added anything in a while so I figured I throw this one on here.
Sammy You have captured 1995 era in a great photo!!!!! Some of my actual photos of the Santa Fe in the 1995 era do not look this convincing. Thanks for sharing Larry |
|
|
|
Post by cellis231 on Jan 10, 2016 23:47:02 GMT -8
Adjusted the mocked up first part of my layout as a last verification before cutting wood for the benchwork. 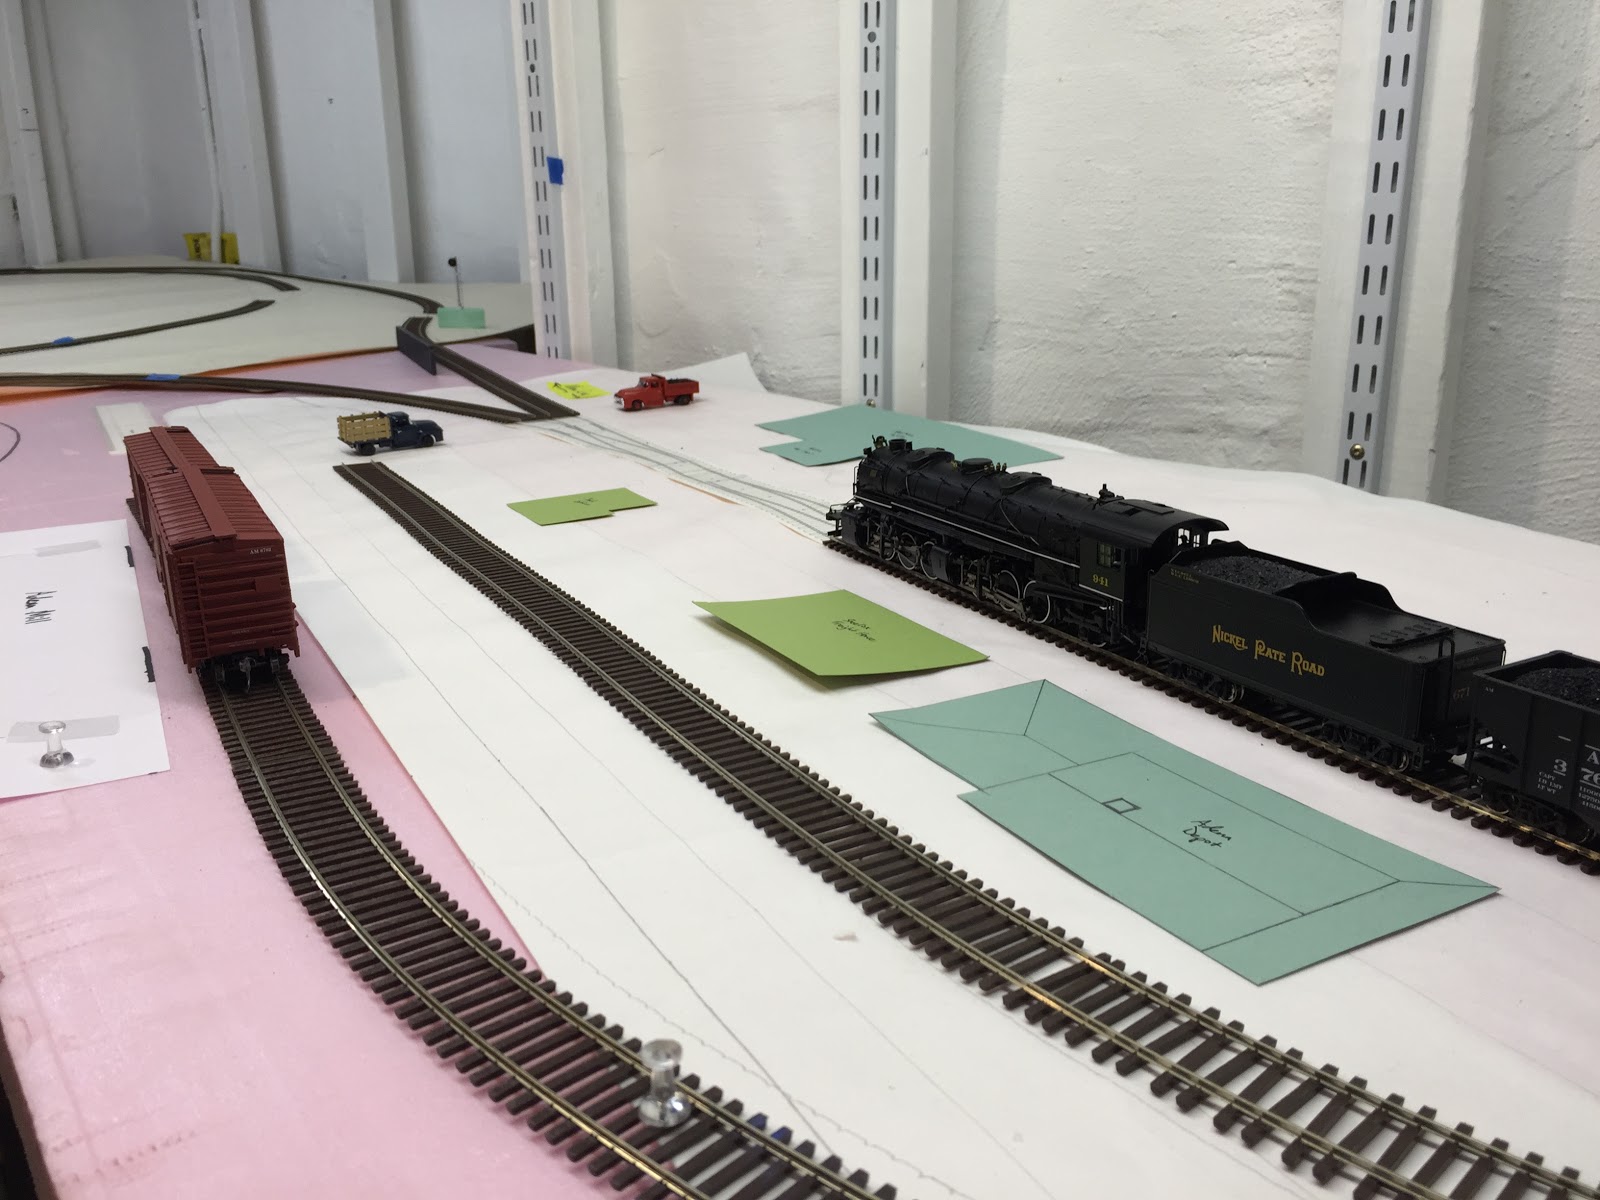 |
|
|
|
Post by SantaFeSammy on Jan 11, 2016 4:15:26 GMT -8
Oh man! You guys are too kind! Thank you for the kind words.
|
|
|
|
Post by riogrande on Jan 11, 2016 7:52:55 GMT -8
Mark, how did you weather the PC&F SP box car?
|
|
|
|
Post by TBird1958 on Jan 11, 2016 10:06:21 GMT -8
Mark, how did you weather the PC&F SP box car?
Hey Jim,
Sorry I missed you question about the 4427, it's an LL2PK one that I painted, decals are from Microscale, the factory painted ones are a bit hard to find at this point (I don't really care for their yellow anyway) so I went ahead and shot this one and an Exactrail low side version. As you noted a few weeks back, groups of these cars were pretty common on the D&RGW, I'll find a few more including the beautiful one from Tangant to fill out the roster. The PC&F car was weathered with colored pencils ( ochre and dark brown) on the weld seams, rivets, door etc. first then two similar shades of chalk applied with an 1 1/2" wide soft straight brush. I dullcoted the car first to give it some "tooth" and again when done. I use the couplers to handle the cars and not leave fingerprints in the chalk. If you look close at the middle car in the pic you'll see that it has some ochre colored pencil of the weld seams as I've started the process on it.
|
|
|
|
Post by riogrande on Jan 11, 2016 10:20:04 GMT -8
Thanks! I've been thinking about getting one of the chalk weathering kits like the one sold by MBK. What colors did you used to cover the sides?
|
|
|
|
Post by TBird1958 on Jan 11, 2016 11:09:43 GMT -8
Sorry for the sideways pic, photobucket is being a PITA today........ Here's my fancy chalk set up, two small boxes and a cradle to lay the car in. If you let the chalk move around in the little boxes it makes it's own "dust" so you don't have to grind it off very often. I use the lighter colors first and the darker second.  |
|
|
|
Post by tangentsm on Jan 11, 2016 17:04:54 GMT -8
This is PRR 112210 Sam Rea Shops built X58 with 7-70 reweigh. It is modeled from the Tangent Scale Models factory-painted PRR X58 boxcar released in January 2015. I renumbered the car, changed the build date, and added return route stencils with ICG Decals. I added chalk marks from ICG Decals and Speedwitch Media, ACI labels from Microscale. The car was fitted with Tangent Scale Models code 88 wheels, and was weathered with artists oils, except the door wear was added to the side posts with acrylic paints, a technique kindly recommended by Jeff Meyer. Thank you for looking! David Lehlbach (Tangent Scale Models) Attachments:

|
|
|
|
Post by dtinut on Jan 11, 2016 21:56:50 GMT -8
Hi David,
Great looking car - when do you think a re-run of these cars will be done?
I wasn't able to get any of the PRR cars, they sold out before I got a chance to buy one or 2.
Brian
|
|
|
|
Post by tangentsm on Jan 12, 2016 11:08:41 GMT -8
Hi David, Great looking car - when do you think a re-run of these cars will be done? I wasn't able to get any of the PRR cars, they sold out before I got a chance to buy one or 2. Brian Brian, Thank you for the kind words. The X58s will be available again sometime in 2016. Stay tuned! David Lehlbach Tangent Scale Models |
|
|
|
Post by roadkill on Jan 12, 2016 16:23:29 GMT -8
Hi David, Great looking car - when do you think a re-run of these cars will be done? I wasn't able to get any of the PRR cars, they sold out before I got a chance to buy one or 2. Brian Brian, Thank you for the kind words. The X58s will be available again sometime in 2016. Stay tuned! David Lehlbach Tangent Scale Models Sweet! Lehigh Valley, I presume ? |
|
|
|
Post by tangentsm on Jan 12, 2016 18:31:43 GMT -8
Brian, Thank you for the kind words. The X58s will be available again sometime in 2016. Stay tuned! David Lehlbach Tangent Scale Models Sweet! Lehigh Valley, I presume ? Absolutely! David Lehlbach Tangent Scale Models |
|
|
|
Post by stevef45 on Jan 13, 2016 0:59:24 GMT -8
Im stuck on my NS SD60E 911 unit as i haven't cut the front and rear weights to allow the shell to fit. So I started on another project that i've wanted to do for a really long time. Picked up this Walthers UP City of LA dome for a pretty good price and immediately started to tear it down. MY GOD what a PITA.  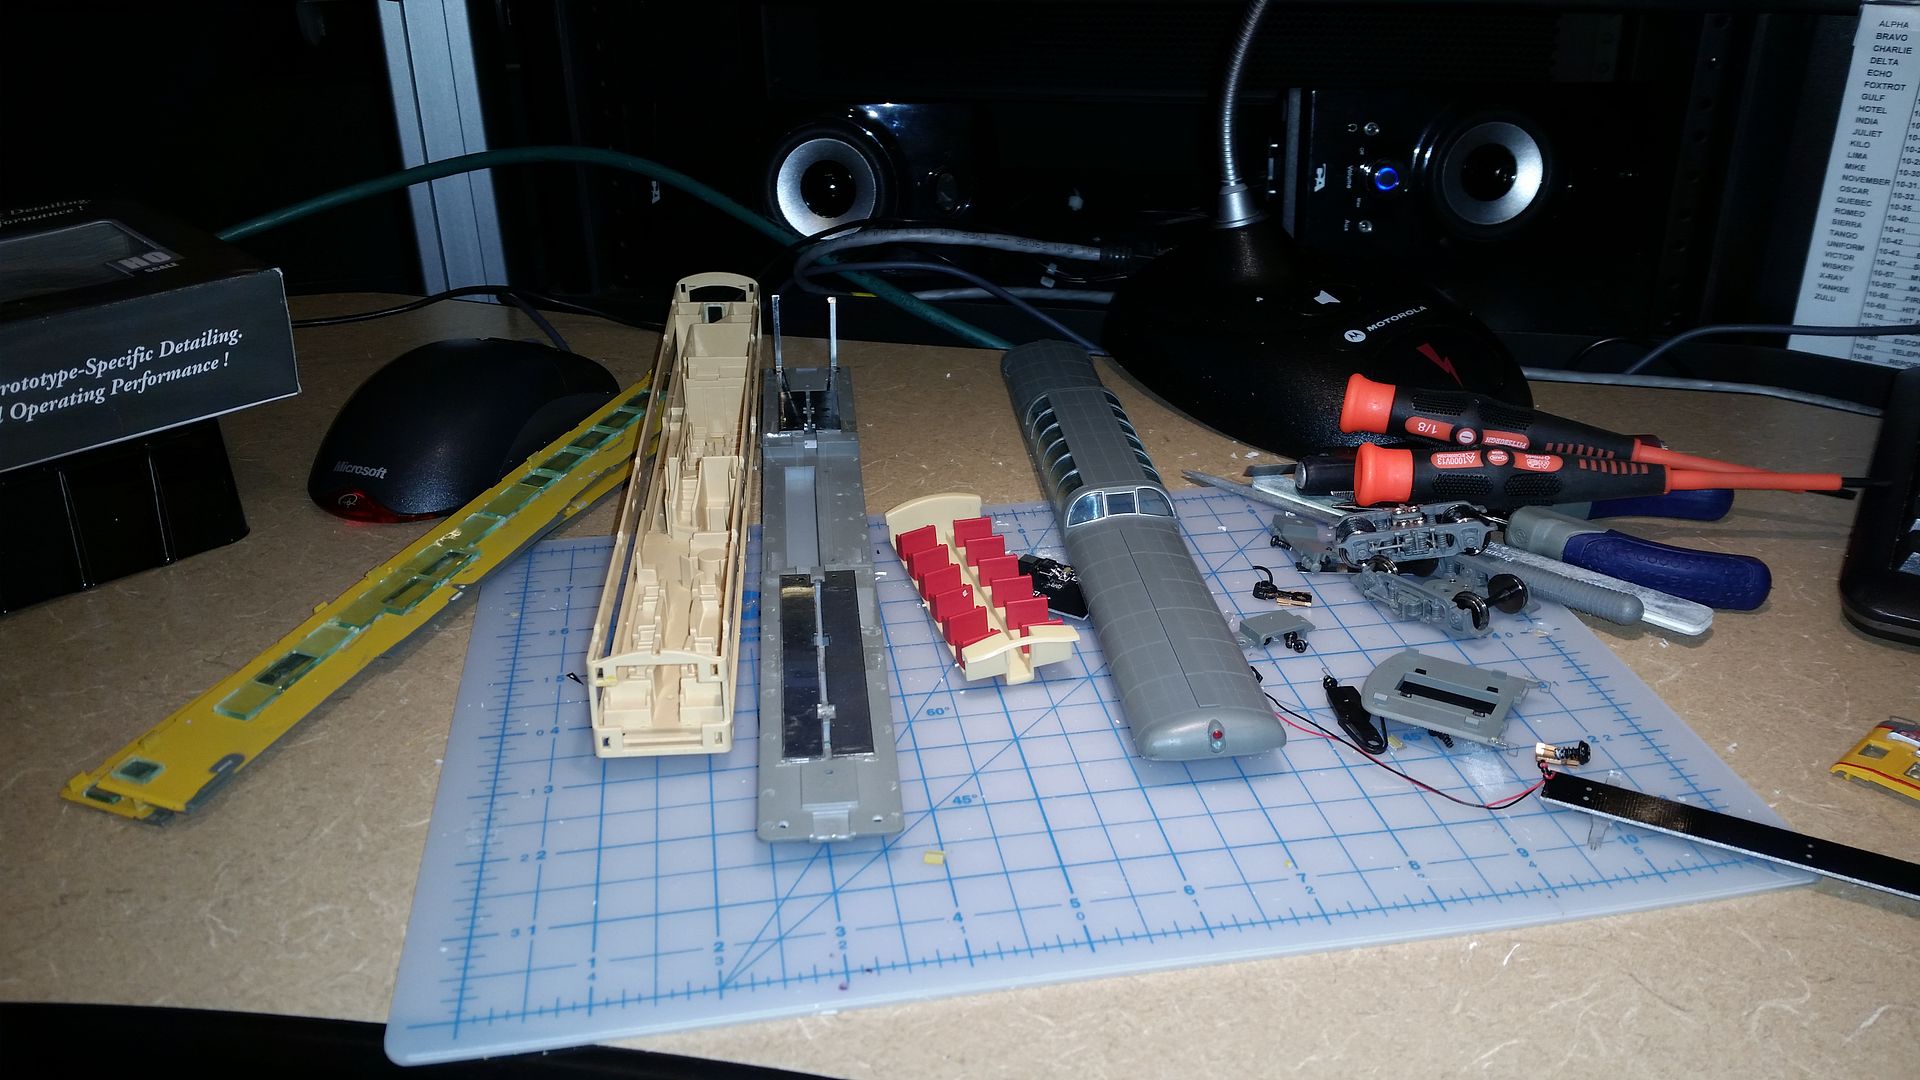 A shot of the car's rear large theater window. 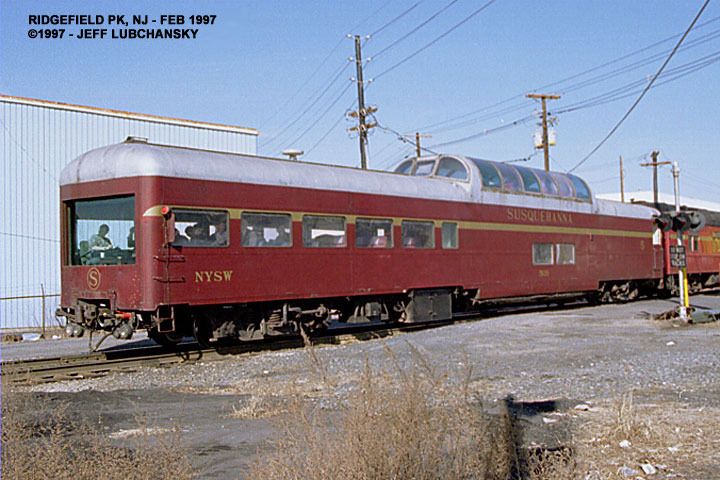 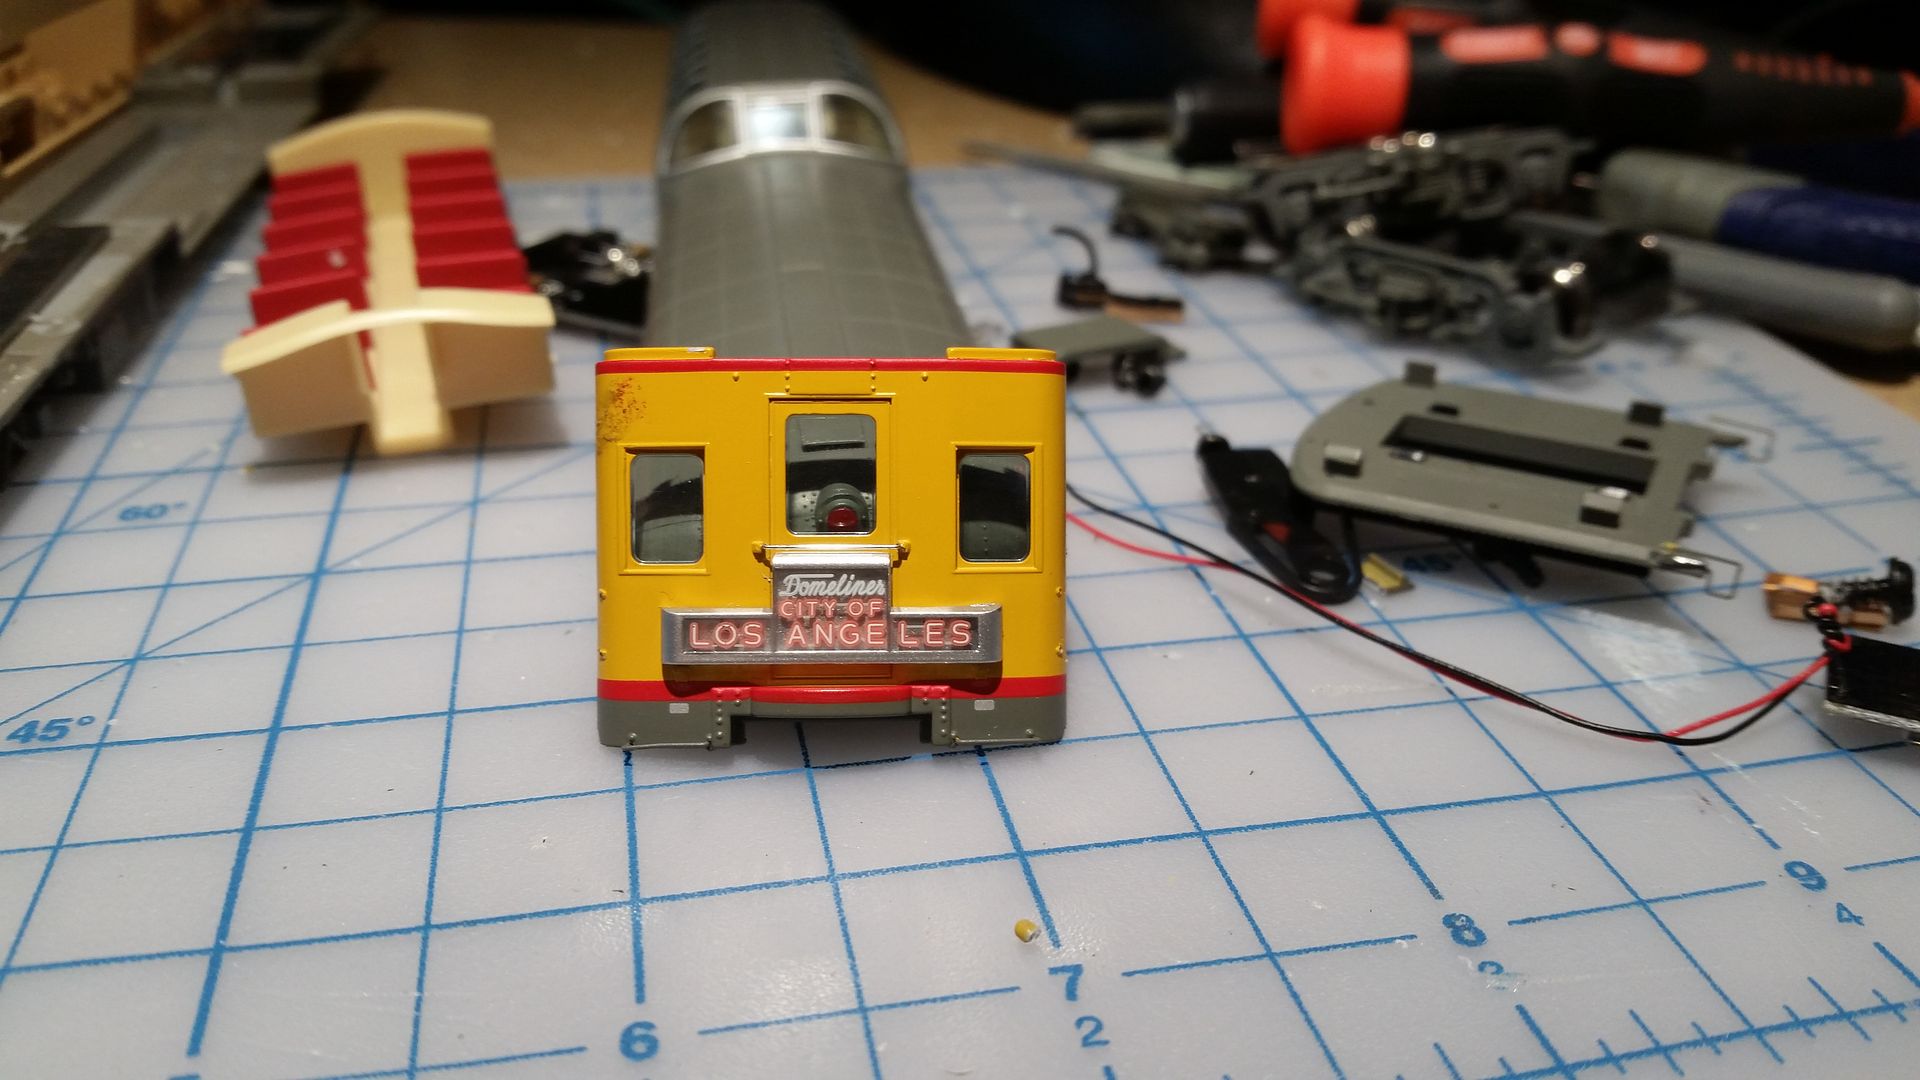 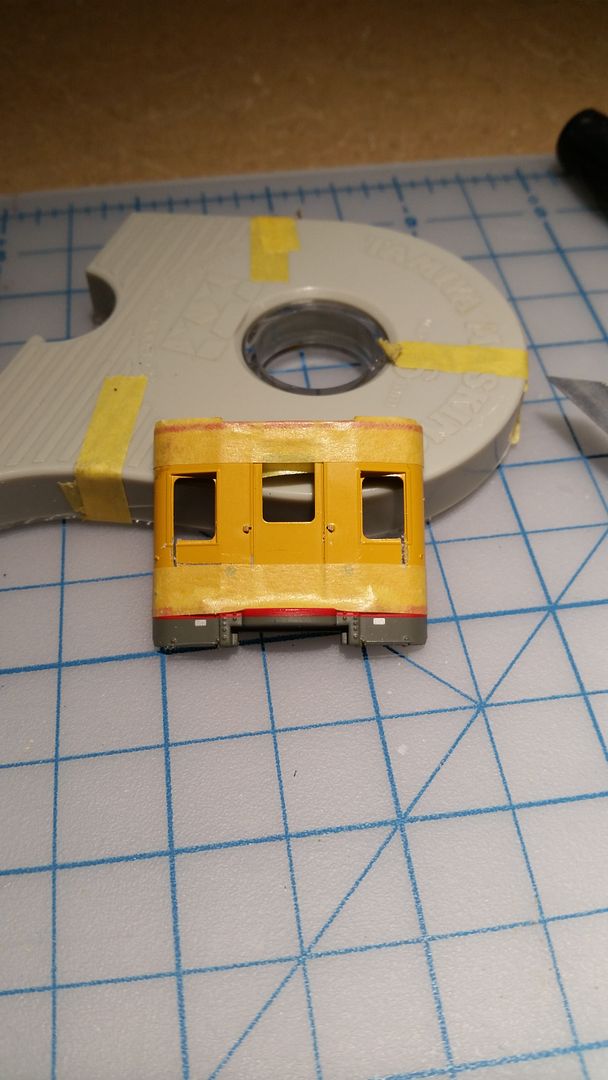 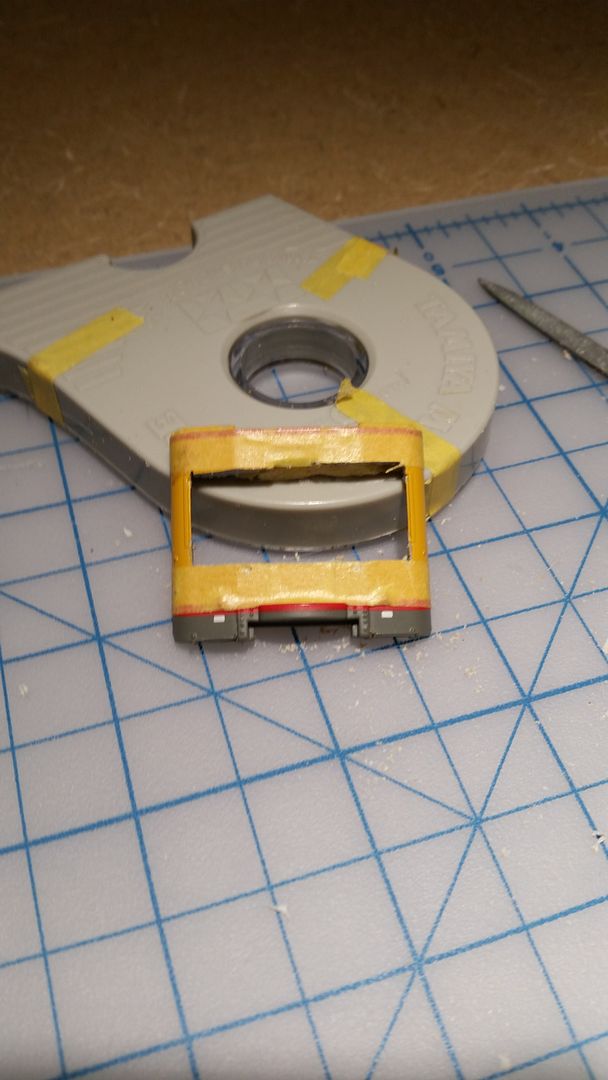 Car sides and anything painted will be put in a bin with other parts for stripping to bare plastic. Anyone have idea's on how to scratch build the marker lights? |
|


