|
|
Post by dtinut on Jan 23, 2016 21:55:42 GMT -8
Hey All, Finished a couple projects this week. First is a DT&I caboose - these were bought 2nd hand from an equipment dealer when the DT&I was in need of some more cabooses, and they bought 4 ex RDG cabs, and rebuilt them at the Jackson shops. This is the 2nd of these I have done, and I scored another really cheaply off ebay recently, so I will do one more of these sometime in future. Blanked off 2 of the side windows, and reshaped the windows, changed the window in the doors, opened up the windows in the cupola, made a taller smokejack, need end sills, and steps, replaced the trucks with Atlas Trainman caboose trucks, painted interior, painted outside with Pollyscale DTI Cherry Red, and EL yellow, underframe and roof with black, and used Future to thin the paint/add gloss for decals. Decals from Highball graphics to get the "We have the CONNECTIONS" slogan otherwise I like the Herald King decals just fine. Before weathering   weathered  2nd is an old Athearn gon, that I stripped long ago of a really poorly done SOO paint job. I carved off all the grabs and installed wire grabs, and redid the underframe so it would sit a tad lower (don't use the piece of steel they provide, and instead used some lead) which makes it sit about .040" lower. I added the tiedown bar to the top cord, and painted Pollyscale Special Oxide Red (with Future for thinner/gloss coat) - decals are leftovers someone gave me, which I had to dig thru to find all the right stuff. This is a new car for me, so weathering is light.  interior of gon  Hope everyone had a good weekend! Brian |
|
|
|
Post by tom on Jan 24, 2016 5:20:50 GMT -8
Here is mine. I was trying to get some good detail shots of my Penn Central X58 which did not turn out too great so I just tried one at a different angle and I liked he look of it. 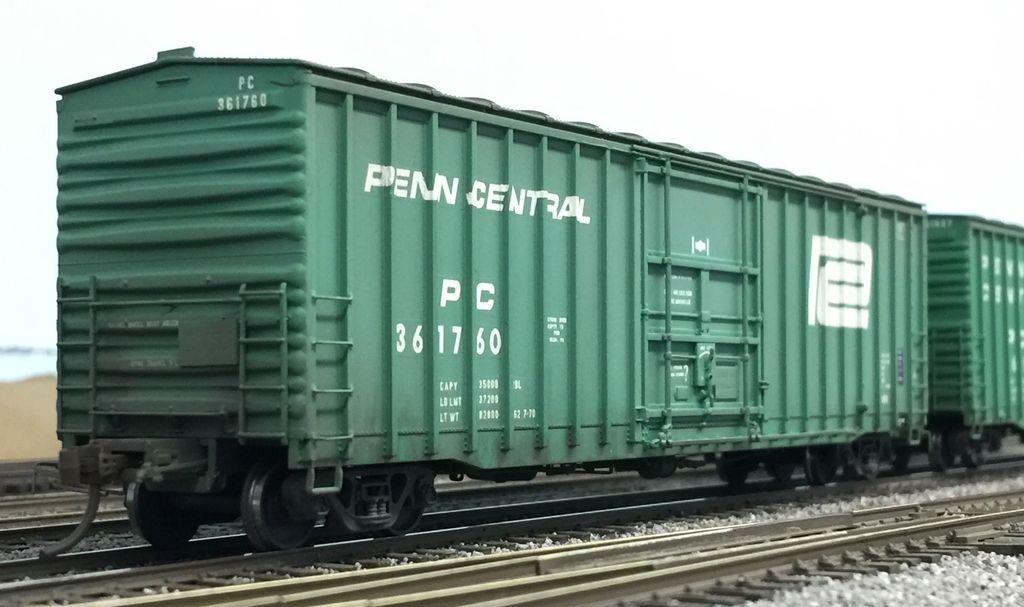 The car started as an unlettered Tangent green X58 boxcar. I then added Daniel Kohlberg Penn Central decals which are made specifically for this car in a different version than the Tangent release. I then faded the paint (since the large PC logo scheme is an early PC paint scheme) and weathered it using colored pencils, water color pencils, dry powders, and an airbrush. The PC X58 in the background is a stock Tangent car. |
|
|
|
Post by tankcarsrule on Jan 24, 2016 6:25:21 GMT -8
This is a old blue box that I detailed a while back. I scratched the lifting lugs and knuckle holders. I cut off the oversized chain and will replace it with stainless that looks much better.  Here's what the chain looks like on my BLI AC6000.  |
|
|
|
Post by dti406 on Jan 24, 2016 7:25:12 GMT -8
Brian, great job with that DT&I caboose, I will have to use that as a master when I do one! I managed to cobble up a few cars this week!  Athearn 2600CF Intermediate Airslide Kit, what a PITA to build, no instructions a drawing that includes the early Airslide parts, part numbers on the sprue that do match the part numbers on the drawing and more! Painted with Scalecoat II MofW Gray and lettered with Mark Vaughn Decals.  Atlas 3650CF ACF Covered Hopper Kit, removed the cast on Roofwalk and Walkover Platforms and replaced with Plano replacements including the risers. Kit painted with Scalecoat II MofW Gray and lettered with Dan Kohlberg's ICG Decals.  Exactrail 4427CF PS Covered Hopper Kit, painted with Scalecoat II MofW Gray and lettered with Oddballs Decals. Thanks for looking! |
|
|
|
Post by gtws00 on Jan 24, 2016 7:33:03 GMT -8
Here are a couple of photos of my modified Milwaukee Road Ribside Boxcar Kit from Stan Rydarowicz that includes a roof with 6 hatches and decals. This car was rebuilt by the Milwaukee Road and used at the Miller Brewery in Milwaukee, Wis for transporting spent grain for animal feed. Most cast on detail was removed from this kit and commercial detail parts were added from Yarmouth Models, Plano, A Line, Tahoe, Tichy, Kadee as well as scratch built ladders, tack boards with rivets shaved from old Athearn Car, scratch Royal F Type Slack Adjustor, Stirrup Steps from A-Line were reformed and filed to a thinner cross section with shaved Athearn rivets and slices of .010 stryene to simulate mounting. Also used an Intermountain Door with new latch detail and grabs. These photos were taken before weathering, and you can see the roof and my first attempt using Sea Salt for chipping effects. Not sure if I am totally happy with the chipping effect but I wanted to try something different. George Toman     |
|
|
|
Post by mlehman on Jan 24, 2016 8:07:45 GMT -8
Thanks to dtinut for kicking things off and all the great work on display so far. I finished up the bulk of trackwork on the layout this week, so am only waiting on 2 or 3 turnouts on B/O to finish it completely. Rick already gave me some ribbing over at MR about my kinky track around Crater Lake Junction. It's hard to see it, even when looking end on into the 10" high space that CLJ sits in, but the telephoto lens tells all. As I get it spiked, most of the kinks smooth out and those that don't can't really be seen by the naked eye  It's much improved already after I added a house track that also serves the Sinclair dealer I relocated from Crater Lake proper. 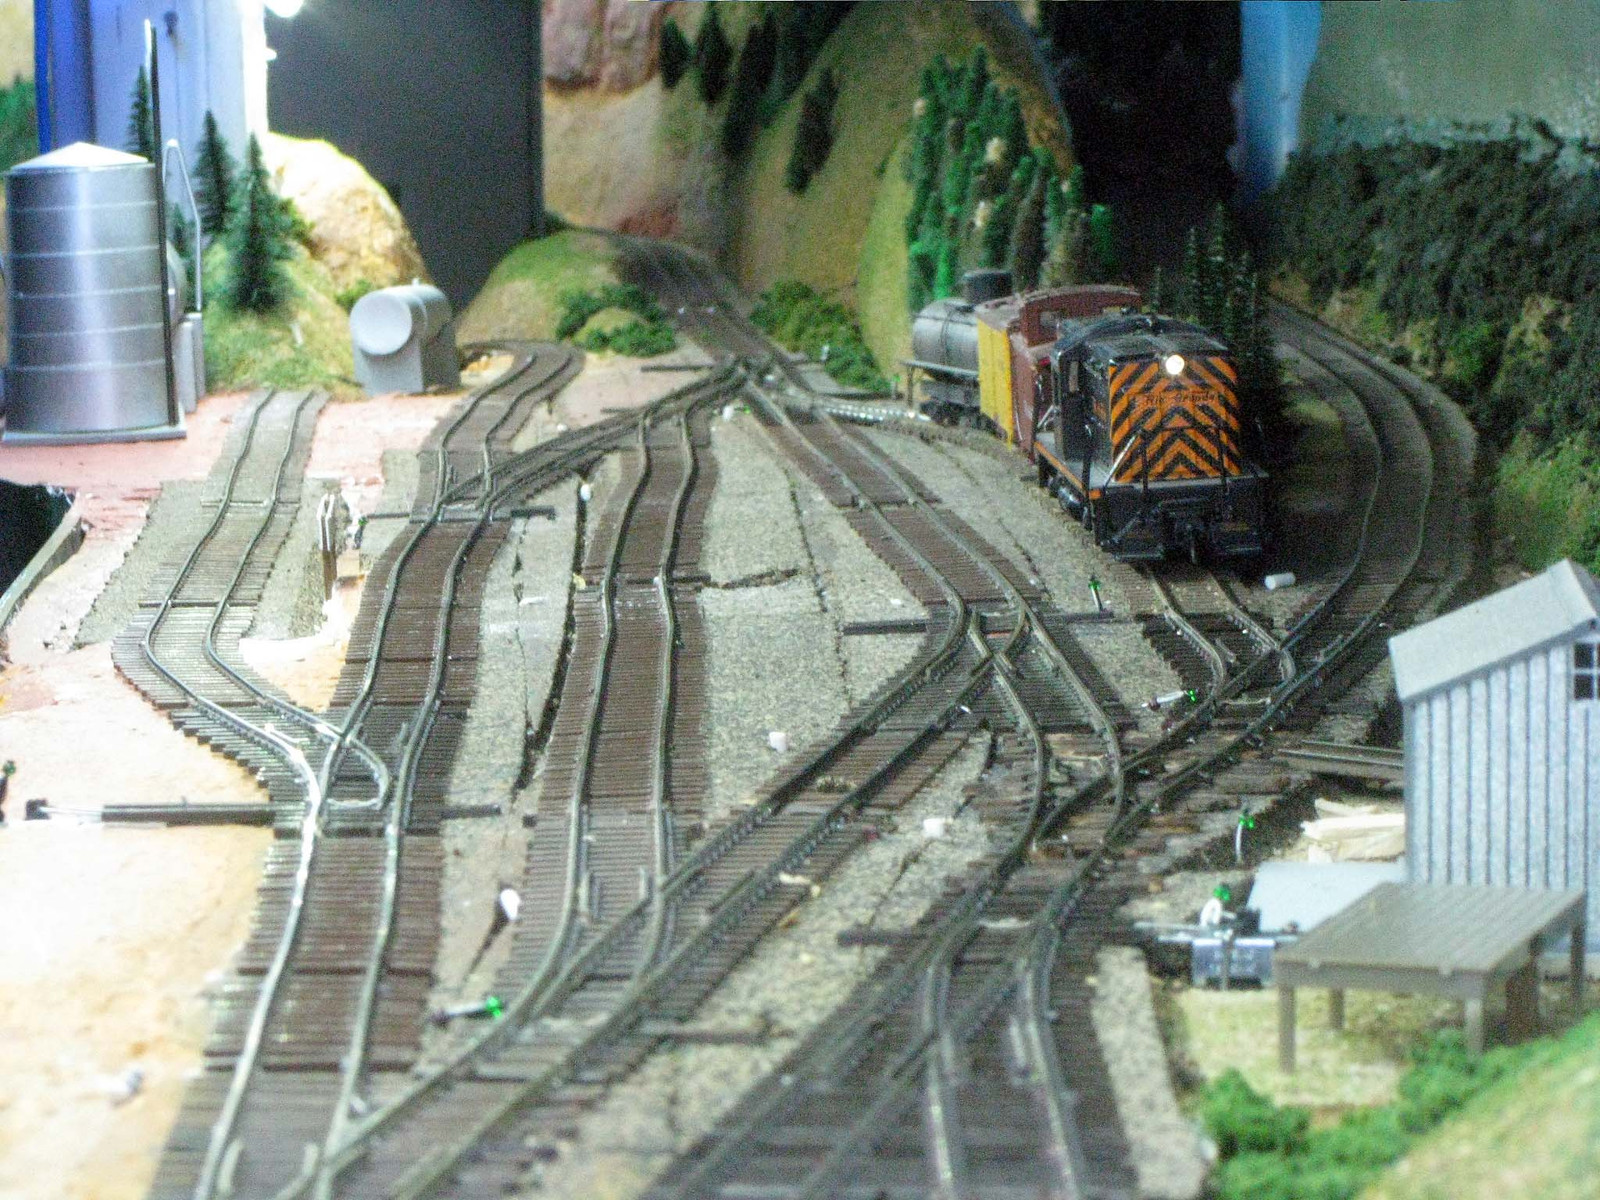 Black Cat Junction also was finished as far as track goes, plus I built a station for it. The shingled roof is very old school, as it's far enough back that I used some leftover Walthers paper printed shingles that probably was last made in the 70s.  Finally, the real purpose in having a layout is to support realistic ops. Here's a stock train eastbound from Crater Lake.  |
|
|
|
Post by kentuckysouthernrwy on Jan 24, 2016 8:09:17 GMT -8
Wow, January is almost over, only one more week. I went to Bruce Chubb's in Grand Rapids yesterday and ran a couple of local trains on his layout set in the Pacific Northwest, far away from the Blizzard of the East Here my SP&S Alco RS1 powered freight leaves the joint yard shared with the UP and NP for the SP's Brooklyn yard them on the Salem, Oregon 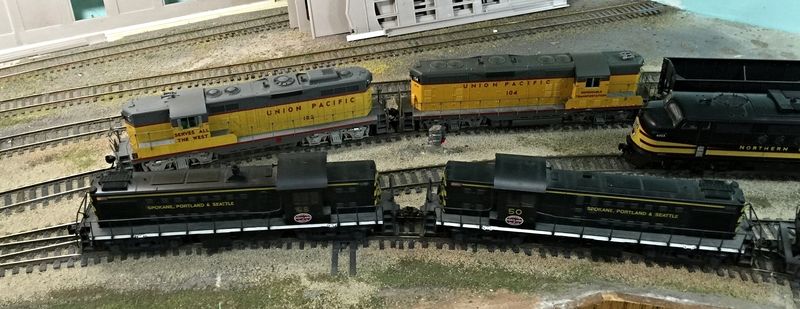 With a favorable signal now I can proceed out of the yard and head toward Brooklyn on SP trackage rights  Later my SP local out of Coos Bay was crossing the river to the enjoyment of folks at the beech on the river bank. 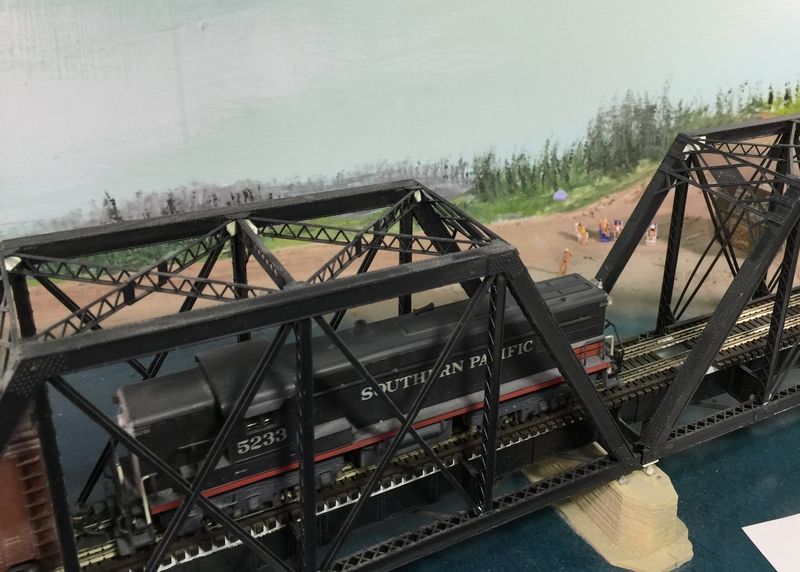 |
|
|
|
Post by dtinut on Jan 24, 2016 10:58:11 GMT -8
I recently learned that Stan Rydarowicz passed away...
I found the following note fron my friend Denis, posted on 12-6-2015.
Guys it is with a saddened heart that I must report the passing of CORPM supporter Stan Rydarowicz. Stan attended most of the CORPMS and featured a line of custom freight car and passenger car kits and parts. He also provided several very informative and well presented clinics for OUR meet as well. He was a kind man and shall be missed. RIP Stan..
He'll be missed by many Modelers who used his custom parts/decals.
Brian
|
|
|
|
Post by edgecrusher on Jan 25, 2016 7:46:59 GMT -8
Sorry for being a day late, I rarely if ever can get pics to upload at home. I been putzing with this Downtown Deco kit for probably close to two months on and off. I'm finally happy with it. Once I get it "planted" on the layout I still have an electrical meter and natural gas meter to stick on it.   |
|
|
|
Post by ln1263 on Jan 25, 2016 8:15:45 GMT -8
Tom: Great to have you back on the site. I have missed your posts. One question: What did you use to fade the paint on your X-58?
|
|
|
|
Post by tom on Jan 25, 2016 13:37:32 GMT -8
Tom: Great to have you back on the site. I have missed your posts. One question: What did you use to fade the paint on your X-58? Thanks! I mix about 10% white paint (I used Scalecote) with 90% Testors Dulcote. I then thinned that white/dulcote paint mixe 50/50 with lacquer paint thinner. This finish is easy to apply and multiple layers can be added as desired. This works really well when the lettering on the car is white since it only fades the paint and not the lettering. |
|
|
|
Post by ln1263 on Jan 25, 2016 14:07:33 GMT -8
Thank you Tom. I will try that formula on my next weathering project that involves white lettering. Looking forward to seeing what you post next. Again as a fan of your work,glad to have you back. Thanks, Andrew.
|
|
|
|
Post by TBird1958 on Jan 25, 2016 17:22:59 GMT -8
Tom: Great to have you back on the site. I have missed your posts. One question: What did you use to fade the paint on your X-58? Thanks! I mix about 10% white paint (I used Scalecote) with 90% Testors Dulcote. I then thinned that white/dulcote paint mixe 50/50 with lacquer paint thinner. This finish is easy to apply and multiple layers can be added as desired. This works really well when the lettering on the car is white since it only fades the paint and not the lettering.
Great idea! I'll look forward to trying that, thank you!
|
|
|
|
Post by Chet on Jan 27, 2016 6:51:39 GMT -8
Haven't figured out how to post full size photos yet.  |
|
|
|
Post by cgstever91 on Jan 27, 2016 8:36:23 GMT -8
|
|
|
|
Post by Chet on Jan 28, 2016 11:03:59 GMT -8
|
|


 It's much improved already after I added a house track that also serves the Sinclair dealer I relocated from Crater Lake proper.


