|
|
Post by bdhicks on Sept 3, 2017 18:14:48 GMT -8
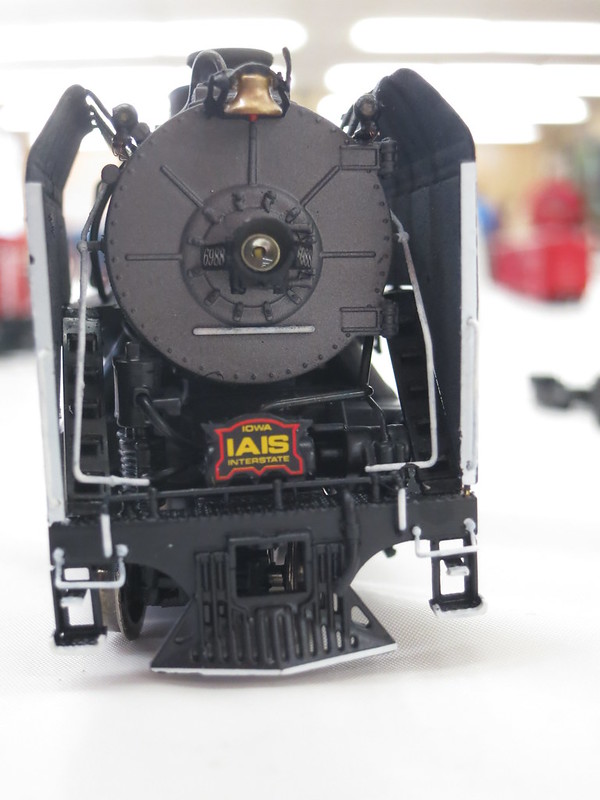
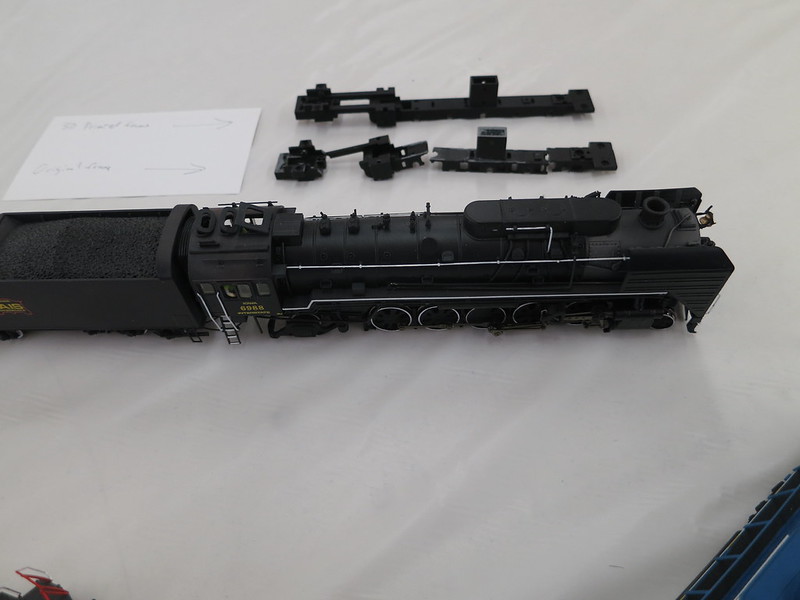
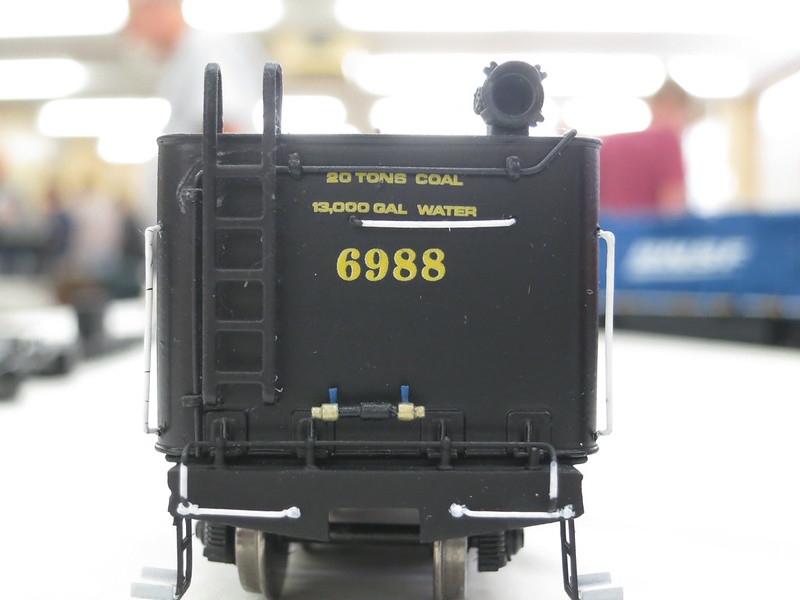
Several years back, I got it into my head to model a steam excursion. I decided I'd try to do IAIS 6988, which was a bit of a stretch for my modeling area, but there weren't many good options available in plastic, and besides it would be interesting to model the modifications they made to make it look more American. When I finally tracked one down and tried to run it, nothing happened. At first I assumed it had come out of quarter for some reason, but upon further inspection the worm wasn't being engaged by the gear tower (and the model was sitting weird on the frame). Then I got to learn about zinc pest. Frustrated, I put the whole thing away, although I would occasionally poke at it. Lately, I've been working on getting some things 3D printed, in part because I thought I could use that to make a replacement frame. Now, after a few attempts, I've managed to get a new frame printed that works (or at least seems to, I've got some other things to get finished before it does any running). It was a bit tricky, because even the parts of the frame that are still in one piece have expanded from the zinc pest and can't be used for measurements. 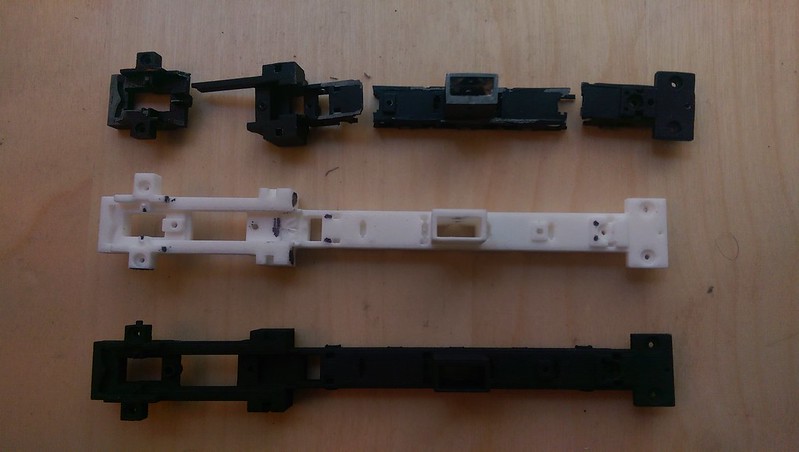 The top is the original frame, which hasn't held up well, although some of the damage came after from being moved around in a loose bag of parts. After I posted the picture I realized I had the section with the gear tower backwards when I took it. The middle is my first attempt (Shapeways white strong and flexible), with various marks where I had to make fixes. The bottom is the latest version, which is pretty close to being final, in Shapeways black strong and flexible. 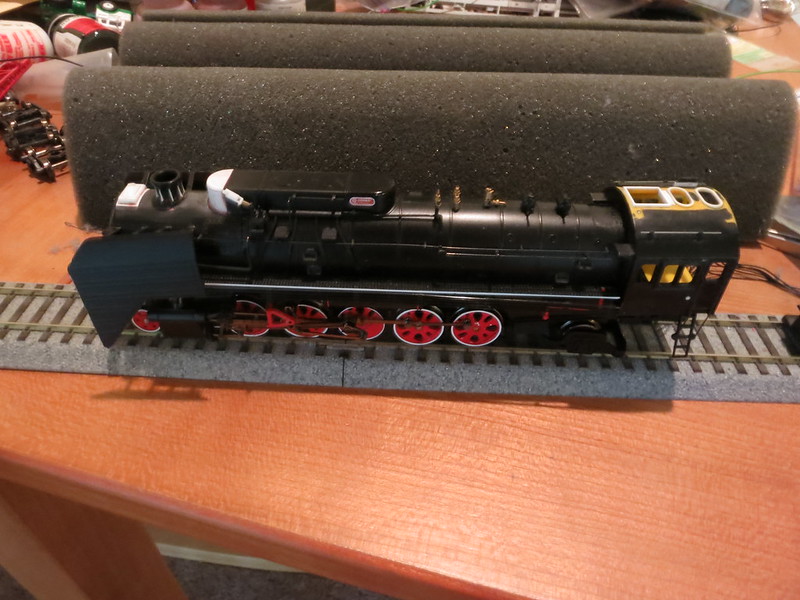 Of course, fixing the frame is just getting me back to where I thought I was years ago when I started. I also had to make several changes for Americanizing the model. Most obviously, I had to remove the molded-on cowling around the stack, and then once that I had to make a new feedwater heater and do some work on the stack, which did not look very good from the shallow angles previously blocked by the cowling. I also made a new whistle and changed the roof vents on the cab. I actually made castings of the original vents and plan to model them open. The smoke deflectors are out of position in order to get better access for modeling and later painting. 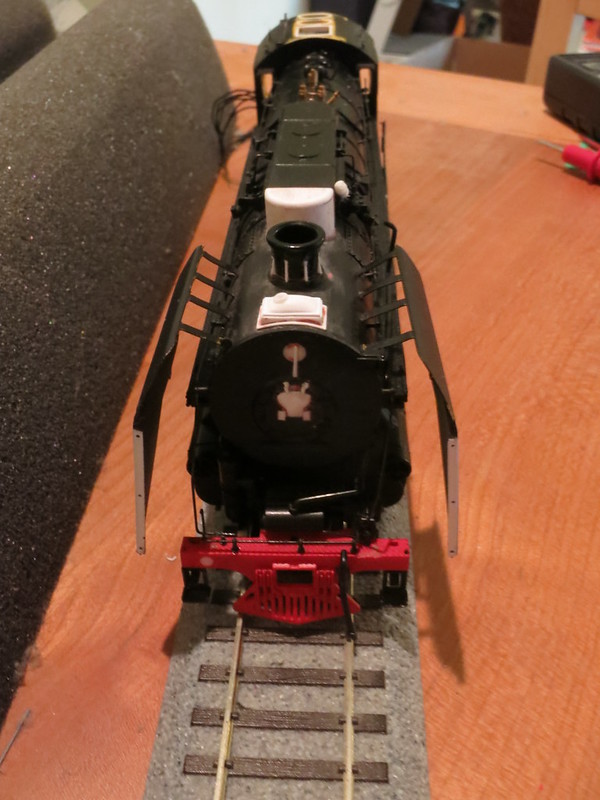 On the front, I had to fill in the existing headlamp mountings because 6988 only has one lamp, mounted lower than the two on the stock Bachmann model. This meant I had to try to reconstruct part of the smokebox door, which admittedly doesn't show up very well in this picture anyway. I still have a fair amount of changes to make before it's ready to paint, but most of the big work is done. |
|
|
|
Post by bdhicks on Sept 3, 2017 18:20:55 GMT -8
Of course, in years since I started this, Broadway Limited has come out with the MILW 261, and presumably Rapido's Hudson they've got planned for 2019 will include CP 2816, both of which would have fit better with my modeling.
|
|
|
|
Post by theengineshed on Sept 4, 2017 5:24:27 GMT -8
That is some serious effort in regards to printing the frame on shapeways, hope she turns out to be a good runner.
|
|
|
|
Post by talltim on Sept 5, 2017 4:49:46 GMT -8
What does the replacement of a mazak chassis with a plastic one do for the weight?
|
|
|
|
Post by bdhicks on Sept 5, 2017 10:03:21 GMT -8
As a straight replacement I lose about one and a half ounces, although I have been stuffing lead shot into a few spots on the model, and I left some open space on the new frame to put more weight into, and I think I can get it at least back to the original weight.
Shapeways has 3 different processes for metal. Stuff like brass, bronze, and precious metals are done with lost-wax castings, but the QJ has too big of a frame for their wax printer. Their steel process is a multi-step thing which has a lot of intermediate handling and is actually not very good for precision work, especially with the part thicknesses I have. The aluminum process is actually very similar to their strong and flexible plastic process, and I could probably make it work with a few changes, but it would be nearly 15x as expensive and heavier than the plastic frame but still lighter than the original. I haven't really looked in to other services if they have anything better, I've been focused on getting a design that doesn't bind up first.
I have actually been a little surprised that modelers haven't really been giving 3d printing much attention on things like frames and gearboxes. It could really be a gamechanger for scratchbuilding.
|
|
|
|
Post by lvrr325 on Sept 5, 2017 10:35:50 GMT -8
Probably should run some extra frames and list them on eBay.
|
|
|
|
Post by bdhicks on Sept 5, 2017 11:15:53 GMT -8
I was planning on offering them through the Shapeways shop once I got the design finalized.
|
|
|
|
Post by craigz on Sept 5, 2017 16:58:58 GMT -8
I gather that Barfmann didn't have any parts available?
|
|
|
|
Post by bdhicks on Sept 5, 2017 17:29:01 GMT -8
I gather that the QJ was imported as a one-time thing and when I asked it was about 6 years later, Bachmann US redirected me to Bachmann UK, who then never responded. I expect any other frames made for this run had the same problem anyway (I think I remember someone on this forum mentioning that they used to have one, but once it stopped working they sent it in to Bachmann, who ended up just offering the replacement price in credit.) www.chinesemodeltrains.com/encyclopedia_qj.html says there was a change in the way the drawbar works between the first run (which my model is) and subsequent runs (which were not imported to the US), and as far as I can tell that would require them to make different frames for both the locomotive and tender. |
|
Deleted
Deleted Member
Posts: 0
|
Post by Deleted on Sept 5, 2017 18:02:16 GMT -8
I did a search on the bay last night and found a handful being sold on there. Only available from an overseas seller. Anywhere from $400+ - 600+, without and with sound.
|
|
|
|
Post by theengineshed on Sept 5, 2017 18:13:17 GMT -8
I did a search on the bay last night and found a handful being sold on there. Only available from an overseas seller. Anywhere from $400+ - 600+, without and with sound. LOL I did the same. Rather expensive locomotive considering the source... |
|
Deleted
Deleted Member
Posts: 0
|
Post by Deleted on Sept 5, 2017 18:27:41 GMT -8
5 or 6 years ago, I saw one locally at the GATS show in Wheaton, Ill. Don't remember the price exactly, around $250? or so, but it was tempting.
|
|
|
|
Post by bdhicks on Sept 5, 2017 23:55:18 GMT -8
I have been following them on ebay in case I can get a deal on a starting model for sister unit 7081. The models on ebay right now are all later runs, and I don't know if they have bad frames or not (and I suspect many of them are using old marketing pictures, which certainly doesn't help). There was one auction that ended a few days ago around $200. That unit was a first run and I could tell by the pictures it had the frame problems as mine did.
I don't remember what I paid, I think something around $150-200, which from what I can tell was around what it retailed for originally.
|
|
|
|
Post by talltim on Sept 6, 2017 1:42:51 GMT -8
|
|
|
|
Post by bdhicks on Nov 19, 2017 17:22:07 GMT -8
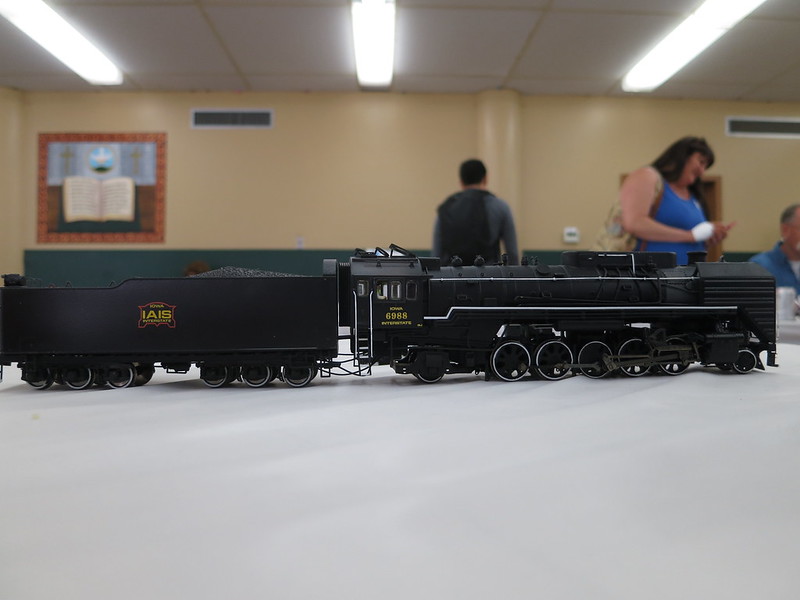
I made some more progress on this project and I'm just about ready to paint. I'm going to wait until after it's painted to mount the bell and lights. 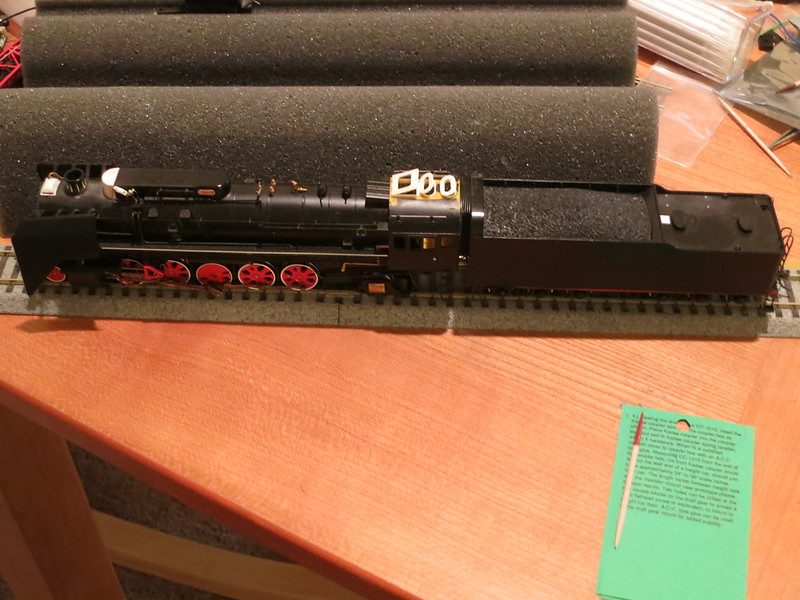 I had decided I wanted the cab roof vents modeled open, since that's how they seem to usually be on the prototype. I had to change them up anyway because they're different on the IAIS units than the Bachmann model. Originally I though to try to make them positionable, but I decided that would be too fragile and now there's a brace on the open edge. I also added a linkage for the new whistle, and replaced the another linkage (I think for the ash pan) that had broken from my repeated disassembling and reassembling. I put covers over the journals on the trailing truck like on the prototype. 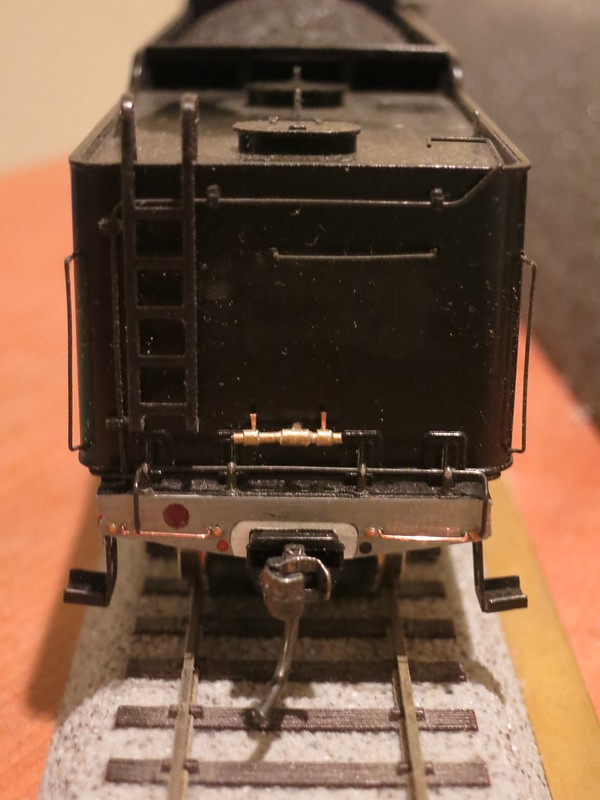 On the tender I added grabs and removed the red light from the end. I also made up the plumbing to connect to the auxiliary tender and modified the coupler mount so it takes a standard Kadee metal coupler instead of stock plastic coupler. 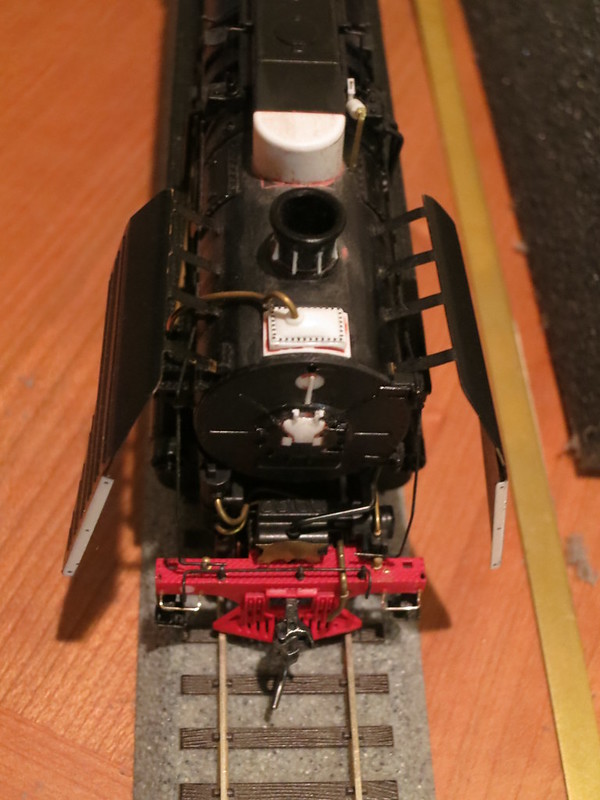 I added rivet decals to the feedwater heater, and bent some brass wire for the pipe in to it. I added some more pipes above the pilot, since that area is no longer hidden behind the big herald banner. 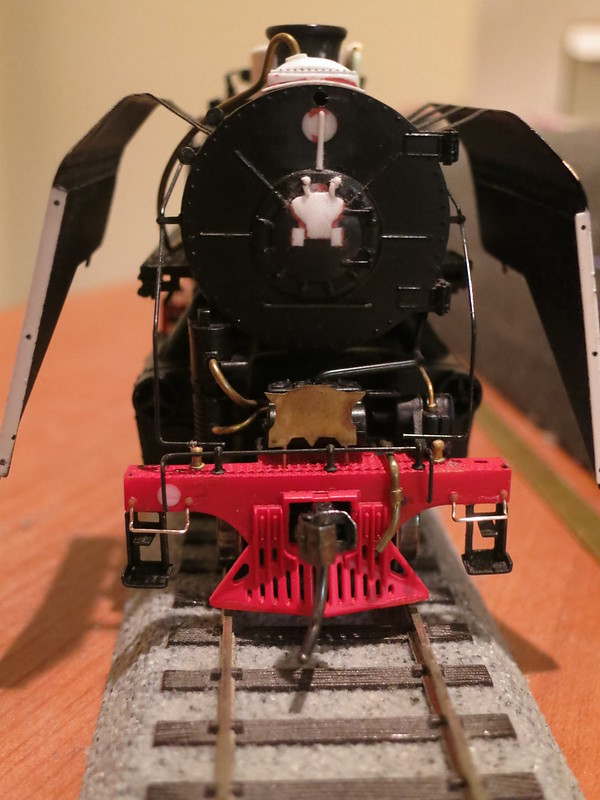 On the front I made the panel for the front herald and added grab irons and the brake line. |
|
|
|
Post by es80ac on Nov 19, 2017 17:34:19 GMT -8
Did you modified the pilot at all? The bachmann pilot does not seem quiet right to my eyes. Also the trailing trucks looks way too flimsy.
|
|
|
|
Post by bdhicks on Nov 19, 2017 17:51:43 GMT -8
Other than the things which are obvious from the pictures, the only thing I did to the pilotwas smooth up the bottom edge where they had molded some comb-like things which I don't see in any of the prototype pictures.
|
|
|
|
Post by es80ac on Nov 19, 2017 18:10:38 GMT -8
Other than the things which are obvious from the pictures, the only thing I did to the pilotwas smooth up the bottom edge where they had molded some comb-like things which I don't see in any of the prototype pictures. Ok. Btw the comb like things on the real thing are rubber pads that almost rubs against the rails, they are in essence mini rock catchers that removes rocks or other small debris from on top of the rails. |
|
|
|
Post by bdhicks on Jun 17, 2018 15:08:38 GMT -8
|
|
|
|
Post by NCC42768 on Jun 18, 2018 14:32:43 GMT -8
VERY nice, glad to see this one finished, I got to ride behind it a couple years ago.
|
|
|
|
Post by valenciajim on Jun 19, 2018 6:36:01 GMT -8
You did a terrific job on this. Just wondering, how does the locomotive run?
|
|
|
|
Post by bdhicks on Jun 20, 2018 17:30:04 GMT -8
Admittedly, it hasn't yet. I've verified that the frame will roll with all of the rods and valve gear on, and that the gear tower will mesh with the worm, but I still haven't gotten it all wired together.
|
|
|
|
Post by edwardsutorik on Jun 20, 2018 19:35:47 GMT -8
Brian,
I admire your commitment to this project. I saw the loco at Richmond, and it looked great.
Ed
|
|
|
|
Post by bdhicks on Jun 26, 2018 22:01:57 GMT -8
It moves.
No sound yet, and I still need to do a few more tweaks.
|
|
|
|
Post by bdhicks on Jul 30, 2018 9:50:47 GMT -8
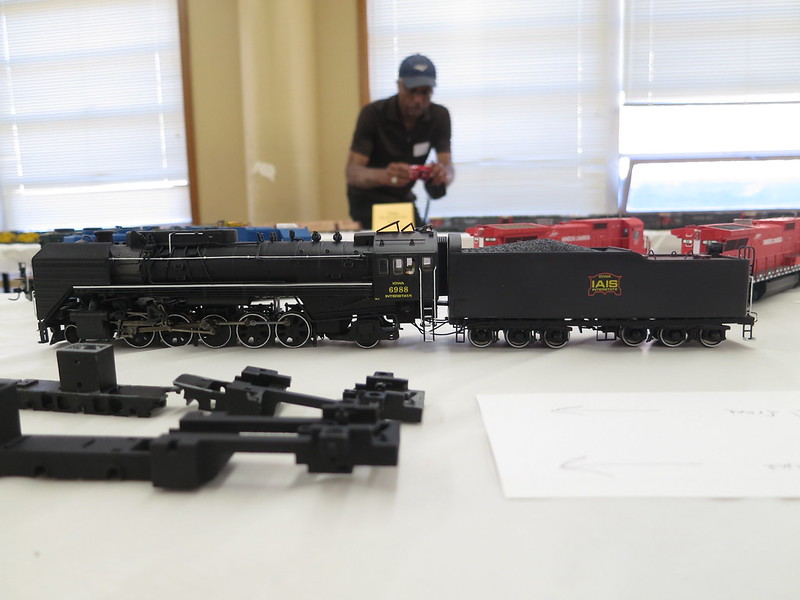
Mechanically, it's not the smoothest runner, so there are probably some tweaks in store. Maybe my frame is off, maybe the drivers came out of quarter, maybe it's an issue from the weird undersized center driver, or maybe some combination of those. An application of bullfrog snot is in order, as well. From a modeling perspective, it's pretty much done except I'll want to spruce up the coal load eventually. 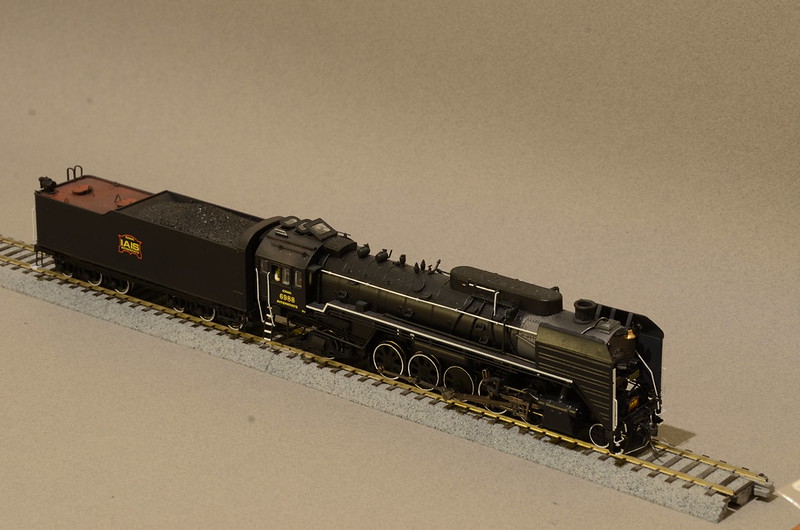 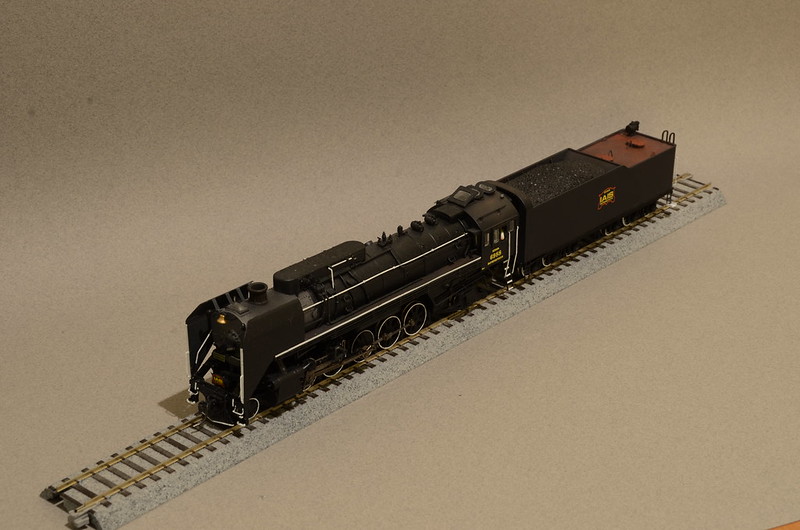 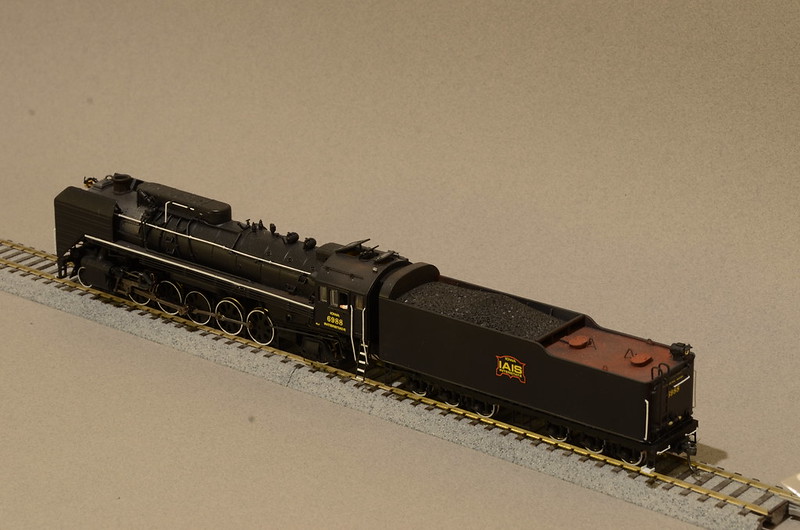 |
|
|
|
Post by es80ac on Jul 30, 2018 10:17:40 GMT -8
The undersizing center driving wheel definitely is contributing to the running issue. The earliest run of the Bachmann' QJ have these weird undersized center driver, they claim it is to prevent shorting at the turnouts. The later runs has the full sized center driver. Also I heard the valve gears on these are not very durable, they get worn down and could also cause running issues.
|
|
|
|
Post by bdhicks on Jul 31, 2018 11:23:14 GMT -8
|
|
|
|
Post by bdhicks on Aug 20, 2018 12:58:32 GMT -8
|
|
|
|
Post by adb968008 on Oct 30, 2018 6:25:50 GMT -8
I have a QJ that has rotted out as well.
I looked over Shapeways but couldnt find this chassis replacement.
Is this replacement 3D chassis available ? I’d love to get my old one back to life.
Many thanks in advance
John
|
|
|
|
Post by bdhicks on Oct 30, 2018 8:15:08 GMT -8
I want to make a few more tweaks before I put it up on Shapeways, but I can't really work on it right now.
|
|


