|
|
Post by mlehman on Mar 4, 2014 22:32:35 GMT -8
I have about a dozen of the BLI CZ cars on the layout. They're bright as heck, especially now that I've dimmed the lights in the rest of my passenger rolling stock. Not sure what the exact circuit used is, but the heart of it seems to be this small circuit board near the center of each car. The top side 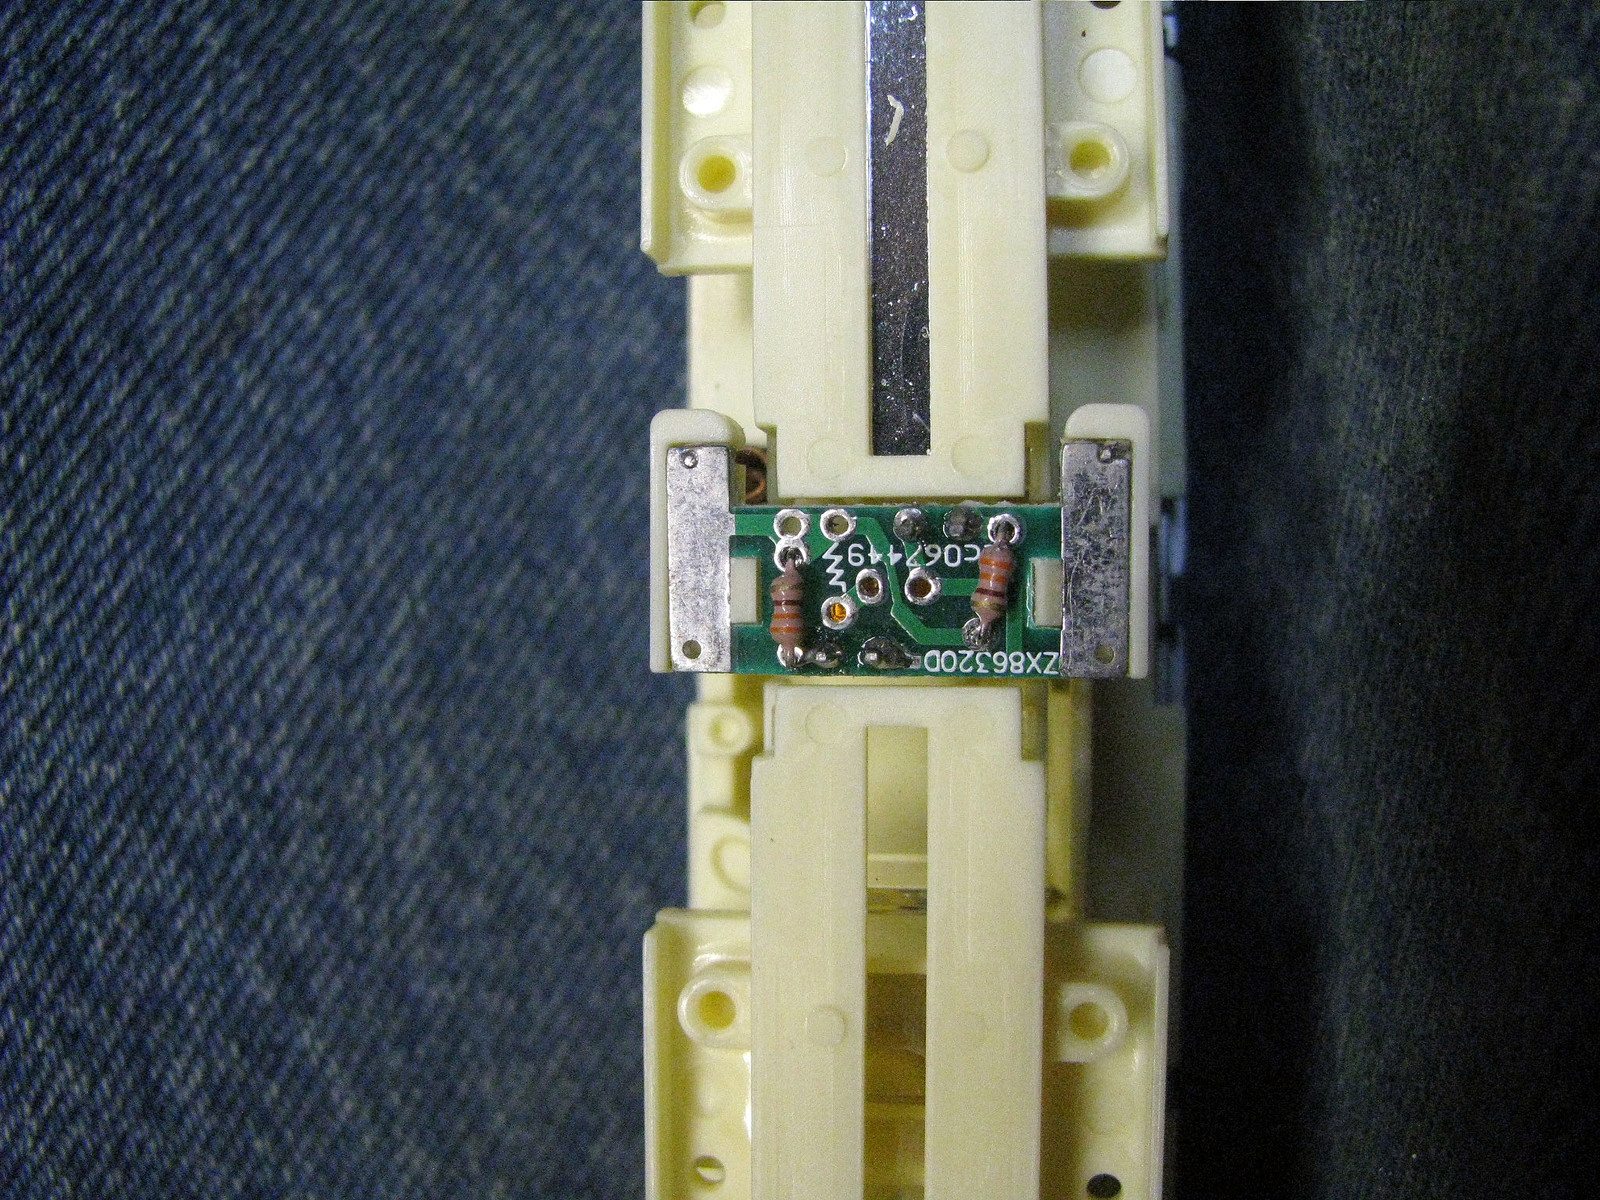 The bottom side 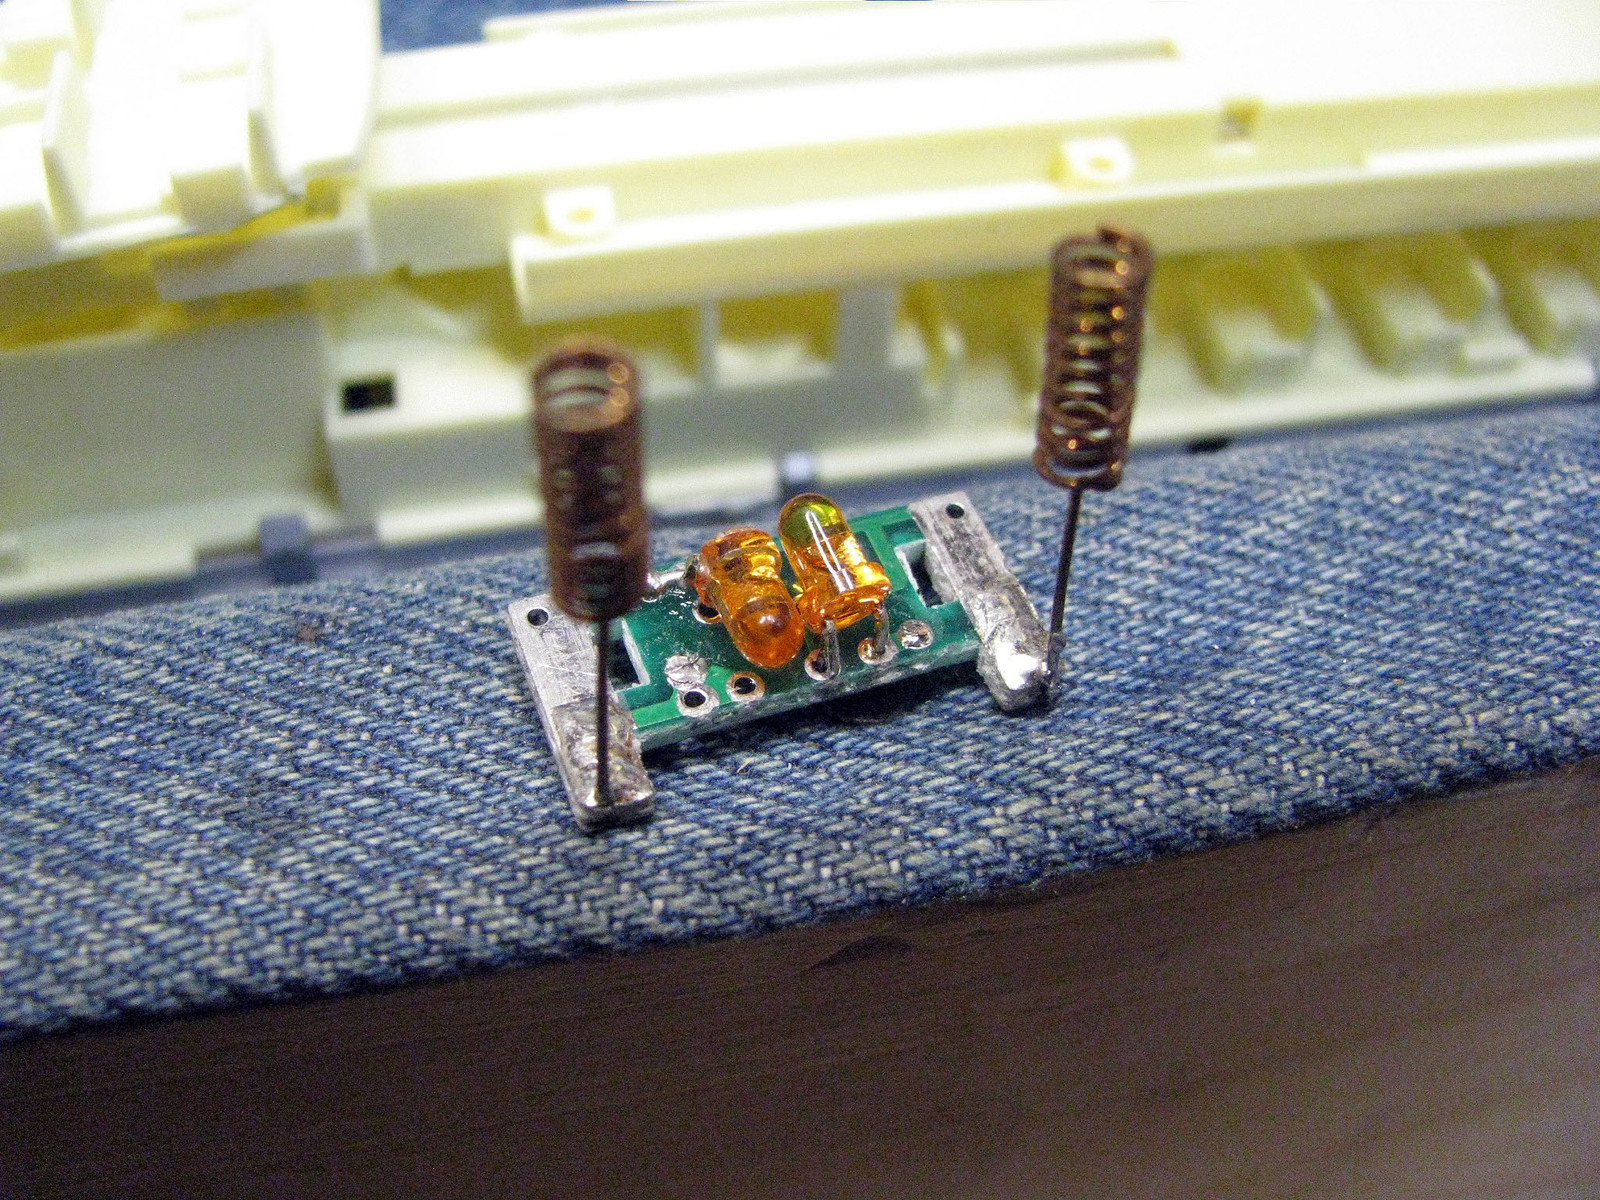 To open the car, use the tool provided with each one or a small screwdriver and follow the instructions. The floor and interior pop right out, just be sure to take the uncoupling gear lose by the coupler on each end so it doesn't get mangled or lost. Once the car is open, the circuit board for the lights sits in the middle of each car. In the dome cars, it is covered by one end of the dome car seating insert, which pops off easily. 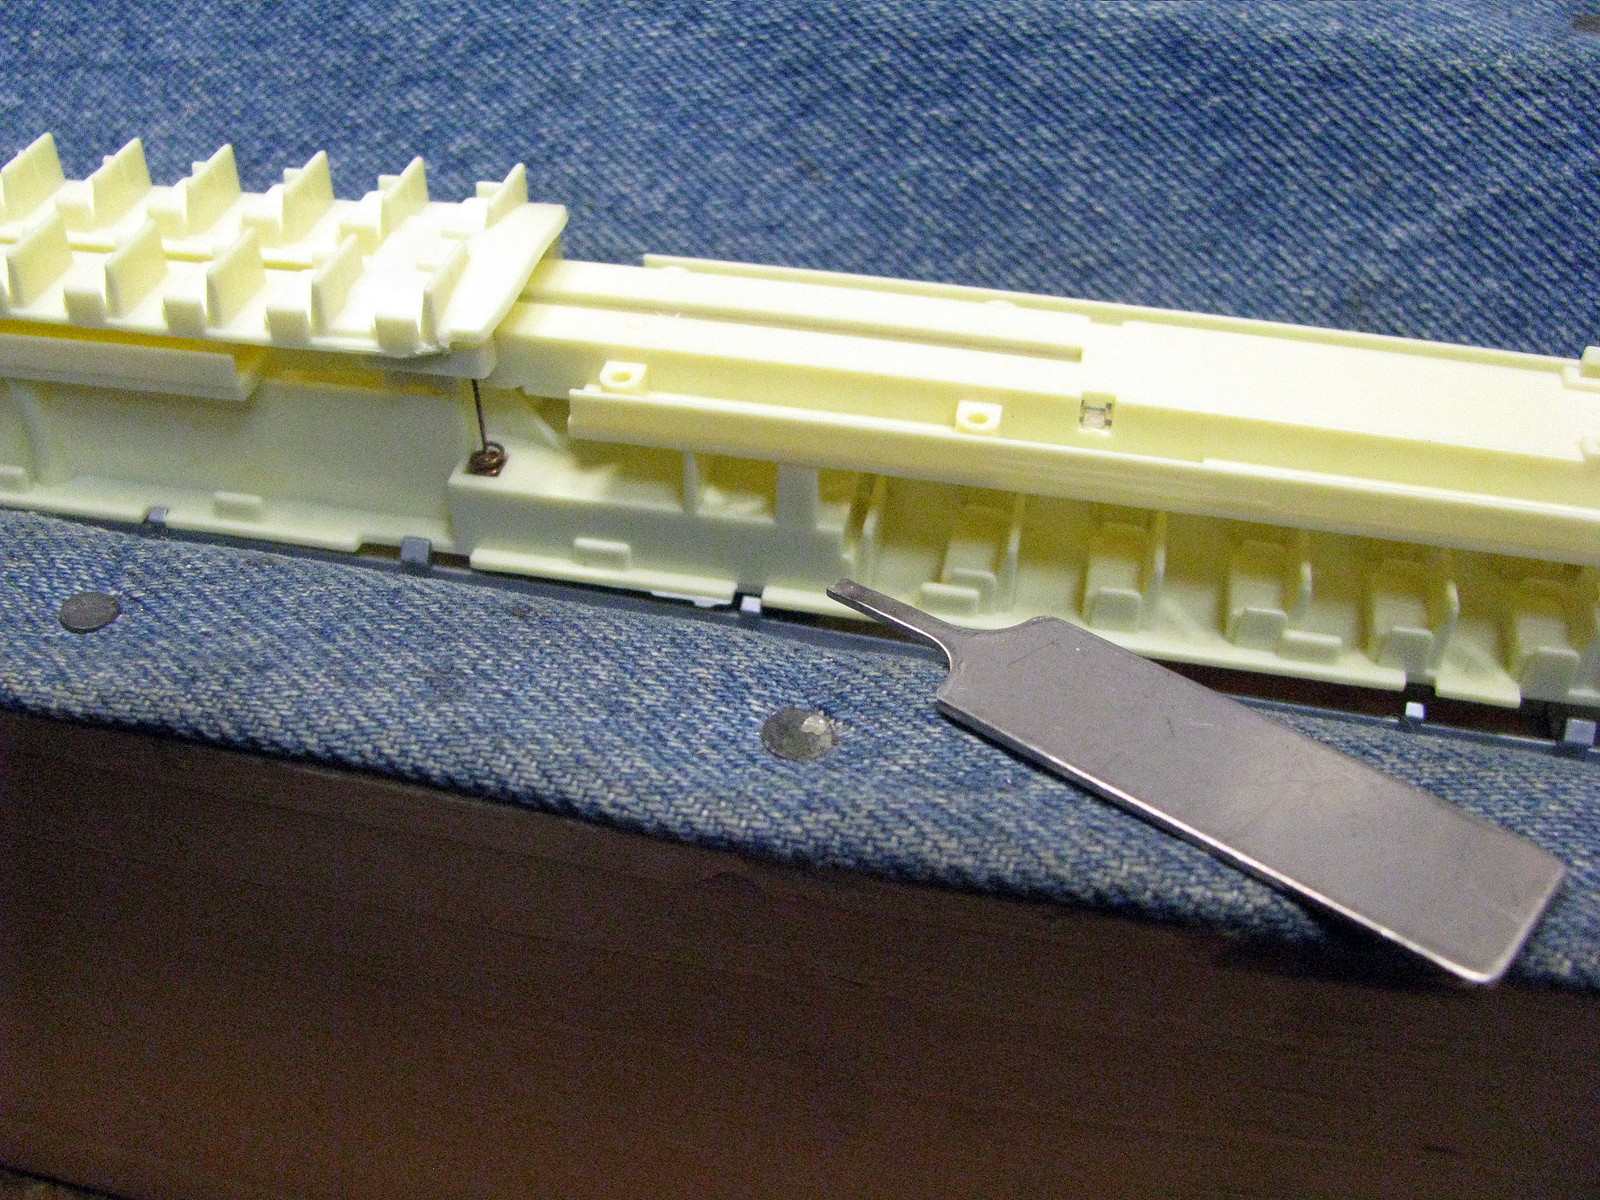 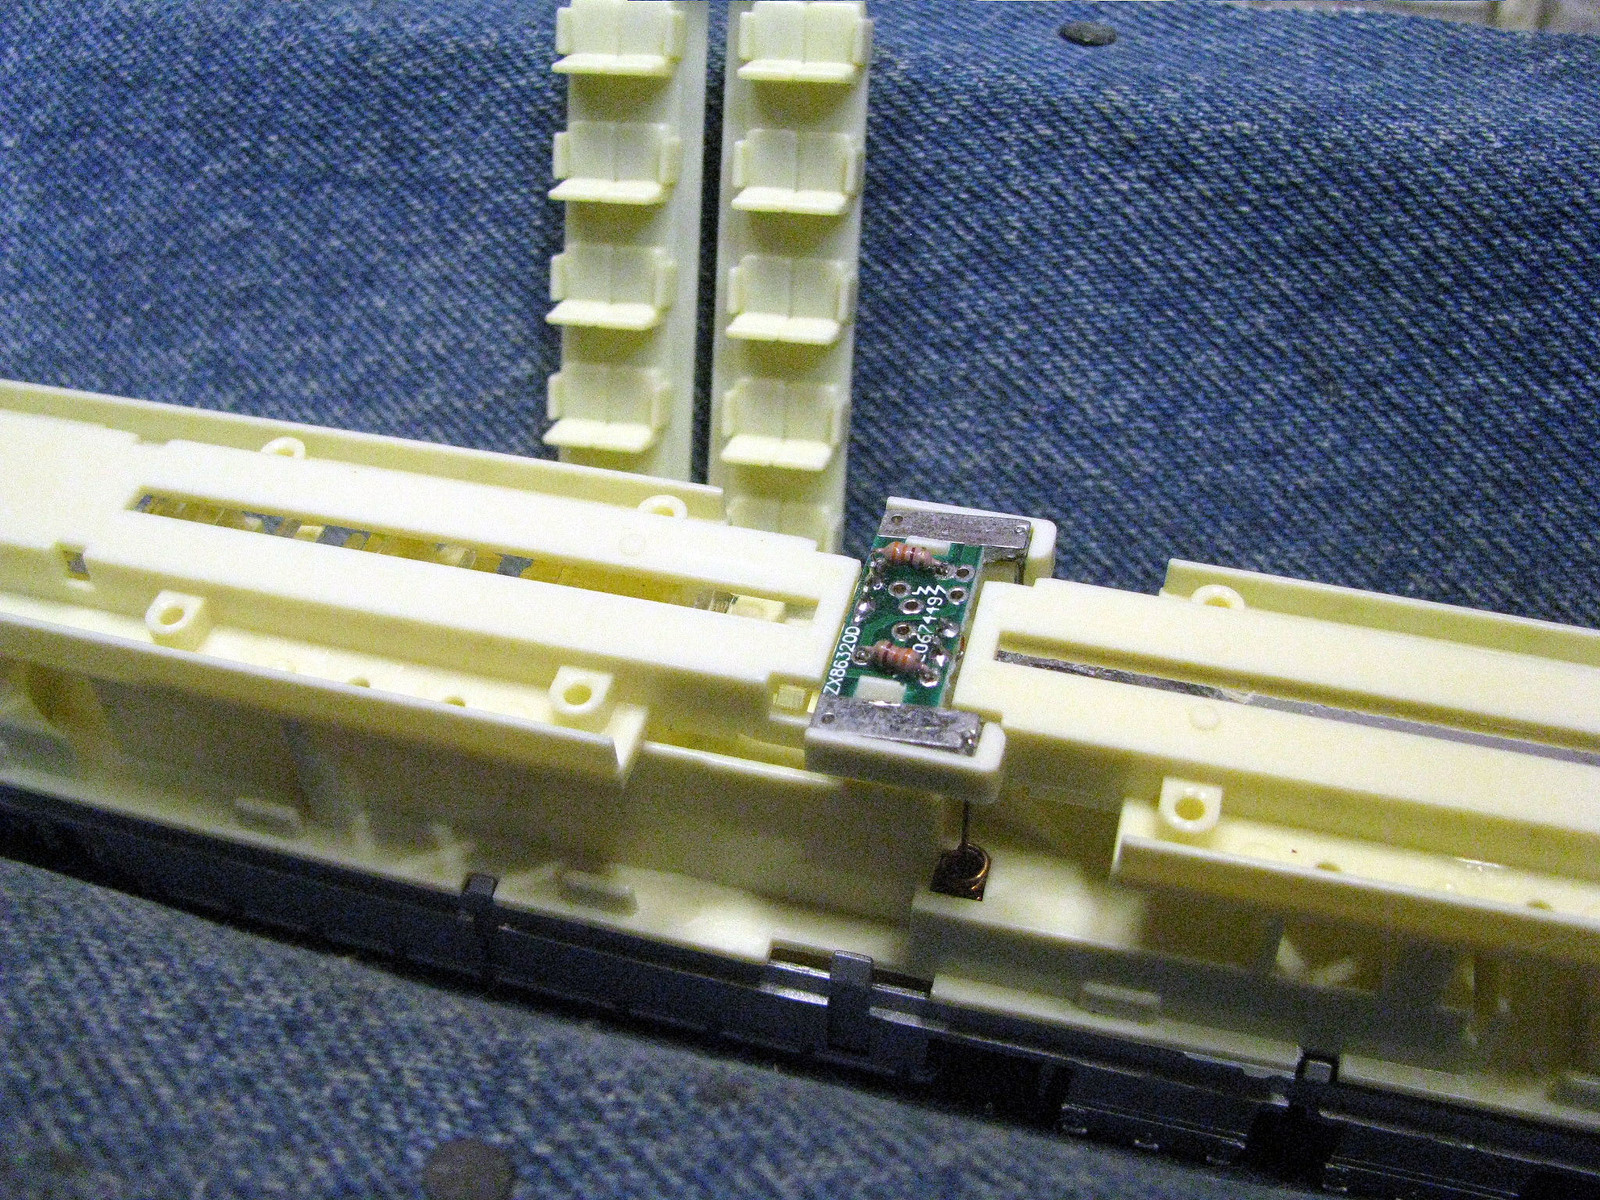 The springs simply project down to a metal strip, which carries the power from the pickups on the trucks. Two small tabs engage the circuit board and need to be released, then the whole assembly can be worked around the holder and removed. 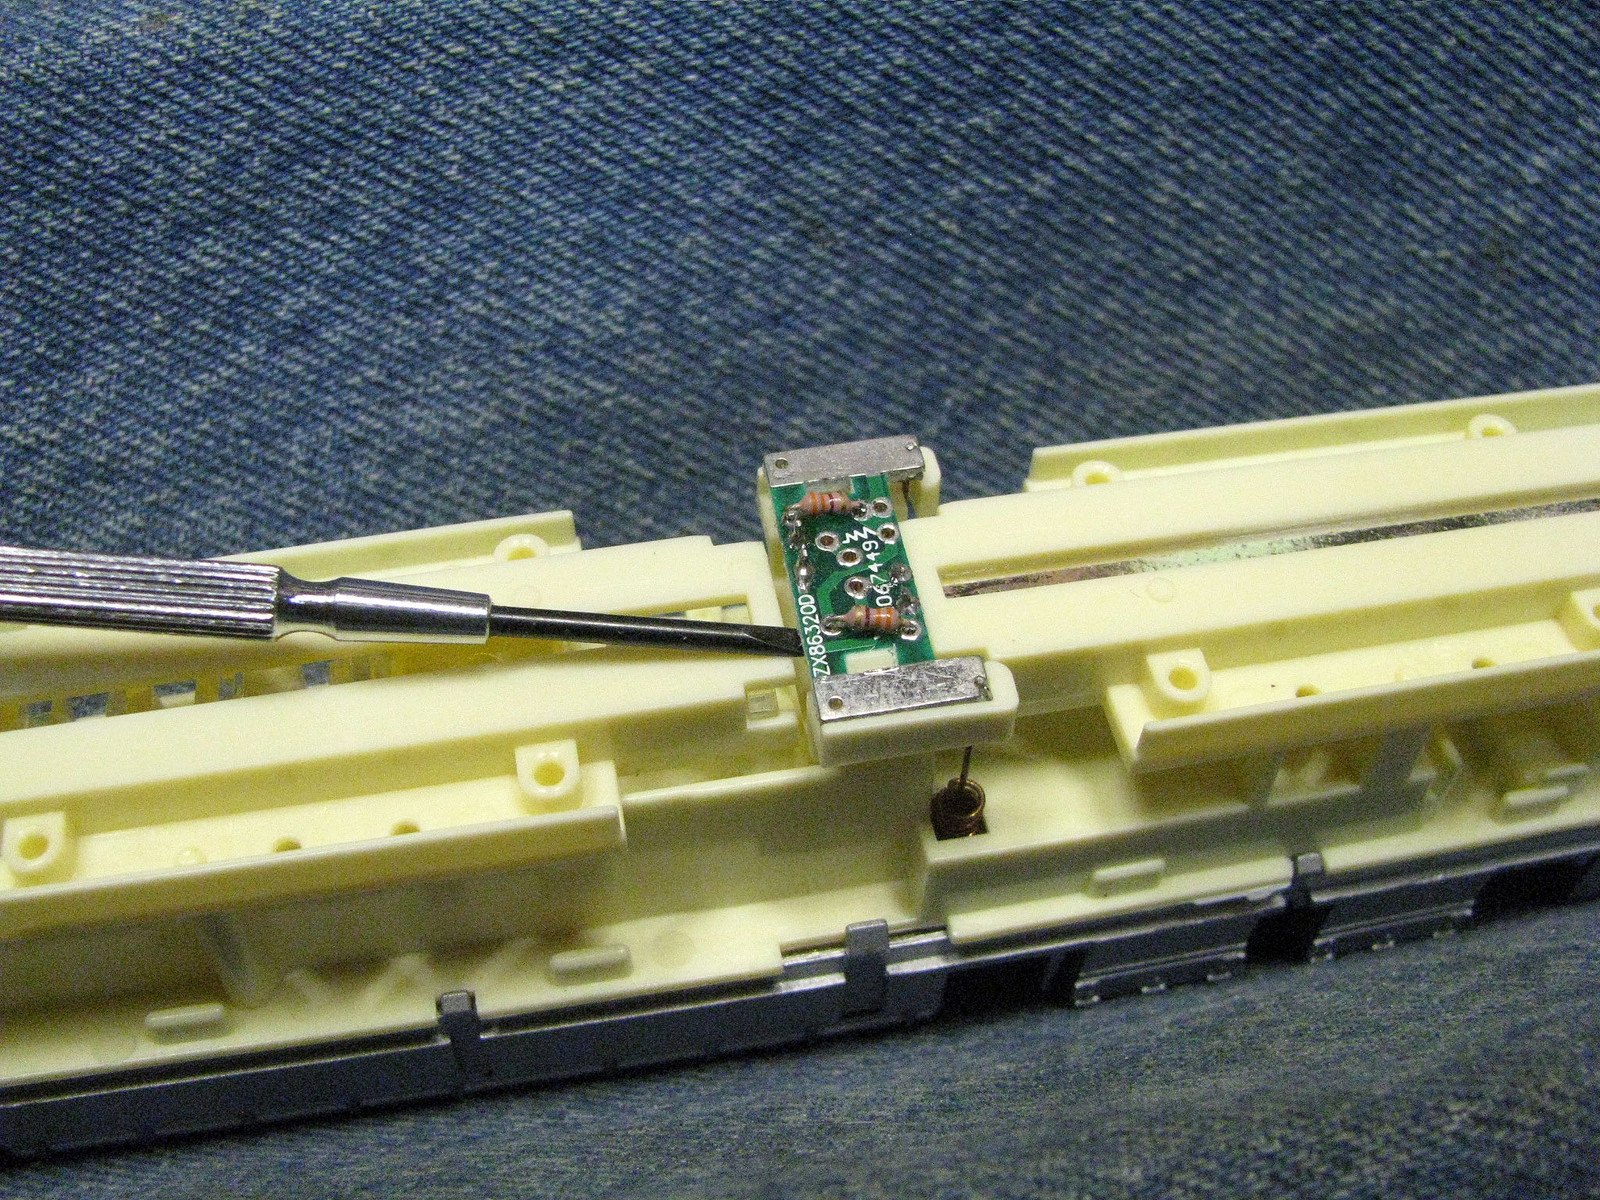 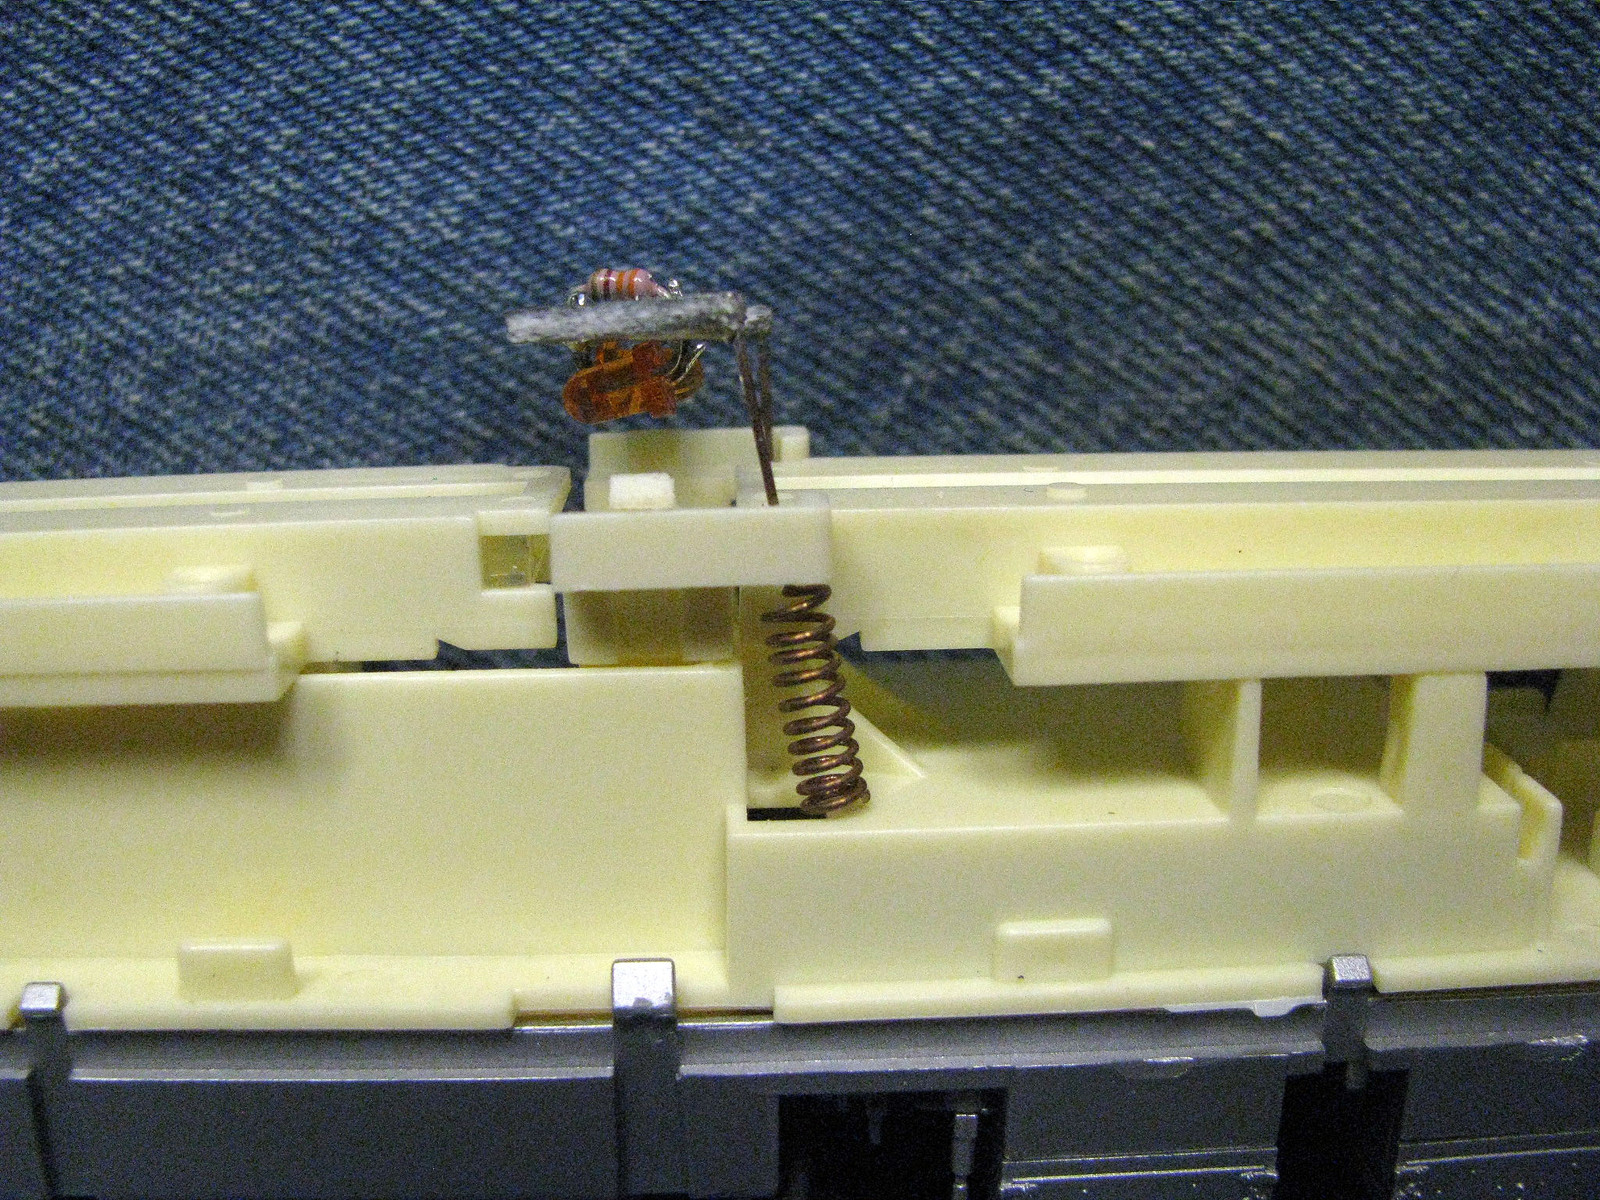 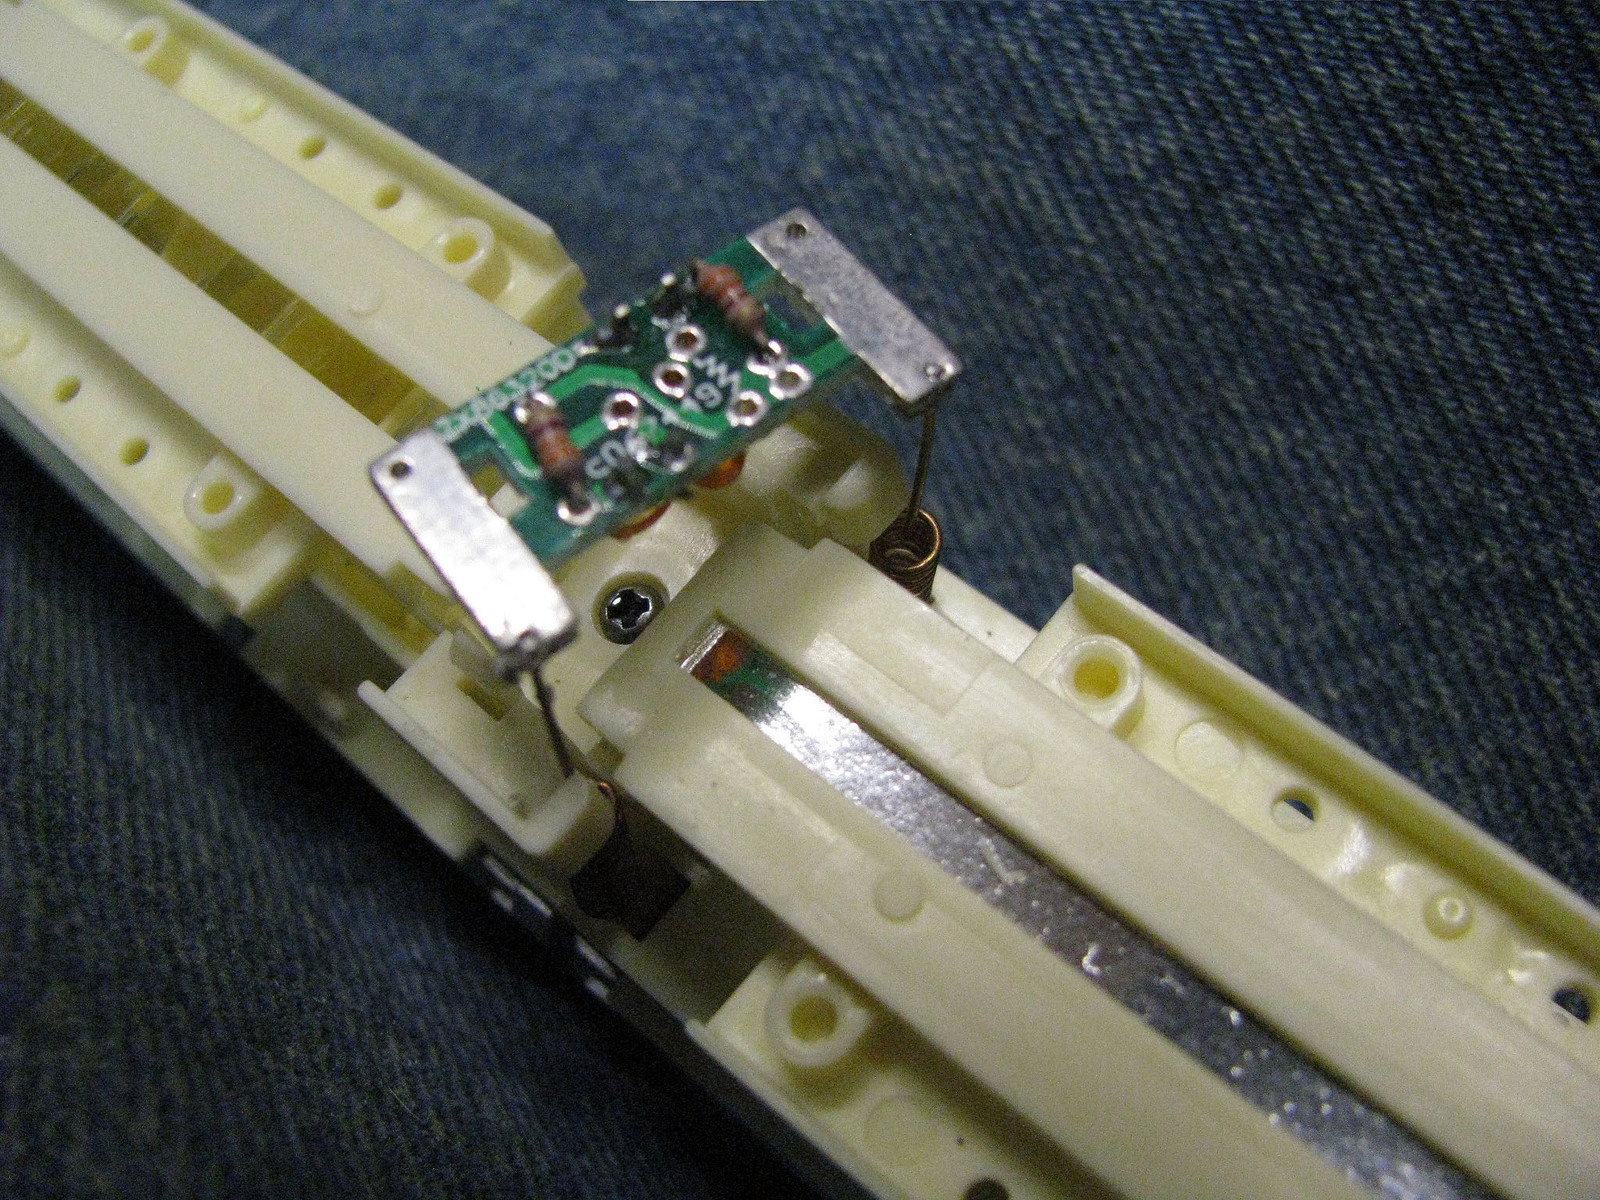 There is one 330 ohm resistor for each of the two LEDs that light most cars. Extract the resistors and clear the holes with a suitable drill bit. 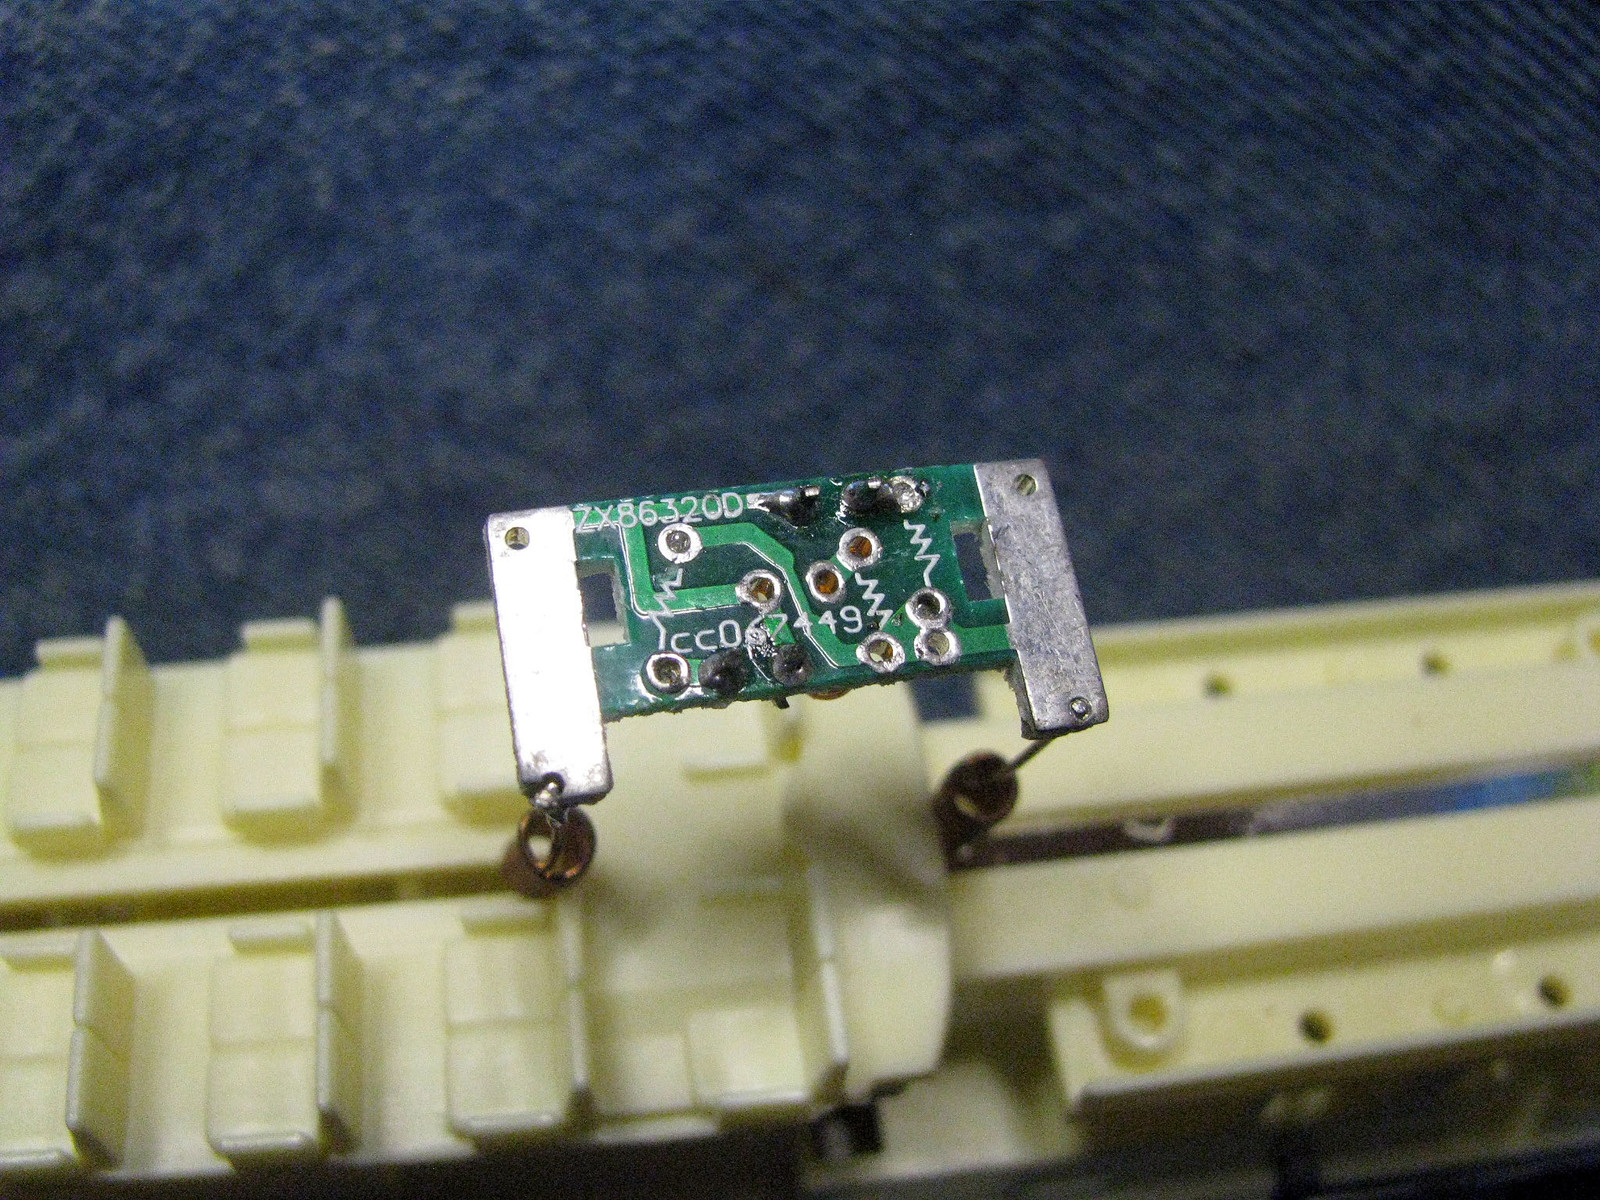 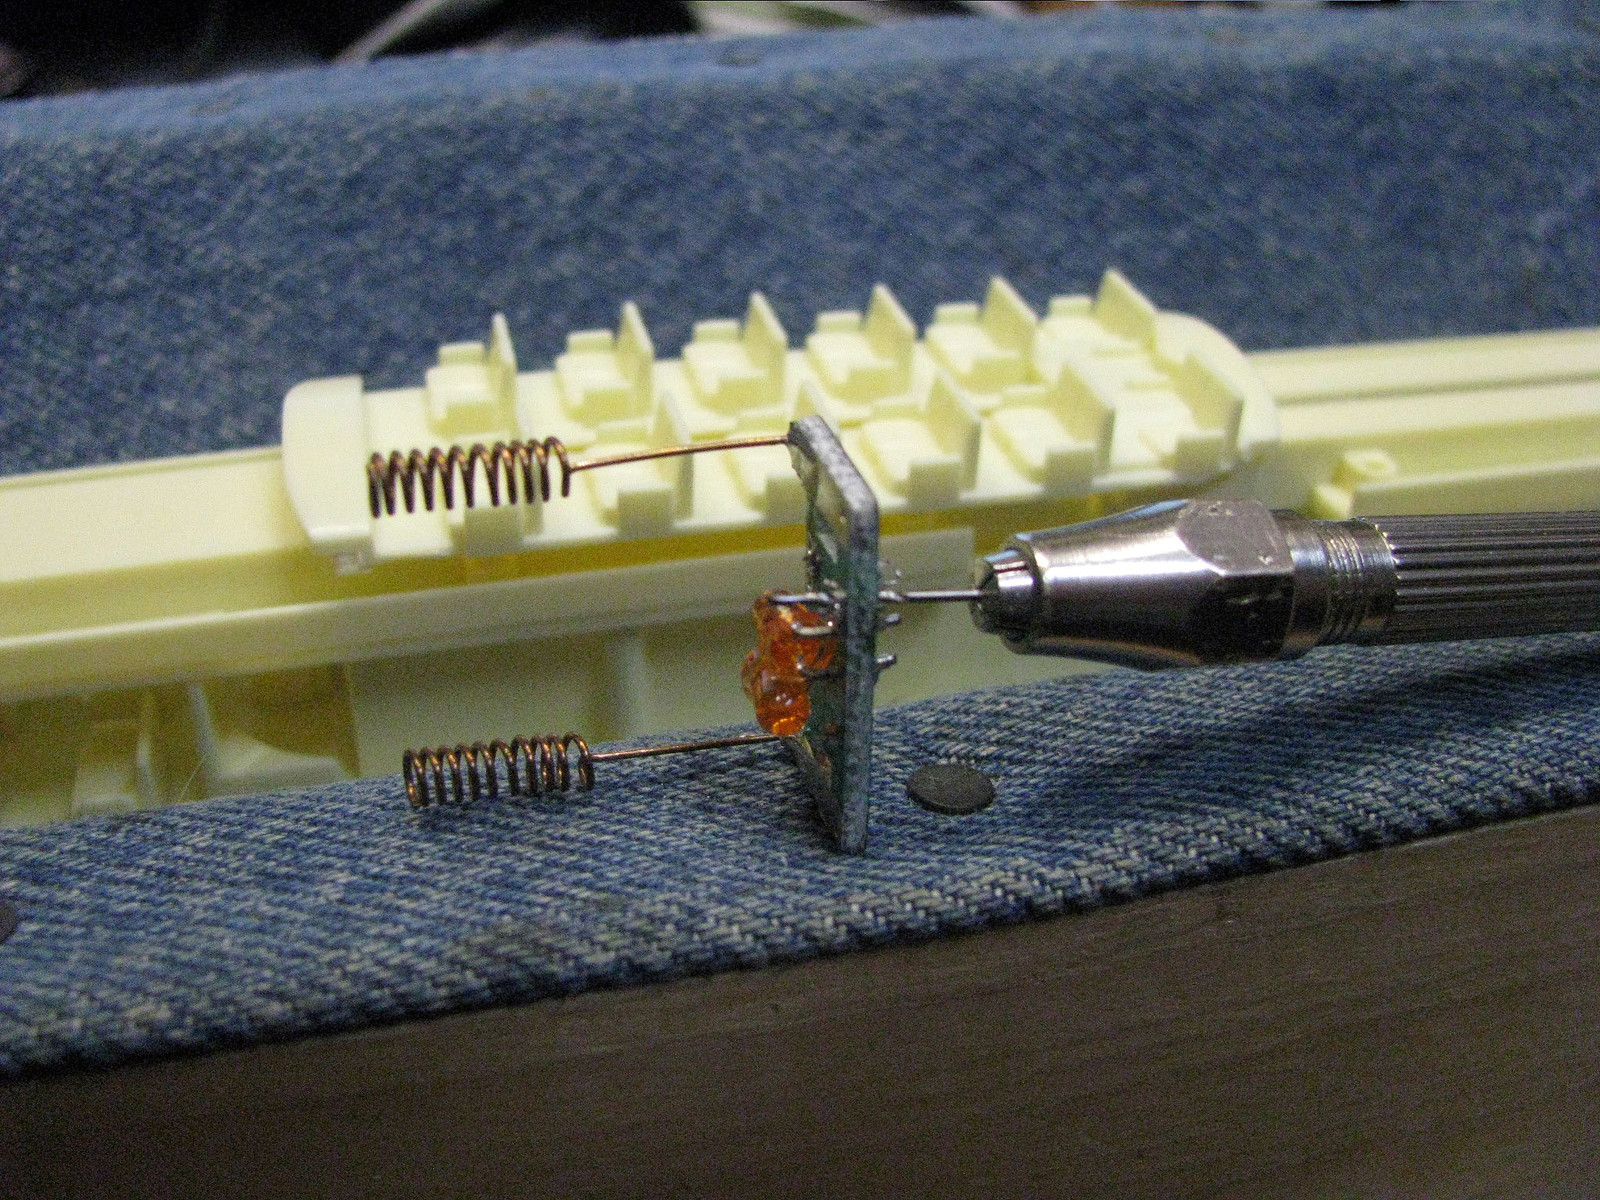 For the dome cars, I used 1500 ohm resistors, for the other cars mostly 1000 ohm resistors. There will be some variance in lighting, but that's a good thing IMO. 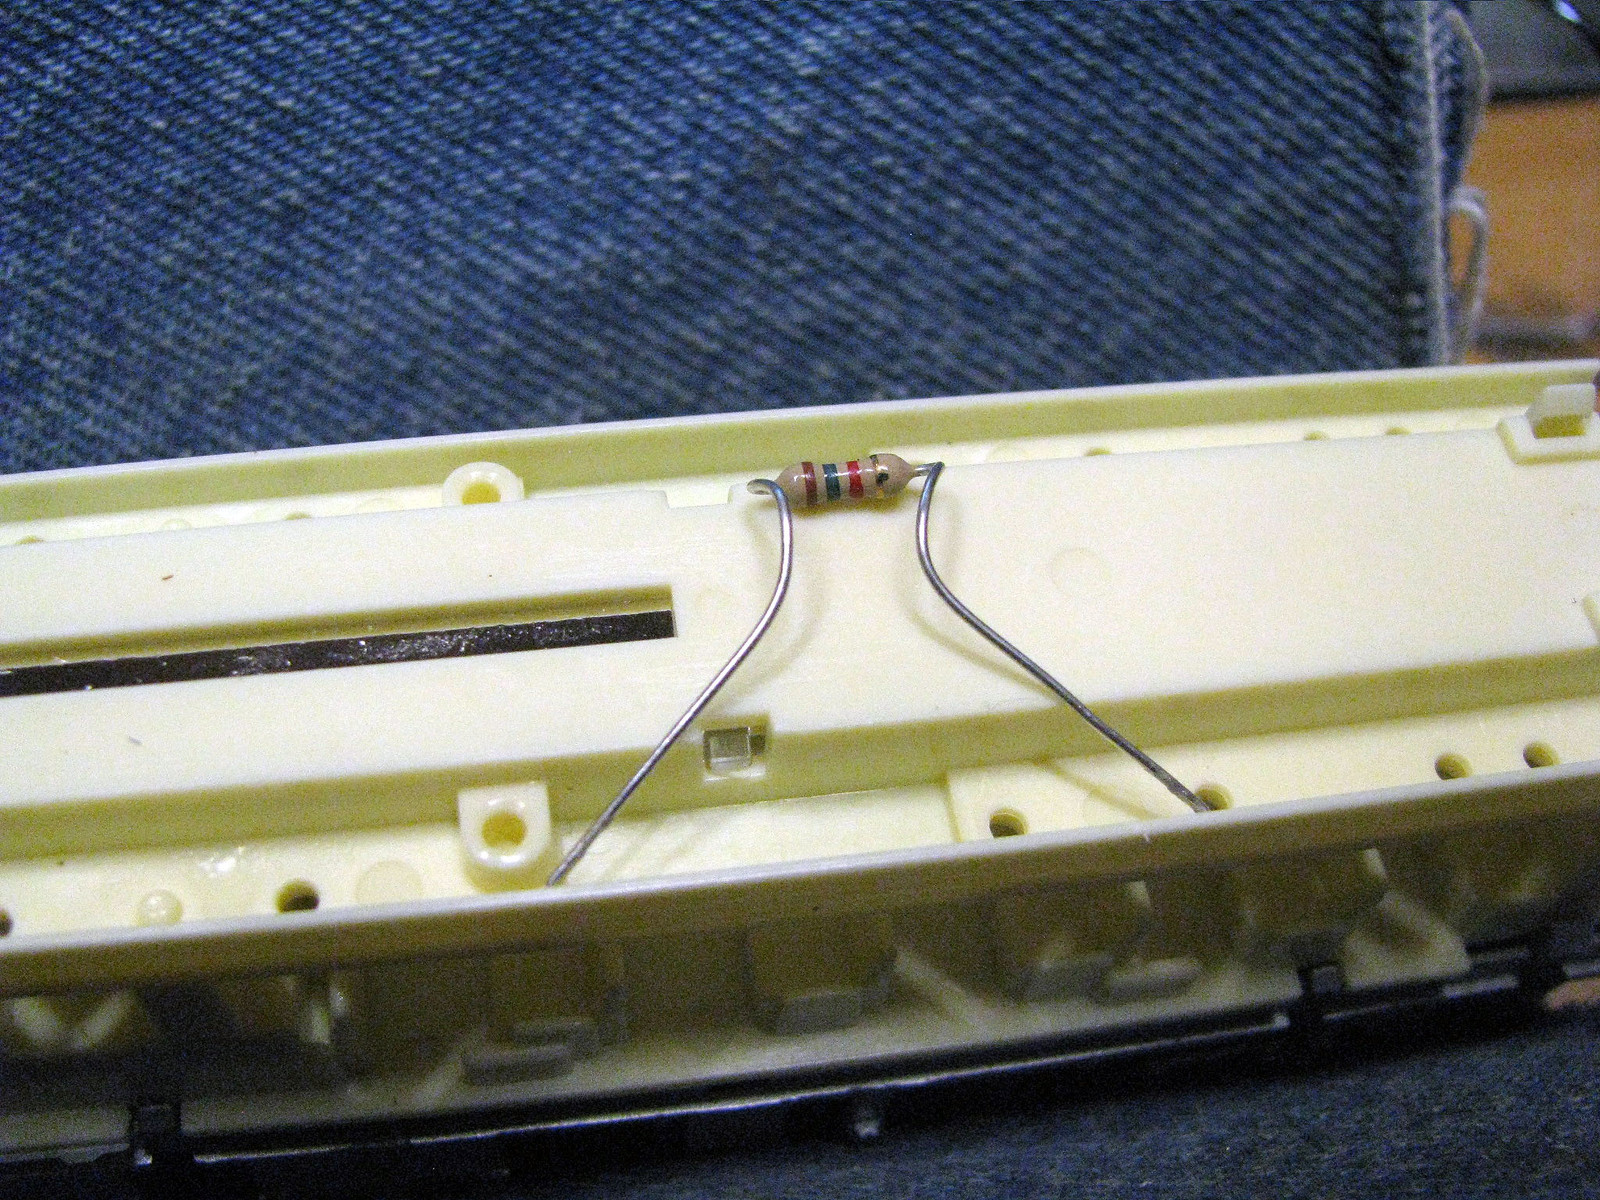 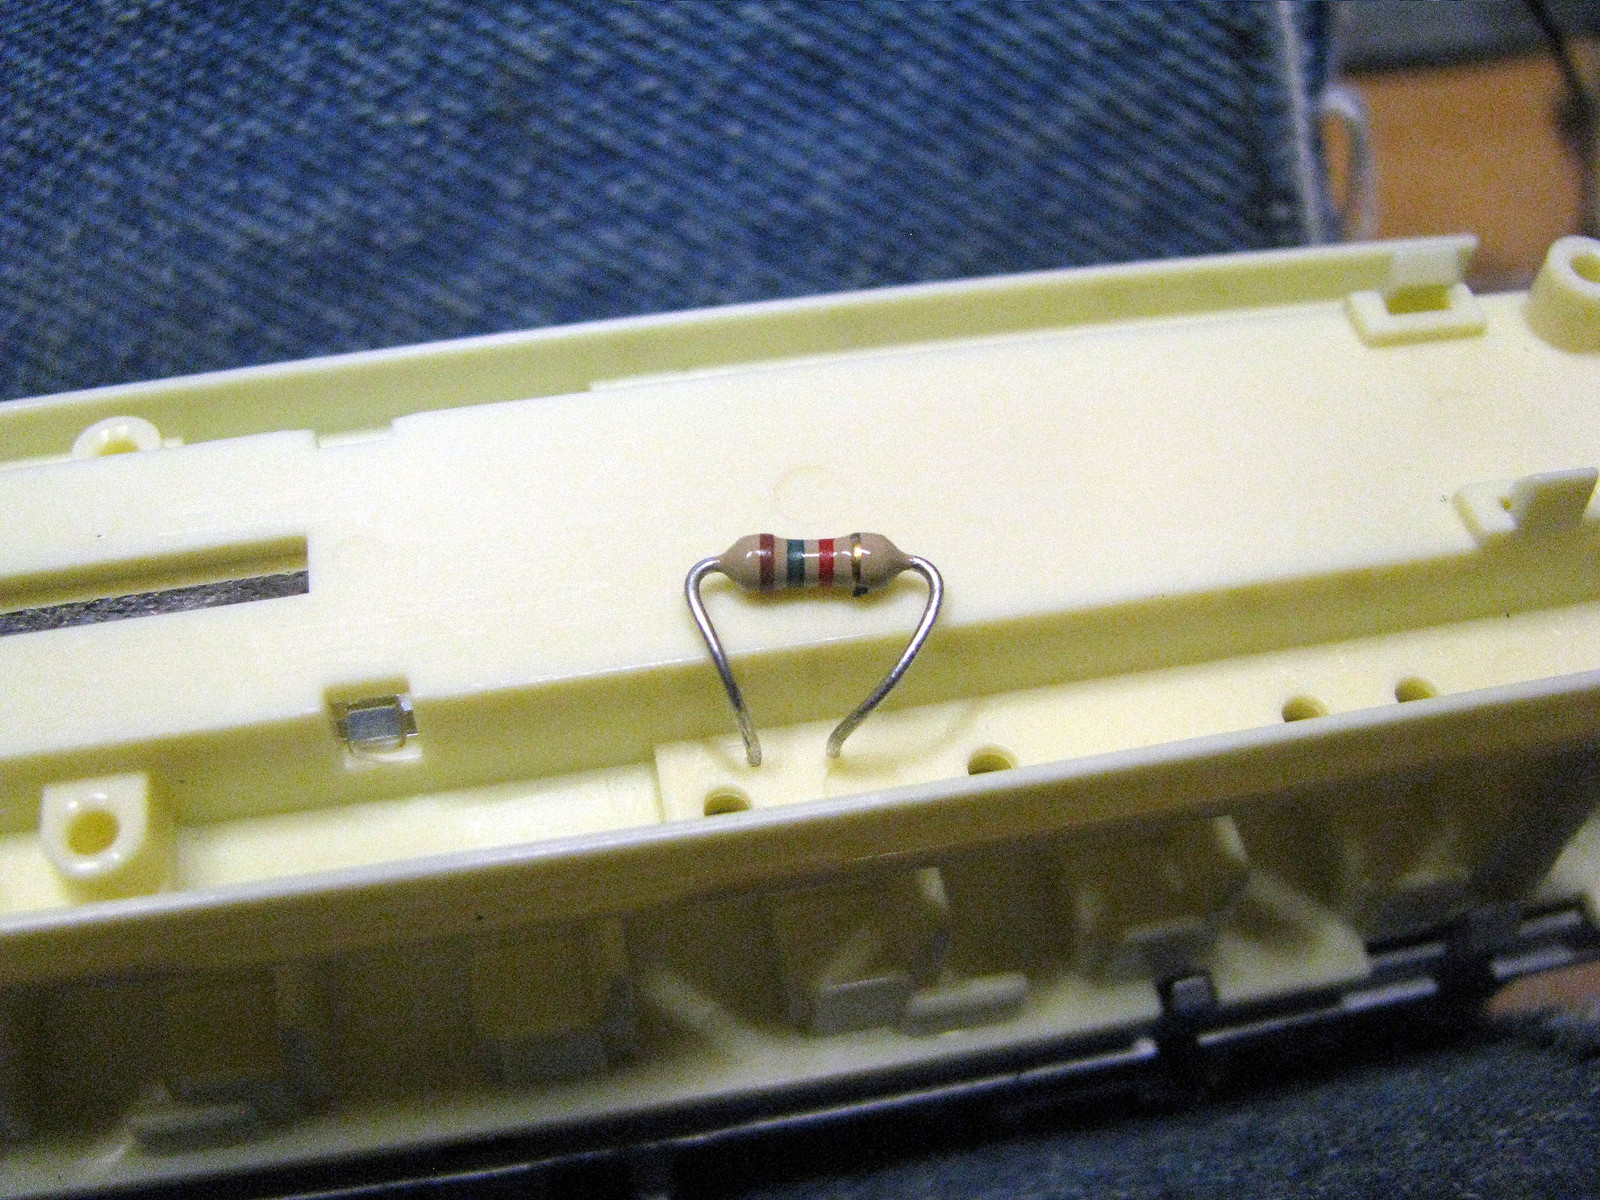 You want to solder the resistors back into the same holes the old ones came out of. Leave enough so that each can be bent over toward the center to reduce height. It should be noted that the board has 1/8 watt resistors, which are not real common. The more typical 1/4 watt resistors will still fit under the dome seating if you follow this method. The other cars have a bit more elbow room. 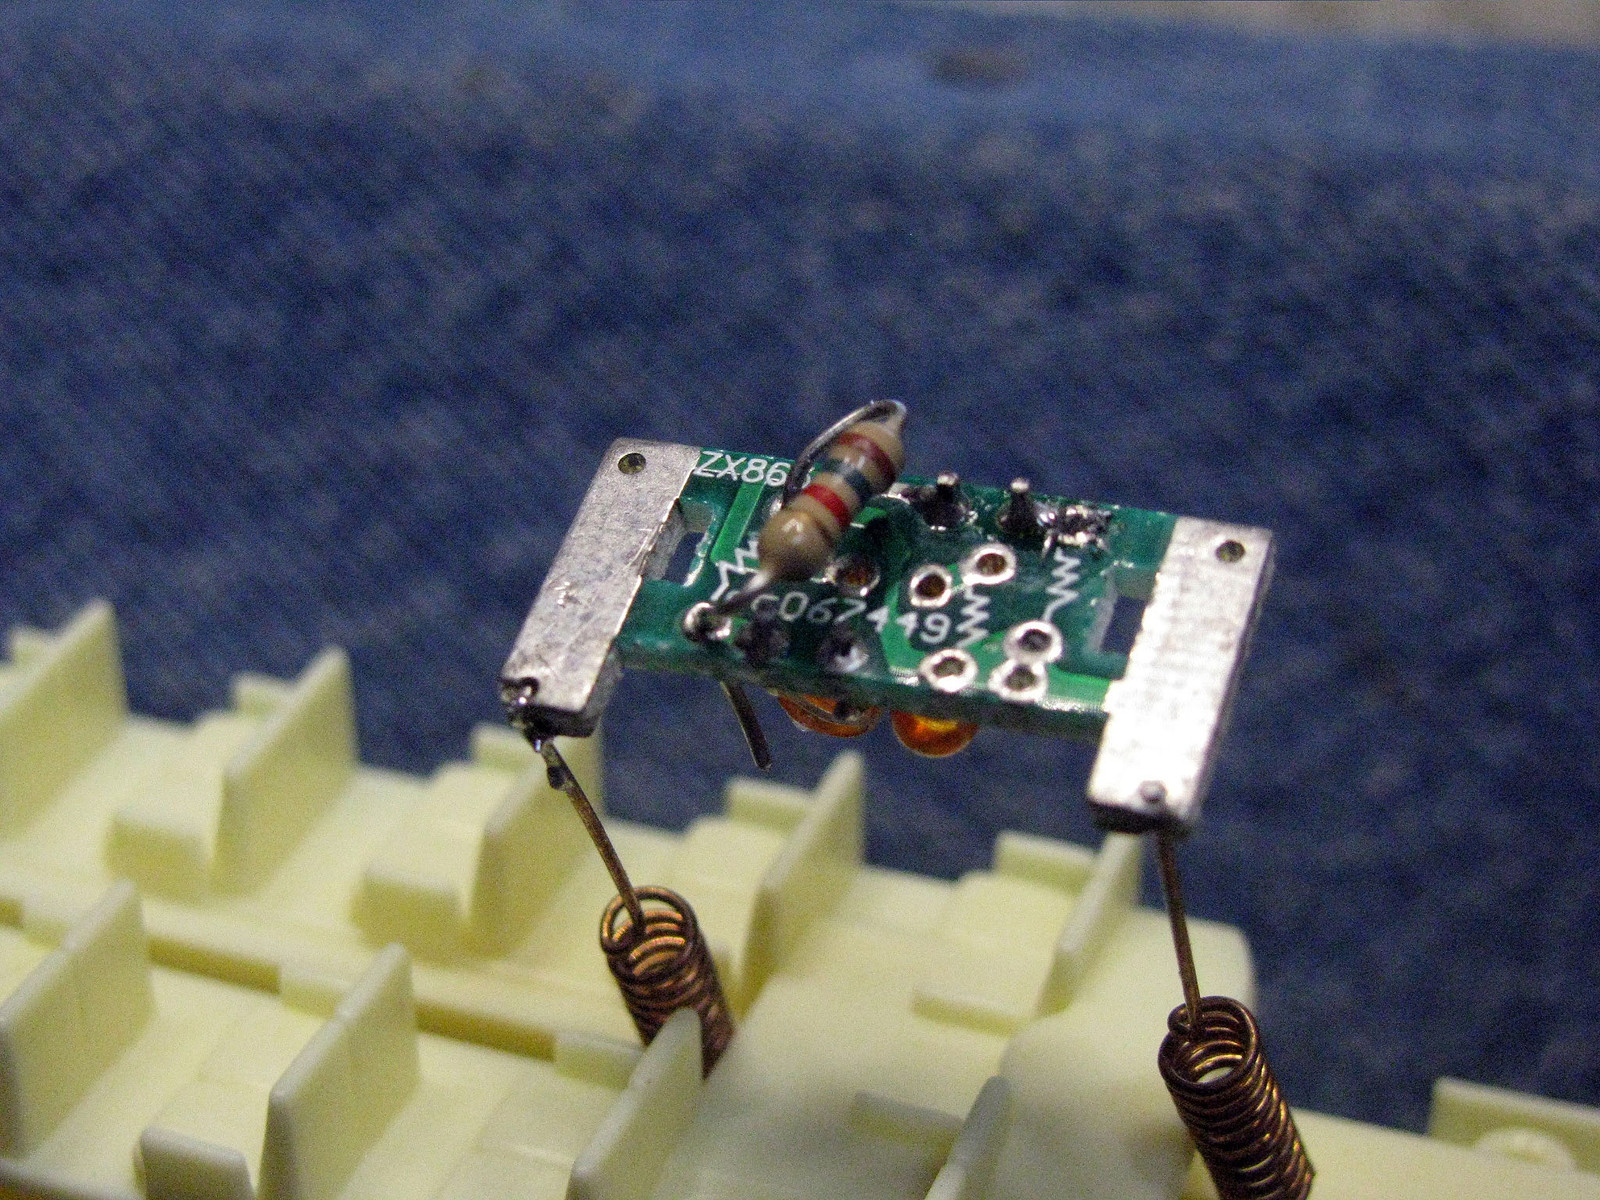 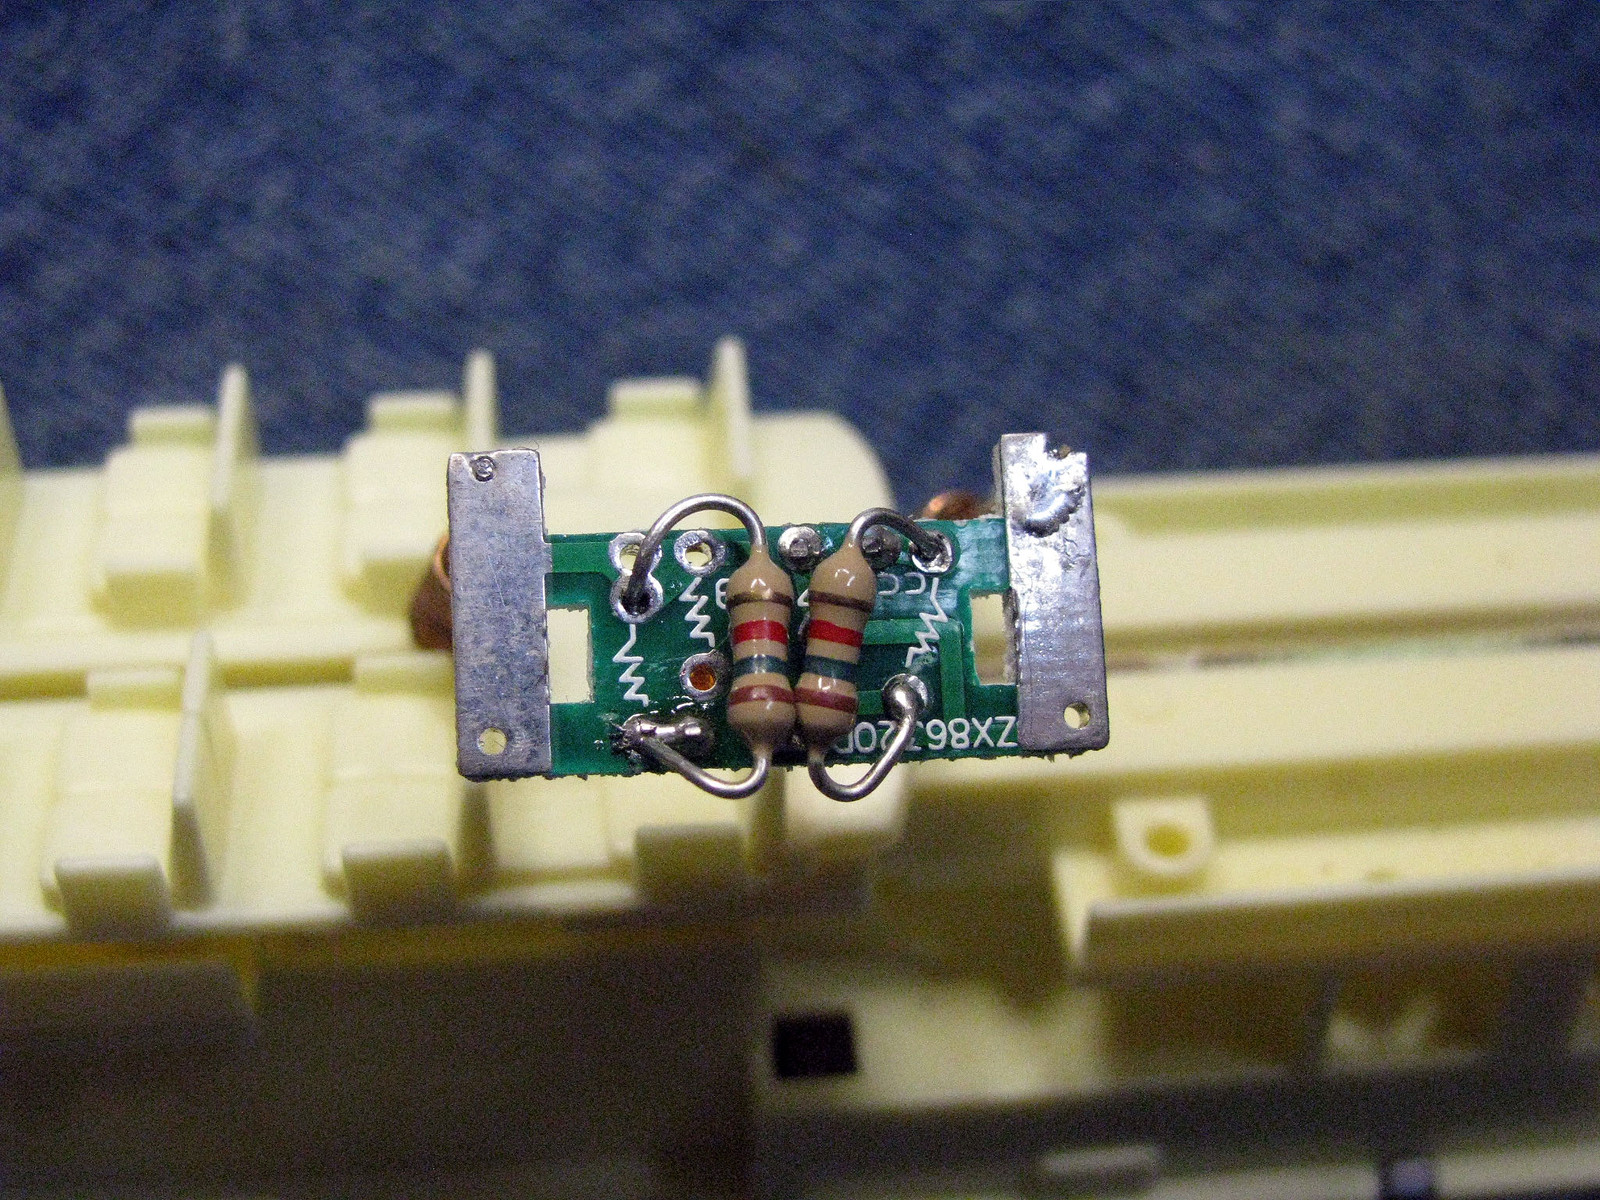 Once done, re-install the circuit board in its holder. The dome seating doesn't need to fit quite all the way down, but it should be close or it won't fit the shell correctly. 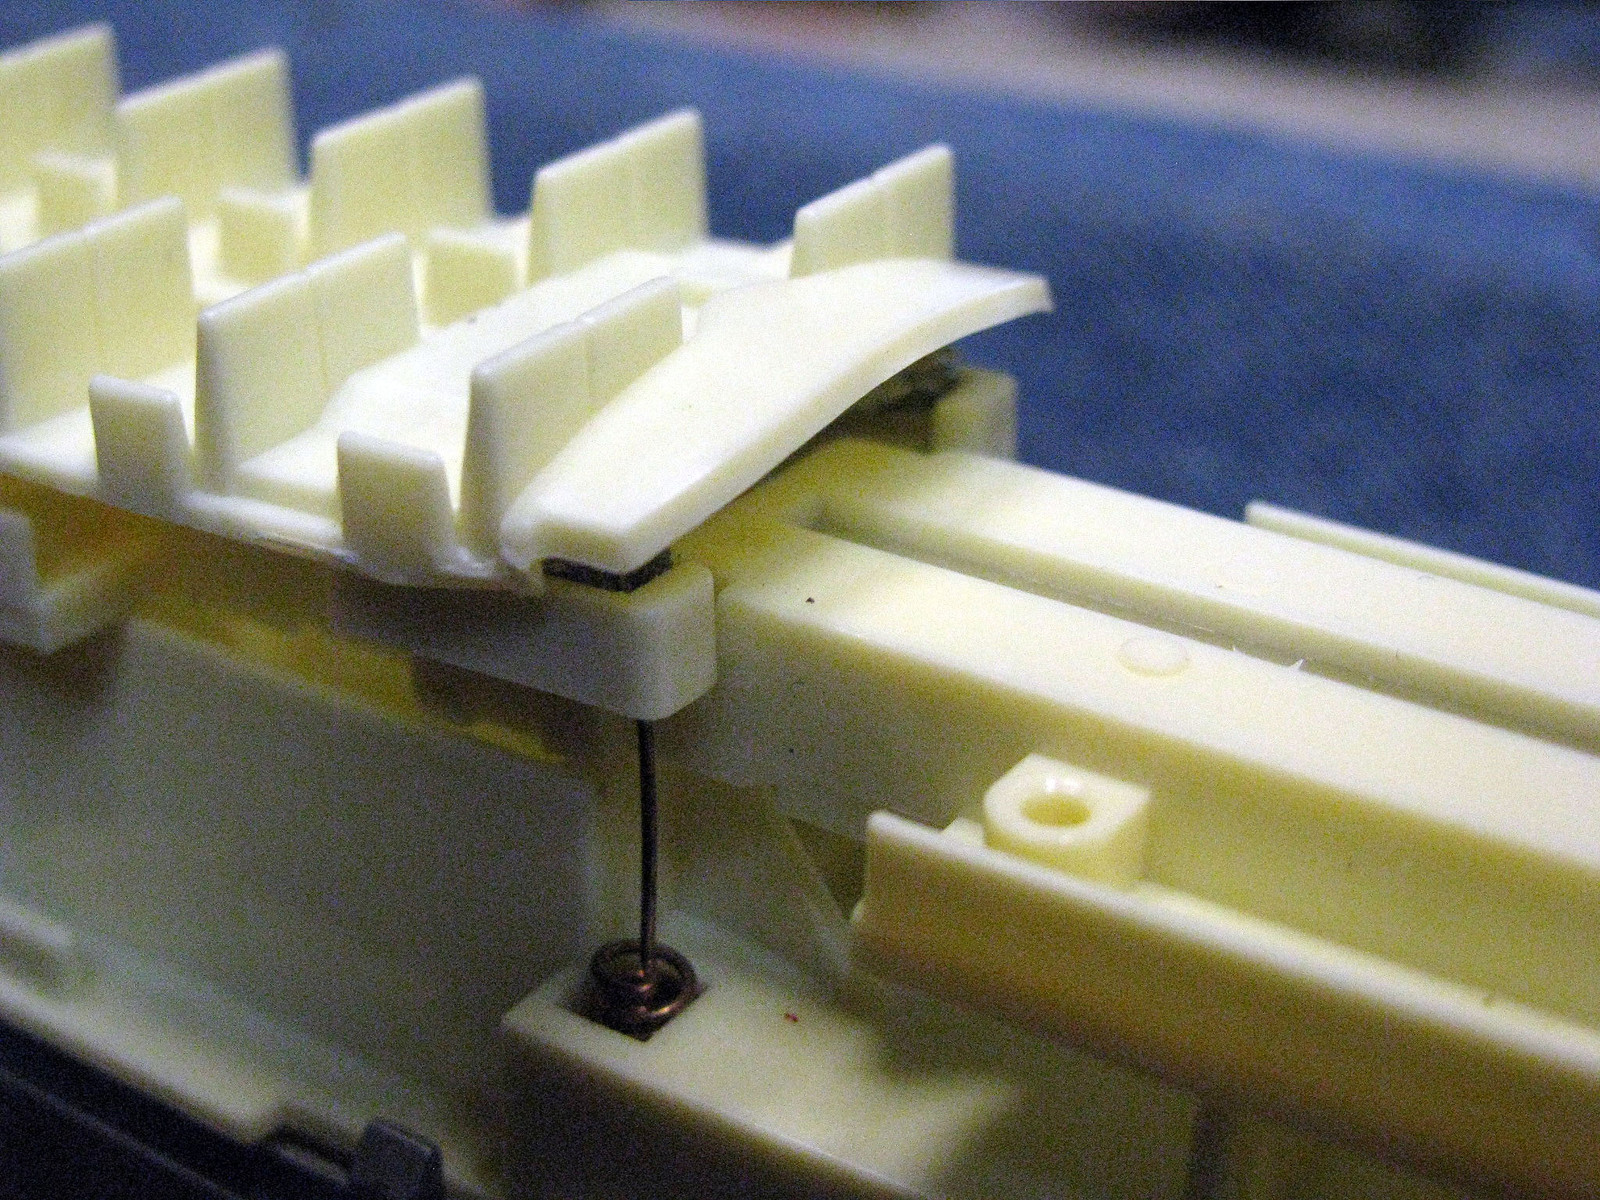 Carefully reassemble the car and reinstall the coupler cut levers. Then comes test time to verify the install. Next up: Pics of the results. |
|
|
|
Post by mlehman on Mar 4, 2014 22:44:29 GMT -8
You know what the BLI cars look like, so I'll compare them to what I think is a more suitable dimer lighting level. I discuss installing this lighting here: atlasrescueforum.proboards.com/thread/2132/cheap-updating-tomar-drumheads-lightingHere are three CZ cars, with the middle one with lights dimmer as described above. 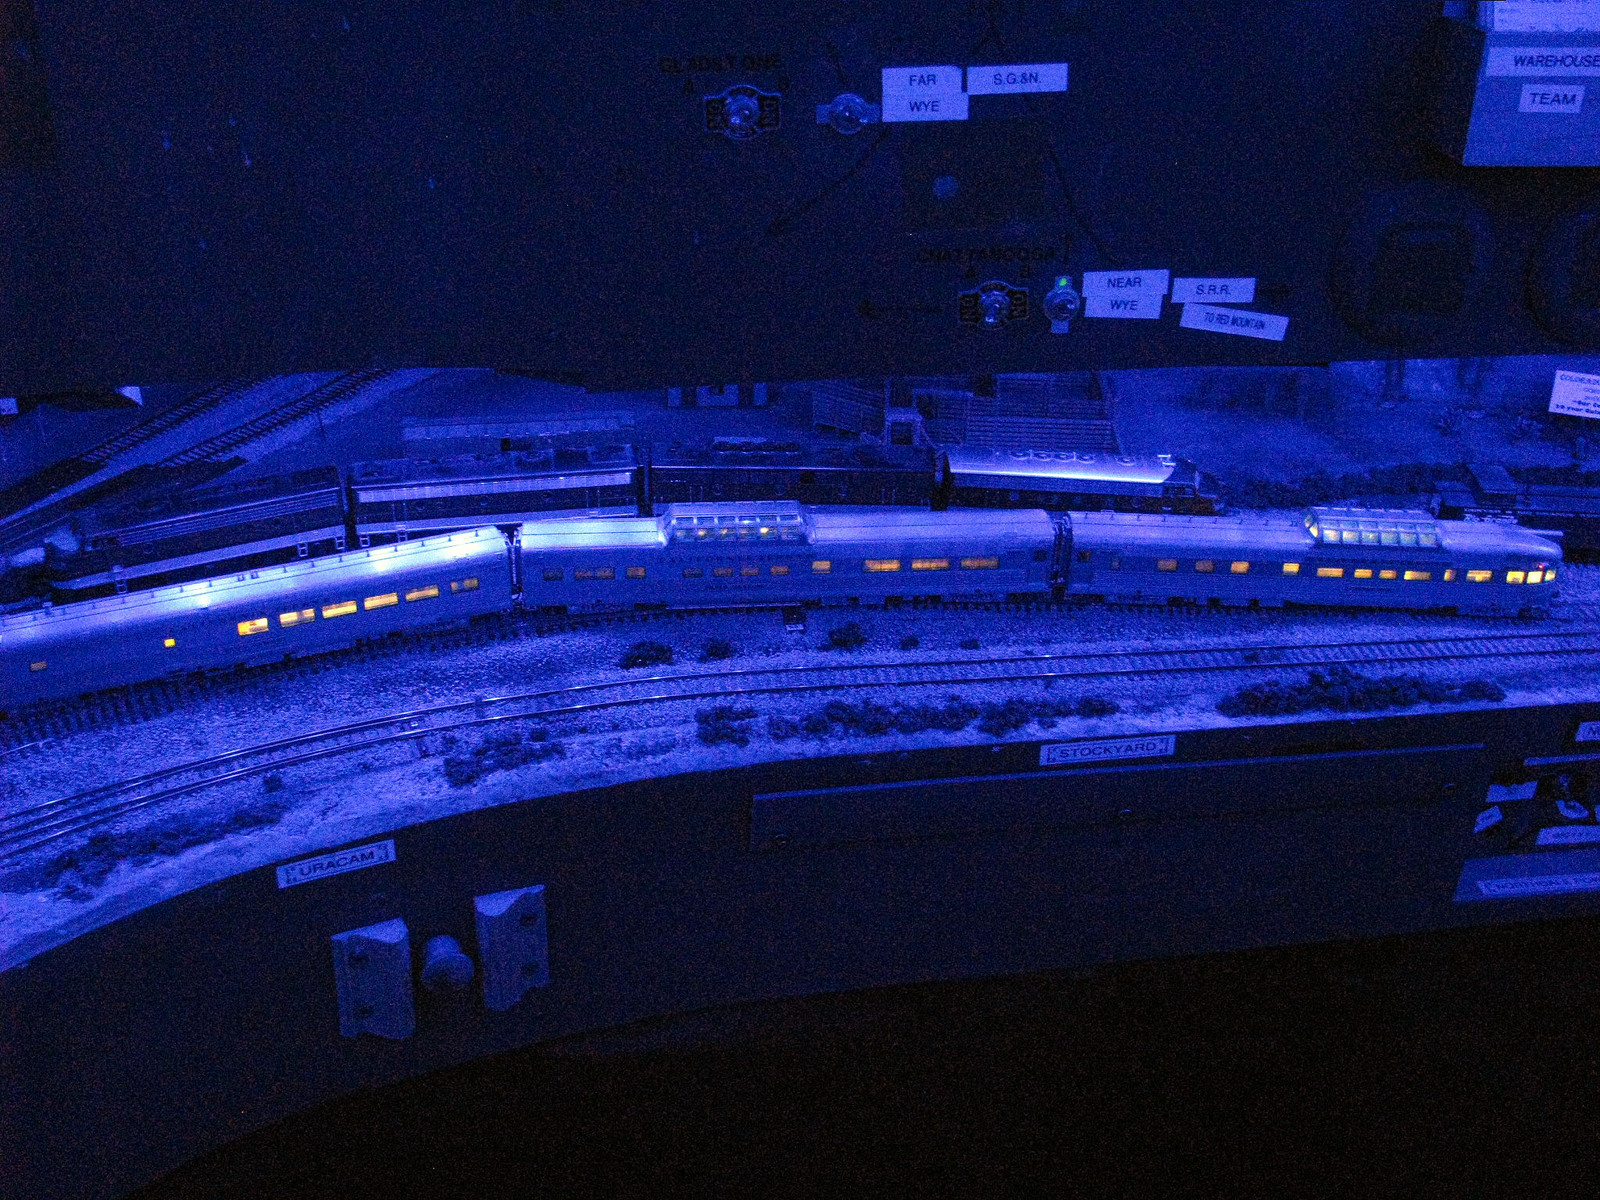 Here a dome with stock lighting 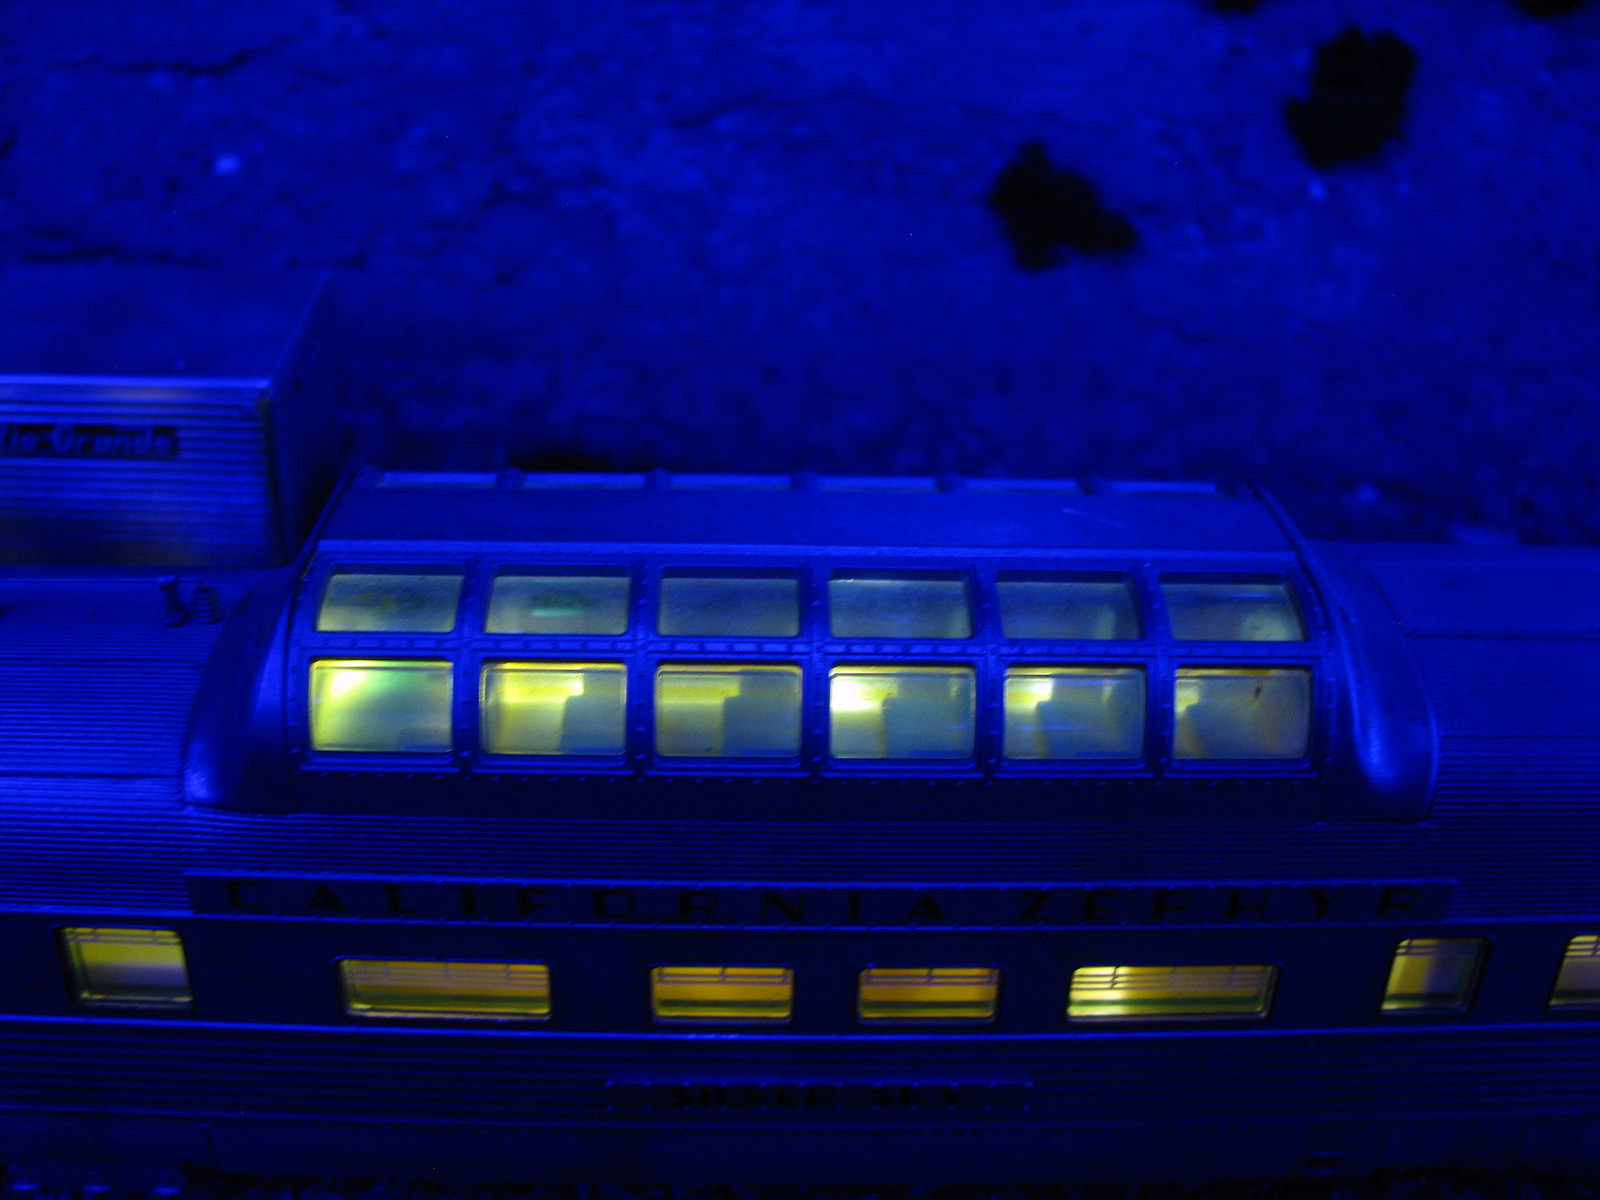 And a dome with the dimmed lighting 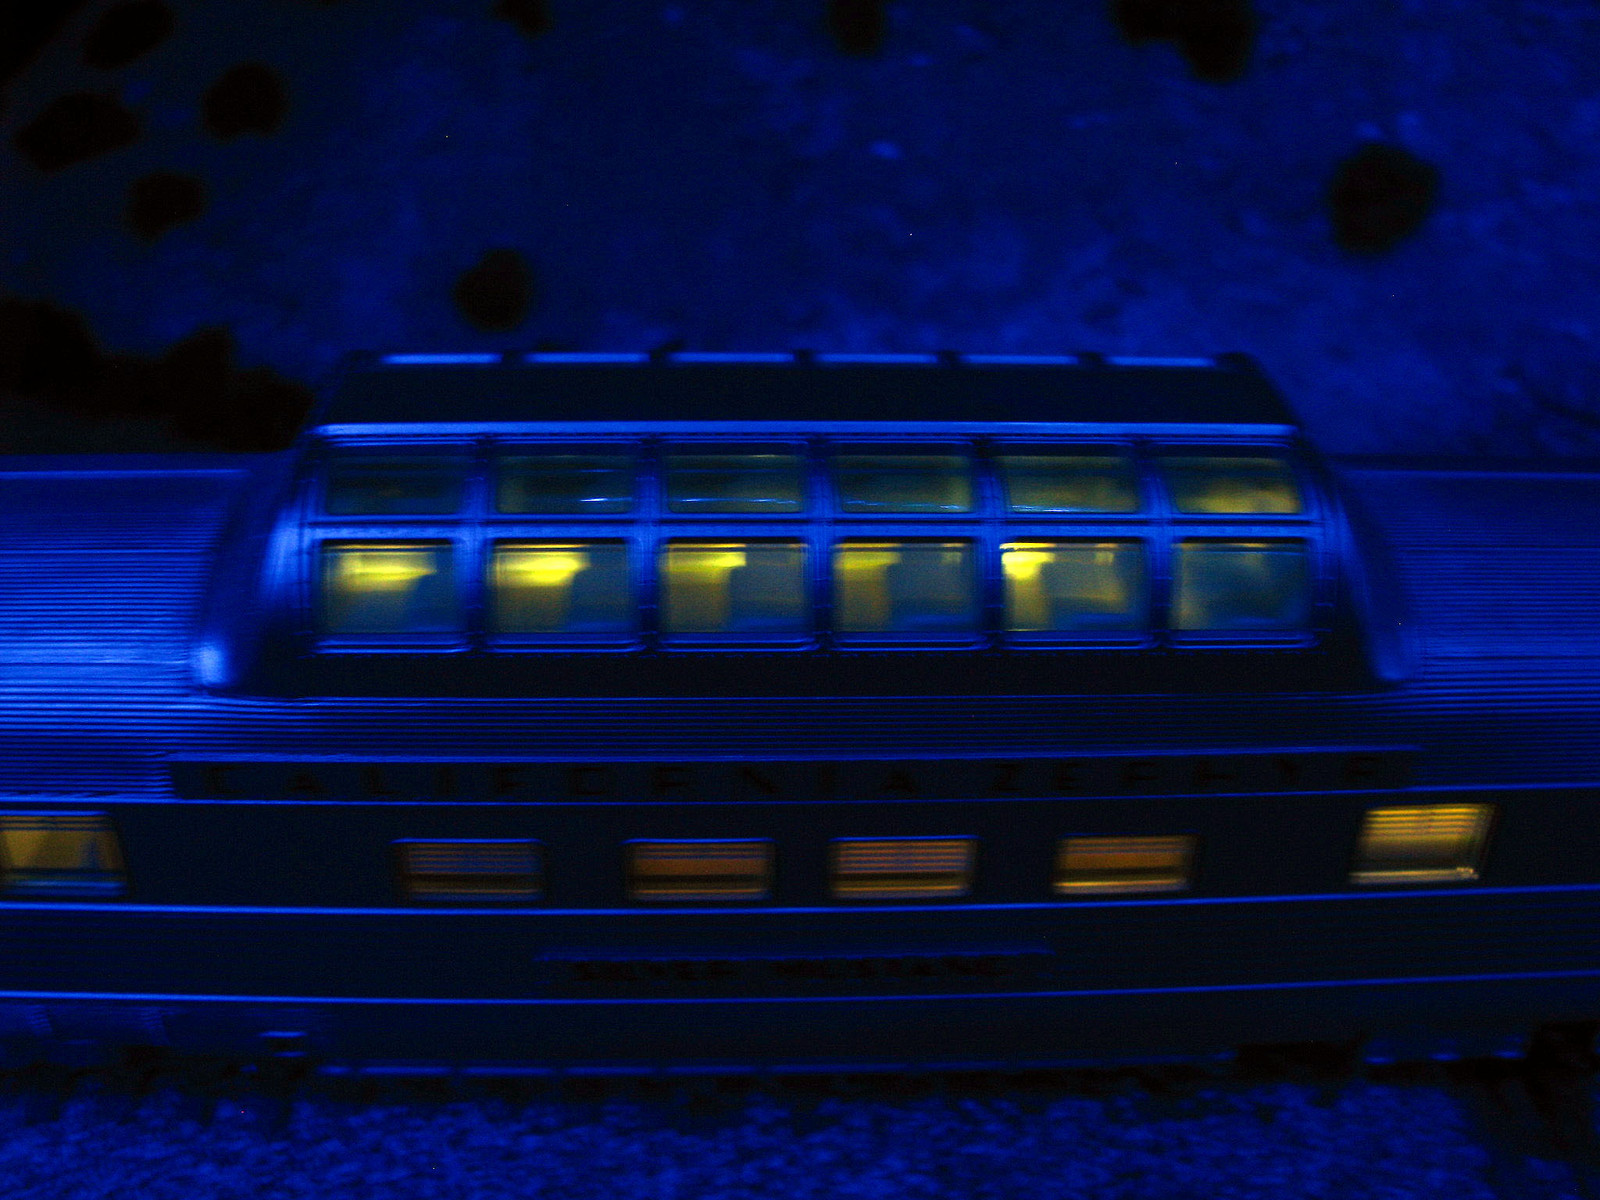 Now the BLI cars match the lighting in my other cars.  Note this is not a keep alive circuit. I found when installing the resistors that my recent problems with flickering were mainly due to the need to clean the wheels. Now there's very little flicker and with the lights being dimmer, it's not so noticeable. The lack of passengers is also a lot less noticeable. Resistors are cheap, so the mod is, too. I may still look into adding a bridge rectifier and cap to prevent flicker, but that's a bit more of a project. |
|
|
|
Post by mlehman on Mar 5, 2014 9:25:46 GMT -8
Great news. BLI has already done most of the work. It turns out once you pull the interior, a voltage-regulated bridge rectifier is lurking underneath. Holes are already drilled to add the wiring, all you need to do is add a cap. I did add a limiting resistor to feed the cap, too, but I'm thinking it may not be needed. This sleeper had a well nearby that could hold an even bigger cap than the 47 uF one I added. 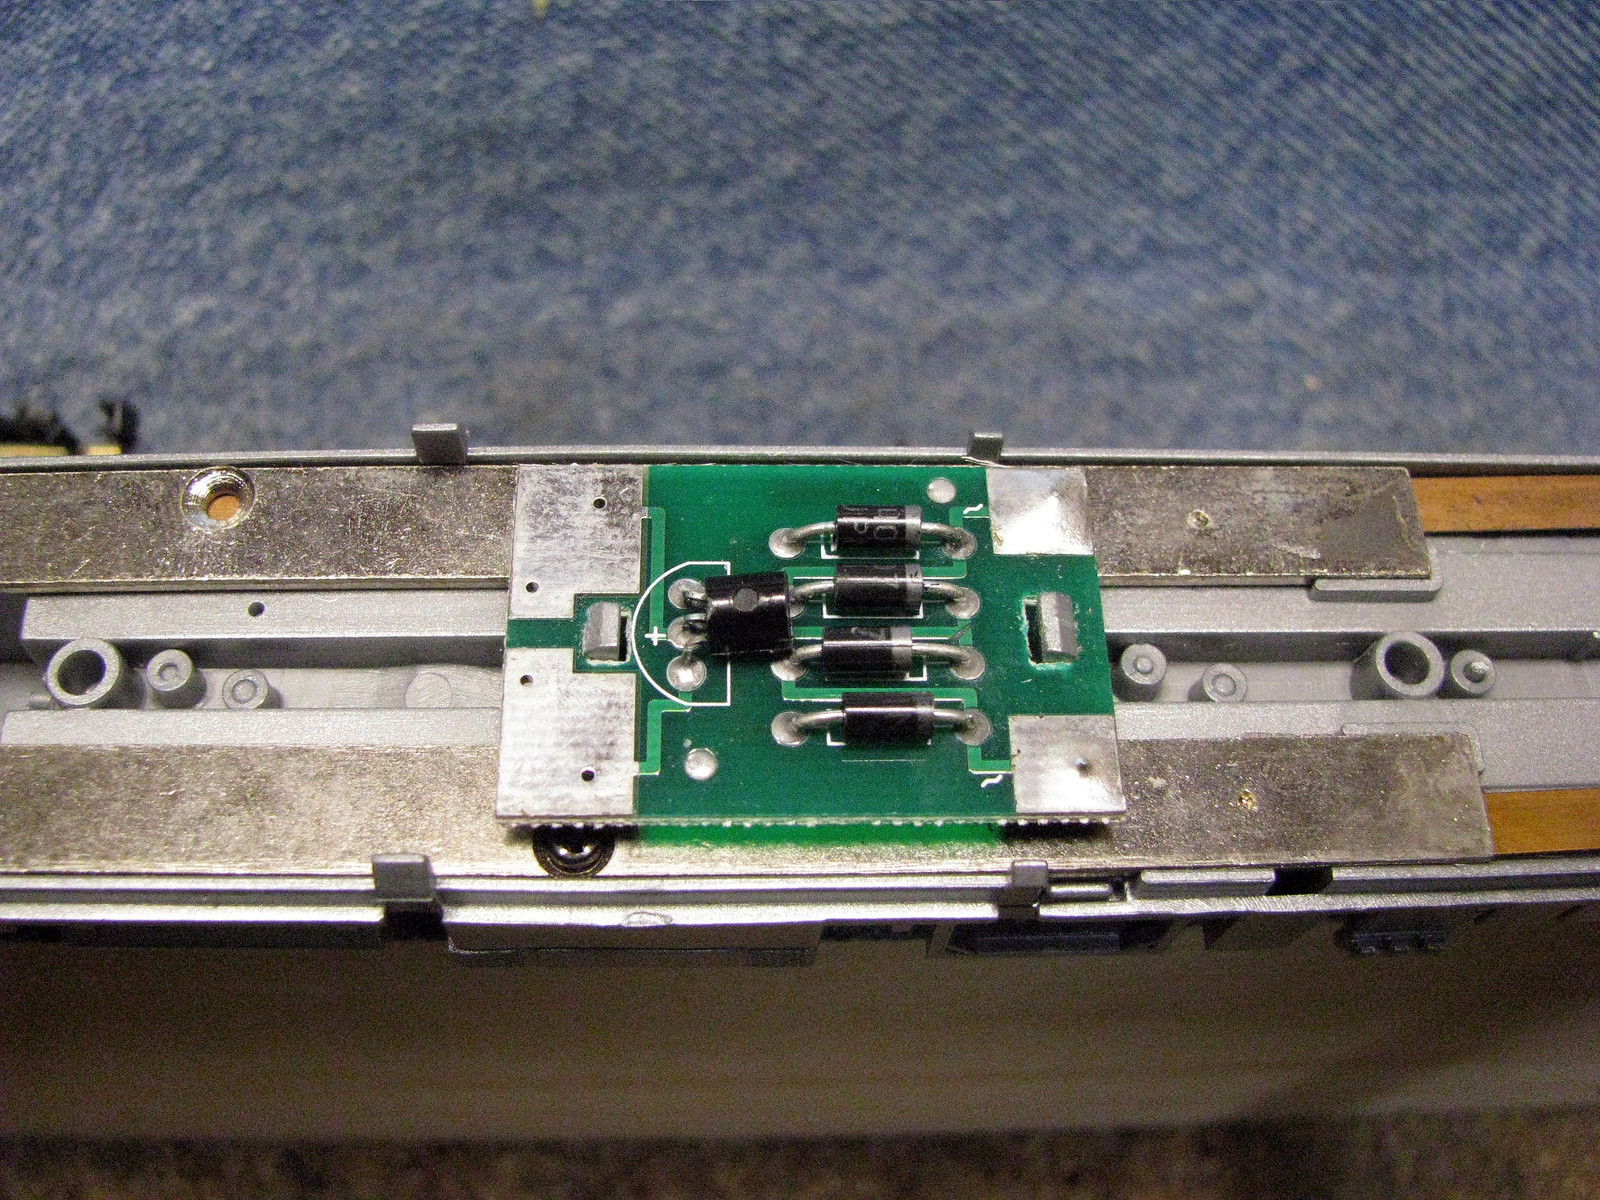 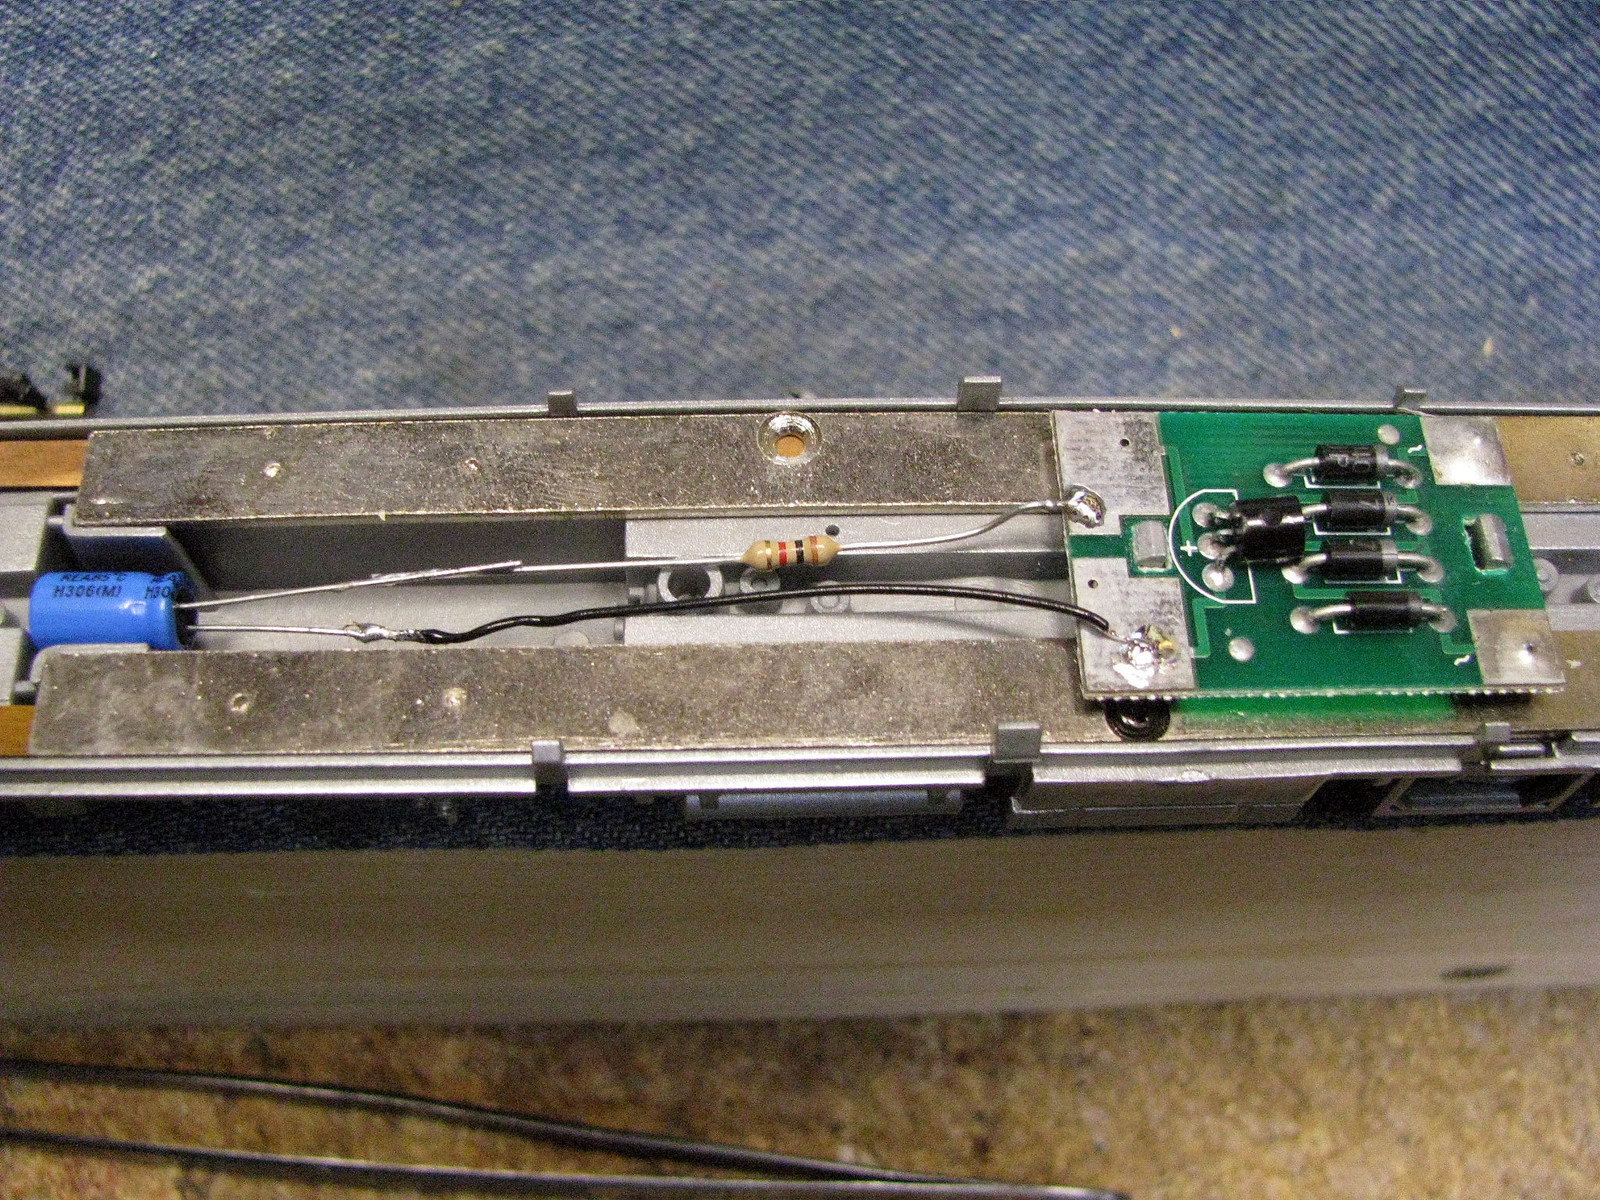 |
|
|
|
Post by mlehman on Mar 5, 2014 20:45:52 GMT -8
This evening I spent several hours messing around with the rear lighting on the dome-observation. The center light has always been weak and as much yellow as red. The markers were virtually no-existent. And the drumhead was way too bright. This is what I ended up with.  I toned down the drumhead by adding another resistor. The markers are stronger. And the center light is, too. I'm getting a little bleed over into the interior right at the rear, but it's not objectionable and sorta makes sense at night if you want to see out. I may still revisit this as the light bar that feeds the markers and center light resists getting all three lights exactly how I'd like them. |
|
|
|
Post by mlehman on Mar 5, 2014 23:18:01 GMT -8
One more note. I did remove the resistor on the cap in the picture from earlier and did not use that for the rest of my installs. So long as your cap is rated at 25V or higher, you should have no issue. If the cap has a lower voltage rating, then it will need a resistor to limit the voltage it sees.
Be careful with the tabs holding the regulated power supply on the lower deck. They are rather fragile and I had to glue one I applied a slight amount of pressure to.
All my CZ cars are from the first run. If BLI has made any mods, I'm not aware of them, but they should work on subsequent runs.
Also note these mods were developed and tested to work on DCC. I don't know of any reason they won't work on DC, but you'll have to determine if they are suitable or not, since I have used them only with DCC.
|
|
|
|
Post by riogrande on Mar 6, 2014 5:53:45 GMT -8
Great series. I have around 21 of the BLI cars - this looks like a relatively easy mod.
Thanks!
|
|
|
|
Post by mlehman on Mar 6, 2014 7:05:40 GMT -8
Thanks, Jim. The first one takes a little time, but after that you can do the mods in about 20 minutes per car. BLI did so much of the work, I decided to just finish what I started. I did the last three cars this morning and just sat down from a test run. The train's lighting looks much more realistic to me eyes and the lack of the usual flicker brought a big smile.  I will reemphasize that dirty wheels account for a significant portion of the flicker and cleaning them eliminates more than half of it by my estimate. This was the first time the wheels were cleaned since they were acquired when the firts run came out, what 7 or 8 years ago? Most wheels were in good shape, but a few were caked badly. But even after cleaning the wheels in conjunction with the resistor mod, there was still some flicker. Now it's gone for all practical purposes. I did experiment with how much capacitance to add, using caps from 470 uF down to 10 uF. They all seem to work well, so I would recommend 47 uF as a happy medium. There's a bit of a pulse every once in awhile in the lighting in the cars with the lowest capacitance (10 uF) so I'm thinking they should get a little more than that for optimal performance. I'll also note that even at the highest value cap installed with this method, 470 uF, flicker is gone but there is no lighting once the car comes off the track, unlike in the circuits I built myself using the LED strip lighting segments. My guess this is because of the high capacitance levels I used with my homemade circuit, somewhere in the range 100,000 ohms, and the fact they run at 12 volts, so that the LEDs take much longer to discharge than with the modified BLI circuit. |
|
|
|
Post by wendtsc on Mar 6, 2014 23:14:00 GMT -8
Mike, Thank you for this! I have about 20 of these cars myself and while I have kinda' been able to live with some of the lighting, that drumhead has just driven me insane!  Now, I haven't had them apart yet. Is there any little tricks or issues, beyond the coupler cut levers I need to watch for when taking these cars apart? I have to ask afterall, since I have a yardful of Walthers cars that never seem to go back together quite right once you crack that paint seal. My El Cap cars all have that extra row of fluting from not quite snapping back together.  As to BLI making it easy to add components, I can only say we hope its a sign of things to come. For our upcoming models, we are trying to make it as easy as possible for people to add and control future lighting. Our DC models will still come equipped with LEDs for every marker, numberboard, gyralight and headlight (even a cablight). But since with DC, they would all pretty much have to be on, we don't connect the cablight, however we still include it and its resistor and wiring is already in place for anyone to connect to later when they add a decoder. We also tie together all the lighting that is sometimes constant, like numberboards and markers so that a basic 9 pin decoder can still control them with one function, however we also provide clearly marked cut points and solder pads so that someone with a 6 function decoder can attach the jumpers for the additional functions and have everything individually controlled. All the LEDs, resistors and wiring to the central decoder plug in board is already in place, so emergency trips to "the Shack" shouldn't be necessary. I have a stableful of locomotives that I have tried to clear up the lighting or add additional lighting to over the years, usually with mixed results. (I hate Athearn ditchlights.) It looks like this time I might have a project that will produce the results I am looking for the first time around. |
|
|
|
Post by mlehman on Mar 7, 2014 5:13:42 GMT -8
It's pretty straightforward to get things apart if you use the supplied tool in the wide slots that are along the side of the chassis underneath. To get to the bridge rectifier underneath, there's no need to take the resistor board up top off first, for instance if you like the look of a rolling tanning salon...  The interior is held in place as a friction fit with locating lugs on the chassis aligning things. Just lift gently from one end and it comes right up, just don't force it. It also connects with what's down below by shorter springs like the ones on the resistor pack. But once that's done, it's all right there and easy to get to. As I noted the logs holding the bridge rectifier are a little fragile, but totally invisible once reassembled, so easy to fix with a dallop of glue. It does need to be fixed in place in order for the contact springs to function right. Once the interior is back in, you slip the shell back on. For some reason a few of the cars can be a bit of a struggle, but if you use the tool and start seating the chassis back in the shell from one end, it will go back together , just may take a try or two. So long as you're gentle and don't force it, it all seats together OK. I'll note I used caps rated from 10 uF to 470 uF in the CZ cars and they all seemed to work for killing the flicker. With the smallest caps, there is a little fade once in awhile, but it's far less frequent than the flicker ever was. On the drumhead, I used 1000 ohms in place of 330, but it could really stand to be dimmer yet, like 2700 ohms, maybe? |
|


