|
|
Post by sd40dash2 on Aug 2, 2023 16:49:27 GMT -8
Thank you to Christian for pointing out an important flaw in my contrived brake system. After reading the feedback by cemr5396, Colin and Evan + likes, I decided only to remove the cylinder and attached rod. Further component removal would have caused much more damage than I was willing to repair. Old cylinder spot has been patched and hand-painted. Thanks again to those who offered input and now back to our regularly scheduled programming.
|
|
|
|
Post by sd40dash2 on Aug 3, 2023 10:18:23 GMT -8
Ends primed and ready for action yellow.
|
|
|
|
Post by sd40dash2 on Aug 4, 2023 12:42:18 GMT -8
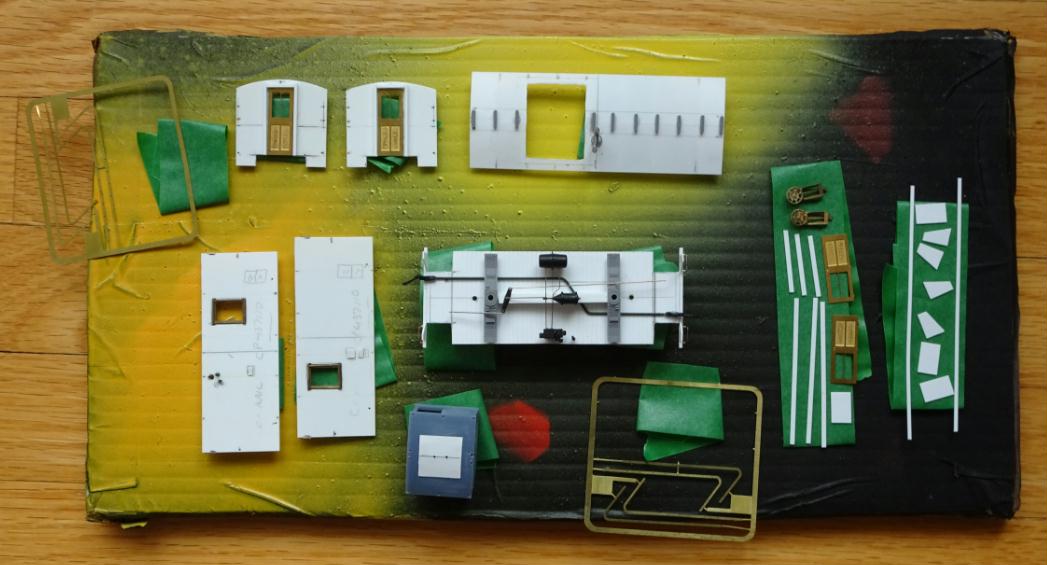
Here are the components used for the next stage of roof work
|
|
|
|
Post by Colin 't Hart on Aug 5, 2023 9:22:48 GMT -8
Here are the components used for the next stage of roof work Are you cheating (  ) and using a 3D printed cupola? |
|
|
|
Post by sd40dash2 on Aug 5, 2023 9:36:02 GMT -8
Are you cheating ( ) and using a 3D printed cupola?
Woof, nothing gets past Colin!
That is a 3D printed Kaslo cupola!
|
|
|
|
Post by sd40dash2 on Aug 5, 2023 11:04:00 GMT -8
Mark locations for cupola, running board supports, railings, smoke jack and center lines.
|
|
|
|
Post by sd40dash2 on Aug 6, 2023 10:12:32 GMT -8
Time to prepare and glue the roof eaves. These clips have proven quite handy for holding things in place while glue dries.
|
|
|
|
Post by sd40dash2 on Aug 7, 2023 9:39:33 GMT -8
Once eaves are in place, it's time to start building in the rafters to support the roof. Cupola location must also be considered so everything fits together.
|
|
|
|
Post by edgecrusher on Aug 7, 2023 12:47:26 GMT -8
Mark locations for cupola, running board supports, railings, smoke jack and center lines.
Are you using some sort of template for roof curvature? looks like you've got a nice even bend in it. |
|
|
|
Post by sd40dash2 on Aug 7, 2023 13:11:29 GMT -8
Working outward, the roof center line was where I manually applied pressure for the bend to match the curvature of the commercial cupola underside. This is one of the trickier parts of the build. |
|
|
|
Post by edgecrusher on Aug 7, 2023 14:09:47 GMT -8
I can imagine, I haven't yet needed to curve styrene for anything.
|
|
|
|
Post by sd40dash2 on Aug 8, 2023 13:57:21 GMT -8
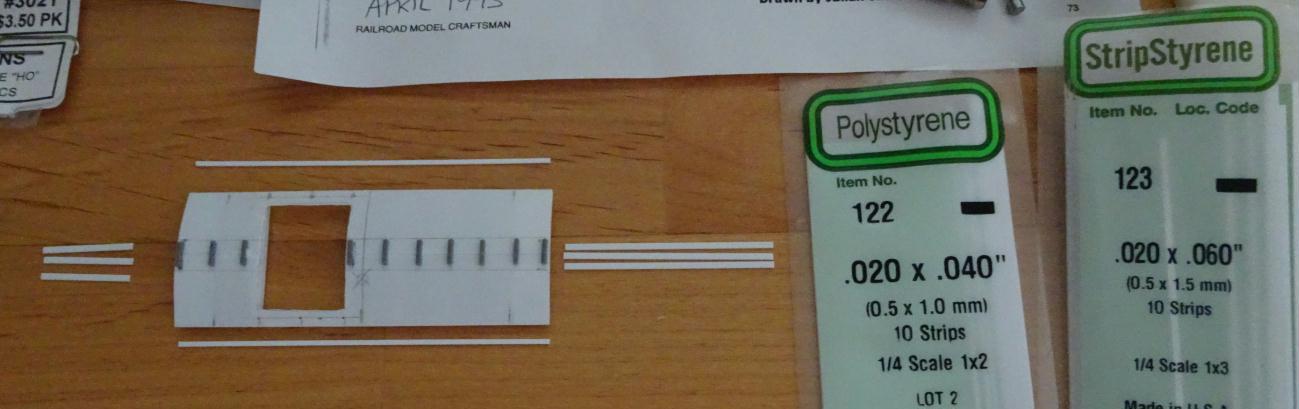
Styrene strip was chosen for the side wall trim and running boards.
|
|
|
|
Post by sd40dash2 on Aug 9, 2023 11:27:49 GMT -8
Smokejack location has been marked, accounting for cupola and running board placement and the part received a nice filing as well.
|
|
|
|
Post by edgecrusher on Aug 9, 2023 11:49:12 GMT -8
Looking good. I especially like the individual "boards" for the roof walk.
|
|
|
|
Post by sd40dash2 on Aug 9, 2023 12:58:58 GMT -8
^ Thanks Evan. I can't emphasize enough how important it is to have a good stock of styrene strip to address the most common rr applications. AFA these running boards, I measured and scribed the joints & used single strips rather than manually assemble board by board in prototype fashion. This is where the RPM folks go the extra mile and I truly admire their willingness to go that far.
|
|
|
|
Post by sd40dash2 on Aug 10, 2023 10:12:07 GMT -8
Everything is coming together nicely, soon time for paint.
|
|
|
|
Post by sd40dash2 on Aug 11, 2023 11:12:56 GMT -8
Roof patch and Sinclair antenna have been prepared and installed. This section is now ready for paint.
|
|
|
|
Post by sd40dash2 on Aug 12, 2023 7:29:38 GMT -8
Roof primed and ready for black.
|
|
|
|
Post by sd40dash2 on Aug 13, 2023 9:10:42 GMT -8
After careful planning, proper sidewall measurements and material have been determined. Time to mark and cut using .030 plain styrene sheet to simulate plywood sides.
|
|
|
|
Post by sd40dash2 on Aug 14, 2023 7:51:11 GMT -8
The Nibbler made short work of cutting out window spots after they were carefully marked. I have never regretted spending money on such useful tools as this.
|
|
|
|
Post by sd40dash2 on Aug 15, 2023 4:37:44 GMT -8
W4 windows have been installed after careful nibbling and filing. This is way easier than the old way of trying to carefully slice out the holes with a knife.
|
|
|
|
Post by sd40dash2 on Aug 15, 2023 16:11:35 GMT -8
With apologies to anyone I missed, thank you to Christian, Evan, Ryan, shroed2, GP40P-2, kentuckysouthernrwy, cnwman, simulatortrain, wp8thsub, 690, grabirons, scl1234, fiend540, nwp0ncrr, hudsonyard, cemr5396, valenciajim, snootie3257, onequiknova and Colin for the likes and comments since the start of page 2!
|
|
|
|
Post by sd40dash2 on Aug 16, 2023 4:37:34 GMT -8
Plywood side walls have been primed. The joints show where standard 4 x 8' sheets were used in the 1979 rebuild of this van.
|
|
|
|
Post by sd40dash2 on Aug 17, 2023 3:24:46 GMT -8
I know this is out of order but wanted to demonstrate the handle used for all parts to be sprayed with primer at once.
|
|
|
|
Post by edgecrusher on Aug 17, 2023 9:48:33 GMT -8
Looking great. Are the P.E. parts going to be the end ladders?
|
|
|
|
Post by sd40dash2 on Aug 17, 2023 15:32:25 GMT -8
^Correct. These require bending and assembly using a jig. Each rung is cut from wire and must then be inserted through tiny holes in each upright. Need to be in the right headspace to succeed at such tasks.
|
|
|
|
Post by edgecrusher on Aug 18, 2023 6:28:59 GMT -8
Maybe I'm a little a warped in the head but that kinda sounds like fun to me. With a little creative trimming those look like they might work for a SOO caboose I have in my to do pile.
|
|
|
|
Post by sd40dash2 on Aug 18, 2023 9:38:03 GMT -8
All parts primed and inspected for possible repair needs.
|
|
|
|
Post by sd40dash2 on Aug 18, 2023 13:02:27 GMT -8
Maybe I'm a little a warped in the head but that kinda sounds like fun to me. With a little creative trimming those look like they might work for a SOO caboose I have in my to do pile. Evan, not sure I can recommend these ladders as I found they exceeded my patience at every stage. I think for future builds it might be better to just use your favourite freight car ladders from anyone, bend the distinctive top sections with wire yourself and glue to the ladder tops. |
|
|
|
Post by grabirons on Aug 18, 2023 13:56:27 GMT -8
I have those same clips for years. I think there were three in a pack. Useful!
|
|


 ) and using a 3D printed cupola?