|
|
Post by mlehman on Apr 23, 2013 16:42:05 GMT -8
I was digging around in some of the documentation for my layout recently and came across some pics. Eventually, I plan to write up what's needed for my Gold Spike in the NMRA's AP program, but that's an exercise for a rainy day. Still, it IS raining right now...thus I daydreamed the pics into a low entry level layout thread idea. Things can change quickly or slowly over the course of building a layout and are not always well-documented step-by-step. Yet almost everyone has an early "Plywood pacific RR" shot and one at some later date that will make an interesting topic of conversation. So here are two shots. The Before is a Polaroid shot from March 1996. The spur running off to the right of the main centered in this pic is what you'll need to orient you in the After shot. It's Sheridan on my HOn3 version of the Silverton RR. 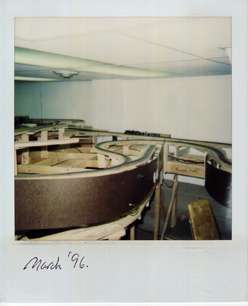 The After pic is from very recently (Dec 2012?) and depicts considerable progress over the intervening 16 years.... ;D 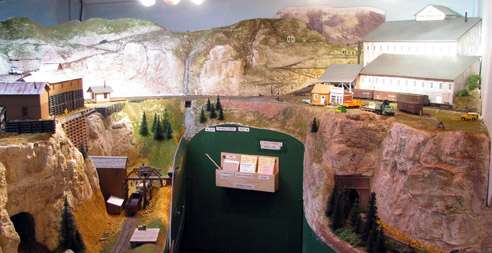 The upper level is Animas Forks on the Silverton Northern RR. Anyone else have a Before and After they'd like to share? |
|
|
|
Post by slowfreight on Apr 23, 2013 18:00:16 GMT -8
Before:  After: 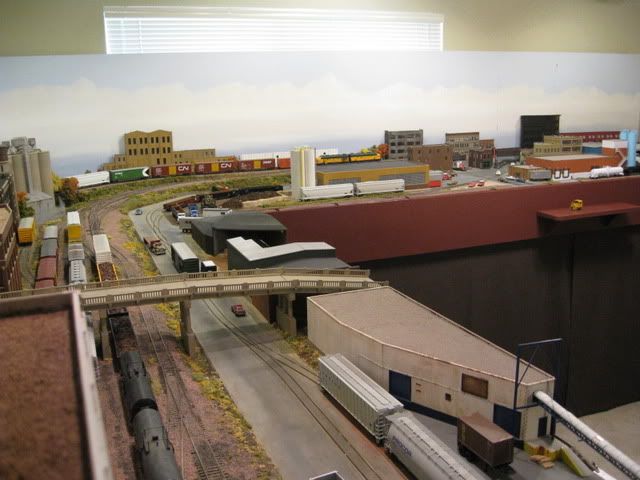 And it ran of a straight DC Troller Transamp 1 with a Troller walkaround, if anybody participating in a certain other thread cares to know!  (Truth in advertising: the after after photo would show it currently mummified in my basement  ) |
|
|
|
Post by PennCentral on Apr 24, 2013 5:00:15 GMT -8
Slowfreight,
Do you have any other pictures of your layout posted online? I'd sure like to see more of this layout.
Thanks,
Jason Cook
|
|
|
|
Post by calzephyr on Apr 24, 2013 6:26:48 GMT -8
I was digging around in some of the documentation for my layout recently and came across some pics. Eventually, I plan to write up what's needed for my Gold Spike in the NMRA's AP program, but that's an exercise for a rainy day. Still, it IS raining right now...thus I daydreamed the pics into a low entry level layout thread idea. Things can change quickly or slowly over the course of building a layout and are not always well-documented step-by-step. Yet almost everyone has an early "Plywood pacific RR" shot and one at some later date that will make an interesting topic of conversation. So here are two shots. The Before is a Polaroid shot from March 1996. The spur running off to the right of the main centered in this pic is what you'll need to orient you in the After shot. It's Sheridan on my HOn3 version of the Silverton RR.  The After pic is from very recently (Dec 2012?) and depicts considerable progress over the intervening 16 years.... ;D  The upper level is Animas Forks on the Silverton Northern RR. Anyone else have a Before and After they'd like to share? Mike Great progress and we wouid like to see more pictures of the detail of your layout! It does take time. Larry |
|
|
|
Post by trebor on Apr 24, 2013 6:33:35 GMT -8
Nice, I hope I can get to a stage like your's in the future.
|
|
|
|
Post by mlehman on Apr 24, 2013 7:55:08 GMT -8
Larry and trebor, Thanks for your comments! Here are a couple of more images showing what seemed like rapid progress at the time. Then came a career change that interrupted things substantially as I went back to school to get my AA, BA, and MA degrees, leading to my diss, which is in editing right now. It was the diss that really helped advance things, as I'd head for the layout whenever I got stuck. Got stuck a lot...  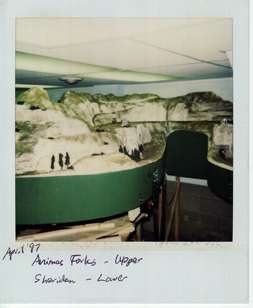 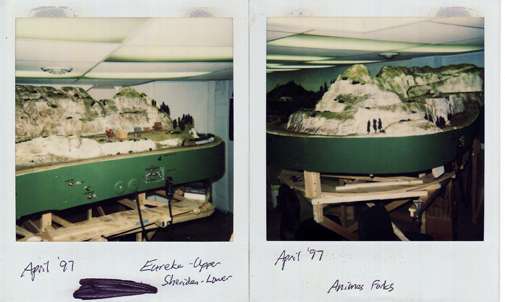 |
|
|
|
Post by slowfreight on Apr 24, 2013 9:32:22 GMT -8
Slowfreight, Do you have any other pictures of your layout posted online? I'd sure like to see more of this layout. Thanks, Jason Cook Many photos, but few are loaded into Photobucket. I will try to get a few more up. |
|
|
|
Post by calzephyr on Apr 24, 2013 12:34:00 GMT -8
Mike
Love those mountains!
Thanks. We enjoy seeing progress and the difference each addition makes to the layout.
Larry
|
|
|
|
Post by upcsx on Apr 24, 2013 13:13:33 GMT -8
Slowfreight,is it hard to reach across your layout,how wide and high is it,looking to redo mine but can't get a plan,I like yours.
|
|
|
|
Post by slowfreight on Apr 24, 2013 14:01:36 GMT -8
Slowfreight,is it hard to reach across your layout,how wide and high is it,looking to redo mine but can't get a plan,I like yours. Sort-of to-scale track plan: 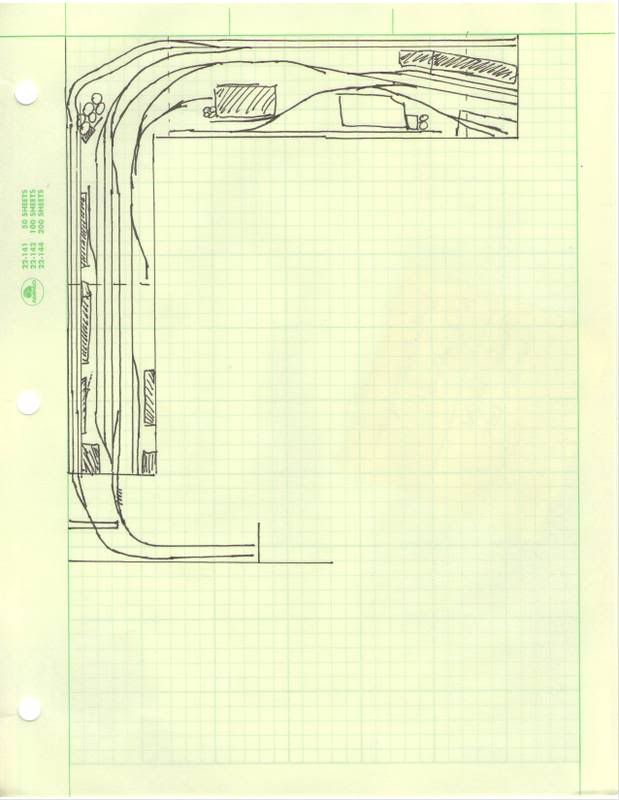 It was originally sized to a 12x12 room. When I moved into a 13x13, I expanded it a bit to make it run better, and extended some hidden track into a closet. At its deepest, the layout was 2.5 feet deep, and the only parts where I HAD to use a stool were the two hidden mainlines that ran behind the yard. But derailments weren't frequent. This was done as a pure switching layout. Cars are delivered to the yard from hidden staging, and then a local switcher spots all the industries. I can think of lots that I would prefer different on the layout, but it's served me well for the last decade or so. When I have space again, I will probably resurrect it again for a while. More before/after:   I particularly liked the sunken truck docks on the factory (Walthers' Peterson Tool, for those who are interested). Silos came from Magic Pan Bakery. Wall not visible is made from mat board---why model what you can't see? |
|
|
|
Post by upcsx on Apr 24, 2013 15:07:53 GMT -8
Slowfreight,Great looking,i have a un built Peterson tool and was wondering what to make out of it,so it has trailer docks and pipes to unload hoppers,did the pipes come from the Magic Pan also ?
|
|
|
|
Post by slowfreight on Apr 24, 2013 15:18:07 GMT -8
Yep. I used the kit unloading equipment, and tool a little modeler's license with running the plumbing in to a central point that you probably wouldn't see in a real system (pump system is too far from the silos?), but I didn't spend the time to get more accurate proto info before cutting plastic. The industry is loosely based on Chicago Transparent Products, which manufactured plastic bags.  Still, it's a point of pride that I modeled actual unloading equipment for my covered hoppers and tank cars. |
|
|
|
Post by onequiknova on Apr 24, 2013 15:29:39 GMT -8
That's a great looking layout Slowfreight.
|
|
|
|
Post by upcsx on Apr 24, 2013 16:16:38 GMT -8
Slowfreight,thank you for the close up,you are a Master.
|
|
|
|
Post by buffalobill on Apr 24, 2013 19:11:16 GMT -8
Slowfreight: Very nice- love the Detail on the plastic factory- you have managed to balance a lot of track and scenery into a limited number of square feet with out the layout looking crowded. Well done.
Bill
|
|
|
|
Post by Gary P on Apr 25, 2013 4:37:42 GMT -8
Slowfreight: Very nice- love the Detail on the plastic factory- you have managed to balance a lot of track and scenery into a limited number of square feet with out the layout looking crowded. Well done. Bill Yes, exactly what I was going to comment. The balance of track and scernery makes it look so much better. I love it!  |
|
|
|
Post by SantaFeJim on Apr 25, 2013 5:12:38 GMT -8
This is quite possibly the best thread to come along in months. I suggest that the moderator bookmark this one. It is a WINNER.  |
|
DHTR
Junior Member
 
Posts: 83
|
Post by DHTR on Apr 25, 2013 15:14:04 GMT -8
I did these a few years ago but it shows a big difference from the two pictures. 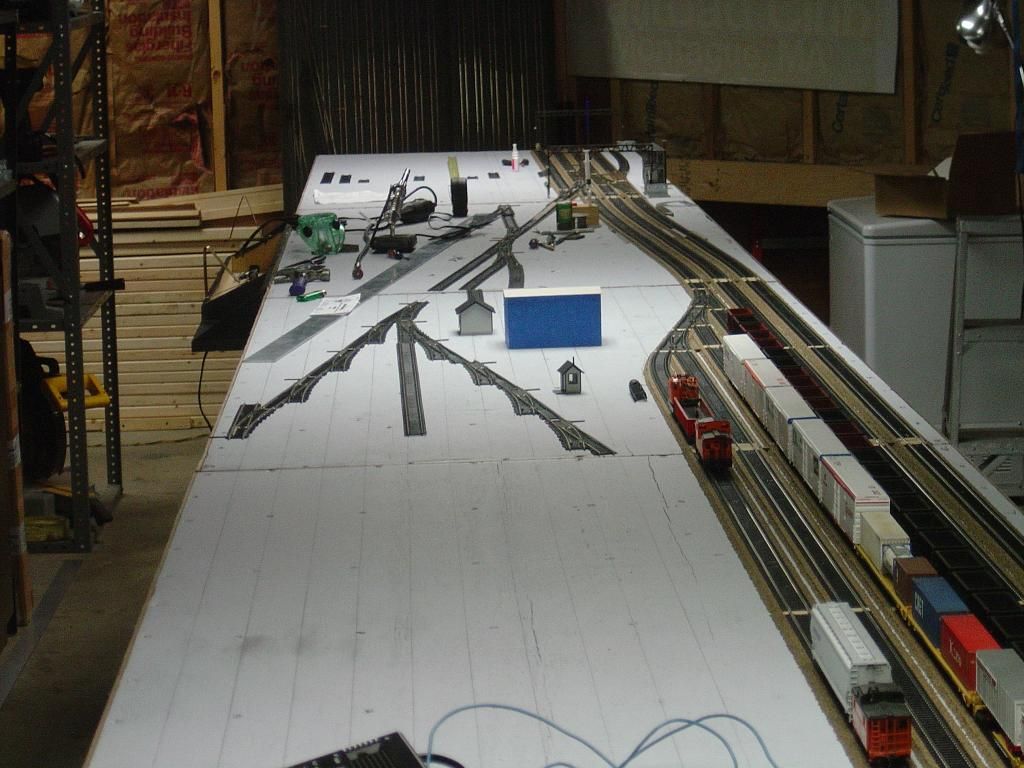 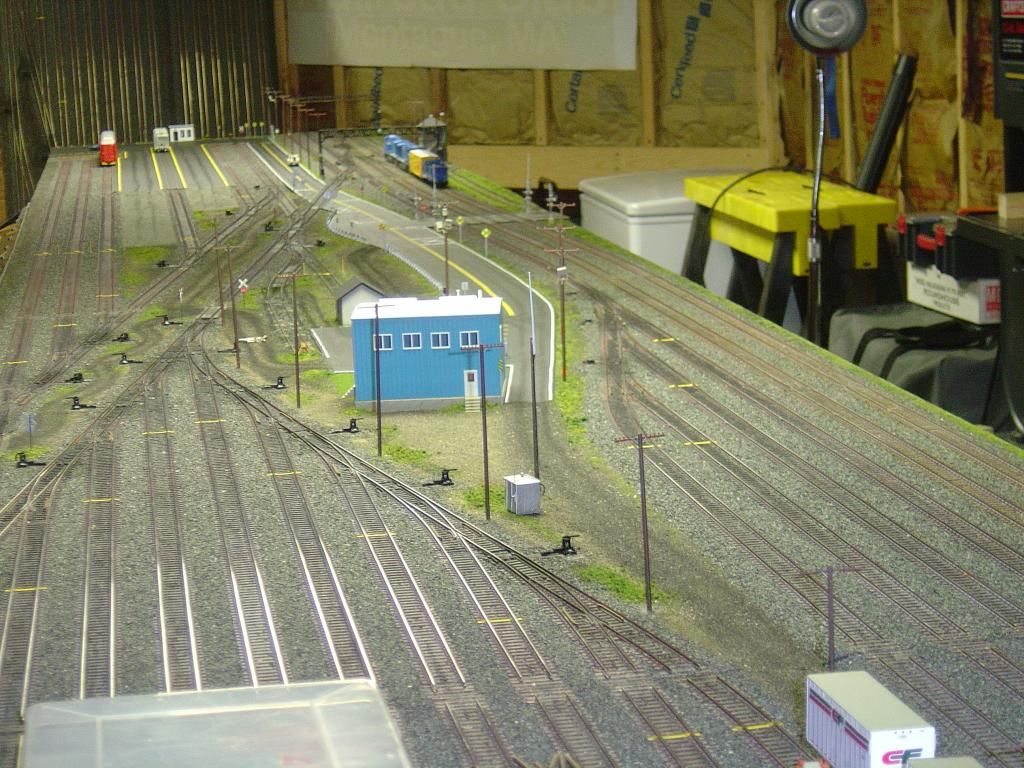 |
|
|
|
Post by mlehman on Apr 27, 2013 6:40:16 GMT -8
dhtr, Wow, that's an awesome yard! Nice work. And it's my distinct honor to have my post stickied!  Here's another one, a look at the main part of the layout overall. Silverton is the top level on the right, with Durango occupying the center. 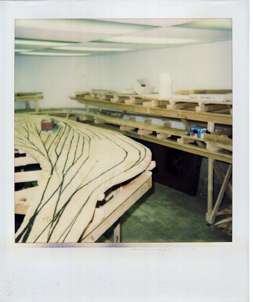 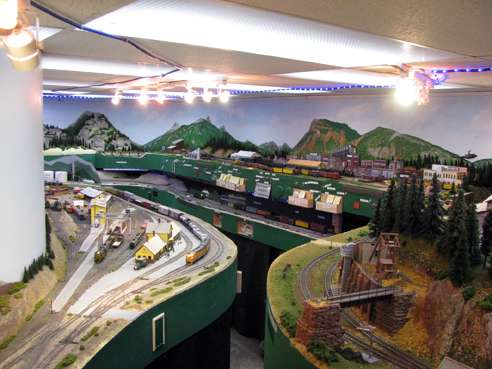 Close observation will show I squeezed more track into the Durango yard in a better configuration. I've found it to be a very good idea to leave yourself some extra room in the sub-roadbed to deal with minor changes and improvements to the original trackplan. An error I made is also visible. In the far corner, background of the second deck, you can see how there wasn't a direct connection of the benchwork between the two parts of the upper deck, which is where I placed a river crossing. I've had a lingering issue of differential movement of the abutment on the right end of the bridge. Since it was in the corner, I thought movement of the basement floor would be minimal. Good idea, but experience now shows I should've connected structurally across this area. |
|
|
|
Post by calzephyr on Apr 27, 2013 10:43:17 GMT -8
dhtr,
What a difference in the yard!! Thanks for sharing.
Larry
|
|
|
|
Post by calzephyr on Apr 27, 2013 10:47:20 GMT -8
Mike
Nice looking layout.
What is the distance for the walkway between the layout in the foreground??
It might be more than it looks like since the left one is higher, right??
Larry
|
|
|
|
Post by mlehman on Apr 27, 2013 12:41:07 GMT -8
Larry,
Thanks.
It's a bit of a squeeze at the point where the pic was taken at 18". The fact that's it's lower on the left side really helps. Past that it opens up with a pit that runs from 26" to 40". Things get narrower again after that, which will be seen in some forthcoming further posts. Wish I had another 2' throughout for more space. It works though, as the space is pretty much where its needed for ops.
The far corner of the room is about 20 feet away. Overall, the room is about 28'x16', but it has several intrusions in the end behind the pic that narrow it. That's also where the entrance is. The visible layout is a no-lix around the room.
Narrowgauge staging is reached via a single turn helix to a double-track return loop under Durango. It holds about 4 trains.
Standard gauge is a folded dog bone, with the back half hidden under the narrowgauge. There is a 7 track staging yard that is mostly in the adjacent room for easy fiddling.
|
|
|
|
Post by calzephyr on Apr 27, 2013 15:14:45 GMT -8
Larry, Thanks. It's a bit of a squeeze at the point where the pic was taken at 18". The fact that's it's lower on the left side really helps. Past that it opens up with a pit that runs from 26" to 40". Things get narrower again after that, which will be seen in some forthcoming further posts. Wish I had another 2' throughout for more space. It works though, as the space is pretty much where its needed for ops. The far corner of the room is about 20 feet away. Overall, the room is about 28'x16', but it has several intrusions in the end behind the pic that narrow it. That's also where the entrance is. The visible layout is a no-lix around the room. Narrowgauge staging is reached via a single turn helix to a double-track return loop under Durango. It holds about 4 trains. Standard gauge is a folded dog bone, with the back half hidden under the narrowgauge. There is a 7 track staging yard that is mostly in the adjacent room for easy fiddling. Mike Nice! Thanks for the tour and explanation. Most of us do not have that great big room with all of the space that is needed. You have done a very nice job of getting a lot of interesting scenes into that room! Larry |
|
|
|
Post by mlehman on Apr 29, 2013 18:00:50 GMT -8
Larry, I went through a lot of iterations of the plan to squeeze everything in to start with -- getting the grades and loops in the right places. As can be seen, I used 3/4" ply with generous margins used in the cookie-cutter over traditional L-girder underpinnings. In the end, a lot of details got shifted around to suit various needs, but haven't needed to add much actual sub-roadbed. The scenery base is all extruded styrofoam, built up, with a Scupltamold scenery base and lots of rock castings. Anyway, still teasing out more contributions. The ones so far are outstanding! This takes you over to the end of the aisle after doing a 180. The aisle's a lot like a question mark. In the Before shot, you can see the entrance door in the left background. Directly ahead is the corner of the room that the helix to Chama staging loop under Durango is entwined with 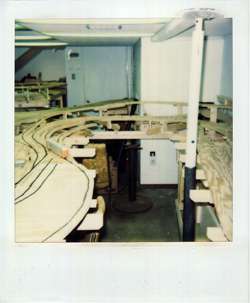 In the After shot, you're somewhere west of Durango along the old RGS. 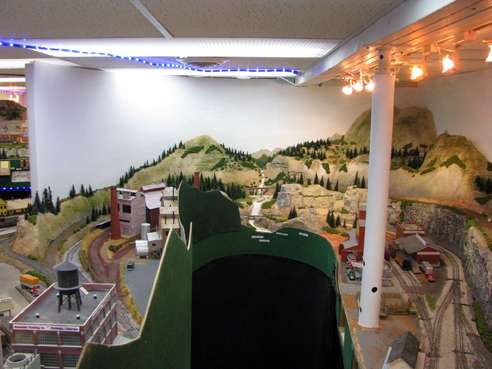 Now there's a curved scenic divider. The upper grade is climbing towards Rockwood on my Silverton Branch where a sawmill operates, while the lower track is dual-gauge to Hesperus, where a large coal mine loads both SG and NG coal cars and the third rail ends for the NG. Both are to the right side of this After picture. |
|
|
|
Post by mlehman on May 4, 2013 6:47:49 GMT -8
OK, here's another take on Before and After. For me, LED lighting is finally reaching the sweet point of price vs performance. I've got a bunch of blue LED rope lights to simulate moonlight. They're on display in this first shot. 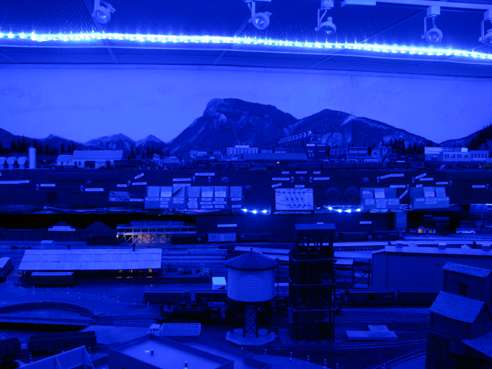 Overhead clearance is limited on my second deck and there just isn't enough here to really work and leave the open feeling of the Silverton yard working to differentiate it from the scenery on the lines that run north from there. For $40, I got this 12' LED line voltage light strip. It shows up well when on by itself. 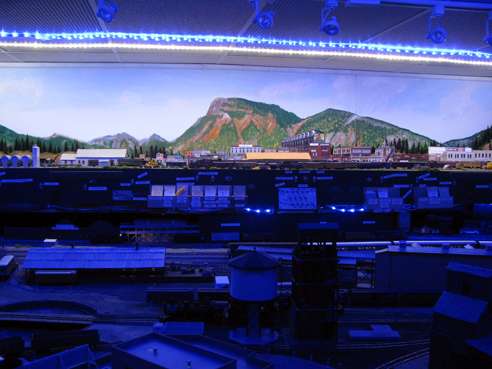 With the overhead lights on, the benefit is less obvious in the pic, but much better with the naked eye.  So, no need for decades in between Before and After. Sometimes you can document a B&A credibly in just a few minutes. |
|
|
|
Post by mlehman on May 14, 2013 6:05:05 GMT -8
We're back today with some more lighting work. This time it's installing line voltage LED lighting. I had some 30+ halogen MR16 50W track lights. Plenty strong, they're hotter than the devil. To replace some of them up in the mountains above Silverton I used a single unit of Meridian 12 line voltage foot Daylight LED strip lighting, which costs ~$40. It can be extended up to 192 feet by adding additional strips. Here's a pic with the old track lights off. 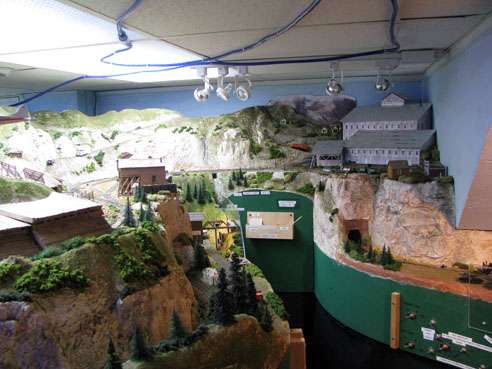 Halogens on and heating the room. 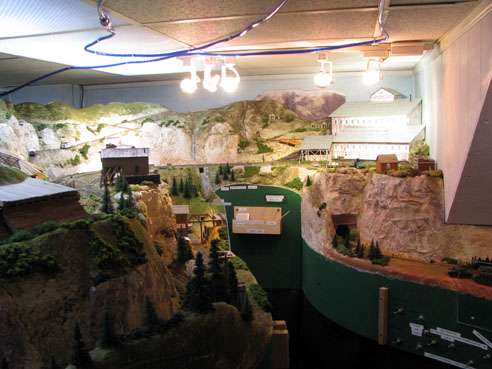 My ceiling is rather close clearance. You could bump your head on the lamps if working in close. As you can see, some like me might even suffer burns from the halogens if not careful  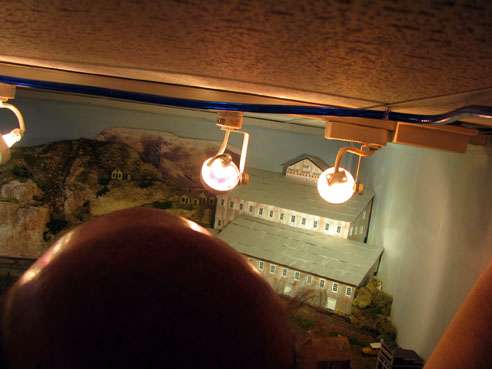 Here you can see how removing halogens gives a less distracting view and eliminates clearance issues. 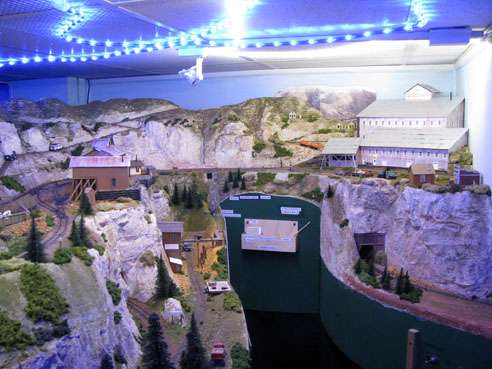 I retained a single track light, because the Gold Prince Mill needed a little more light, but I converted it to a LED lamp. It is now cool, but also out from over the aisle, so there's more clearance when working back in there. Here's the finished lighting. 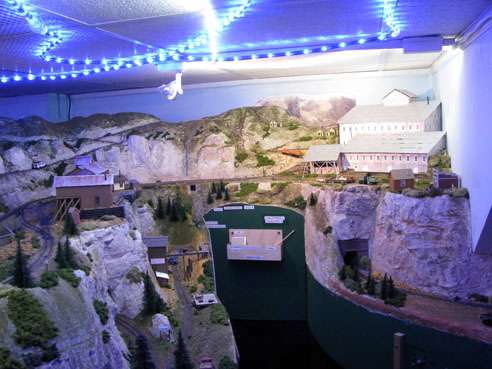 I still have halogens illuminating Eureka, back down the branch towards Silverton. I'll most likely get another piece of strip lighting and connect the Animas Forks segment with the first one that I installed over Silverton. I have a dozen more halogens over the Rockwood area of the layout. Not sure if I'll go with the MR16 LED bulbs or the Meridian strip lighting (which will be cheaper, if I only need two, or the same cost if I need three strip light strings for proper illumination. I'll save on the cost of lighting the halogens AND the AC costs with keeping the room cool. Plus I'll be able to leave the LEDs on all the time, given there's no heat issue like the halogens have. |
|
|
|
Post by mlehman on May 19, 2013 14:49:41 GMT -8
This time we'll look at some pics of my Silverton backdrop. I have pretty limited skills when it comes to anything beyond painting barns, especially if I need to do free-hand. That's why I can say enough about the Greg Gray approach. I'm sure like many painters, Greg has paid attention to the work and methods of others. But I found his VHS tape worked for me. His work can be found on many layouts in the St. Louis area and across the country. The (now) DVD is available from Green Frog: www.greenfrog.com/paintbakDVD.shtmlThis is the raw material I had to work with. I covered one basement window in the process and that's given me a few issues with a joint that's in about the same place in the 1/8" hardboard I used for the backdrop. The concrete wall first had a 1x2" header installled at the level where the suspended ceiling would abut the wall. Then I applied 3/4" insulation with adhesive abutting the bottom the pine board. The hardboard went on sideways giving me a 4' tall backdrop/insulation that extends about 3' below the outside grade, also attached with adhesive. This has worked well for climate control where I'm at. Other the the one joint near the blocked window, I've had no issues and the whole thing has held up well despite only being glued together in an area infamous for wet basements (mine is nearly dry, fortunately.) In the process, I coved the corner when the Rio de las Animas flows on the south side of Silverton. I primed the backdrop with Kilz, then went over it with gesso. Here's a pick of the raw "canvas."  Then the backdrop goes up in stages as Greg demonstrates in his video. Even better for me, for his example he paints a Durango backdrop, so this really helps. 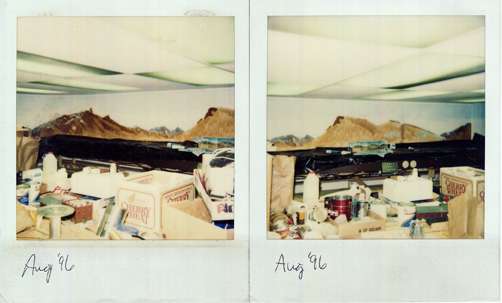 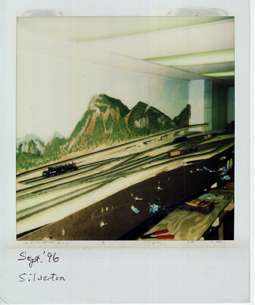 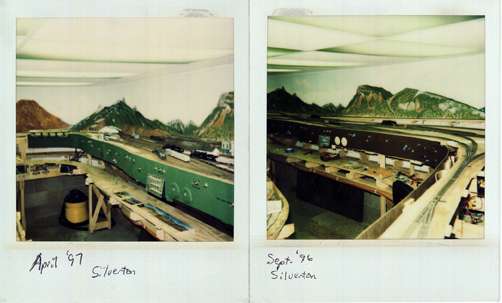 This shot shows how the backdrop blends into scenery at its right side. Matching coloration between the backdrop and scenery is vital to the scene coming together. 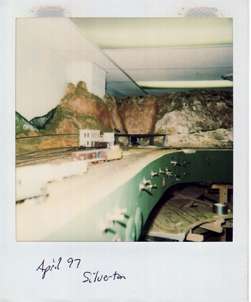 This is the way it looks today, which to me is pretty credible.  I never did go back and do the final layer of details. Maybe someday? Works for me for now.  |
|
|
|
Post by mlehman on May 26, 2013 18:38:49 GMT -8
We're back to playing with more lighting. This time, I joined the two previous sections of LED strip lights to make one long 36' section by adding 12' in between them. This also allowed me to do away with another rack of inefficient 50W halogen track lights. The improved and less distracting view with the old lights gone is ap[parent in this series of three views. Halogens in the way. 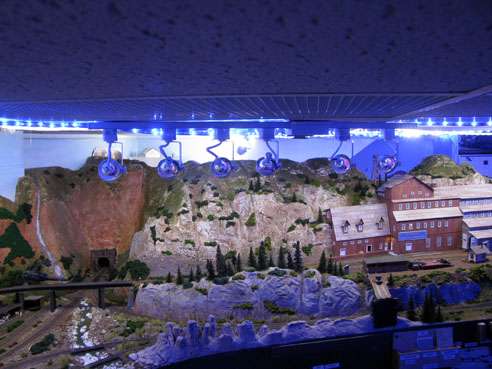 Halogens heating up the room and in the way. 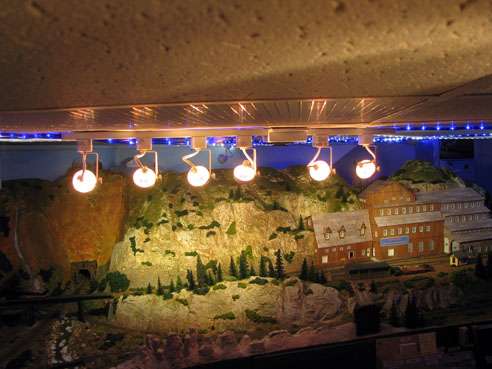 Halogens gone and the scene chilling before you. 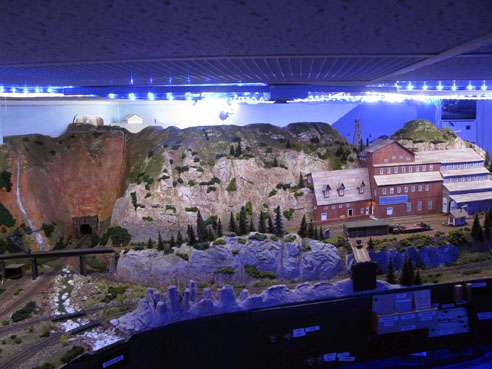 Here's a set of shots of the Sunnyside from a different angle. 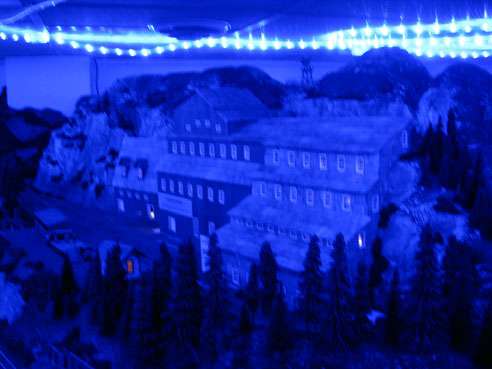 With LEDs. 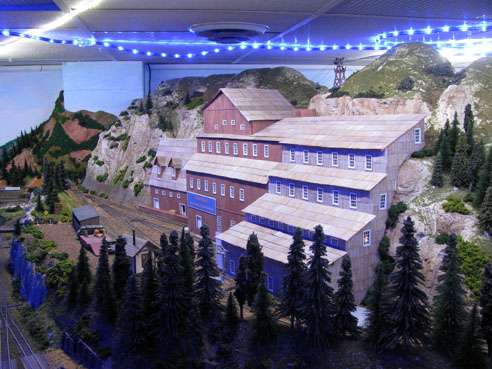 A long shot from the layout room door. I am not only dispensing with most of the odl track lighting, I'll probably only need the room lighting in the ceiling for work lighting now. The effect of these new lights is just awesome and the whole 36' string of white lighting runs on just 30 watts. Amazing. 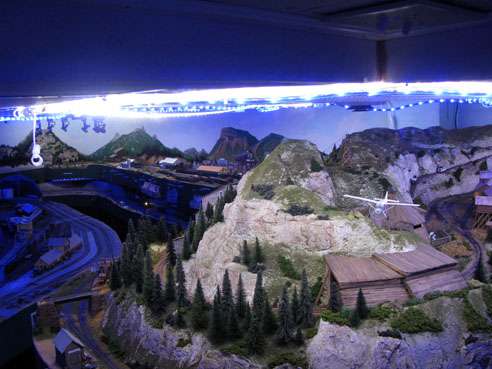 Anyone else have any B&A they'd like to share? Classics or Recent Hits or whatever ya' got will surely be appreciated.  |
|
|
|
Post by jeznew on May 28, 2013 2:37:21 GMT -8
From this:  To this: 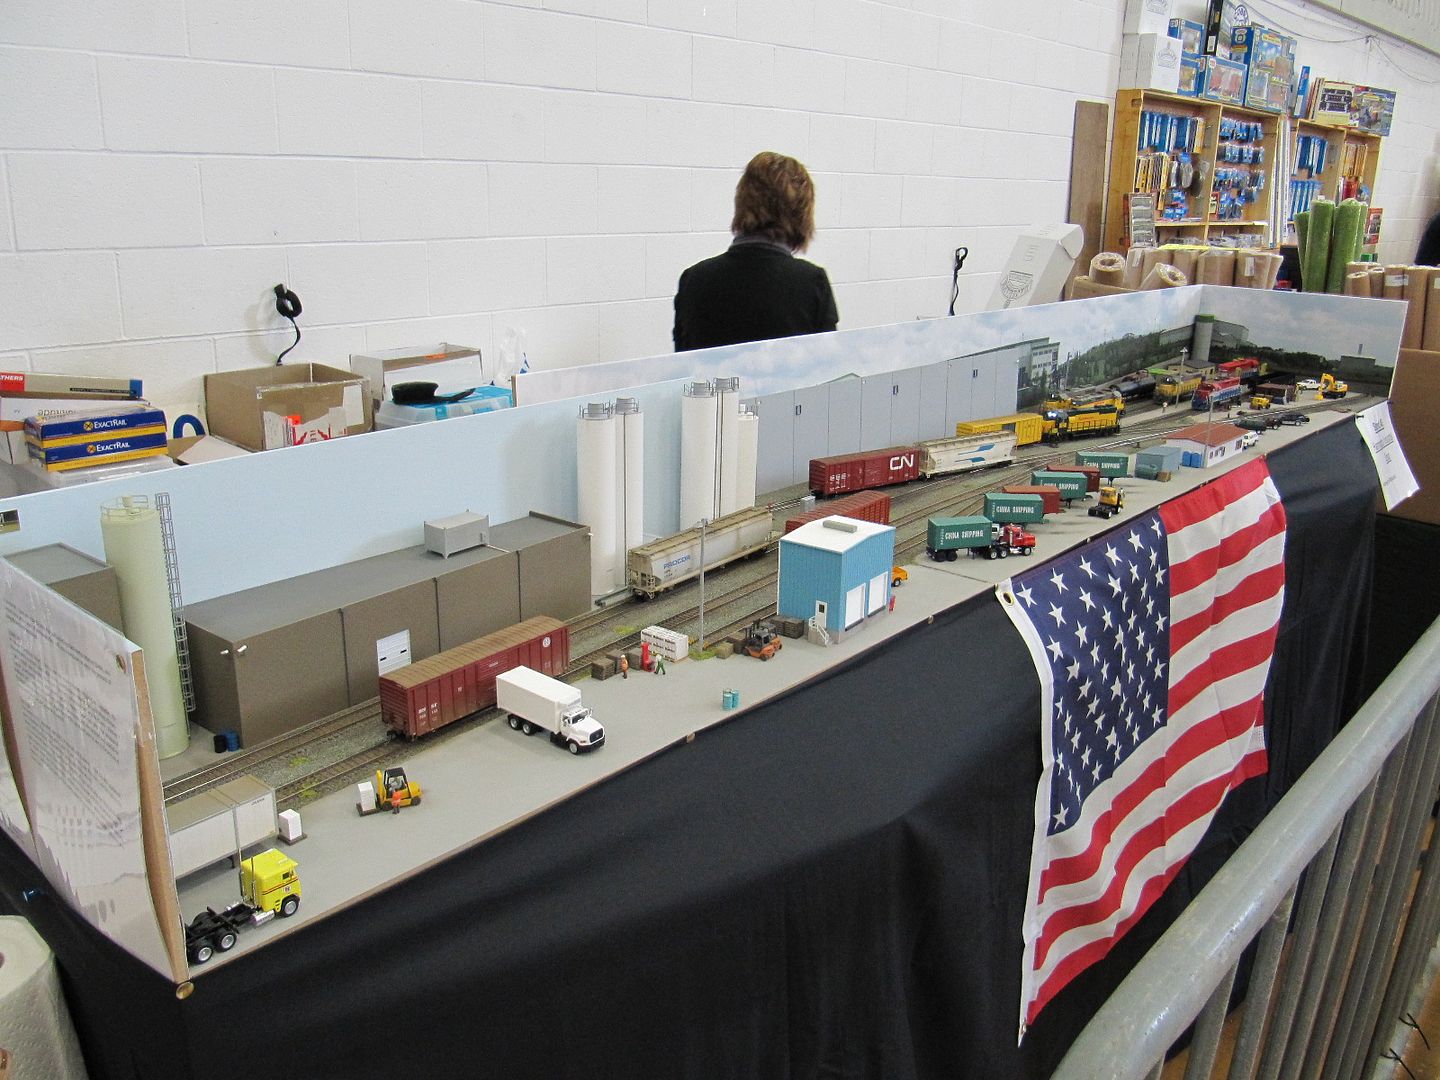 This is Harrington, my first US switching layout built to exhibit in the UK. Enjoy. Jez lawleystreet.com |
|
|
|
Post by mlehman on May 28, 2013 5:05:09 GMT -8
Jez,
Nice work! The trackwork really flows well for the eye in your modules.
|
|