|
|
Post by sd40dash2 on Jul 11, 2020 16:24:52 GMT -8
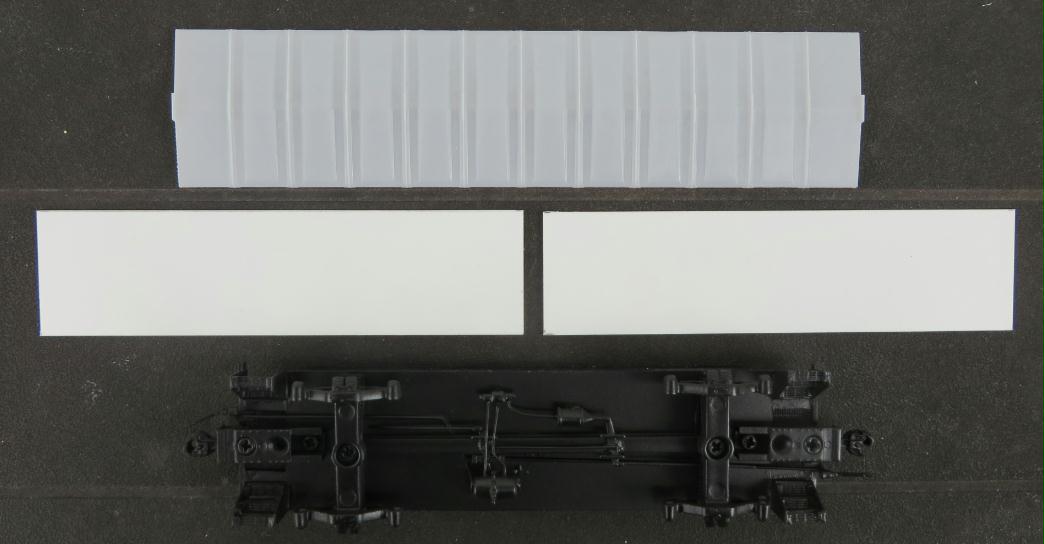
Canadian Pacific in 1948 and 1949 built 137 all-new steel end cupola cabooses to replace aging wood ones of a similar design. These cabooses were initially numbered in the CP 437268-437404 range and many were renumbered and assigned to different types of service (transfer, run-through, pools etc) several times over their long career. Most survived until the end of the caboose era in 1990 and a few were thankfully preserved for public display. This prototype is only represented in HO scale with decades-old brass Van Hobbies and Overland models. There are no accurate plastic models available but Kaslo Shops announced a few years ago a resin kit that should cover all versions. That model hasn't yet been released so recently I decided to try scratch building one of these just for fun. I will share the progress here as long as there is interest, so your comments and questions are welcome!  Starting point of the project was to see if I had the right parts on hand. Green signal! Starting point of the project was to see if I had the right parts on hand. Green signal! |
|
|
|
Post by migalyto on Jul 11, 2020 16:50:53 GMT -8
Yes please share your journey. Im always amazed at the modelers that have the talent to set out and build something that doesnt exist. I realized that is far beyond my skillset, but really enjoy watching others create.
|
|
|
|
Post by edwardsutorik on Jul 11, 2020 17:16:44 GMT -8
Most excellent!!
Looking forward to the build.
Ed
|
|
|
|
Post by sd40dash2 on Jul 11, 2020 19:19:44 GMT -8
 Prototype photo of the upgraded 4340-series version, on display in Alberta. Prototype photo of the upgraded 4340-series version, on display in Alberta. |
|
|
|
Post by thebessemerkid on Jul 12, 2020 1:52:53 GMT -8
That's a sharp looking caboose. Looking forward to the build.
|
|
|
|
Post by cp6027 on Jul 12, 2020 10:21:17 GMT -8
Looking forward to seeing how you accomplished this model.
I could use one or two models from that exact series of CP caboose; the Kaslo kit has been "coming soon" for a long time.
|
|
|
|
Post by davidmbedard on Jul 12, 2020 12:07:19 GMT -8
I'll be printing one off late august. Best of luck with your build!
|
|
|
|
Post by sd40dash2 on Jul 12, 2020 13:19:31 GMT -8
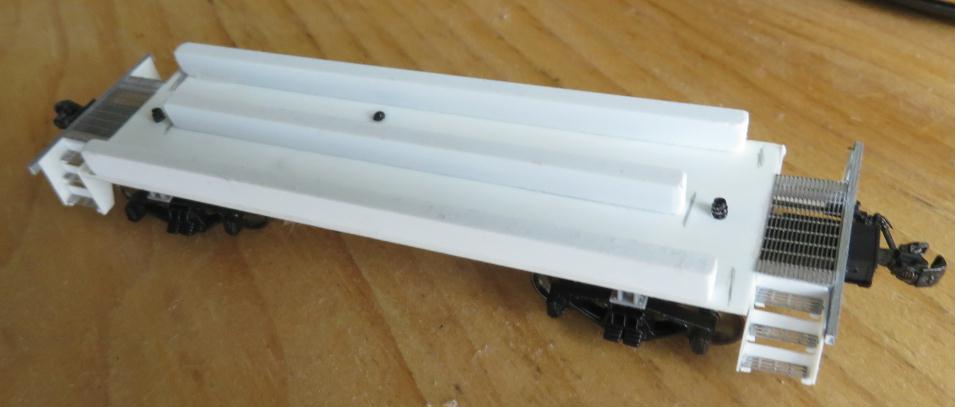
Thanks for all the supportive comments and likes! OK I will start the build with a .040 styrene underframe base. Prototype truck spacing is 21' - 2.6" and length is 35' - 11" over strikers. I used 21' for the former to allow trucks to swing and clear the steps.  |
|
|
|
Post by TBird1958 on Jul 12, 2020 13:41:04 GMT -8
Go for it!
I know you'll find this to be a very rewarding project - Cheers!
Mark Hills
|
|
|
|
Post by grahamline on Jul 12, 2020 14:30:19 GMT -8
Builds like this often bring to light obscure small-production parts that help out other projects, like the Black Cat screen doors. Thanks.
|
|
|
|
Post by sd40dash2 on Jul 14, 2020 9:00:44 GMT -8
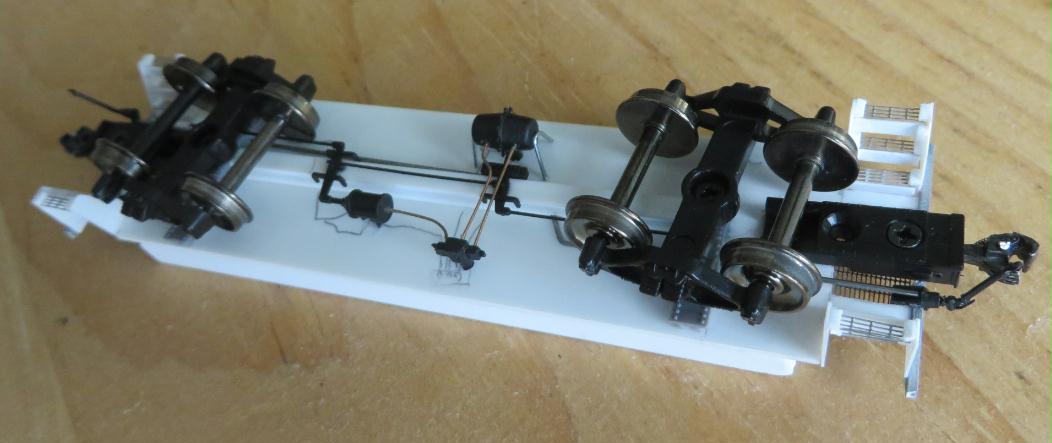
Chassis build was completed quickly -- things go together quite easily when you've got the key parts and tools on hand:


|
|
|
|
Post by edgecrusher on Jul 14, 2020 9:39:56 GMT -8
Looking good. What are you using for brake system?
|
|
|
|
Post by sd40dash2 on Jul 14, 2020 9:44:55 GMT -8
^ Thanks for the comment. That's an Accurail part #180 brake rod set (visible in its package to the right of the top photo), modified to suit and supplemented with wire and scrap box parts. Accurail doesn't get enough credit for all the effort they put into making parts available at very reasonable prices: www.accurail.com/accurail/parts.htm |
|
|
|
Post by edgecrusher on Jul 14, 2020 10:00:31 GMT -8
Thanks, that's good to know. I didn't realize Accurail was offering parts like that. I guess I should have a look at what they're offering these days.
|
|
|
|
Post by sd40dash2 on Jul 14, 2020 10:10:12 GMT -8
Builds like this often bring to light obscure small-production parts that help out other projects, like the Black Cat screen doors. Thanks.
True. Black Cat has 2-3 styles of those storm doors -- I've found them to be very handy.
|
|
|
|
Post by Colin 't Hart on Jul 15, 2020 11:28:48 GMT -8
Chassis build was completed quickly -- things go together quite easily when you've got the key parts and tools on hand:    Really nice work on that chassis!! |
|
|
|
Post by sd40dash2 on Jul 16, 2020 15:59:57 GMT -8
Chassis spray painted black, way easier and faster than fighting with the airbrush:  |
|
|
|
Post by kentuckysouthernrwy on Jul 18, 2020 7:36:39 GMT -8
Nice to actually see some real model building on this forum, well done, too!
|
|
|
|
Post by sd40dash2 on Jul 18, 2020 17:45:29 GMT -8
After some light drybrush rust weathering and addition of a few small styrene braces, I set aside the chassis and proceeded to the roof and body shell.  |
|
|
|
Post by davidmbedard on Jul 21, 2020 5:32:14 GMT -8
Quick question.... What are your plans for the rivets?
|
|
|
|
Post by sd40dash2 on Jul 21, 2020 6:31:58 GMT -8
^ Micromark rivet decals on the bare styrene just before painting.
Edit 7-25: It has been decided to spray the bare styrene with glosscote and apply rivet decals when dry. Better adhesion that way.
|
|
|
|
Post by brammy on Jul 21, 2020 15:50:51 GMT -8
Quick question.... What are your plans for the rivets? Count them? Sorry, couldn't resist. |
|
|
|
Post by sd40dash2 on Jul 22, 2020 16:37:55 GMT -8
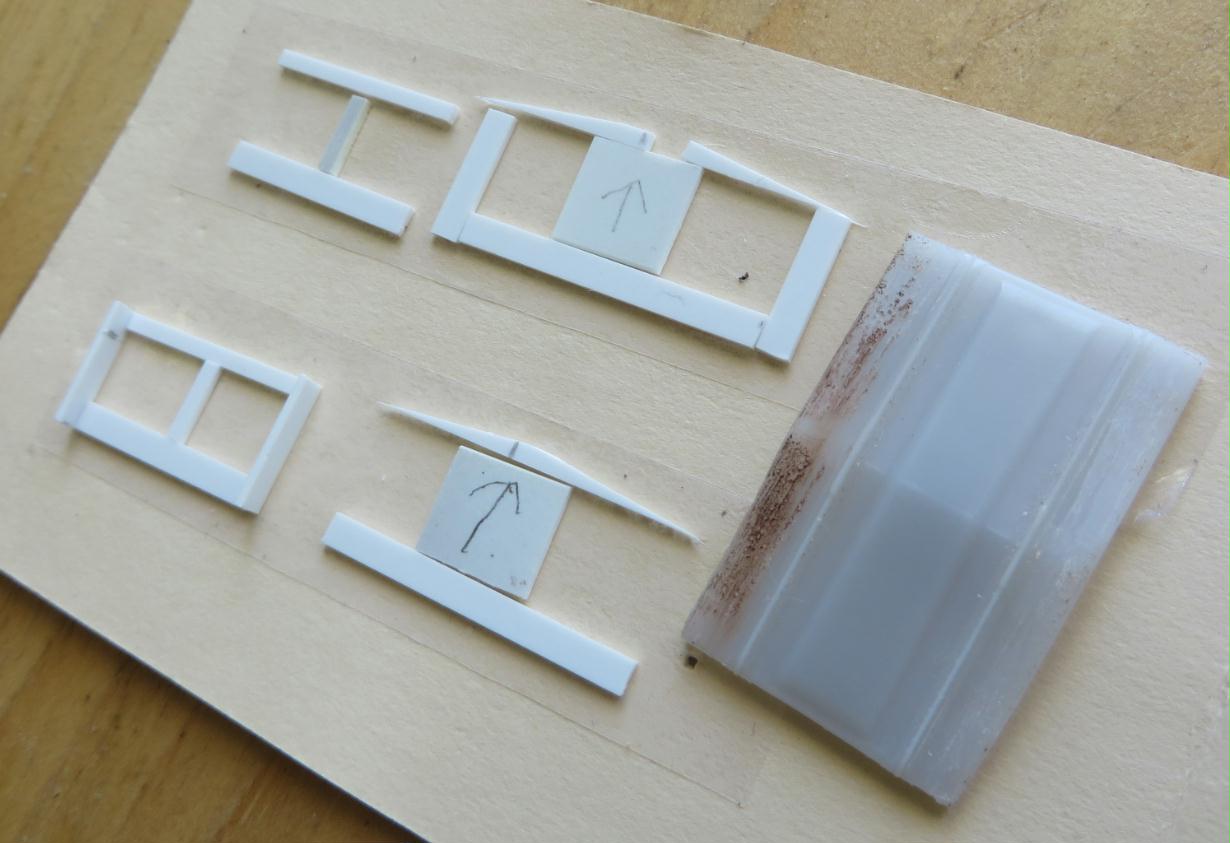
I'm thinking of building the cupola with strip styrene rather than trying to cut out all those windows from sheet. Here are the pieces on my painting handle. They will align properly when assembled onto the roof. Remember this is the CP 4340-series version of 1982+ with upgraded and enlarged windows, electric marker lights and lower fuel panel.  |
|
sd50f
Full Member
  
Posts: 101
|
Post by sd50f on Jul 22, 2020 20:31:26 GMT -8
It's always nice to see a step by step diary of a model being constructed. I am anticipating more from this thread. You've got the makings of a very nice looking van.
Timothy Dineen
|
|
|
|
Post by sd40dash2 on Jul 23, 2020 17:28:59 GMT -8
Roof has been carefully measured and cut along with spots marked for smoke jack and three vents. Sides and ends are ready for next steps and doors are ready to install in the openings.  |
|
|
|
Post by slowfreight on Jul 23, 2020 18:57:52 GMT -8
With those door castings, it's nice that you don't have to totally square up the door opening on the end. That's the fussy filing that is such a pain.
|
|
|
|
Post by sd40dash2 on Jul 23, 2020 19:04:59 GMT -8
^ Thanks for the comment. Indeed, the doors are a key part that helps keep everything aligned. Always grateful for the doors made by companies like Black Cat, Athabasca, Grandt and Tichy.
|
|
|
|
Post by sd40dash2 on Jul 24, 2020 10:30:24 GMT -8
Roof cut, cupola bracing installed, pencil lines added for rivets to align with roof panel seams as per prototype. Window lines, generator, tack boards, old filler plates, spots for curved railing drill points and lamps added as well. Ignore the 4x5' notation as the filler panel is smaller than that.  |
|
|
|
Post by Colin 't Hart on Jul 24, 2020 10:48:12 GMT -8
Enjoying the progress so far. I looked but didn't see any note about who made the roof?
|
|
|
|
Post by sd40dash2 on Jul 24, 2020 10:56:24 GMT -8
^ Thanks for your likes and comments. I somehow feel I'm "invading" the forum with these modelling posts as there seems to be a lot of other discussions happening lately. I'm certainly not trying to compete with those posts. But it seems as though you and a few people are enjoying the posts in this thread, so I'll continue unless I'm getting on people's nerves with this.
Anyway, this is an Intermountain Murphy roof from their 1937 AAR 40' boxcar. They are a critical piece for these CP cabooses but are sadly no longer available since IM recently stopped selling these types of parts.
|
|