|
|
Post by Christian on Sept 15, 2020 1:16:15 GMT -8
Looking at the photograph; you are going to need a red wash to fade those huge SOO letters no matter what the base is.
Use your samples for a test. Top color with boxcar red wash. Bottom sample with your current thought of white followed by boxcar red. I have a feeling that the top sample with boxcar red wash will be close. A white wash dulls things and I think that white over the very dark sample followed by a sorta dark wash of boxcar red might be interesting, but not what is on the prototype.
|
|
|
|
Post by sd40dash2 on Sept 15, 2020 4:45:47 GMT -8
Thanks for the paint comments! Continuing on with the underframe, the center piece should easily snap off at this point. Don't worry about all the damaged plastic, most of that will be cleaned up. The step sides are NOT damaged, despite what it looks like here. 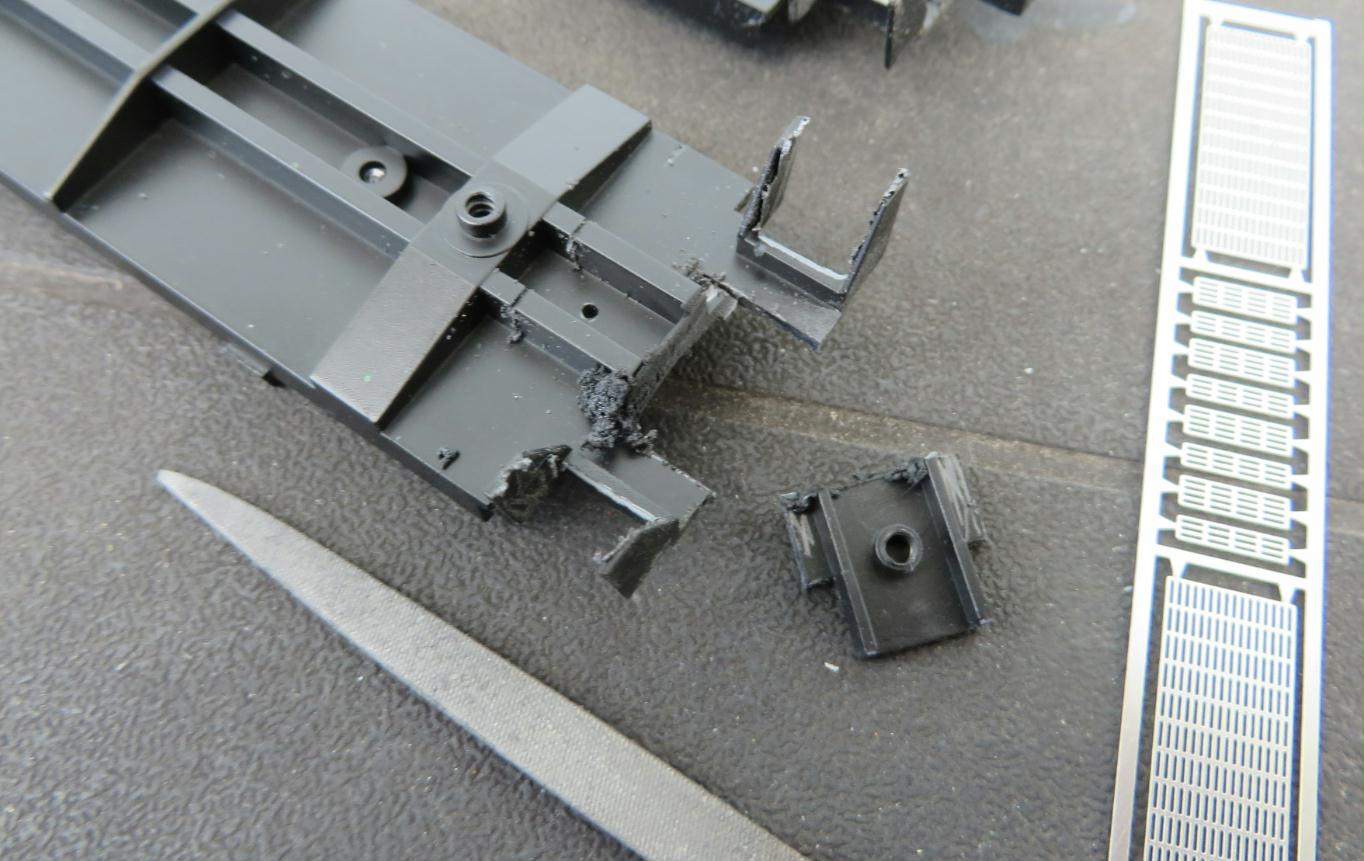 |
|
|
|
Post by sd40dash2 on Sept 15, 2020 7:05:24 GMT -8
Top from left to right: base leather brown from can, base brown with oxide wash. Bottom from left to right: base kona with white wash, base kona with white and oxide wash, base kona with oxide wash and lastly original base kona from can. Which do you think is closest?  |
|
|
|
Post by Christian on Sept 15, 2020 8:22:32 GMT -8
All of them! Here are several photos of one specific caboose over the years. It looks to me that your Kona right out of the can is good for new paint based on the 1987 photo. Your oxide wash over the Kona seems good for the same caboose in this century. Both your leather browns somewhere in between. The white and white/oxide as washes don't work for me. www.rrpicturearchives.net/rspicture.aspx?id=362839 |
|
|
|
Post by sd40dash2 on Sept 16, 2020 1:50:35 GMT -8
Next use a sanding drum to grind back some of the center sill to accommodate the new draft gear. Don't worry about this mess -- all these tools will do a fine job of cleaning this up as you'll see in the next photo. 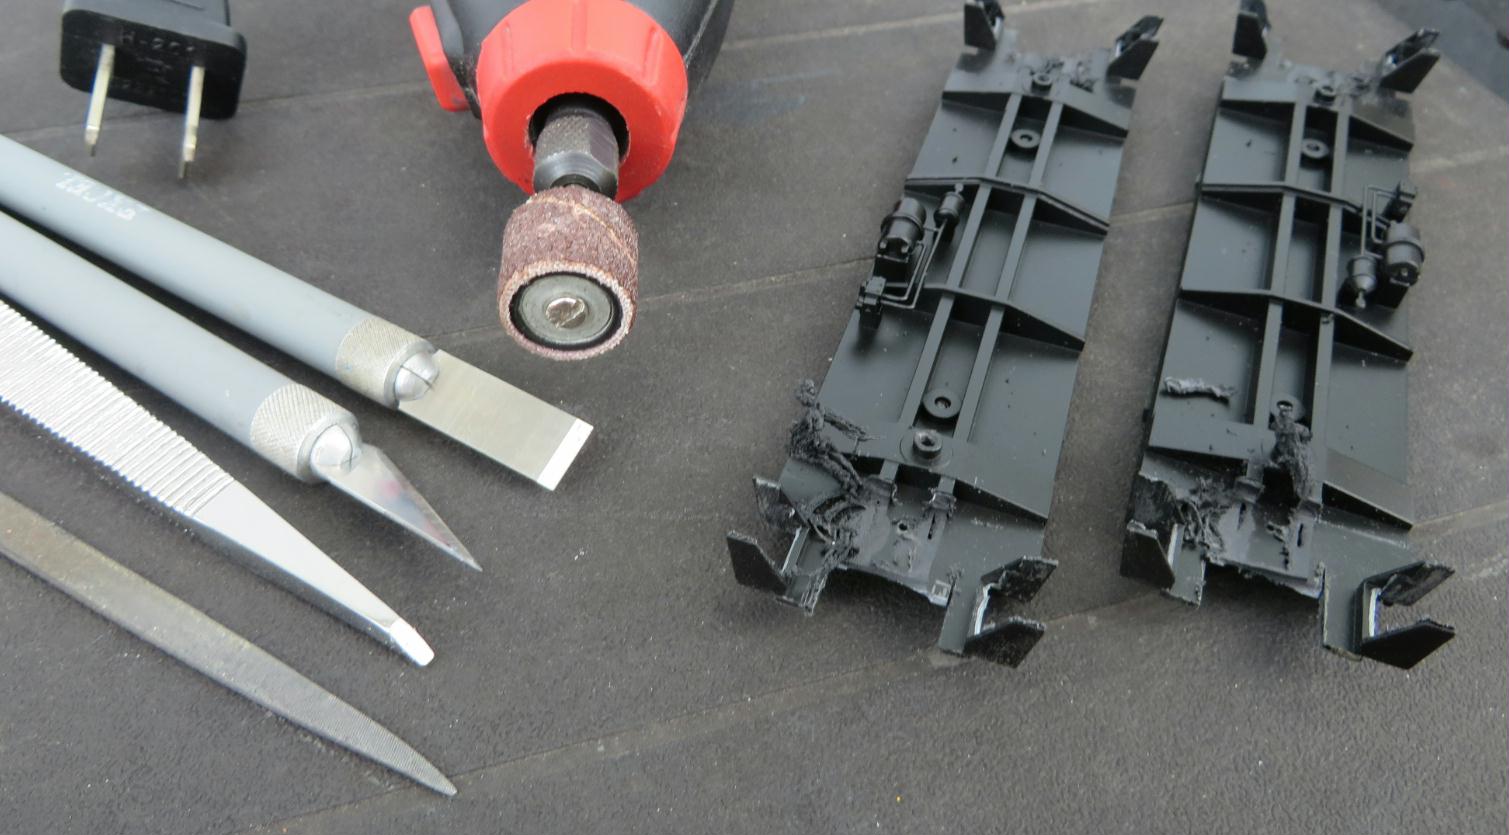 |
|
|
|
Post by sd40dash2 on Sept 16, 2020 4:31:39 GMT -8
After all that grinding and cutting, now is the time to file and clean everything up nicely. Constantly refer to your new parts to ensure proper placement and knowledge of how much and where to remove material.  |
|
|
|
Post by sd40dash2 on Sept 16, 2020 7:47:24 GMT -8
With all detail removal behind us we can now turn our attention to the new parts to be added. Use the NWSL Chopper II to cut out consistent step kick plates from styrene strip, 8 needed per caboose. 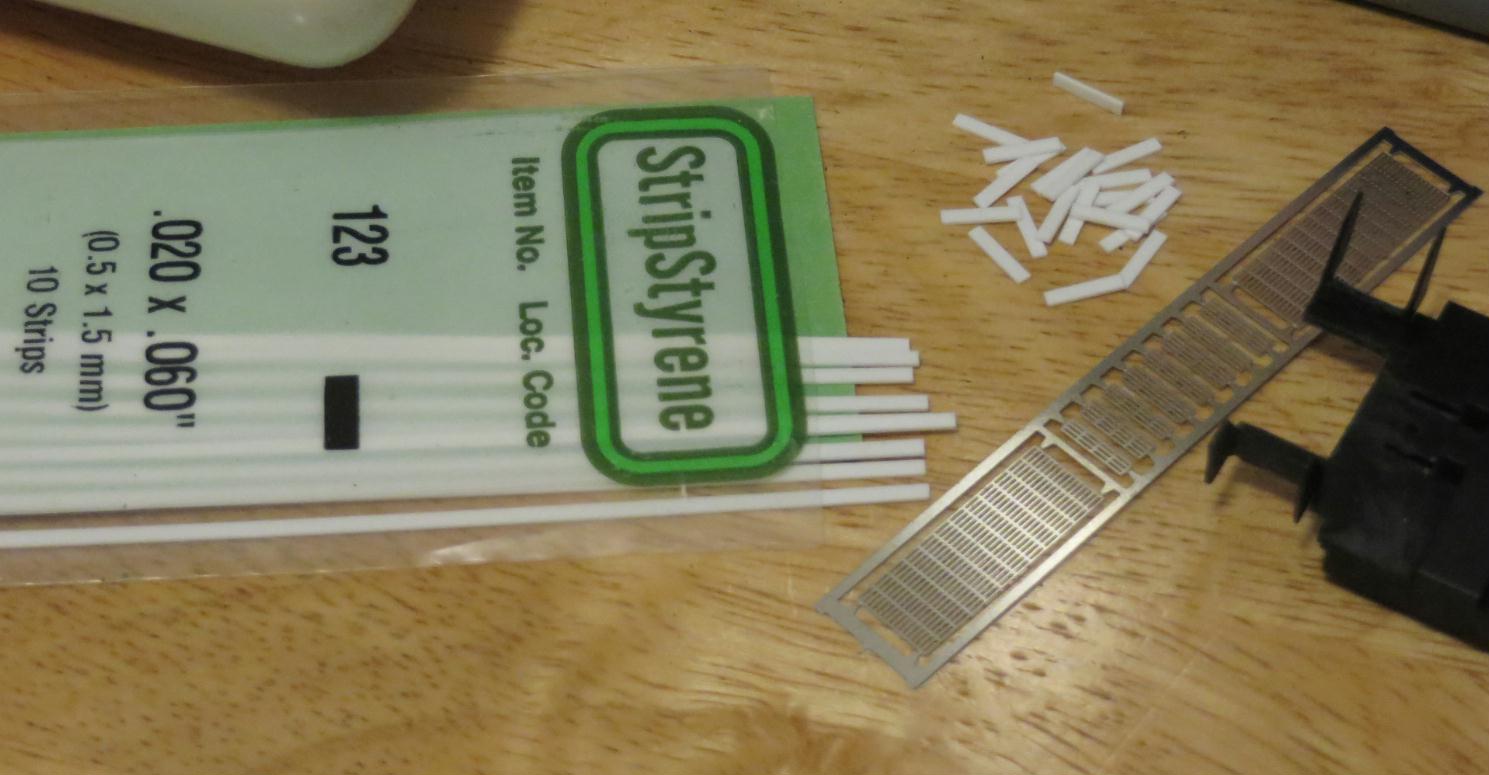 |
|
|
|
Post by sd40dash2 on Sept 16, 2020 10:36:38 GMT -8
Steps and platforms have been removed from their frets, ready to install. 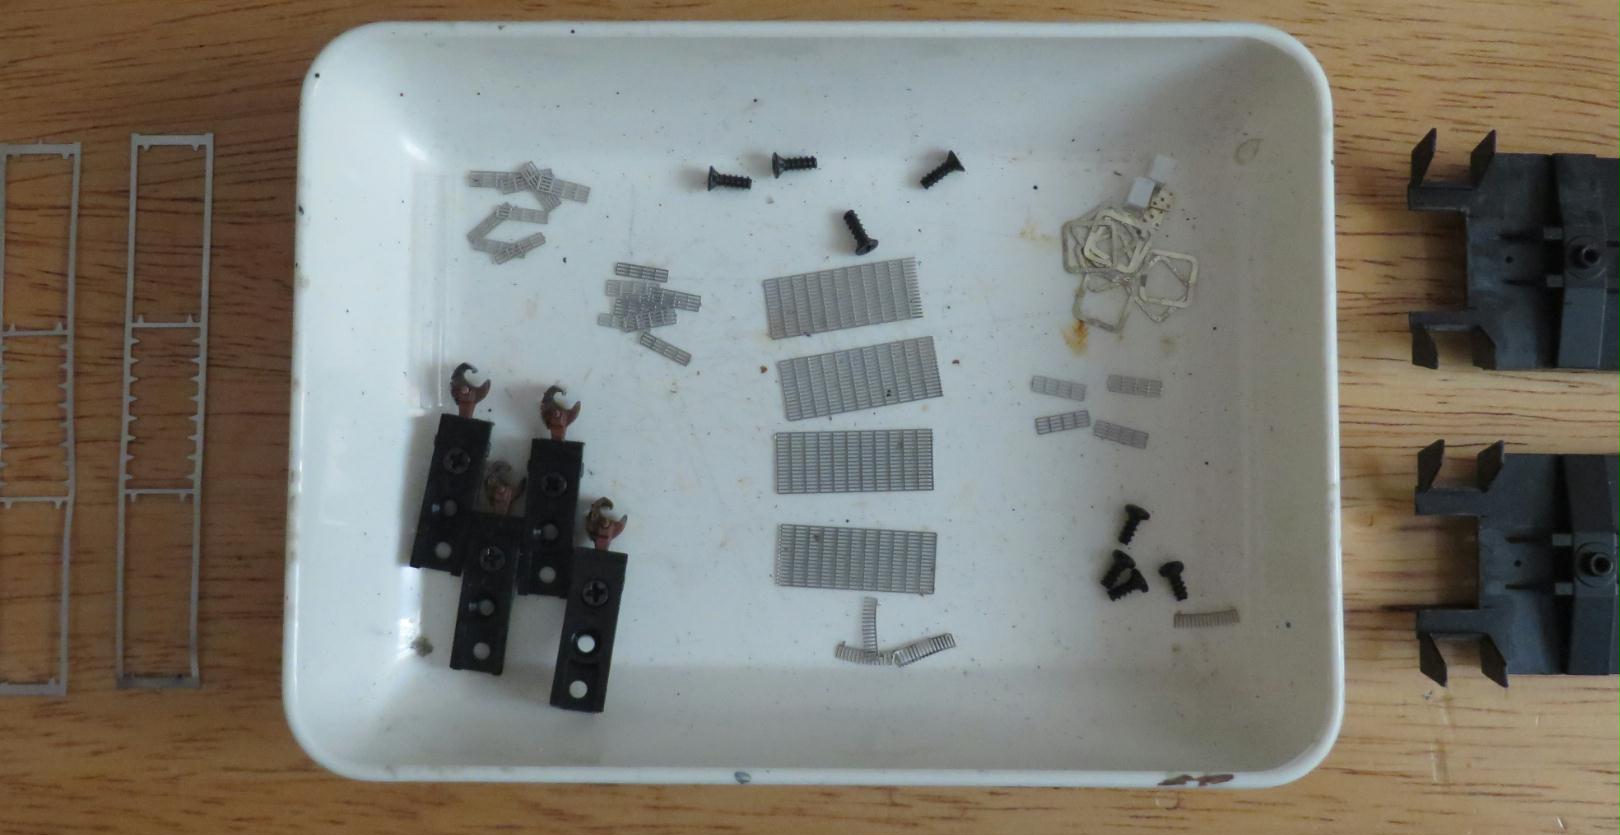 |
|
|
|
Post by edgecrusher on Sept 16, 2020 11:12:11 GMT -8
I don't know what you are using to cut out the photo etch parts, but I'd highly recommend one of these. xuron.com/index.php/main/consumer_products/2/80 They pretty much eliminate any of the warping and twisting you get from other methods. I've had mine for about a year and I love it, its still as sharp as the day I got it. Just make sure to ONLY use it on thin sheet metals. |
|
|
|
Post by sd40dash2 on Sept 16, 2020 13:29:39 GMT -8
^ Thanks for the suggestion. I am using small nail scissors to remove etchings. The reason the frets above are bent was so I could fit the tool in to be able to cut. Will take a look at the Xuron part you mention.
|
|
|
|
Post by sd40dash2 on Sept 16, 2020 13:31:16 GMT -8
Plano steps and styrene backers have been installed with ACC. I had to open a second Plano set for the 3rd step.  |
|
|
|
Post by myoungwisc on Sept 16, 2020 16:57:51 GMT -8
Steps and platforms have been removed from their frets, ready to install. Manny - who makes the FRA window glazing frames you're using on this model? |
|
|
|
Post by sd40dash2 on Sept 16, 2020 17:21:02 GMT -8
^ Those are custom parts I had made last year, not available commercially.
|
|
|
|
Post by Colin 't Hart on Sept 16, 2020 23:50:50 GMT -8
After all that grinding and cutting, now is the time to file and clean everything up nicely. Constantly refer to your new parts to ensure proper placement and knowledge of how much and where to remove material. Wow, that chopping, cutting, and grinding cleaned up very nicely! |
|
|
|
Post by sd40dash2 on Sept 17, 2020 3:39:44 GMT -8
^ Thanks Colin for your comment. Yes, it seems the underframes are coming along very nicely. Once everything is back together you'll never know such major work took place. Here is a photo of the underside of the model showing new Plano steps installed and area ready for new platform and draft gear. 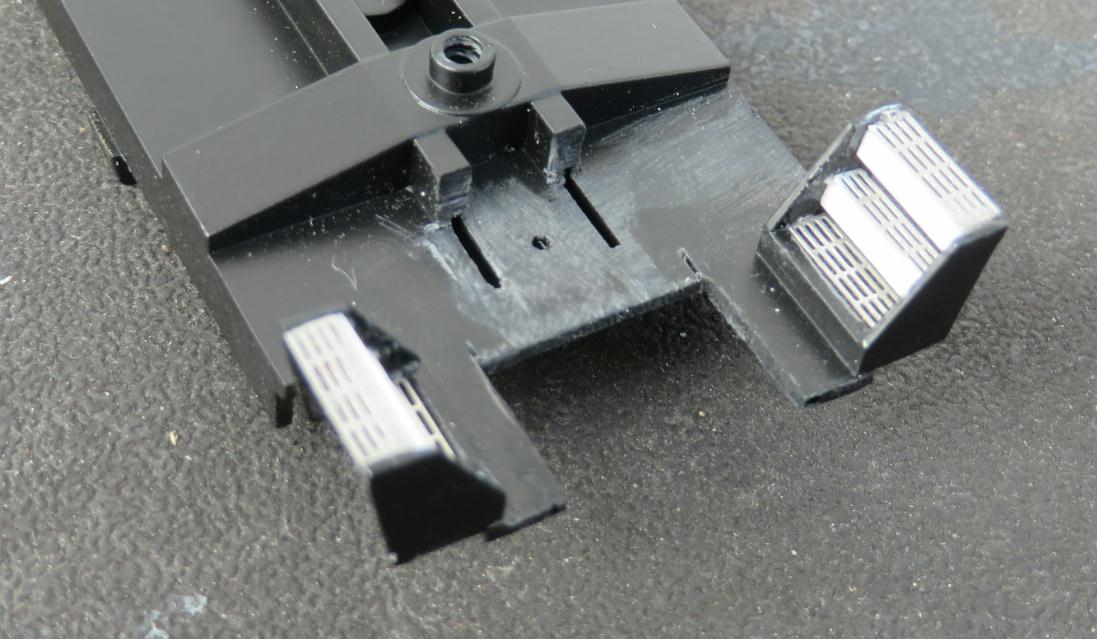 |
|
|
|
Post by sd40dash2 on Sept 17, 2020 6:58:32 GMT -8
Plano platform has been applied with ACC.  |
|
|
|
Post by sd40dash2 on Sept 17, 2020 9:00:47 GMT -8
Underframe detailing complete and sprayed with flat black. Note the added lead weights. Even without chopping off the ends to accommodate the draft gear screws, more weight was necessary for these cars.  |
|
|
|
Post by sd40dash2 on Sept 17, 2020 12:29:48 GMT -8
Underframe painting complete. Note I removed the wheels and couplers before doing this.  |
|
|
|
Post by cp6027 on Sept 17, 2020 13:31:13 GMT -8
Looks good so far! Back in the 80s did any of the SOO run-through coal trains into the Crowsnest region or other cross-border trains to Winnipeg and Moose Jaw use a SOO caboose such as this one, or would they have been turned back in favor of a CP van north of the border?
|
|
|
|
Post by sd40dash2 on Sept 17, 2020 14:07:11 GMT -8
^ There are experts out there (railfans and employees) who have an excellent memory of those operational details from decades past. I do believe WPG and MJ had CP 4349xx series vans assigned for this purpose so that the SOO cabooses remained on the US side. In my book I show a photo of CP 434950 parked at Thief River Falls for this type of service so it's possible they were swapped out there.
I am reminded of a 1992 Glenn Courtney photo of CP 4710 beside a CAST container train headed east through Guelph Junction with a SOO caboose bringing up the rear. That photo was posted to railpictures.net at one time but I can't presently find it through a google search. I can't recall if this was normal practice as there are many photos and videos showing CP cabooses moving in and out of Chicago in this rough timeframe.
Again, such prototype questions must be deferred to better sources than me. You live in WPG right?
|
|
|
|
Post by thunderhawk on Sept 17, 2020 14:12:52 GMT -8
This is just a wild ass guess, but having been on Soo cabooses in the late 90's I'd guess they were not equipped as required by CP labor agreements. Soo locomotives have/had hotplates and refrigerators so they could lead in Canada. I don't recall seeing hotplates or reefers in our labor agreement on the Soo side. One would think the trainmen had similar for the cabooses, but like I say; just guessing.
|
|
|
|
Post by sd40dash2 on Sept 17, 2020 15:06:27 GMT -8
Light rust drybrush weathering has been carefully applied to the underframe. I have also marked the A and B ends. 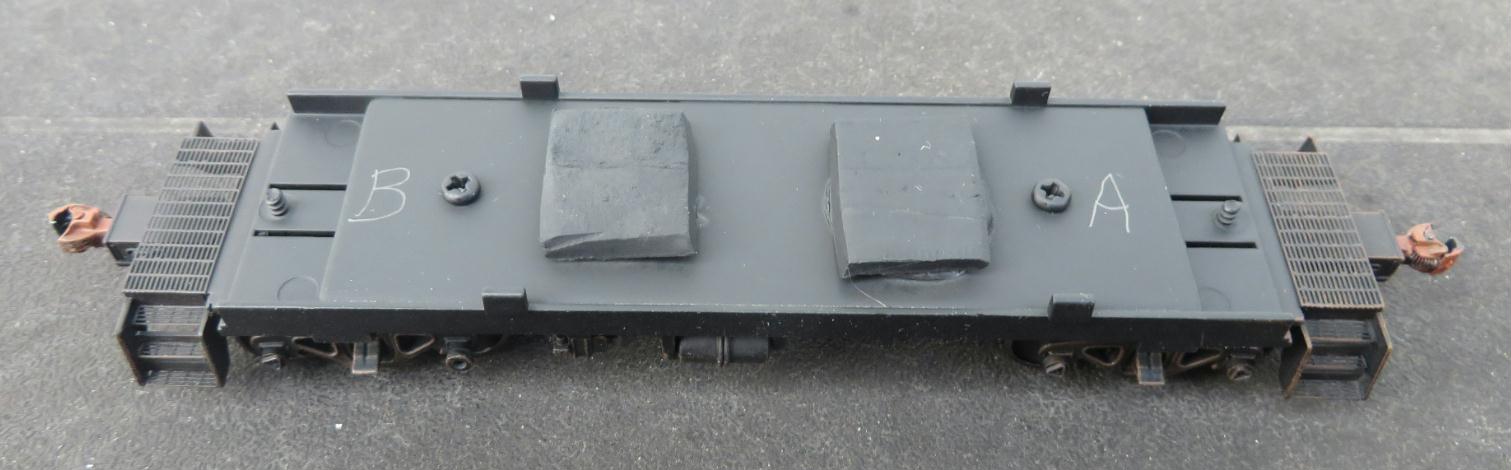 |
|
|
|
Post by fr8kar on Sept 17, 2020 15:53:48 GMT -8
Looking good, but I think you might have your A and B ends backwards. The brake cylinder always points toward the B end as far as I've seen. Having said that, there may be exceptions.
|
|
|
|
Post by sd40dash2 on Sept 17, 2020 16:00:22 GMT -8
^ Thanks Ryan, you are no doubt correct. I am not too worried in this case since the letters are merely locators to help me correctly mount the shells. After that it won't matter to me and the letters will be invisible to all. Hope you are enjoying the build otherwise, thanks for all the likes and comments.
|
|
|
|
Post by fr8kar on Sept 17, 2020 17:36:23 GMT -8
Absolutely enjoying it! I do the same thing labeling A and B ends on many of my builds just as a quick visual reference so I don't have to flip it over to check.
|
|
|
|
Post by sd40dash2 on Sept 17, 2020 18:22:29 GMT -8
View of the detailed, painted and weathered underframe. These Walthers cabooses are a very good kitbashing platform. I am having fun with this entire project. Great way to keep your hands and mind busy while physical distancing.  |
|
|
|
Post by sd40dash2 on Sept 18, 2020 3:29:32 GMT -8
One last close-up. Note the old leftover axle generator pulley after the rest of the hardware was removed. You can also see the steps and all other detailing elements. This will be the last underframe photo as I put this aside and turn my attention to the body shells and cupolas. Thanks for following along this phase of the project.  |
|
|
|
Post by Christian on Sept 18, 2020 3:59:47 GMT -8
I'm curious - back a couple of pages - why not just cut off the screw rather than cut the weight? |
|
|
|
Post by sd40dash2 on Sept 18, 2020 4:06:28 GMT -8
I'm curious - back a couple of pages - why not just cut off the screw rather than cut the weight? Yeah. Between you and edgecrusher you have suggested a couple of better options. He had suggested raising the weight (which may have caused me to have to find weight-mount replacement screws since I don't think the Walthers ones have much to spare) which is clever just like your idea. Rather than to make excuses, I will try both of these ideas on future builds if I ever build more of these cars. I suspect my mindset was that it was easier to simply trim the weights than to scrounge for such specific screws as these are not standard 2-56s. Hard to know exactly how much material to trim from a screw sometimes but I guess that's where trial and error comes in a case like this. Thanks for the suggestion! |
|
|
|
Post by fr8kar on Sept 18, 2020 4:34:54 GMT -8
This view demonstrates how effective it is to remove that portion of the crossover platform and replace it with the etched material. I have a few more cabooses to build and I'm convinced this is the way to do it now. |
|


