|
|
Post by sd40dash2 on Oct 2, 2020 3:30:34 GMT -8
Shell has been weathered.  |
|
|
|
Post by Christian on Oct 2, 2020 6:40:51 GMT -8
Shell has been weathered. Looks really good. Flush windows really make a difference as it comes together. |
|
|
|
Post by sd40dash2 on Oct 3, 2020 2:39:09 GMT -8
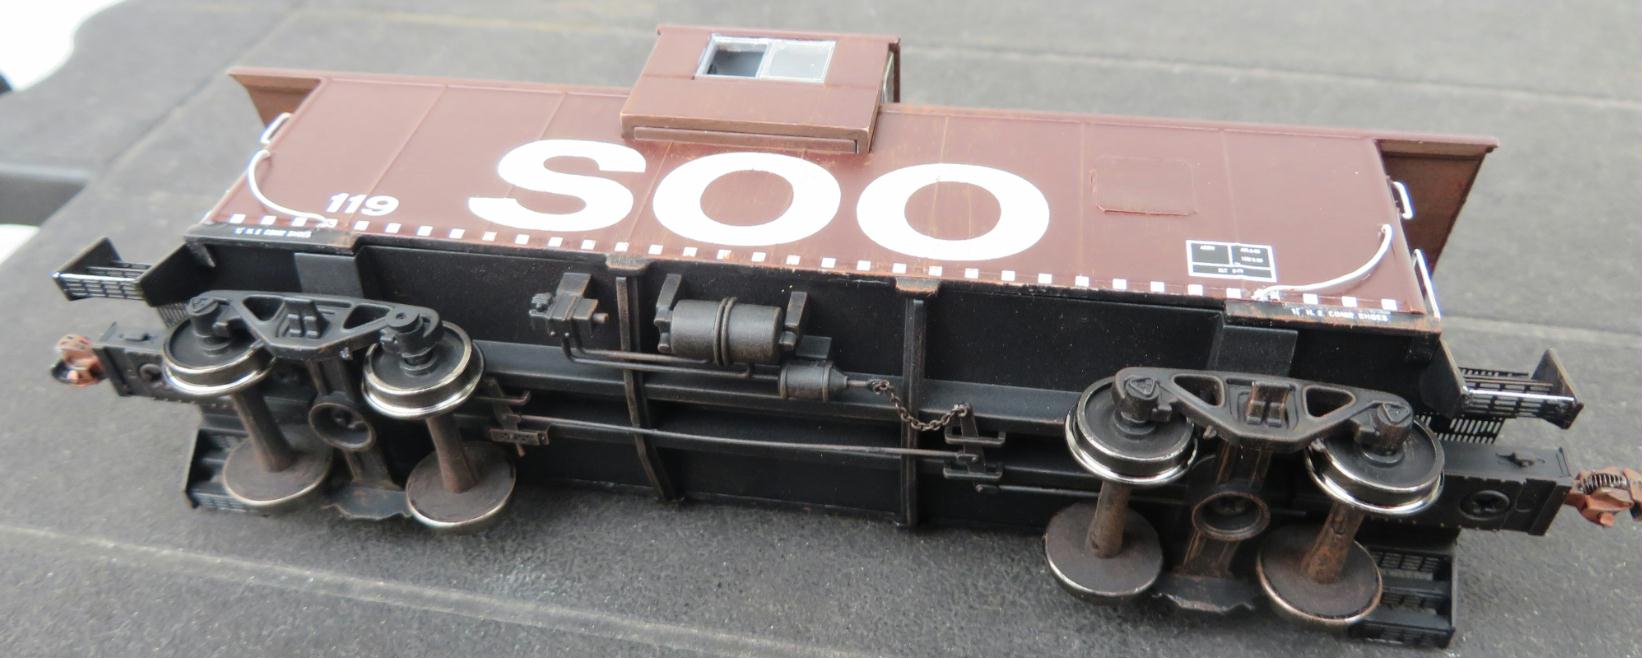
Shell attached to underframe, most weathering complete. Don't forget to paint the underside of the shell mounting "lip" to match the cupola. Even on factory models this is often missed.  |
|
|
|
Post by Colin 't Hart on Oct 3, 2020 11:21:27 GMT -8
Really nice work thus far!
|
|
|
|
Post by sd40dash2 on Oct 4, 2020 3:59:59 GMT -8
All that remains now is to detail, paint, dullcote and install the end railings. Also have to build and add the smoke stack guy wires.  |
|
|
|
Post by sd40dash2 on Oct 5, 2020 2:42:37 GMT -8
Time to turn my attention to the end railings. These are some of the parts I'll be using.  |
|
|
|
Post by Christian on Oct 5, 2020 5:06:06 GMT -8
Time to turn my attention to the end railings. My favorite part of the caboose. The more I look at your photos of the ends so far, the more I'm liking those Moloco boxes. Your work might be costing me some money.  |
|
|
|
Post by sd40dash2 on Oct 5, 2020 5:20:02 GMT -8
Time to turn my attention to the end railings. My favorite part of the caboose. The more I look at your photos of the ends so far, the more I'm liking those Moloco boxes. Your work might be costing me some money.  I hear you. There is no question those boxes are costly. This tells me that coupler boxes are a poorly executed segment of the hobby. Even the beloved Moloco boxes still come out a bit too short. Mfrs often do not fully represent how far the cushion draft gear sticks out from the ends of things like boxcars and cabooses over the past 50-60 years or so. I hope we start seeing better cushioning detail (incl the associated lengthy uncoupling levers and curled air hoses) from everyone; in the meantime I think these Moloco boxes are the best available. |
|
|
|
Post by sd40dash2 on Oct 6, 2020 2:49:50 GMT -8
SOO 119 railings have been modified and painted, ready for decals and detail.  |
|
|
|
Post by sd40dash2 on Oct 6, 2020 17:02:15 GMT -8
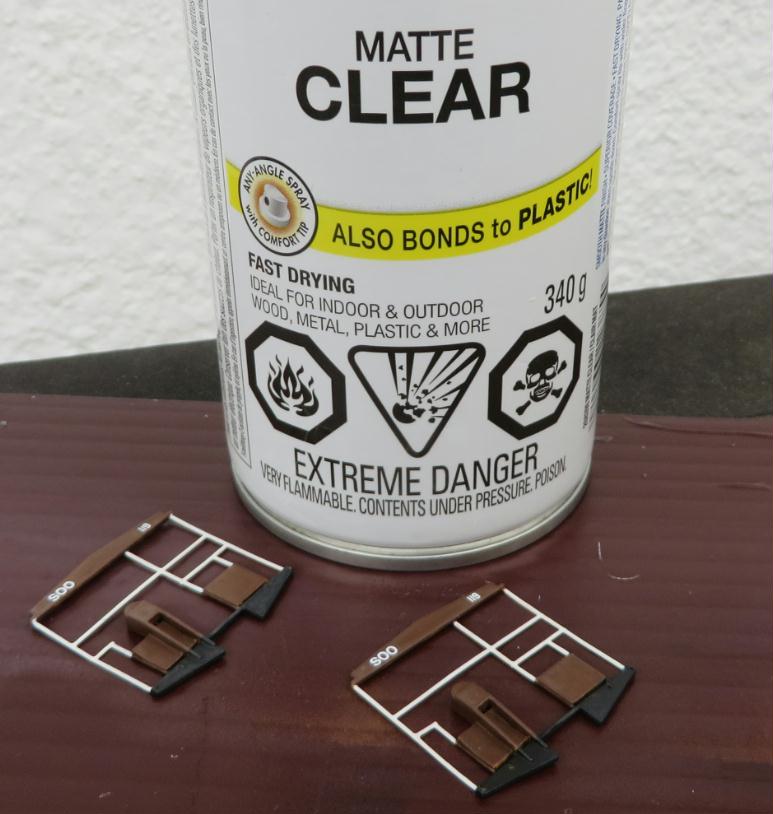
After the paint was dry, I applied some glosscote, the decals and now some dullcote. This part is ready to install back onto the car, after which point it will be detailed.  |
|
|
|
Post by sd40dash2 on Oct 7, 2020 2:37:29 GMT -8
SOO 105 railings have been modified and painted, ready for decals and detail.  |
|
|
|
Post by Christian on Oct 7, 2020 6:52:01 GMT -8
So far they are identical except for the color. Why the different colors? Or did I miss something earlier?
|
|
|
|
Post by sd40dash2 on Oct 7, 2020 6:56:31 GMT -8
^ Not sure if you're asking me a prototype question. I'm working on two models at once.
|
|
|
|
Post by Christian on Oct 7, 2020 7:18:08 GMT -8
^ Not sure if you're asking me a prototype question. I'm working on two models at once. Yes, proto question. Why two seemingly identical cabooses painted different colors? But I thought on it for a bit and realized that they represent different years. I think? |
|
|
|
Post by sd40dash2 on Oct 7, 2020 7:26:59 GMT -8
Yes, the brown prototype colour scheme came out in 1987 whereas the white ones originated prior to that. There were several small variations amongst the handful of cabooses that were repainted brown during the SOO caboose twilight years. I believe they did this to save on maintenance since rust and grime on a neglected and dwindling caboose fleet would be less offensive on a brown background than a white one.
|
|
|
|
Post by sd40dash2 on Oct 7, 2020 10:07:01 GMT -8
End railings and cupola have been decalled as per the 1996 appearance of SOO 105. Plus I dullcoted these last parts just in the nick of time as outdoor temps cool down.  |
|
|
|
Post by sd40dash2 on Oct 7, 2020 14:43:23 GMT -8
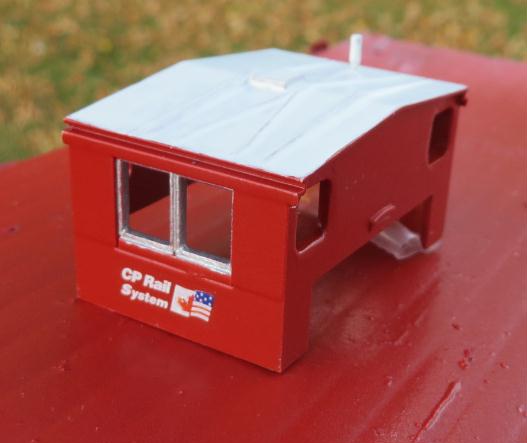
SOO 105 received these decals on the cupola in 1996.  |
|
|
|
Post by sd40dash2 on Oct 7, 2020 18:26:22 GMT -8
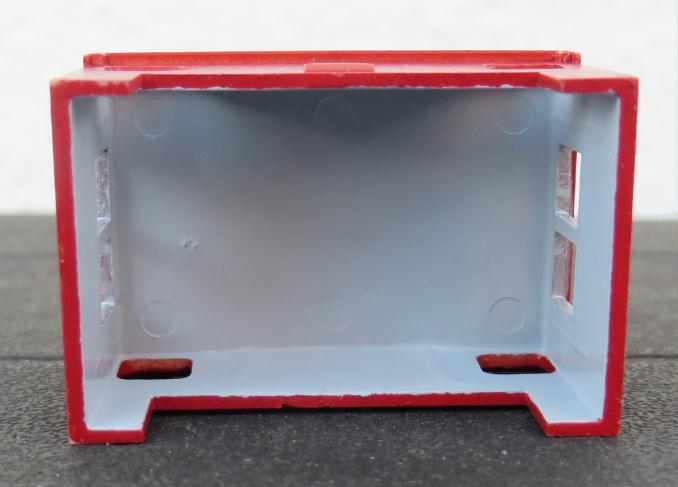
Painting the interior walls of SOO 105 cupola will improve the looks from the outside.  |
|
|
|
Post by Colin 't Hart on Oct 8, 2020 1:52:04 GMT -8
End railings and cupola have been decalled as per the 1996 appearance of SOO 105. Plus I dullcoted these last parts just in the nick of time as outdoor temps cool down.  Those end railings are fragile! |
|
|
|
Post by sd40dash2 on Oct 8, 2020 2:47:04 GMT -8
Ahhh that's better. SOO 105 cupola interior walls hand painted.  |
|
|
|
Post by sd40dash2 on Oct 8, 2020 6:04:01 GMT -8
Cupola seats have been installed.  |
|
|
|
Post by cemr5396 on Oct 8, 2020 6:30:38 GMT -8
those small CPRS decals are a neat touch. That's gonna be one good looking caboose when you're done!
|
|
|
|
Post by sd40dash2 on Oct 8, 2020 6:56:53 GMT -8
^ Thanks for commenting! Yeah I agree about those CPRS markings. There's also a 1989 photo of SOO 101 with an old Milwaukee Road herald in one of the Os that would also be a fun thing to replicate. barp.ca/rail/soo/0101.jpg |
|
|
|
Post by edgecrusher on Oct 8, 2020 7:01:16 GMT -8
These are coming along great! It kills me how quickly you work.
|
|
|
|
Post by fr8kar on Oct 8, 2020 7:22:16 GMT -8
These are coming along great! It kills me how quickly you work. I second that! I also appreciate the dedication to a true step-by-step build. The photos are clear and it's easy to see everything that is done during each step. |
|
|
|
Post by sd40dash2 on Oct 8, 2020 7:30:00 GMT -8
^ Hi Evan, thanks for all your encouraging likes in this thread as well as your latest comment. Due to various circumstances, I have been working on models almost every single day since early July. It's amazing how much you can get done when you eliminate screen distractions, put your mind to something more meaningful and focus. No unfinished projects here.
These models will be finished very shortly. I sense the forum may be getting a little tired of my posts so I plan to give everyone a break after the last photos of SOO 105 and 119 are shared here over the next couple of days.
|
|
|
|
Post by sd40dash2 on Oct 8, 2020 7:33:24 GMT -8
These are coming along great! It kills me how quickly you work. I second that! I also appreciate the dedication to a true step-by-step build. The photos are clear and it's easy to see everything that is done during each step. Thank you Ryan, that is quite a compliment coming from you. I am glad that you approve of my format. I try to let the photos do the talking. It takes more effort than just flinging out comments but I feel it's worth it. |
|
|
|
Post by edgecrusher on Oct 8, 2020 7:43:27 GMT -8
If you feel up to it, I say keep em coming. A couple pages of build photos is far more valuable to me than hundreds of pages of people griping about what a manufacturer did or didn't do. What your doing is helping to enrich the content of the forum. Buy all means keep it up if you can.
|
|
|
|
Post by sd40dash2 on Oct 8, 2020 8:04:15 GMT -8
If you feel up to it, I say keep em coming. A couple pages of build photos is far more valuable to me than hundreds of pages of people griping about what a manufacturer did or didn't do. What your doing is helping to enrich the content of the forum. Buy all means keep it up if you can. You are very perceptive to my concept. 
At the risk of starting a debate, I definitely agree with your observations. I too have noticed the forum seems to be largely focused on very subjective threads and gripes about mfrs. One reason for this I suspect is that with RTR, HO railroaders have become naturally dependent on mfrs to supply their wants. This creates a long list of people who spend years waiting and wanting mfrs to fill these wants and they tend to get upset when said wants are not met. I get it but it seems you and I at least agree all that time and energy could be better spent building your own models and enjoying the hobby that way. Just my opinions though, I know many here obviously disagree with me. Thanks to you, Christian, Colin and others who liked and commented in this thread for at least supporting my efforts. 
|
|
|
|
Post by riogrande on Oct 8, 2020 8:16:26 GMT -8
These are coming along great! It kills me how quickly you work. Yes, a man on fire. Mind boggling! I just got word that I'm back in the office full-time so no more teleworking it looks like. These models will be finished very shortly. I sense the forum may be getting a little tired of my posts so I plan to give everyone a break after the last photos of SOO 105 and 119 are shared here over the next couple of days. Speaking for myself, this has been very educational and very helpful to see what is involved with the steps. Anyone with little or no experience doing a build like this would find this very informative. |
|